


5 Reasons to Start Seeds Indoors
- You’ll save money – seeds are less expensive than plants.
- You can choose from an almost endless variety of heirloom and commercially bred seeds.
- You’ll enjoy vegetables earlier in the season.
- It’s a fun project to do with your kids!
- Nothing beats the joy of watching a seed grow and the sense of accomplishment when you harvest your own food.
11 Tips to Seed Starting Success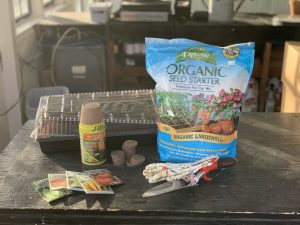
Start seeds 4 to 6 weeks before you plant in the garden. Cool season crops like broccoli or lettuce can go into the garden before the last frost. Warm season crops like tomatoes and peppers should not be planted until all danger of frost is past. Almost anyone can succeed by following the guidelines below.
- Fresh is best. Start with fresh, high quality seeds each year.
- Plastic is fantastic. You can purchase plastic trays and kits designed specifically for starting seeds. They’re clean and free of pathogens, they keep soil uniformly moist and allow for adequate drainage.
- Use a magical mix. Good mixes, like Espoma Organic Seed Starter, ensure that you’ve got a lightweight, clean and sterile medium without insects, fungus or weeds. Moisten the mix with a little water (damp, not soggy).
- Packets know best. Plant your seeds according to the depth and spacing directions on the seed packet. Cover the seeds with soil mix and tamp down to ensure that the seeds are held in firm contact with the soil.
- Bottom’s up. It can be challenging to apply the right amount of water to freshly sown seeds by pouring, sprinkling or spraying. It’s better to water from the bottom. That means placing the planting container into a larger pan of shallow water for a short time (few seconds to a couple of minutes).
- Take cover. Loosely cover with plastic wrap after watering to retain moisture. Check the moisture daily and watch for germination. As soon as the seeds germinate, remove the plastic wrap
- Stay warm. For most seeds, sprouting requires a minimum temperature of about 65° to 75°F. If the ambient temperature is less than that, you can use a heating pad or position a space heater nearby. Just make sure the soil doesn’t dry out.
- Let the sun shine in. Most seeds need about 12 to 16 hours of sunlight each day. Place your set containers in a sunny location such as a window with southern exposure. Once the seeds sprout, turn the container a little each day. This will prevent seedlings from overreaching in one direction toward the light.
- The need to feed. Don’t use fertilizer on seedlings until they have sprouted! In the very early growth stage, the seed provides its own nourishment, but once leaves develop, it’s time for a little fertilizer like Espoma Plant-tone.
- Harden them off. Your sheltered seedlings need to get ready for the outdoors. For 7 to 10 days, put your plants outside for a few hours each day, increasing their exposure to sunlight & wind. Cut back on watering a bit, too. Your plants will be hearty and better prepared for transplanting
- No stripping. Slowly, gently remove plants from their containers without stripping the roots naked or tearing them. Plant them in the ground and mix in a really good starter plant food like Bio-tone Starter Plus in with the soil.
Now that the plants are safely in the ground, there’s just one last step. Give yourself a big pat on the back for a job well done-and look forward to enjoying the fruits (or flowers and veggies) of your labor later in the season.