Monthly Archives: April 2018

Holiday Gardener’s Calendar

Winter is upon us. Depending upon the temperatures, there may still be time to finish remaining chores. If you have any questions about the following procedures or products, please come in and see us. We can help you select the correct dormant oil, fertilizer, selective herbicide and frost protection method. We’re always here to help.

General Landscape

  • Mulch with bark, compost or other local materials to enrich soil, protect plant roots and prevent erosion.
  • Protect plants from frost and wind.

Houseplants

  • Perk up tired houseplants by removing dead and dying leaves. Wash under a soft shower in the sink or tub.
  • Spider mites proliferate in warm dry winter homes. Check for mites by looking for tiny speckles on leaves.
  • Transplant if roots are growing through the drainage holes or over the pot edge. If you don’t want to move into a larger pot, untangle the roots and cut back by 1/3, scour the pots and replant with new soil.
  • Remember to turn your plants each week as they begin to grow towards the weaker window light.
  • For indoor bloom, plant amaryllis, paper white narcissus, hyacinth, crocus and indoor cyclamen.
  • Popular holiday plants such as poinsettias, chrysanthemums and orchids fill the stores. Check them thoroughly for “hitchhikers” before bringing into the home or spray with household plant insecticide or soap.
  • Be creative in your arrangements and combine them with metallic painted twigs, pinecones or seashells.
  • If using a live tree for a “living Christmas tree”, prolong its time indoors by using Wilt-Pruf to reduce the loss of moisture from the needles.

Lawn:

  • Remove leaves, toys, hoses, etc, from lawns to prevent dead spots.
  • Apply winter fertilizer, if not already done. The middle number, phosphorus, aids root growth during the winter.
  • If you have weeds in your lawn, consider using a winter fertilizer with weed control.
  • Mow one time after lawn goes dormant and before freezing. This last mowing should be 2 ½” tall.
  • When temps are freezing, stay off the lawn as much as possible to reduce blade breakage.

Vegetables:

  • Protect cool season vegetables with row covers, leaf or mulch cover.
  • Mulch beds to enrich and protect from rain/snow erosion.
  • Review gardening notes and plan next year’s garden.
  • Test germination rate of leftover seeds, if wanting to use again.
  • If gardening under lights or in heated greenhouse, start seeds of early spring crops: lettuce, kale, mustard, spinach, and other greens.
  • Harvest carrots, lettuce, greens and over-wintering crops.

Trees and Shrubs

  • Stake young trees and vines if needed. In case of a heavy freeze, use Wilt-Pruf or similar product to reduce transpiration of moisture.
  • Prevent southeast trunk injury, a form of winter freeze damage. Use light-colored tree guards to protect the trunks of young trees for at least two years after planting. After two years, paint the trunks with white latex paint. These two methods prevent the tree trunk from splitting when sunlight warms the bark on side of the trunk.
  • Fertilize shrubs and trees, if not done already, and the ground is not frozen. This allows roots to absorb when temperatures are above 40° and when spring returns. Granules and spikes provide nutrients effectively and easily.
  • Prune out dead and diseased tree branches to prevent from falling on roof or pedestrians.


Fall Gardener’s Calendar

Fall Gardener’s Calendar

Spray Bonide All-Season Concentrate on hemlocks to control woolly adelgid.

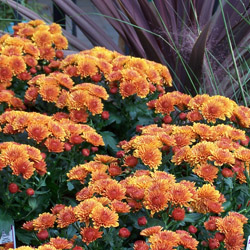
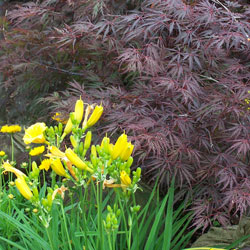
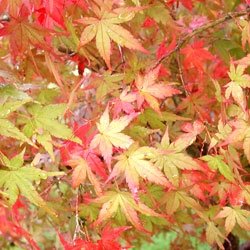
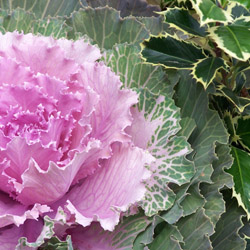
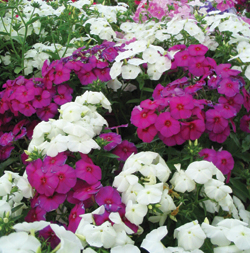
Spruce up the landscape by planting Flowering Cabbage & Kale, Garden Mums, Fall-Blooming Perennials as well as Trees and Shrubs.

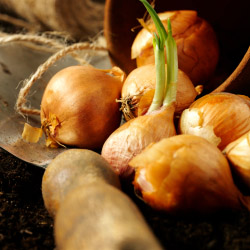
Pick up your Spring Flowering Bulbs now!  To make planting easier, use a Bulb-Digger or an Auger.

Apply Hi-Yield Superphosphate now to coax stubborn plants into bloom next year.

Aerate, re-seed and apply Fall Lawn Food to the lawn. Keep grass seed damp; water every day if necessary.  You will also want to check for grubs.  Increased activities of skunks, raccoons and moles as well as brown patches that peel back easily are an indication of grub activity.  Apply granular Sevin or Milky Spore to control the grubs as well as chinch bugs and sod webworm.

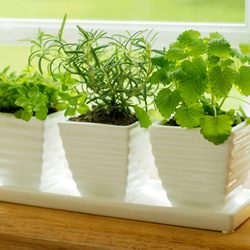
Treat houseplants with Bonide Systemic Granules and Bonide Insect Killing Soap now to get rid of any insects before bringing them into the house prior to the first frost.

Clean out garden ponds and pools. Cover with Netting before the leaves start falling.

Plant bulbs. Fertilize with Espoma Bulb-Tone and water in well.

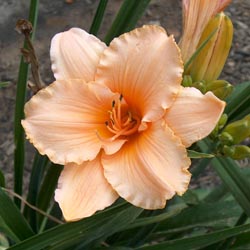
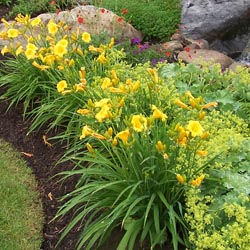
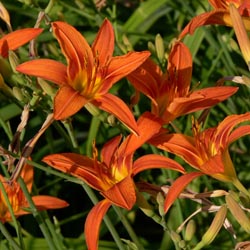
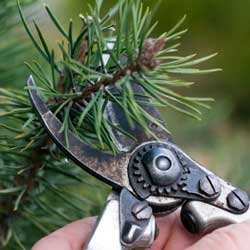
Divide daylilies and spring-blooming perennials, including iris and peonies. Don’t be tempted to prune your spring flowering shrubs like forsythia, azaleas, camellia, holly, lilac, rhododendron, spirea or viburnum or you will destroy next year’s buds.

Dig up summer-flowering bulbs, such as dahlias, cannas, tuberous begonias, caladiums and gladiolus after the frost kills the top growth.  Treat them with Bulb Dust, pack them in Peat Moss, and store them in a ventilated area for winter.

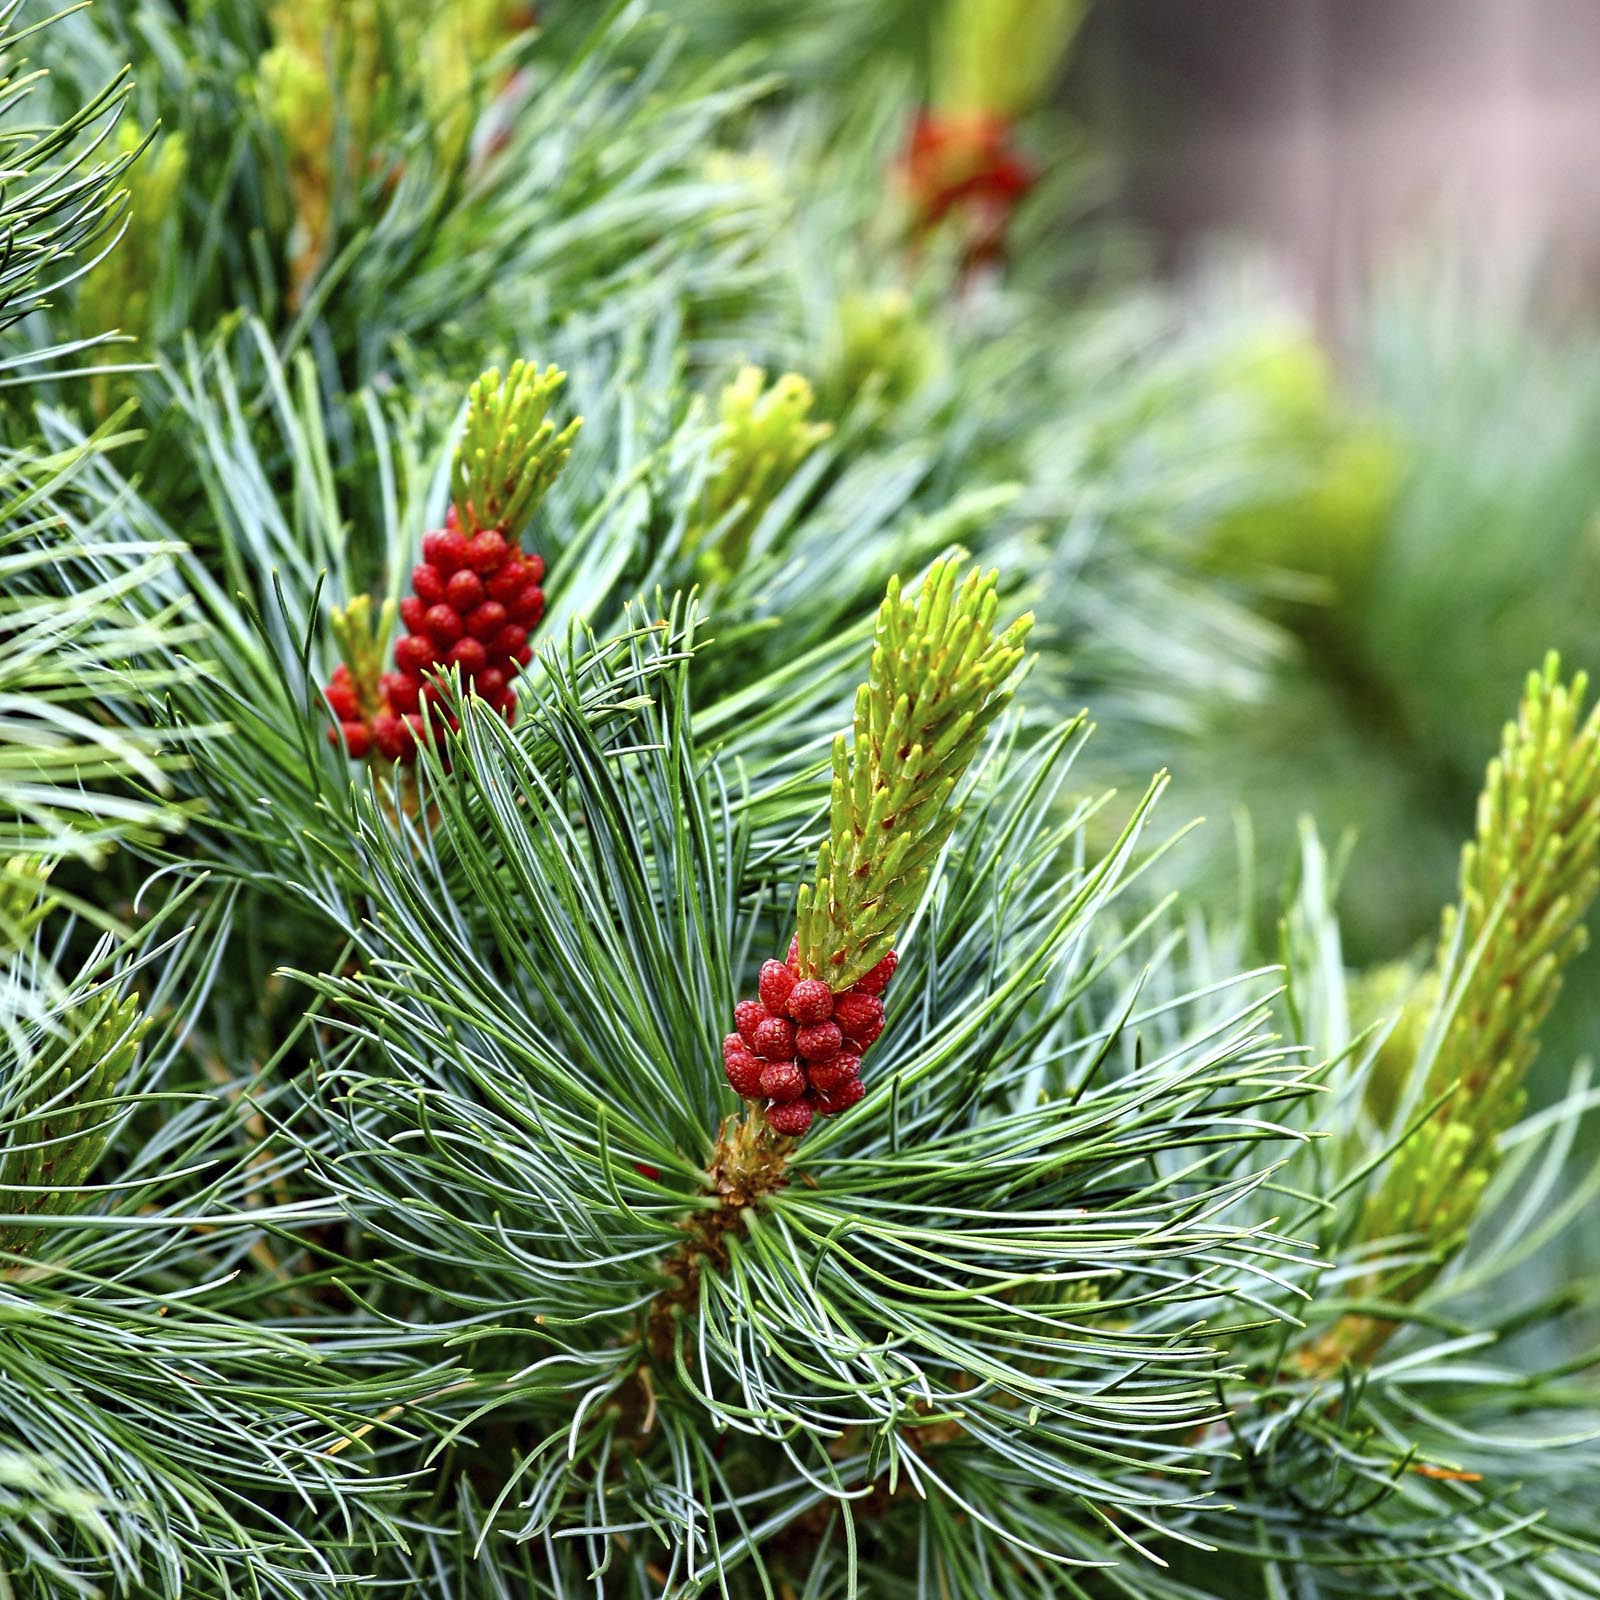
Fertilize your trees with Espoma Tree & Shrub Fertilizer after the leaves fall. Fertilize azaleas, rhododendron, and evergreens with Holly-Tone and other shrubs with Plant-Tone. Spray hemlock again with Bonide All-Season Concentrate.

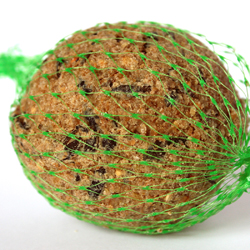
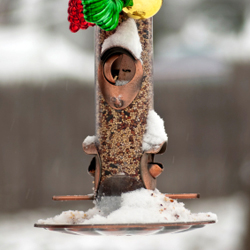
Set up bird feeders. Clean out birdbaths, refill and purchase heaters for the winter.

Clean up and destroy diseased rose leaves and debris surrounding shrubs and perennials. Use a Rose Collar to mound 6-10 inches of dirt around roses to protect from winter damage. Use Rose Cones for complete coverage.

Remove annuals, roots and all, and add to your compost pile, but do not add any diseased material to it.

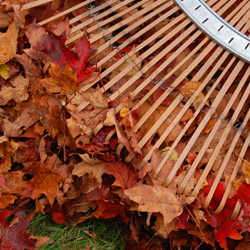
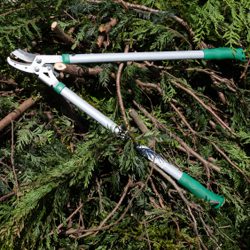
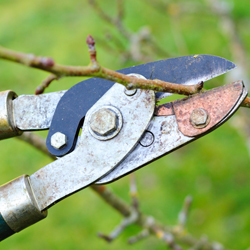
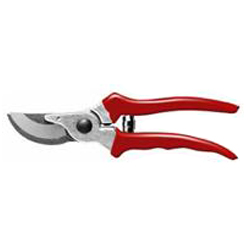
Cut back perennials unless they feature ornamental seed heads and fertilize with Espoma Tree-Tone. Prune long raspberry and rose canes back to a height of three feet.  Clean up your beds and gardens to avoid harboring insects and diseases over the winter.

Pot hardy spring bulbs (anemone, crocus, daffodil, hyacinth, ranunculus and tulip) and place in a cold frame or cool garage (40 degrees) or sink into the ground and mulch.  Keep evenly moist.

Update garden records, noting successes and failures, gaps in planting, future planting and landscape changes.

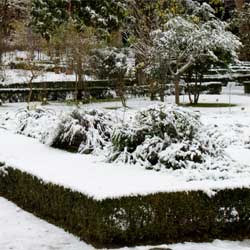
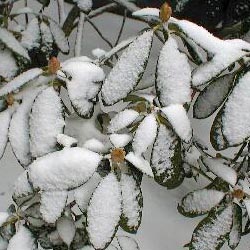
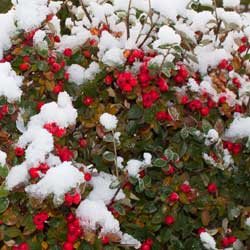
Water all landscape plants well and mulch before the winter cold sets in.

Spray evergreens, azaleas, rhododendron, boxwood and rose canes with Wilt Stop for protection against wind and cold weather.


Herbs As Companion Plants

Practiced by organic gardeners for years, companion planting has become very popular for all gardeners. The concept is to plant together species that will benefit each other, to help prevent disease and insect infestation without the use of chemicals. In general, herbs and other aromatic plants like tomatoes, marigolds and onions are helpful in warding off insects. Certain colors, like the orange of nasturtium flowers, are thought to repel flying insects. While these practices have not been scientifically proven, many gardeners have been using them for years with positive results. Try it – and see if it works for you!

Best Companion Herbs

The exact herbs you choose to pair with other plants will depend on what you want to grow and what problems you want to eradicate. The most common herbs and their purported benefits include…

  • Basil – Enhances the growth of tomatoes and peppers. Dislikes rue. Repels flies and mosquitoes.
  • Borage – Companion to tomatoes, squash and strawberries. Deters tomato worm.
  • Chamomile – Companion to cabbages and onions. Improves the growth of all garden plants.
  • Chives – Companion to carrots. Deters Japanese beetles, blackspot on roses, scab on apples and mildew on cucurbits.
  • Dill – Improves the growth of lettuce, cabbage and onions. Dislikes carrots.
  • Fennel – Most plants dislike it – avoid using it as a companion herb and instead plant it away from the garden.
  • Garlic – Plant near roses and raspberries. Deters Japanese beetles.
  • Horseradish – Plant at the corners of your potato patch; deters potato bug.
  • Hyssop – Companion to cabbage and grapes. Deters flea beetles and cabbage moths. Dislikes radishes.
  • Marigolds – Plant throughout the garden as they discourage nematodes and other insects.
  • Mints (esp. Spearmint and Peppermint) – Companion to cabbages and tomatoes. Deters aphids, flea beetles and many types of cabbage pests.
  • Nasturtium – Companion to radishes, cabbage and cucurbits. Plant under fruit trees. Deters aphids and squash bugs.
  • Onion – Repels cabbage loopers, potato beetles, carrot flies and imported cabbage moths.
  • Oregano – Improves the growth of beans.
  • Parsley – Enhances the growth of roses. Repels asparagus beetles.
  • Pot Marigold – Companion to tomatoes, but plant elsewhere, too. Deters tomato worm, asparagus beetles and other pests.
  • Rosemary – Companion to cabbage, bean, carrots and sage. Deters cabbage moth, bean beetles and carrot fly.
  • Rue – Companion to roses and raspberries, dislikes sweet basil. Deters Japanese beetles.
  • Sage – Plant with rosemary, tomatoes, strawberries, cabbage and carrots. Dislikes cucumbers. Deters cabbage moth and carrot fly.
  • Summer Savory – Companion to beans and onions. Deters bean beetles.
  • Tarragon (French) – Enhances the growth of all vegetables.
  • Thyme – Improves the growth of tomatoes, potatoes and eggplant. Repels whiteflies and cabbageworms.
  • Wormwood – Use as a border, keeps animals from the garden.
  • Yarrow – Plant along borders, paths and near aromatic herbs. Enhances production of essential oils. Attracts beneficial insects including ladybugs and predatory wasps.

Exactly how much benefit companion plants give to one another will vary; be sure to choose varieties to group that have similar soil, light, water and fertilization needs. Even if their companion benefits may not pan out, you’re sure to enjoy a more diverse and vibrant garden filled with delicious vegetables and herbs!

herbs_companion_3

herbs_companion_1

herbs_companion_2

Pruning Forsythia

Forsythia is a true spring favorite and never disappoints with its shocking yellow blooms atop a mass of unruly branches. This early-flowering shrub can thrive for decades on neglect but there will come a time, whether out of want or necessity, that your forsythia will require pruning. But how can you do so without dampening the ferocious spring flame these spring shrubs produce?

Why Prune Forsythia?

When this shrub does so well without detailed care, why is it necessary to prune it at all? In many landscapes, if the shrub is properly sited, it may not need pruning. Unfortunately, many people underestimate the vigorous growth of these beauties, and in just a few years it may seem crowded and overgrown in a corner, narrow bed or border. A large, unruly forsythia may also seem overwhelming in a smaller space or when paired with less vigorous plants. Damage or illness may also create a misshapen or unbalanced plant that is no longer so pleasing to the eye. In these cases, judicious pruning can rejuvenate and refresh the shrub and give new life to its part of the landscape.

Pruning and Rejuvenating Forsythia

Pruning out of shape and poorly flowering forsythia is simple. After the shrub has finished flowering in late spring, cut all the branches back to within one foot of the ground. When branches put on new growth, reaching two feet from the ground, prune all branch tips to the first set of side shoots. This will help develop a fuller, thicker shrub for a more lush look. Be aware, however, that it will take until the second bloom season for a severely pruned forsythia to return to its former splendor.

A newer forsythia that is just a few years old can be kept in tip-top shape a bit more easily. Each spring, after it flowers, cut up to one-third of the branches back to the ground. Choose dead branches, branches thicker than your thumb and all crossed or inward facing branches. This will help create a good form with healthy air circulation and pleasing growth for years of beauty and enjoyment.

It’s easy to keep forsythia looking stunning for many years. Whether you want to make the most of the forsythia already in your yard or want to add this beauty to your landscape, stop by – our landscaping experts can help you choose the best species for your yard and needs so you can enjoy its beauty for many springs to come.

forsythia-1

Pre-Emergent Control of Crabgrass

Did you have a crabgrass problem last year? Well, chances are, it’s gonna be even worse this year! Crabgrass is an annual lawn weed that dies once a hard frost hits. The main problem with this pest is the tenacious seed that it leaves behind after it blooms.

Early spring is the season to control crabgrass with a pre-emergent herbicide like Fertilome Crabgrass Preventer Plus Lawn Food or Bonide Weed Beater Complete.

This chemical works by killing the crabgrass seedlings as they germinate. Here’s what you need to do:

  • Apply the pre-emergent as the forsythia is going out of bloom.
  • For newly seeded lawns, wait until you have mowed your lawn three times before applying the herbicide. This will help to avoid killing the new grass.
  • Use a spreader to apply the herbicide uniformly across your lawn.
  • Apply your pre-emergent before a light rain. This will knock the chemical off the grass blades and down to the soil surface where the crabgrass seed is germinating.
  • Do not de-thatch or aerate the lawn after applying the herbicide, as this disruption will break the chemical barrier.
  • Wait two to four months to re-seed the lawn after applying.
  • Repeat this same procedure year after year.
  • Keep you and your lawn safe. Always follow the manufacturers’ instructions.
crabgrass

Dealing With Winter Damage

It’s early spring – time to survey the damage that winter has produced. In some areas, shrubs may still be hiding under piles of frozen snow, and could be crushed or compacted. Severed tree limbs may lie scattered across the landscape, and bark may be torn and stripped from trunks. It’s difficult to know what to tackle first, but fortunately, much of the damage is easily correctible.

Repairing Winter-Damaged Trees

When surveying and repairing winter damage, start with your trees – they are generally the most valuable additions to your property. As you survey the damage – broken limbs, torn bark, a tilting trunk – ask yourself “Is this tree salvageable or should it be removed?” If the damage is extensive, or you are unsure about how the damage may affect the tree’s overall health or future growth, hire a professional for a consultation. Replacing a severely damaged tree with a younger one, perhaps a type you like even better, may be the best solution.

If a limb is broken somewhere along its length, or damaged beyond repair, employ good pruning practices and saw off the remaining piece at the branch collar, being careful not to cut into the trunk or leave a stub. Sometimes a fallen limb may strip bark off the tree trunk. To repair this damage, cut the ragged edges of the loose bark away from the stripped area to firmly affixed healthy bark. Nature will take care of the rest. Even if the trunk of the tree is split, the tree may still be saved. For large trees, repairing this type of damage usually requires cabling and bracing done by a professional. If the tree is still young, the crotch may be pulled tightly together and tied or taped until the wound eventually heals.

Repairing Winter-Damaged Shrubs

Shrubs can suffer the same damage as trees, including broken limbs and stripped bark. Heavy snowfall can crush smaller shrubs, and larger varieties may have their trunks or centers split from heavy snow or ice accumulation. Most shrubs are resilient, however, and slowly regain their shape as the weather warms. If branches are bent but not broken, you may tie them together to help them along and prevent further damage from late-season storms. Do not tie tightly and remove twine after about a year. Completely broken branches may be pruned away, but take care to maintain the shrub’s form and balance, keeping in mind its growth pattern so it will not look lopsided or ungainly. Again, if the damage is severe, you may need to replace the plant.

The harder the winter is, the more of a beating trees and shrubs will take. With prompt attention in early spring, however, you can easily undo much of the damage and help your landscape recover with ease.

damage_1damage_2

Dividing Hybrid Hellebores

Hybrid hellebores bring us all sorts of happiness. These are one of the first plants to bloom in the late winter and early spring and are available in flower colors of chartreuse, cream, white, pink, red and deep purple. Hybrid hellebores are also those rare and treasured perennials that provide year-round interest, giving you the most bang for your buck and brightening your landscape in every season. As evergreens, they never lose their luster, and their flower shapes and textures are quite varied for even more interest, with a cultivar to suit any gardener’s taste. What’s not to be happy about?

A Love Divided

To keep these plants healthy and thriving, and to increase your quantity, division is a necessity. It is important to divide these plants carefully, however, or else you risk sadness with fewer blooms, lopsided plants or even losing these gems. Fortunately, it’s possible for even a novice hellebore lover to divide their plants with confidence.

  1. Divide hybrid hellebores in the spring when it is in bloom. This will also let you see how the blooms are positioned on the plant so you can divide shapes appropriately.
  2. Choose a plant that has at least 5 flower stems. Each one represents a division and will give you great new plants to bloom.
  3. Dig your hellebores up with a garden spade by inserting it deeply into the soil around the perimeter of the plant about 6 inches away from the outer stems of the clump. This will keep the root system largely intact and uninjured.
  4. Lift the clump and shake off loose soil or any trapped rocks or ensnared mulch. You can gently loosen clumps with your fingers, but take care not to damage the roots.
  5. With a garden hose, wash away any additional soil from the clump so the plant roots are exposed. This will help them get established in their new location more quickly.
  6. Divide the clump by cutting through the roots with a heavy-duty serrated knife. Make your root cuts where you see obvious natural divisions between the flower stalks.
  7. Replant your divisions at their original depth, in a shady location. Include plenty of compost in the planting hole for good nourishment. Water well and continue to keep soil from drying out until your new plants are well established.

Before you know it, you’ll have many more hybrid hellebores to enjoy! If you have a few too many, be sure to share the happiness by giving them to family members, friends, neighbors and anyone else who can fall in love with these beauties.

Helleborus orientalis

King of the Cold: Ornamental Cabbage & Kale

Looking to add interest to the fall and winter landscape? This year, plant ornamental cabbage and kale for bold textures and vibrant colors.

About Ornamental Cabbage & Kale

Unlike most other annuals and perennials, these two hardy plants improve in appearance after a frost or two, which bring out more intense and brilliant colors in their foliage – perfect as an autumn accent or centerpiece plant. Identified by a number of names including floral kale, decorative kale, ornamental-leaved kale, flowering kale and flowering cabbage, ornamental cabbage and kale are classified as Brassica oleracca (Acephala group). Offering unlimited use in the landscape, these plants have large rosettes of gray-green foliage richly variegated with cream, white, pink, rose, red and purple. Kale leaves are frilly edged and sometimes deeply lobed.

While typical ornamental kale and cabbage varieties are easy to find, you can also try more unusual options, including dwarf varieties as well as upright, taller hybrids that can even be used in cut arrangements.

Using These Attractive Plants

Popular in borders, grouped in planting drifts, or planted in containers for the deck or patio, ornamental cabbage and kale typically grows to 12-18” high and wide, depending on the cultivar. Plant these specimens at least 12” apart in an area with full sun that has moist, well-drained soil. Organically rich soil with proper compost or fertilization is best to provide adequate nutrition for these lush plants. Although they are able to withstand light frosts and snowfalls, ornamental cabbage and kale will typically not survive hard freezes and are best treated as showy annuals.

The best foliage color will occur if ornamental cabbage and kale is planted in early fall as temperatures are cooling, or you can sow seeds 6-10 weeks before the first anticipated frost date – just be sure the seeds have sun exposure in order to germinate properly. These plants are usually attractive in the garden until Thanksgiving or slightly later, or in mild climates they may even last until spring temperatures begin to rise. Hint – when the plants smell like cooked cabbage, it is time to pull them out!

While these plants are superficially similar to the familiar cabbage and kale vegetables popular in salads and other edible uses, it is important to note that ornamental varieties are cultivated for color and shape rather than taste. Keep them out of the kitchen and in the garden instead, and you won’t be sorry!

Healthy Soil: Winter Cover Crops

It’s fall and our annual and vegetable gardens are winding down for the season. Now is the time to invest a little extra time and effort to prepare your soil for next year. Whether your garden is large or small, all annual planting beds will benefit from the addition of a winter cover crop.

Benefits of Cover Crops

A cover crop is a fast-growing, low-maintenance crop that can be used to protect your garden and landscaping beds in fall and winter. Depending on the crop you choose, it can provide many benefits to your garden, including…

  • Stabilizing soil and preventing erosion
  • Adding organic matter back into the soil to nurture later crops
  • Adding nutrients to the soil that have been used by previous crops
  • Suppressing disease that can wither new crops even before they start
  • Repressing weeds that will take over a garden
  • Improving soil structure with aeration and better drainage
  • Encouraging beneficial insects that will help later crops

Recommended Cover Crops

Different cover crops work best in different areas, and the climate, soil type and growing season will help determine which cover crops will work best for your gardening needs. The most popular recommended cover crops for our area are oats, rye and wheat.

  • Oats
    Sow 6-8 weeks before the first hard frost. Planted early, oats will provide a quick covering with the added benefit of providing an early planting time for next spring’s crops. Oats are not winter hardy, but they will grow in the fall and die in the winter, leaving behind nutritious mulch that will easily decompose when incorporated into the soil in the spring. This is a great cover crop choice for low- or no-till gardens. Sow at 2 lbs. per 1,000 sq. ft. for the best coverage.
  • Winter Rye
    Sow 2-4 weeks before the first hard frost. This is a good choice for gardeners who have late season crops and don’t want to cut off that last harvest. If hardened off before frost arrives, winter rye will continue to grow over the winter. Rye is a vigorous grower and can be difficult to turn in the spring, so bear that in mind depending on what crops you will be planting in spring. Sow at 3-4 lbs. per 1000 sq. ft. for appropriate coverage.
  • Winter Wheat
    Sow 2-4 weeks before the first hard frost. Wheat will cover quickly but is not as aggressive as winter rye. Winter wheat is also leafier, making it easier than winter rye to turn into the soil in the spring. Sow at 3 lbs. per 1000 sq. ft. to provide good coverage.

Cornell University provides a tool to assist you in choosing the correct cover crop for your situation. (http://covercrops.cals.cornell.edu/decision-tool.php)

Planting Cover Crops

Before planting a cover crop, clean out garden beds, removing all roots and plant material. Compost all plant matter that is not diseased. Broadcast seed evenly and cover with soil. Water thoroughly when planting and when necessary during dry periods. In the spring, till or fork oats into the planting bed and you are ready to plant. For winter rye and wheat, mow or chop tops 4 weeks before planting leaving cut cover crop on top to dry. Till or fork dried wheat and rye into the bed before planting.

With the appropriate cover crop, you can protect your garden’s most valuable asset – the soil – and be sure it is ready for spring planting.


Over-Wintering Container Plants Outdoors

All containerized plants that are considered hardy in your zone can spend the winter outdoors, but you do need to take a little special care to keep them safe and comfortable as temperatures drop. Despite their hardiness, winter is still a challenging season, but it is possible to keep your container plants healthy until the days grow longer and warmer again.

Options to Overwinter Your Container Plants

  • In the late summer or fall, removed the plant from its container and plant it in the ground while the soil is still warm. Another method is to bury the pot, with the plant in it, in the garden and remove the pot following spring. Both of these methods will help insulate the root system, preventing it from freezing solid and killing the root system.
  • Place containerized plants in an unheated garage but along a heated wall. This is an excellent method for very large pots or porous pots that tend to break apart from the constant cycle of freezing and thawing, and so would not be very hardy if buried. For extra root protection and insulation, wrap the pots in plastic bubble wrap or wrap an old comforter or quilt around the pots.
  • Group pots together along the sunny side of your house or shed. If this area is windy, create a windscreen with stakes and burlap. Place bales of straw or hay around the perimeter of the grouping up against the pots to further protect plants from cold winds. Fill in areas between pots with mulch, shredded leaves, grass clippings or hay for insulation. Lay evergreen branches or place a layer of mulch on top of the pots for additional protection.
  • Use a cold frame covered with plastic or Reemay fabric to help control temperatures and reduce light as well, helping plants stay dormant in winter. It will still be necessary to use mulch, shredded leaves or hay around and in-between pots for insulation. Rodent control, such as Havahart traps, may be necessary when using this method.

Watering Container Plants in Winter

Make sure that plants go into the winter with moist soil so that there is water available to plant roots. Check soil moisture occasionally, never allowing it to dry completely. It is also a very good idea to spray needled and broadleaf evergreens with an anti-desiccant. This acts as a protective coating for plant foliage and stems as it helps them retain moisture.

With just a little care and forethought, you can easily prepare containers for winter without risking the plants and arrangements you have so carefully cultivated.


Tulips: Spring Starts Now!

Tips for Planting Tulips

Tulips are an easy care addition to any landscape, and they are easier to plant than many gardeners realize.

  1. Choose only top-sized bulbs without any bruises or obvious damage. Bigger bulbs generally indicate better quality and bigger flowers.
  2. Plant bulbs as soon as purchased or store in a cool, dry location.
  3. Choose a sunny (or part sun) location with well-drained, rich soil.
  4. Plant 2″ deeper than recommended to promote re-blooming each year.
  5. Apply bone meal 3 times a year – in fall when you plant, in spring as bulbs emerge from the ground and after flowering has finished. This will provide food for the foliage and bulb growth for next year’s flowers.
  6. Mulch and water the bed thoroughly after planting.
  7. Plant before the ground freezes.
  8. Deadhead flowers after they have faded, but leave the foliage to die back naturally. Do not cut off the leaves until they have turned brown, or else they will not develop large enough bulbs for a good show the next year.


Applying Horticultural Oil or Neem Oil

Autumn is an excellent time to apply All Seasons Horticultural Oil or Neem Oil. The oil smothers many soft-bodied insects and hard-shelled scales that are impenetrable to many insecticides, and can therefore help control some of the most stubborn insect populations. But is it right for your plants?

About Horticultural and Neem Oils

Horticultural oil, or hort oil, is typically derived from petroleum, and is a type of ecologically-friendly mineral oil. Some cottonseed and soybean oils can also be effective horticultural oils. Emulsifying agents are typically added to these oils so they can be mixed with water and used as a spray, which helps distribute them evenly over plant foliage to be most effective.

Neem oil can control pests that are trying to overwinter in your potted plants. You can apply it on upper and lower leaves. Use neem oil as a preventative for established infestations and horticultural oil to eliminate eggs.

Pests That Don’t Like Horticultural Oils

Different types of horticultural oils can be effective against many unwanted garden pests, including…

  • Spider mites
  • Aphids
  • Whiteflies
  • Mealy bugs
  • Psyllids
  • Lace bugs
  • Caterpillars

In addition to smothering the larvae or insects directly, the heavy oil also makes it difficult for many insects to crawl therefore starving them to death and preventing them from spreading diseases from plant to plant. Additionally, the oil repels many insects looking for winter homes. The oils also act as fungicide against powdery mildew, rust and leaf spot on some plants.

Applying Horticultural Oils

Application of horticultural oils is easy, requiring only a simple hose-attached sprayer. Because oil and water do not mix, frequent agitation by shaking is required even if the oils are mixed with other agents to be more sprayable. These products are most effective if applied when plants are dormant, since oil-based products can burn and harm actively growing foliage, buds, flowers and fruit. Some lighter weight, summer-formulated oils are available, but they should be used only sparingly and only if absolutely necessary. Autumn and winter are the best seasons to apply horticultural oils when insects are a problem, though autumn applications can occasionally cause problems with plants dying back and other winter damage. Because the oils can evaporate and dissipate quickly, they should only be used when insects are present, otherwise they will be ineffective. In freezing weather the oil coverage will be inconsistent, so cool but not bitterly cold temperatures are best.

Of course, always follow the instructions for proper application rates, plant sensitivity and ideal weather conditions to ensure the most effective treatment. Because these oils are still pesticides, protective gear such as gloves and goggles should also be worn to avoid accidental irritation or more severe contamination.

Using  oils can be a great way to control insects on your plants, but only if the oils are used appropriately. Come in for a consultation to see if these products can help end your insect problems.

Repotting Houseplants

Fall is an excellent time to repot many houseplants. Potted plants that have been growing outdoors during the summer have probably grown quite vigorously due to the high light levels and greater humidity. If the top growth of the plant has increased in size by 20 percent or more, it probably should be transplanted into a larger container so the roots can stretch and settle comfortably.

Before You Repot

Before repotting, check the plant and the soil carefully for insects.  Add systemic granules to the soil and spray the leaves with an insecticidal soap to remove any unwanted pests. If an insect infestation is particularly bad, it may be necessary to remove most of the plant’s soil and replace it with fresh potting soil. Avoid using soil from the garden, however, which will harbor insect larvae and eggs as well as weed seeds and other material you do not want in your houseplants.

Acclimating Plants

Bring your plants indoors well before any danger of frost for proper acclimation to the indoor environment. The change in light levels and humidity could shock more delicate plants, and they may wilt temporarily or drop leaves before they adjust to the new conditions. If possible, bring them in just a few minutes at a time for several days, gradually increasing their indoor time to several hours before keeping them indoors all the time. Flowering tropicals will also benefit from cutting back some of their foliage to avoid shock before being brought indoors.

To help houseplants overcome the transition from outdoors to indoors, position them in a bright, sunny area and consider adjusting indoor temperature and humidity controls to more closely mimic outdoor conditions. Make adjustments slowly and gradually, and the plants will adjust.

Time to Repot

Once your houseplants are adjusted to their indoor fall and winter environment, they can be safely repotted without adding to their stress. Repot the plants early in the day, and move them to a slightly larger pot. Avoid jumping several pot sizes, which could lead to excessive root growth while the foliage is neglected. Be sure to fertilize and water the plants appropriately to provide them proper nourishment as they settle into new pots. Do not expect luxuriant foliage growth right away, however, as it will take some time for the plants to begin growing again, especially in fall and winter when most houseplants are entering a dormant, slow growth period.

By repotting your houseplants in fall, you can help healthy, vigorously growing plants adjust to a new environment and continue their growth with ease in a new, larger, more comfortable pot.

Choosing a Japanese Maple

We’re certain you’ve heard it numerous times: fall is the best time to buy your Japanese maple. Have you come into the garden center to pick one? Did the varieties overwhelm you? Let us make it easier for you by explaining Japanese maple differences. Then, when you come in, you’ll know exactly what you want.

The species Japanese maple, Acer palmatum, moderately grows to a 20′ by 20′ multi-trunked tree. The leaves have 5-9 finely cut lobes giving them a more delicate look than other maples. Red spring leaves turn to green in the summer and blaze with yellow, orange and red in the fall. All do best with protection from drying winds and hot overhead afternoon sun. During their centuries of use in gardens around the world, gardeners have discovered and propagated those selections with unusual growth habits and bark patterns, as well as leaf color and shape. With hundreds of Japanese maple varieties available at garden centers, we feel a little simplification is in order.

  • Leaf Shape
    The variation Dissectum or Laceleaf Japanese Maple has leaves are deeply cut and finely lobed giving a lace cutout look. These varieties generally grow best in shady locations as the leaves easily burn or scorch. The leaves of non-Dissectum varieties are much less lacy. They resemble the leaves of native maples but are smaller and more deeply cut.
  • Leaf Color
    The leaf color of different Japanese maples also varies. Many have red spring growth changing to green in the summer. However, some retain the red through the growing season. Some varieties have variegated leaves with white, cream, gold or pink. Variegated leaves burn easily in the sun but can revert to all green in too much shade. Green leaves tolerate more sun than red. Autumn is when Japanese maples really put on a show with a riot of blazing colors.
  • Tree Form
    Non-Dissectum varieties grow more quickly into upright forms. Some varieties remain less than 10′ tall but others can grow to 25′ tall by 20′ wide. Laceleaf maples slowly develop a weeping form approximately 8-10′ tall and 8-12′ wide. However, ‘Seiryu’ is an exception, growing into an upright form.

Laceleaf (Dissectum)

Non-Dissectum

Location

More shade

Less shade

Size

Smaller

10-25′ tall depending upon variety

Tree Form

Weeping

Upright

Leaf Shape

Lacy, fine cut

Lobed

Leaf Color

Red, green

Red, green, variegated

Now that you have identified a suitable planting location and the type of Japanese maple you prefer, come see us and let our friendly staff show you the varieties that meet your requirements. Autumn colors are blazing now so this is a great time to make your selection.


Forcing Bulbs for the Holidays and Beyond

Blooming baskets and pots of brightly colored forced bulbs make a fabulous holiday or winter gift for others and ourselves. What better way to dress up the holiday home or cheer up a long, cold winter, reminding us of impending spring?

The forcing process should begin in September or early October if you want the bulbs to be blooming when given in late November or December. If you are starting late, no worries, just print these easy instructions to give with your potted bulbs and let the recipient do the rest.

Forcing Bulbs in 10 Easy Steps

  1. Count backwards from the desired bloom date the number of weeks required for bloom plus the number of weeks required for cooling. This is the planting date. To use your forced bulbs as a blooming Christmas gift, you will have to plant in September.
  2. Select a container that has drainage holes and is at least twice as tall as the unplanted bulb. There is an exception for paperwhites that you plan to grow in stone. These should be placed in a container without drainage holes.
  3. Mix a good bulb fertilizer into your potting soil according to directions on the package.
  4. Fill enough of your container with potting soil so that when the bulb is placed on top of the soil the tip of the bulb sits slightly above the lip.
  5. Place your bulbs on top of the soil. Keep them close without touching each other or the container.
  6. Continue to fill the area between the bulbs with soil. Fill until slightly below the lip.
  7. Water the soil gently, allowing excess to drain.
  8. Refrigerate potted bulbs for the appropriate amount of time. Check frequently and water as necessary to keep the soil moist.
  9. Gradually acclimate planted bulbs to a warm, bright location when their required cooling time has been completed. Move back out of direct sun and into a cooler location when the bulbs finally flower to prolong the blooms.
  10.  Rotate container frequently to produce straight stems.

Post Bloom

After flowering, cut back flower stems and place your containers back in full sun. Continue to water until the foliage dies back naturally. When the foliage is completely spent, place containers in a cool, dry place until early next fall when the bulbs may be safely planted into the garden. Forced bulbs cannot be forced a second time. Paperwhites will never bloom again and should be discarded after forcing. Previously forced bulbs, after planting in the ground, may skip a year’s bloom but will eventually return to their former beauty and regular schedule.


Holiday “Cactus” (Schlumbergera varieties)

Have you noticed the odd-looking plants with neon bright flowers blooming since Halloween? You may know them as Thanksgiving cactus, Christmas cactus or Crab Cactus. Whatever you call them, they’re certainly bright and cheerful, and bring a bold bloom of color indoors during the winter months.

These plants don’t resemble their cactus cousins. Native to forests and jungles rather than desert regions, these plants are generally epiphytic, growing on trees or rocks. Distinctly flattened claw-like joints approximately 1″ long form the arched and hanging stems. The 2.5 – 3″ tubular blossoms emerge from the stem tips.

In case you’re wondering, the Easter cactus is a close relative but a different genus. However, in addition to blooming in the spring, another difference is the blossoms also form at the stem joints. Hybrids now bloom at different times of the year and new introductions create a wider variety of colors including pink, reddish, white, orange, purple and even multicolored blooms on the same plant. You can actually create a blooming rainbow effect over the entire year, with proper care and diligent upkeep.

The Christmas cactus usually begins flowering when night temperatures are around 55° Fahrenheit. After the buds are set, night temperatures of 60-70° Fahrenheit and slightly higher during the day are ideal. Many people summer their plants outdoors in a shady location and bring them indoors after bud set to enjoy during the holidays.
Caring for Holiday Cacti

Holiday cacti are as easy to grow as most houseplants. These easy instructions can help your Christmas cactus become part of your holiday traditions for years to come.

  1. Use general all-purpose container potting soil and a pot with sufficient drainage to protect the roots.
  2. Keep the soil moist while the cactus is blooming and allow it to become mostly dry while resting before watering again.
  3. Fertilize “weakly, weekly” while flowering. Otherwise, water every other month without fertilization.
  4. Place the cactus where it will receive bright indirect light for 6-8 hours a day. Avoid direct sunlight that can burn the plant.
  5. Transplant the cactus to a larger container when roots are very tight and blooming is less vigorous.

A holiday cactus can be a fine addition to any winter decorations, or by itself it will brighten any room for weeks with its bold, colorful blooms. With proper care, you’ll enjoy your cactus for many holiday seasons.


Size Up Your Site: A First Step in Planning Your Landscape

Whether you plan your garden from start to finish or use a professional designer, a few simple steps can help you assess your property’s potential to develop the landscape of your dreams. By getting involved in the landscape design process, you can address practical problems, structure your outdoor living space and develop a plan that will reflect your taste and lifestyle.

Surveying Your Site

Every yard, garden and landscape site will have differing light conditions, grade changes, varying soil conditions and existing plants and structures to consider when planning changes and expansions. Using a loose-leaf binder, take notes on each of the following:

Overall:

  1. What are your favorite spots in your yard and why? What your least favorite and why?
  2. In landscapes, do you generally prefer open on enclosed spaces?
  3. What existing plants do you want to preserve, and which do you want to remove?
  4. What is the architectural style of your home? What is your decorating style?
  5. Are you planning any additions to your home that may take away yard space?
  6. Do you want special areas for children, entertaining, pets, recreation, vegetable gardening, water features or composting?
  7. What is your time frame? Do you want a short-term or long-range plan?
  8. Which building materials do you like – brick, wood, stone, pavers, etc.?
  9. Is your outdoor lighting adequate for your use?
  10. Do you need to screen an area for wind, noise or an unwanted view?
  11. What is you landscaping budget (both short- and long-term)?
  12. How will your landscape use change over time, such as when children grow up?

Specific Areas:

  1. What is the light condition of the area? How does it change seasonally?
  2. How is the soil – well-drained, poor, heavy clay, poorly drained, etc?
  3. What are the dimensions of a confined area that could affect plant size?
  4. What are your favorite plants or types of plants?
  5. Would you like a garden accent or other feature in this area (trellis, arbor, sculpture, bench, pond, etc)?
  6. What is the pH and general condition of the soil?

Once you have taken adequate notes, you’ll have a much better understanding about the overall layout of your landscaping site. This can help you plan the best options without making costly or time-consuming mistakes, such as planting the wrong tree that will outgrow a corner in a few years, or choosing building materials that won’t stand up to your climate.

More Tips for Landscape Surveying

You can never have too much information at your fingertips when you are surveying your site for landscaping changes. More techniques that can give you all the information you need include…

  • Photographing your property. Snapshots can reveal what the eye may overlook, and can be useful to show others to get their unique perspectives. Take views from your house and various areas of your property. Include photos from different times of day.
  • Measure everything and mark it on a map. You can use graph paper to create a simple sketch that will show dimensions so you can properly size your landscaping plans.
  • Make a sketch that shows what is existing (plants & structures) and where it is located. This will help you figure out what features you want to preserve, what you may want to expand and what you would rather remove and how the space will change.

Sign up for our Landscape Design Classes on our event page. Bring your information in – we can help you choose the best plants, accents and accessories suitable to your needs, style and budget for the landscape of your dreams!

Rotating Your Vegetable Crops

Whether you just plant a few tomatoes, herbs and some lettuce or an elaborate garden complete with exotic selections of lesser known veggies, you’ll want to rotate your crops each year. All types of vegetable crops – brassicas, onions, legumes and root crops – require a slightly different blend of nutrients and trace elements, even if their light and water requirements are similar. If you always grow your tomatoes in the same place, eventually the soil will become exhausted of the nutrients that tomatoes require the most, and the crop will become weaker and less productive. Meanwhile, another vegetable could easily thrive in that location and its growth would help replenish the nutrients that tomatoes may need in future years. If you rotate crops in and out, you’ll enrich the soil and enjoy larger, more productive, more flavorful harvests.

The easiest way to rotate your vegetables is to use a 3-year plan. First, you’ll need to decide which vegetables you plan to grow, then divide them into these three main groups:

Group 1:
Peas
Beans
Celery
Onions
Lettuce
Spinach
Sweet Corn
Tomatoes
Zucchini

Group 2:
Cabbage
Cauliflower
Broccoli
Kohlrabi
Rutabaga
Turnip
Radishes

Group 3:
Beets
Carrots
Parsnips
Potatoes

It’s all right if you don’t plant to grow vegetables from each group. Simply adjust your rotation plan to compensate, or even consider trying out a new vegetable to complete the rotation and expand the variety of your garden.

Next, draw a plan of your garden and mark where each group of plants will go, keeping in mind the light and watering requirements of different varieties. It may help to sketch out the boundaries of each group, noting which plants are part of which rows, boxes, containers or beds. Keep those notes and sketches in your garden journal, and also take notes throughout the growing season about which plants perform best and which may be struggling. Next year, move the plants accordingly to shift where different crops are located. If you choose to add new vegetables to your garden, start them in the location with their appropriate group and bring them right into the rotation scheme.

As you rotate crops each year, you will notice consistently lush, healthy plants, bountiful harvests and delicious produce. After a few growing seasons, rotating your vegetable crops will be second nature and will be an important part of your gardening plan to ensure only the best comes from your garden.


Anti-Desiccants: Why, What, and When

Use Bonide Wilt-Stop to protect live evergreens, fresh cut evergreens, newly transplanted shrubs and tender bulbs from drying out during harsh winter weather.

You’ve removed late-autumn weeds, layered on the mulch, pruned appropriately, possibly even covered or wrapped your plants – so why do some still die in the winter, despite all your well-meaning efforts?

Many plants die during winter because they dry out, or desiccate. As temperatures drop, the ground freezes and plant roots cannot take water from the soil, no matter how much snow may fall. This causes the plant to use stored water from the leaves and stems as part of the transpiration process, during which water exits the plant through the leaves. If the sun is shining or the wind is blowing, transpiration increases and more water exits the leaves. If no water is available and transpiration continues, the plant will soon die. Because evergreen plants do not drop their leaves, they are especially susceptible to this death.

Preventing Desiccation

How can you help your plants stay well-hydrated through the frozen drought of winter? The first step is to remember healthy plants in the summer survive the hardships of winter far better than sickly or stressed plants. Through the spring, summer and fall, you should always be on the lookout for signs of pests, diseases and damage, and take all necessary steps to keep your plants thriving.

Second, be sure to water well even when temperatures begin dropping below freezing. Later, if the ground thaws, water before the ground refreezes. Water slowly to provide a deep drink without waterlogging the roots, however, so they are not damaged by ice.

The third step is to use an anti-desiccant, also called an anti-transpirant like Bonide Wilt-Stop, to reduce the moisture loss from the leaves and needles. Because broadleaf evergreens such as boxwood, aucuba, holly, rhododendron, many laurels, Japanese skimmia and leucothoe do not drop their leaves, they are especially vulnerable to winter death. Using a product such as Wilt-Stop to reduce transpiration by protecting the pores will save many broadleaf evergreens.

When using any horticultural product, be sure to check the label and follow all instructions properly. Some conifers such as cedar, cypress, juniper and pine may benefit from these products. However, be sure to read the instructions to prevent burning specific conifers. Also, do not use on “waxy” blue conifers, such as blue spruce, which already have an oily protective film on the nettles.

Here are a few reminders to get the best protection from an anti-desiccant:

  • Plan to apply when day temperatures begin dropping below 50⁰ Fahrenheit. Apply when temperatures are above freezing on a dry day with no rain or snow anticipated within 24 hours. This allows the product to thoroughly dry. Spraying in freezing temperatures will cause plant damage.
  • Do not spray conifers until thoroughly dormant, generally in late winter. This prevents trapping moisture in the needles which could burst when frozen.
  • Generously apply to dry leaves and needles. Don’t forget the undersides. Spray from several angles to ensure complete coverage.
  • Because the anti-desiccant will break down in light and warmth, reapply in late winter on a dry day when temperatures are above freezing for at least 24 hours.

Beyond Winter Drought

Other than protecting your landscape evergreens from winter drought, there are other uses for anti-desiccants. Many gardeners use it to protect newly transplanted shrubs from drying winds and sunshine as they settle in. It also provides protection to tender bulbs going into storage. A quick spray in early winter protects rose canes and hydrangea stems. Spraying onto live or cut Christmas trees and carved pumpkins slows the drying process, making them last longer for greater holiday enjoyment.

To answer your questions, or to choose the best product for your landscape plants, come in to discuss anti-desiccants with one of our friendly and knowledgeable staff members. Together, we can reduce the number of plants you lose to the dryness of winter and keep your garden beautiful and healthy.


Dormant Pruning With the Proper Tools

Late winter pruning is often recommended for many trees and shrubs. Pruning the plants while they are dormant is less stressful for the plant and it’s also easier to view the structure of deciduous trees and shrubs without leaves to ensure the pruning helps create the desired shape. It’s also a time of the year when late winter sunshine makes us all long to be in our gardens and pruning is an excellent job to get us out there.

Pruning Tools

To get out and get pruning, you will need the proper tools. There are several types of pruners that should be in every serious gardener’s tool shed.

  • Hand Pruners
    The simplest tool, but the hardest to choose, is the hand pruner. There are two distinct styles of hand pruners: the anvil type and the bypass. The anvil pruner is good for pruning deadwood or undesirable growth. For more valuable specimens anvil pruners tend to smash the wood during cutting, leaving the wound open to insects and disease. Bypass pruners are like a pair of scissors and give you an easier, cleaner healthier cut. Different hand pruners are available in different sizes and grip styles, including options for both right-handed and left-handed gardeners. To get the best results, it is important to choose a hand pruner that feels comfortable but still provides adequate strength for the job.
  • Lopping Shears
    Another tool that comes in handy is the lopping shear. They are used for making larger cuts up to 1-1/2″ in diameter, and have longer handles to provide more power without stress or strain. The longer handles also provide a better reach than hand pruners. They are also excellent for clearing away undesirable growth in your yard, including trimming hedges.
  • Pole Pruners
    The last tool you’ll need is a pole pruner. It is a combination lopping shear and pruning saw. The pole pruner extends out to twelve feet and can be used for making small cosmetic cuts or larger limb removals without needing to set up a ladder. Pole pruners are also useful in dense canopies when using a ladder would not be practical or suitable.

To learn more about pruning specific trees or shrubs and to choose the appropriate tools for the job, please stop in or give us a call. We’ll be happy to help you be sure you are equipped to make clean, appropriate cuts that will help your trees and shrubs look their very best.


Flirting with Spring

In January and February, winter flirts with spring. Despite snow on the ground, there will be occasional warm days, balmy breezes and stunning blue skies that remind us of the rich colors of spring. On these flirtatious days, quince, forsythia and pussy willow begin to emerge from dormancy. With this slight swelling of buds, it is time to cut a few branches to bring spring indoors, so even when winter reappears with the next freeze or storm, we’re reminded of the warmer times to come.

Forcing Branches

Just like forcing bulbs, forcing branches will bring their buds into full beauty even if the outside weather isn’t quite right yet. To force branches, select plants that have set their buds in the fall or early winter. Look for branches with plump flower buds, and cut branches that you would have normally pruned in order to preserve the shape and health of the plant.

Next, scrape about 2 inches of the bark from the pruned end of the branch and make a 3-5 inch cut up the branch (lengthwise from the pruned end) to allow water to be absorbed. You can also split the end by carefully hammering it, but avoid crushing the tissues. Fill a tall container or vase with room-temperature water and floral preserver, then place the cut branches in it. Place the arrangement in a dimly lit room for 2-3 days, then move into a brighter area (but no direct sunlight). Change the water and cut 1 inch off the bottom of the stem each week. Mist the branches daily. Although they may take up to 3 weeks to bloom, the delightful bursts of color will be a celebrated reward for your time and efforts.

Flowering Branches for Forcing

Depending on when you want your buds to bloom, there are a variety of great branches you can work to force into brilliance even when spring is weeks away.

Early bloomers…

  • Witch Hazel
  • Cornelian Cherry
  • Forsythia
  • Pussy Willow
  • Azalea
  • Flowering Quince

For Later Blooms…

  • Magnolia
  • Apple
  • Crab Apple
  • Flowering Dogwood
  • Hawthorn
  • Red Bud
  • Mockorange

 Decorating With Forced Branches

There are many different ways you can add a little spring glory to your interior décor with forced branches. Consider…

  • Using blooming branches in lieu of any flowers in vases.
  • Putting shorter branches in bud vases on a windowsill.
  • Adding branches to candle centerpieces or other arrangements.
  • Twining thinner branches around a wreath form.
  • Using the tallest branches in a tall, thin floor vase.

Spring will be here before you know it, and you can speed it along when you force branches to enjoy their blooms a few weeks early!


Birdscaping

As wildlife habitats are threatened by development, the creation of a bird-friendly environment that provides food, water and shelter is crucial to the existence of our wild bird population. Caring for our feathered-friends is an educational and enjoyable activity for the entire family that brings beauty and song to our lives.

Benefits of Wild Birds

Birds are great guests to have in your yard, garden or landscape, and they provide more benefits than many homeowners and gardeners realize. Wild birds can…

  • Control insects by feasting on both flying and crawling insects, as well as spiders, slugs, snails and other creepy-crawlies.
  • Pollinate plants by flitting from flower to flower as they seek out insects or eat seeds, taking pollen along between blooms.
  • Manage weeds as they consume copious amounts of weed seeds before the seeds ever have a chance to sprout.
  • Control rodents when raptors visit the yard in search of mice, rats, gophers, voles or other unwanted pests.

Attracting Backyard Birds

Fortunately, it is easy to attract a wide variety of backyard birds when you offer them what they need most – food, water and shelter.

Food for Birds

Wild birds rely on both natural and supplemental food supplies so it is important to consider both when birdscaping. Feeding the birds is most important in the winter when natural food is scarcer, but they will visit feeders at any time of year. Migratory birds require additional food in the spring and fall as they pass through the region and nesting birds will utilize feeders in the summer.

Tips:

  • Provide a variety of natural foods for birds by planting berry bushes, seed-bearing flowers, nectar-rich flowers and sunflowers. Leave windfall fruit on the ground for birds to nibble. Minimize pesticide use so birds can feast on insects as well.
  • Add supplemental feeders to your yard, such as birdseed feeders, suet feeders and nectar feeders. Clean feeders weekly to avoid mold that can be dangerous to birds, and be sure feeders are full when birds need them most.

Water

Improve your backyard bird habitat by adding water. Birds require a constant supply of clean water for drinking and bathing. This is especially important in late summer, when water is scarce, and in the winter, when it is frequently frozen.

Tips:

  • Place bird baths in a protected location safe from predators, and keep the baths filled at all times so a fresh supply of water is constantly available.
  • Scrub off algae as soon as it is appears and thoroughly was the bird bath each week to minimize feces contamination or other messes in the water.
  • Provide motion for greater attraction by using a bubbler, wiggler, dripper or fountain. Birds will see the sparkles of the moving water and will hear the splashes from great distances, so more birds will visit.
  • Use Mosquito Dunks to safely prevent mosquito larvae in warm weather. A clean bird bath with moving water will also harbor fewer insects.
  • Add an outdoor-safe submersible heater to the bath in winter to keep the water liquid instead of frozen, or consider using a fully heated bird bath during the coldest months.

Shelter

It is important to offer safe and comfortable shelter for your wild birds to nurture their young, protect them from predators and shield them from the elements. Planting evergreen trees and shrubs and providing bird houses, along with roosting boxes and pockets, are all beneficial additions to your birdscape.

Tips:

  • Choose both deciduous and evergreen landscaping trees and shrubs to offer birds different types of shelter in all seasons.
  • Minimize pruning to give birds denser, more secure shelter to take advantage of when they feel threatened.
  • Plant in layers and create thicket-like pockets or corridors in your landscape so birds can move around freely without feeling exposed.
  • Supplement the shelter in your yard with good quality bird houses, winter roost boxes or nesting pockets to give birds even more options to stay safe and secure.

When you meet birds’ needs for food, water and shelter, your birdscape will soon be home to a fun and friendly flock of backyard birds.

Spruce Up for the Holidays

From the Fir Family come some of our most beloved Christmas trees, the Colorado, Norway and White Spruce varieties. Both the Colorado and Colorado Blue Spruce have a nice pyramidal shapes with strong limbs that can hold heavy ornaments or light strands. The Colorado Blue is set apart by its stunning steel-blue foliage. The Norway Spruce has short, soft, deep green needles and the White Spruce possesses a robust full form. Both the Norway and White Spruce should be purchased planted in containers or balled and burlapped as they tend to lose their needles quickly when cut.

Beyond the holidays, spruces make a lovely addition to any landscape. When viewed in the northern forests, these majestic, needled evergreens are glorious with their graceful, symmetrical, conical forms. Smaller landscapes may also enjoy the merits of this genus with the many slow-growing and dwarf cultivars that are commonly offered, many of which are also ideal when selected as living holiday trees. Larger spruces work wonderfully planted in a row as a windbreak but shine equally as well when chosen as a specimen plant. Added benefits include deer resistance and salt tolerance.

Caring for Your Living Christmas Tree

If you do opt for a bagged, balled or potted spruce, there are certain steps you need to take so they can survive the rigors of the holiday and be ready for planting. 

  1. Only leave a live spruce tree inside the house for a maximum of 5-7 days.
  2. If possible, place the tree in a garage, carport or sheltered area to help acclimate it to a warmer location before putting it into the house. Keep the root ball moist.
  3. Before bringing indoors, spray the tree with Wilt-Pruf to help keep it from drying out.
  4. Place the tree in a tub of 2 inches of water and cover with newspaper or mulch to retain moisture.
  5. Place the tree away from heating vents, wood stoves and baseboard heaters.
  6. Check water level daily and refill as needed.
  7. Prepare your planting hole outside by digging it early and covering with plywood until needed. Store soil in the garage so it does not freeze.
  8. If possible, acclimate the tree once more by putting it in a garage or sheltered area for a few days before planting outside. Continue to keep the root ball moist.
  9. Plant the tree as you normally would, mulch and water well.

Growing Tips 

  • Plants require full sun, good air circulation and moist, well-drained, acidic soil.
  • Spruces are shallow-rooted and should always be planted high rather than low.
  • Mulch the root zone with a thick layer to keep plant roots cool and moist.
  • Consider available space and ultimate size of the chosen variety before planting.

 Since we are interfering with the natural growth cycle of these trees, their survival through the season cannot be guaranteed. However, customers who have purchased living trees from us and followed the guidelines have reported 80-85 percent success rate with the trees thriving in the spring. It is fun to look out into your yard at trees from Christmases past!


Family Gardening: Attracting Wildlife to the Garden

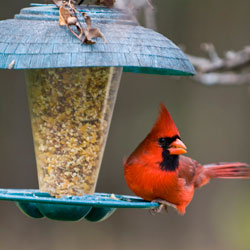
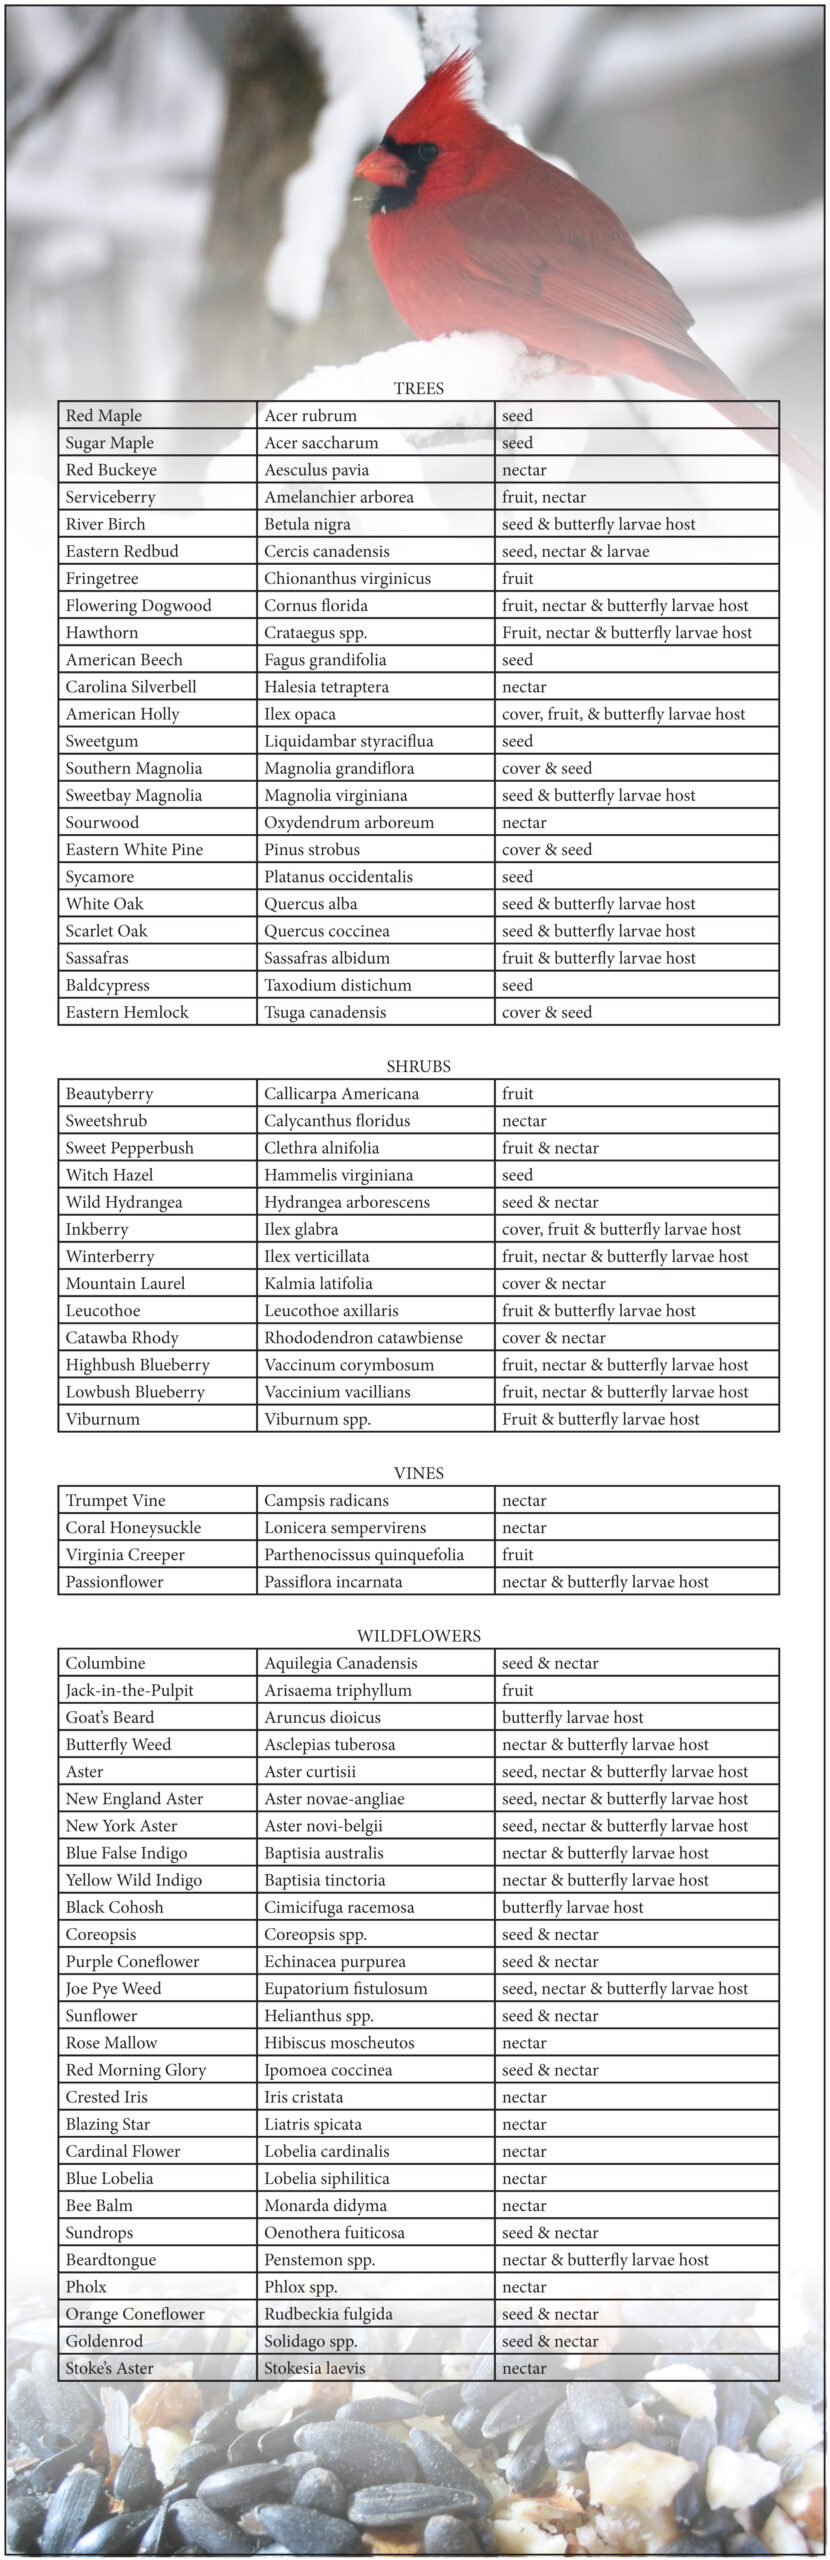
Attracting wildlife to the home garden is an enjoyable and creative way to teach children about nature, evoke their respect for the environment and provide meaningful family together time. Many things that are good for wildlife are equally good for a wholesome, thoughtful garden – win-win!

 Covering the Basics

 All wildlife – butterflies, birds, squirrels, snakes, deer, etc. – requires three things for survival: food, water and cover. When you meet these basic needs in the garden, you can expect a variety of visitors.

  • Food
    Native trees, shrubs, vines and wildflowers provide the foliage, nectar, pollen, berries, seeds and nuts that wildlife requires to survive and thrive. As an added advantage, natives are well adapted to their particular geographic area and therefore are more disease and pest-resistant and generally require little extra fertilization, supplemental watering or other maintenance.There will be times when natural food sources are not readily available, especially in late winter when many stores of food are exhausted or early spring before natural supplies are replenished. This is when it is most important to provide supplemental sources of food using bird, squirrel and butterfly feeders to add to the native food sources for resident and migrating wildlife.
  • Water
    All wildlife requires a source of clean water for drinking and bathing. Many of us do not have a natural water source on our properties but this situation is easily remedied by adding a garden bird bath or water dish. With larger landscapes, adding a pond, fountain or pondless waterfall is an ambitious and rewarding project that will greatly enhance your efforts to increase the wildlife population. If space and your budget permits, you might even consider a tiered stream or other extensive feature.
  • Cover
    Wildlife requires a place to hide from predators, shelter in inclement weather and a secluded place to birth their young. Trees, both dead and alive, are perfect for hiding, nesting and perching. Leafy and thorny shrubs also provide wildlife protection and a suitable hiding place. Tiers of plants are most desirable, and thicker, denser plantings such as thickets or groves will be very attractive. Even if you have plenty of vegetation already, the addition of bird and bat houses will increase areas of wildlife safety in your landscape.

Native Plants to Benefit Wildlife

All types of plants, from trees to vines to shrubs to flowers, can provide food, water and cover to wildlife, but some plants are more useful than others. These handy lists can help you choose the best options for your landscape and the type of help you want to give backyard birds, butterflies, squirrels, deer and other visitors.

Note: “Seed” denotes abundant seeds that are attractive and nourishing for wildlife; “Nectar” denotes blooms butterflies and hummingbirds will sip from; “Fruit” denotes berries or other small fruits to feed wildlife; “Host” denotes a nourishing host plant for butterfly larvae.

Still not sure about the best plants for your backyard wildlife? Come on in and we’ll help you select just the plants you need for the wildlife you want to welcome to your yard!

Our product availability varies each day, so if you’re looking for something specific, feel free to give us a call ahead of your visit. 


Seed Starting

Starting seeds indoors is a rewarding gardening experience and can help extend your growing season to include more plant varieties than your outdoor season may permit. Furthermore, a larger selection of seed varieties doesn’t limit your opportunities to growing only those transplants that are available at planting time. The key to success in growing seedlings is in creating the proper environment.

What Seeds Need

Seeds are generally hardy, but to start them properly they do need gentle nurturing so they can produce healthy, vibrant plants. In general, seeds should be started 4-6 weeks before the recommended planting time so the seedlings will be large and strong enough to withstand the stresses of transplanting. Use a sterile growing mix which is light enough to encourage rich root growth. Sow the seeds thinly and cover lightly with sphagnum peat moss. Water using a fine spray but do not soak the seeds – they also need oxygen to germinate, and if they are overwatered they will drown. Cover the container with clear plastic to hold the moisture and increase humidity. Place the containers in a warm (70-80 degrees) spot and watch daily for germination. The top of the refrigerator is often an ideal location. When the first seeds germinate, place the seedlings in bright light or under artificial lights (tube lights should be 2-3″ from seedling tops) for several hours each day, since late winter sunlight will not usually be sufficient to prevent weak, leggy seedlings. Daytime temperatures should range from 70-75 degrees. Night time temperatures should range from 60-65 degrees.

As Seeds Grow

When the seedlings develop their first true sets of leaves, add half-strength water soluble fertilizer to their water – organic fish emulsion or seaweed fertilizers are great to use. Repeat every second week to provide good nourishment. Thin the seedlings or transplant them to larger containers as they grow. Before planting outdoors, harden-off the plants at least one week before the planting date. Take the transplants outdoors in the daytime and bring them in at night if frost is likely. Gradually expose them to lower temperatures and more sunlight. The use of hotcaps and frost blankets to cover early plantings will also aid in the hardening off process so the seedlings can adjust well to their new outdoor environment.

Transplanting Seeds

Transplant seedlings into the garden after the safe planting date on a calm, overcast day. Pack the soil around the transplant with as little root disturbance as possible. Sprinkle the plants with water, keeping the soil moist until the plants become established.

Popular Indoor Seed Start Dates

The exact dates you want to start seeds will vary depending on your local growing season, the varieties of plants you choose and what their needs are. In general, dates for the most popular produce include…

Vegetable Seed Starting Dates

  • February – Asparagus, celery, onion
  • March 1 – Broccoli, Brussels sprouts, cabbage, cauliflower, collards, kale, lettuce
  • March 15 – Eggplant, peppers, tomatoes
  • April 1 – Summer squash
  • April 15 – Cantaloupes, cucumbers, winter squash

Flower Seed Starting Dates

  • January/February – Begonia, carnation, geranium, impatiens, nicotiana, pansy, rudbeckia, salvia, snapdragon, verbena, vinca
  • March 1 – Ageratum, dahlia, dianthus, petunia
  • April 15 – Aster, calendula, celosia, marigold, zinnia

Use seed starting dates as a general guide to ensure your seeds have plenty of time to reach their full harvest potential before the weather turns in autumn. At the same time, consider staggering seed starting every few days to lengthen your harvest and keep your favorite vegetables and flowers coming even longer during the growing season. As you gain more experience with starting seeds, you’ll be able to carefully plan your seed calendar to ensure a lush, rich, long harvest season.