Monthly Archives: June 2024

Battling the Bugs of Summer

In the summer months, insects can take their toll on your plants if you are not on the alert for problems. If the right product is used at the right time and under the right conditions, however, pesticides can be reduced to a minimum and your plants will be well-protected.

Organic Products
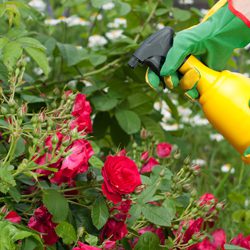
Apply organic products early in the morning when bugs are eating. To stop insect damage, the spray must be applied to the insect itself or sometimes to where the bug is eating. The entire plant must often be sprayed to keep the pests from moving on to untreated areas. Organic controls include insecticidal soap, Bonide All Season Spray (horticultural oil), tobacco dust, bacillus thuringiensis (Bt), rotenone and pyrethrin sprays.

Contact Products
Inorganic in composition, these insecticides must be applied either to the insect or the leaf where the pest is feeding. Apply in the morning for best results, and as with the organic controls, soak the entire plant so the insects do not find a safer spot to nibble. Contact pesticides include Malathion and Sevin.

Systemic Products
Systemic insecticides circulate to all parts of the plant. Therefore, if you are only able to spray part of a shrub, the product will move to all leaves within 24 hours to control feeding insects for about two weeks. Systemics are best applied in the evenings when there is no chance of rain and sprinklers will not be used. The product will be absorbed only as long as the leaf stays wet. When the leaf dries by mid-morning, the product is then moved through the entire plant when the insects resume feeding. Systemic insecticides available to the homeowner include Bonide Systemic Insect Spray, Ortho Systemic Insecticide and Bayer Season-Long Tree & Shrub.

Not sure how to deal with your pests and unwanted insects? This handy chart can help!

Environmentally Friendly Controls for Common Garden Pests

Pest Type

Control Methods

Ants & Cockroaches Diatomaceous Earth, Bonide Eight,
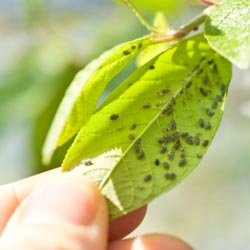
Aphids Insecticidal Soap, Pyrethrin, Bonide All-Season Spray, Bonide Eight, Hot Pepper Wax, Neem Oil
Predator: Ladybugs, Praying Mantis
Caterpillars (Tomato Hornworm, Cabbage Looper, etc.) Captain Jack’s Dead Bug Brew, Bt (Bacillus Thuringinensis), Dipel Dust, Bonide Eight, Neem Oil
Predator: Trichogramma, Praying Mantids
Fleas Diatomaceous Earth,  Bonide Eight
Predator: Beneficial Nematodes
Japanese Beetles Beetle Traps, Neem Oil,  Pyrethrin, Bonide Eight
Predator: Praying Mantids, Beneficial Nematodes for grub stage control
Lacebugs Hot Pepper Wax, Insecticidal Soap
Mealy Bugs Insecticidal Soap, Pyrethrin, Bonide All-Season Spray, Pyrethrin, Bonide Eight
Predators: Crytpolnemus or green lacewing
Mites Captain Jack’s Dead Bug Brew, Insecticidal Soap, Bonide All-Season Spray, Pyrethrin, Hot Pepper Wax,  Neem Oil
Mosquitoes Pyrethrin, Mosquito Bits, Mosquito Dunks (pond control)
Scale Hot Pepper Wax, Bonide All-Season Spray, Insecticidal Soap, Bonide Eight
Predator: Green lacewing
Thrips Captain Jack’s Dead Bug Brew, Insecticidal Soap, Bonide All-Season Spray, Pyrethrin, Hot Pepper Wax, Neem Oil
Whiteflies Insecticidal Soap, Pyrethrin, Repel M Sticky Tape, Safers or Tanglefoot Sticky Whitefly Trap, Bonide Eight
Predators: lady bugs, encarsia formosa or lace wings


Battling Bugs of Summer

Rose Care Basics

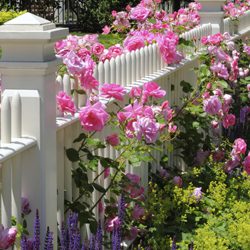
Beginners often become confused with the many recommendations and suggestions for growing roses. However, it is important to start with the basic guidelines for successful rose growing. Roses can thrive under many conditions, but they are sure to grow better, with more luxurious blooms and fewer problems, when you follow the basics.

Prepare the Soil

The proper soil is essential to nourish roses so they can grow to their full potential. To make the soil ideal for roses…

  1. Take a soil sample to test the pH, either with a home testing kit or through your local extension service. Roses like a pH of 6.0 to 6.8. You may need to add lime to raise the pH or sulfur to lower it to the optimum rose range.
  2. Incorporate composted cow manure or other healthy compost into the soil. This will provide superior drainage and excellent organic material for roses to absorb.

Planting Roses
If they aren’t planted properly, roses won’t thrive as well as they could. Improper planting could even damage roots and destroy a rose bush.

  1. Select a sunny spot with good soil drainage – roses require at least 6 hours of full sun daily. Early morning sun is preferred because it dries the leaves, which helps prevent disease.
  2. Dig a wide, shallow hole that is 2-3 times as wide but not quite as deep as the root ball (about 1 inch shallower). The plant should sit on solid ground so it doesn’t sink when the soil settles.
  3. Remove the plant from the pot and loosen any circling roots. If you can’t pull the roots apart, use a knife to make 4-5 vertical cuts in the root ball. This will allow new roots to grow out into the surrounding soil as the plant becomes established.
  4. Place the plant in the hole slightly elevated above ground level. Backfill with soil until the hole is half full.
  5. Soak the root ball with a mixture of a Root Stimulator & Transplanting Solution.
  6. Fill the rest of the hole with soil and water thoroughly. Apply mulch to a depth of 2 inches, being careful not to mound mulch against the trunk of the plant, which could encourage rotting or insect damage.

Pruning Roses

To look their best, roses must be properly pruned. This can be intimidating for rose-growing novices, but once the basics are mastered, the techniques for pruning roses are not difficult.

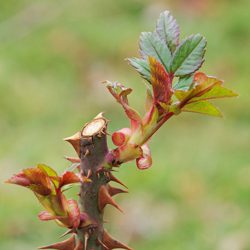
  1. In spring, remove winter mulch when new grow appears. Prune out all dead wood and twiggy growth and cut back to sound wood with a clean slanting cut, just above a good bud eye.
  2. During the growing season, remove fading roses promptly, cutting just above a five-leaflet leaf. This will help encourage reblooming on many cultivars, and will help prevent rot or disease infestation.
  3. To winterize, remove all fallen leaves and debris from the base of the plant, cut back to 10-12 inches after the ground freezes, then apply a mound of mulch over the canes to protect them from temperature shock. 

Food and Water

Roses need the proper nutrition – water and fertilizer – to bloom well and develop stunning colors and fragrances.

  1. Roses thrive best when given 1 inch of water weekly. A thorough soaking from rain or hose will keep roses blooming all season. Try not to overhead water unless it is early in the day, as the damp leaves can promote disease.
  2. Fertilize monthly with Espoma Rose-Tone or Fertilome Rose & Flower Food similar products specially formulated for the nutritional needs of roses.

Treat for Disease and Pests

There are times when roses will succumb to diseases and pests. Quickly recognizing these problems and treating them properly will help minimize outbreaks that can damage several rose plants at once.

  1. Fungus diseases cannot be cured, so a regular spraying schedule is very important. Keep an eye on plants that were infected last year and spray with a fungicide to prevent outbreaks this year.
  2. You may also need to use an insecticide for severe insect problems. Minor problems can be handled with less harsh methods, but diligence will be necessary to keep pests from taking over the rose bushes.
  3. Many rose lovers find it convenient to use an all-purpose insect and disease spray once a week or a systemic control every 6 weeks.

It may seem like a lot of work to cultivate roses, but when you wander through your rose garden or see your favorite rose bush in full bloom, that effort will be well rewarded.

Check out our Rose List and stop by to take yours home!


Growing Mint in Your Herb Garden

Many of us love mint. With many different flavors of mint available at garden centers, it is easy to want to plant one of each. Planning ahead makes this possible to do, but lack of planning may have you tearing them all out.

How Mint Grows

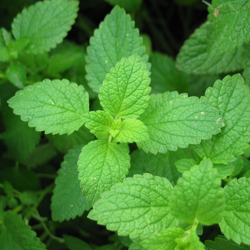
Mint grows as a groundcover. The underground runners spread quickly and are difficult to remove if containment is desired. In other words, mint is often considered invasive and can quickly take over flowerbeds, vegetable plots and even areas of turf near where it is originally planted. Planting in pots placed into the ground prevents its escape, or intensive labor may be needed to help get mint back to its original proportions after it has wandered.

Planting Mint

To help keep mint under control and more accessible for use, many gardeners opt to plant it indoors. Attractive in barrels or pots by the kitchen, mint leaves and flowers can be easily available for cooking or beverages.

To prevent plants from looking rangy, frequently cut or pinch back new growth. Pinching off the flower buds produces more lush leaves and fuller plants.

Mints grow well in sun or part shade, preferring well-drained but moist soil. Although not particular about soil type, enriching clay soil with compost will improve the overall plant appearance and taste. Different soil pH values and organic compositions may also have some minor influence on the taste of different mints.

Most mints grow 18-30 inches tall. Plant at least 2 inches apart to prevent cross-pollination of different varieties and preserve the best flavors. As a perennial, the plant may disappear in the winter, but will return in spring, hardier and more vigorous than ever.

Using Mint

It’s no surprise that mint is an edible favorite. Not only is it popular for refreshing drinks such as mint juleps or mint-infused lemonade, but it is also ideal for…

  • Sauces
  • Salads, especially fruit salad
  • Flavoring for cookies, cakes and puddings
  • Jellies and preserves
  • Smoothies
  • Soups and stews
  • Ice cream, gelato and frozen yogurt
  • Garnishes on meats
  • Freezing in ice cubes for a drink garnish

Mint can be used fresh for a strong, vibrant taste, or it can easily be dried and used all year long. Both fresh and dried mint sprigs can also be fragrant additions to cut flower arrangements, wreaths or other greenery decorations as well. With so many wonderful options for mint, you’ll want to add some to freshen up your herb garden today!

General Soil Amendments

We’ve all heard of the importance of amending the soil properly for gardening and landscaping, but the number of soil amendments sold in garden centers often confuses gardeners. Which is which, and which will work best for your soil conditioning needs?

Types of Soil Amendments

Soil amendments fall into two basic categories, inorganic and organic. Inorganic amendments come from non-living materials such as sand, perlite, vermiculite and crushed stone. With the exception of limestone and gypsum, which are used to increase soil calcium, these are not commonly used in the garden.

However, organic amendments are the opposite. They come from previously living materials such as peat, manures and composts. When leaves, bark, peat, animals and animal wastes are mixed together to decompose, compost or “humus” is the final product. Very commonly used, these materials enrich the soil by increasing the air spaces, adding extra nutrients to the soil, improving the absorption of those nutrients and increasing overall soil fertility.

Why You Need Soil Amendments

Excellent soil is not common around most homes. Even if it was initially, house construction and roadwork often removes the good soil and construction equipment compacts the remaining soil. Furthermore, heavy use of the remaining turf – children and pets playing, for example – continues to compact the soil. Chemical treatments, runoff from gutters and downspouts, removal of existing plants, changes in local wildlife – all of these factors can wreak havoc on soil.

Adding organics loosens compacted soil and results in better gardens. Incorporate organics into the beds throughout the year by working evergreen needles, leaves and lawn clippings into the soil. Amendments such as peat or lime can improve a pH problem, if one exists. Calcium and magnesium deficiencies can be corrected using organic materials such as bone meal or wood ashes, or inorganic materials such as limestone, gypsum or soft rock phosphate.

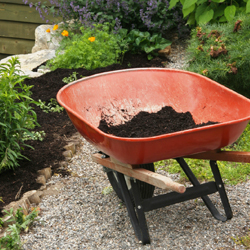
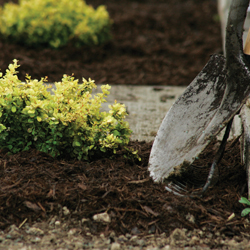
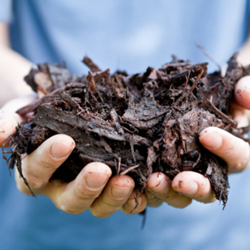
Mulching is another simple way to add biodegradable materials to the soil. Simply place mulch around the plant, leaving several inches bare closest to the stem to discourage insect invasions and rot. In addition to slowly providing nutrients as it decomposes, mulching is attractive, reduces weeds and erosion, maintains soil temperature and prevents “crusting” that occurs when soil becomes too dry.

Another advantage of adding organics is the attraction of worms. They further assist in the decomposition, increase aeration and leave worm castings, a valuable organic material, behind. A healthy garden is home to many worms, and it all starts with adding organic soil amendments.

Whether you opt for organic or inorganic soil amendments, if you use them properly, you soil will improve and your landscaping, flowerbeds and garden will look better than ever.