Monthly Archives: April 2018

Flirting with Spring

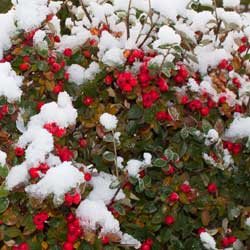
In January and February, winter flirts with spring. Despite snow on the ground, there will be occasional warm days, balmy breezes and stunning blue skies that remind us of the rich colors of spring. On these flirtatious days, quince, forsythia and pussy willow begin to emerge from dormancy. With this slight swelling of buds, it is time to cut a few branches to bring spring indoors, so even when winter reappears with the next freeze or storm, we’re reminded of the warmer times to come.

Forcing Branches

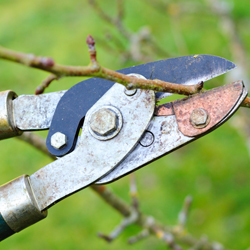
Just like forcing bulbs, forcing branches will bring their buds into full beauty even if the outside weather isn’t quite right yet. To force branches, select plants that have set their buds in the fall or early winter. Look for branches with plump flower buds, and cut branches that you would have normally pruned in order to preserve the shape and health of the plant.

Next, scrape about 2 inches of the bark from the pruned end of the branch and make a 3-5 inch cut up the branch (lengthwise from the pruned end) to allow water to be absorbed. You can also split the end by carefully hammering it, but avoid crushing the tissues. Fill a tall container or vase with room-temperature water and floral preserver, then place the cut branches in it. Place the arrangement in a dimly lit room for 2-3 days, then move into a brighter area (but no direct sunlight). Change the water and cut 1 inch off the bottom of the stem each week. Mist the branches daily. Although they may take up to 3 weeks to bloom, the delightful bursts of color will be a celebrated reward for your time and efforts.

Flowering Branches for Forcing

Depending on when you want your buds to bloom, there are a variety of great branches you can work to force into brilliance even when spring is weeks away.

Early bloomers…

  • Witch Hazel
  • Cornelian Cherry
  • Forsythia
  • Pussy Willow
  • Azalea
  • Flowering Quince

For Later Blooms…

  • Magnolia
  • Apple
  • Crab Apple
  • Flowering Dogwood
  • Hawthorn
  • Red Bud
  • Mockorange

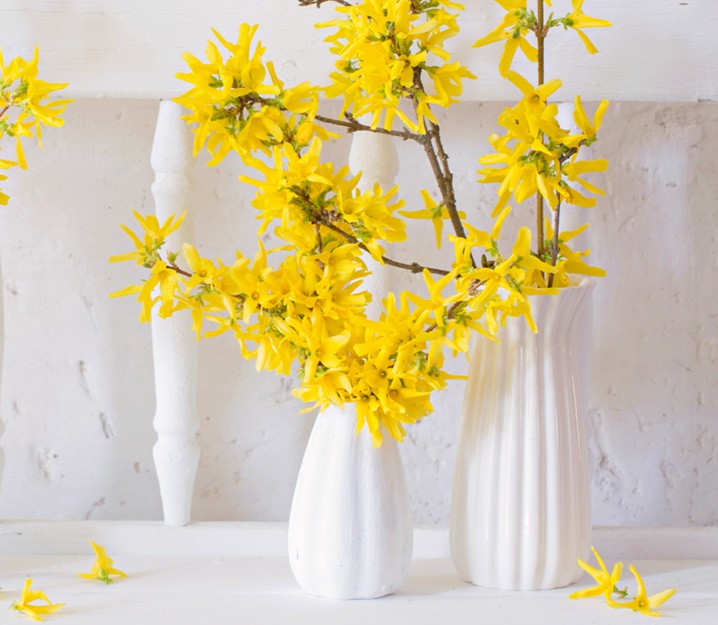
 Decorating With Forced Branches

There are many different ways you can add a little spring glory to your interior décor with forced branches. Consider…

  • Using blooming branches in lieu of any flowers in vases.
  • Putting shorter branches in bud vases on a windowsill.
  • Adding branches to candle centerpieces or other arrangements.
  • Twining thinner branches around a wreath form.
  • Using the tallest branches in a tall, thin floor vase.

Spring will be here before you know it, and you can speed it along when you force branches to enjoy their blooms a few weeks early!


Dormant Pruning With the Proper Tools

Late winter pruning is often recommended for many trees and shrubs. Pruning the plants while they are dormant is less stressful for the plant and it’s also easier to view the structure of deciduous trees and shrubs without leaves to ensure the pruning helps create the desired shape. It’s also a time of the year when late winter sunshine makes us all long to be in our gardens and pruning is an excellent job to get us out there.

Pruning Tools

To get out and get pruning, you will need the proper tools. There are several types of pruners that should be in every serious gardener’s tool shed.

  • Hand Pruners
    The simplest tool, but the hardest to choose, is the hand pruner. There are two distinct styles of hand pruners: the anvil type and the bypass. The anvil pruner is good for pruning deadwood or undesirable growth. For more valuable specimens anvil pruners tend to smash the wood during cutting, leaving the wound open to insects and disease. Bypass pruners are like a pair of scissors and give you an easier, cleaner healthier cut. Different hand pruners are available in different sizes and grip styles, including options for both right-handed and left-handed gardeners. To get the best results, it is important to choose a hand pruner that feels comfortable but still provides adequate strength for the job.
  • Lopping Shears
    Another tool that comes in handy is the lopping shear. They are used for making larger cuts up to 1-1/2″ in diameter, and have longer handles to provide more power without stress or strain. The longer handles also provide a better reach than hand pruners. They are also excellent for clearing away undesirable growth in your yard, including trimming hedges.
  • Pole Pruners
    The last tool you’ll need is a pole pruner. It is a combination lopping shear and pruning saw. The pole pruner extends out to twelve feet and can be used for making small cosmetic cuts or larger limb removals without needing to set up a ladder. Pole pruners are also useful in dense canopies when using a ladder would not be practical or suitable.

To learn more about pruning specific trees or shrubs and to choose the appropriate tools for the job, please stop in or give us a call. We’ll be happy to help you be sure you are equipped to make clean, appropriate cuts that will help your trees and shrubs look their very best.


Anti-Desiccants: Why, What, and When

Use Bonide Wilt-Stop to protect live evergreens, fresh cut evergreens, newly transplanted shrubs and tender bulbs from drying out during harsh winter weather.

You’ve removed late-autumn weeds, layered on the mulch, pruned appropriately, possibly even covered or wrapped your plants – so why do some still die in the winter, despite all your well-meaning efforts?

Many plants die during winter because they dry out, or desiccate. As temperatures drop, the ground freezes and plant roots cannot take water from the soil, no matter how much snow may fall. This causes the plant to use stored water from the leaves and stems as part of the transpiration process, during which water exits the plant through the leaves. If the sun is shining or the wind is blowing, transpiration increases and more water exits the leaves. If no water is available and transpiration continues, the plant will soon die. Because evergreen plants do not drop their leaves, they are especially susceptible to this death.

Preventing Desiccation

How can you help your plants stay well-hydrated through the frozen drought of winter? The first step is to remember healthy plants in the summer survive the hardships of winter far better than sickly or stressed plants. Through the spring, summer and fall, you should always be on the lookout for signs of pests, diseases and damage, and take all necessary steps to keep your plants thriving.

Second, be sure to water well even when temperatures begin dropping below freezing. Later, if the ground thaws, water before the ground refreezes. Water slowly to provide a deep drink without waterlogging the roots, however, so they are not damaged by ice.

The third step is to use an anti-desiccant, also called an anti-transpirant like Bonide Wilt-Stop, to reduce the moisture loss from the leaves and needles. Because broadleaf evergreens such as boxwood, aucuba, holly, rhododendron, many laurels, Japanese skimmia and leucothoe do not drop their leaves, they are especially vulnerable to winter death. Using a product such as Wilt-Stop to reduce transpiration by protecting the pores will save many broadleaf evergreens.

When using any horticultural product, be sure to check the label and follow all instructions properly. Some conifers such as cedar, cypress, juniper and pine may benefit from these products. However, be sure to read the instructions to prevent burning specific conifers. Also, do not use on “waxy” blue conifers, such as blue spruce, which already have an oily protective film on the nettles.

Here are a few reminders to get the best protection from an anti-desiccant:

  • Plan to apply when day temperatures begin dropping below 50⁰ Fahrenheit. Apply when temperatures are above freezing on a dry day with no rain or snow anticipated within 24 hours. This allows the product to thoroughly dry. Spraying in freezing temperatures will cause plant damage.
  • Do not spray conifers until thoroughly dormant, generally in late winter. This prevents trapping moisture in the needles which could burst when frozen.
  • Generously apply to dry leaves and needles. Don’t forget the undersides. Spray from several angles to ensure complete coverage.
  • Because the anti-desiccant will break down in light and warmth, reapply in late winter on a dry day when temperatures are above freezing for at least 24 hours.

Beyond Winter Drought

Other than protecting your landscape evergreens from winter drought, there are other uses for anti-desiccants. Many gardeners use it to protect newly transplanted shrubs from drying winds and sunshine as they settle in. It also provides protection to tender bulbs going into storage. A quick spray in early winter protects rose canes and hydrangea stems. Spraying onto live or cut Christmas trees and carved pumpkins slows the drying process, making them last longer for greater holiday enjoyment.

To answer your questions, or to choose the best product for your landscape plants, come in to discuss anti-desiccants with one of our friendly and knowledgeable staff members. Together, we can reduce the number of plants you lose to the dryness of winter and keep your garden beautiful and healthy.


Family Gardening: Attracting Wildlife to the Garden

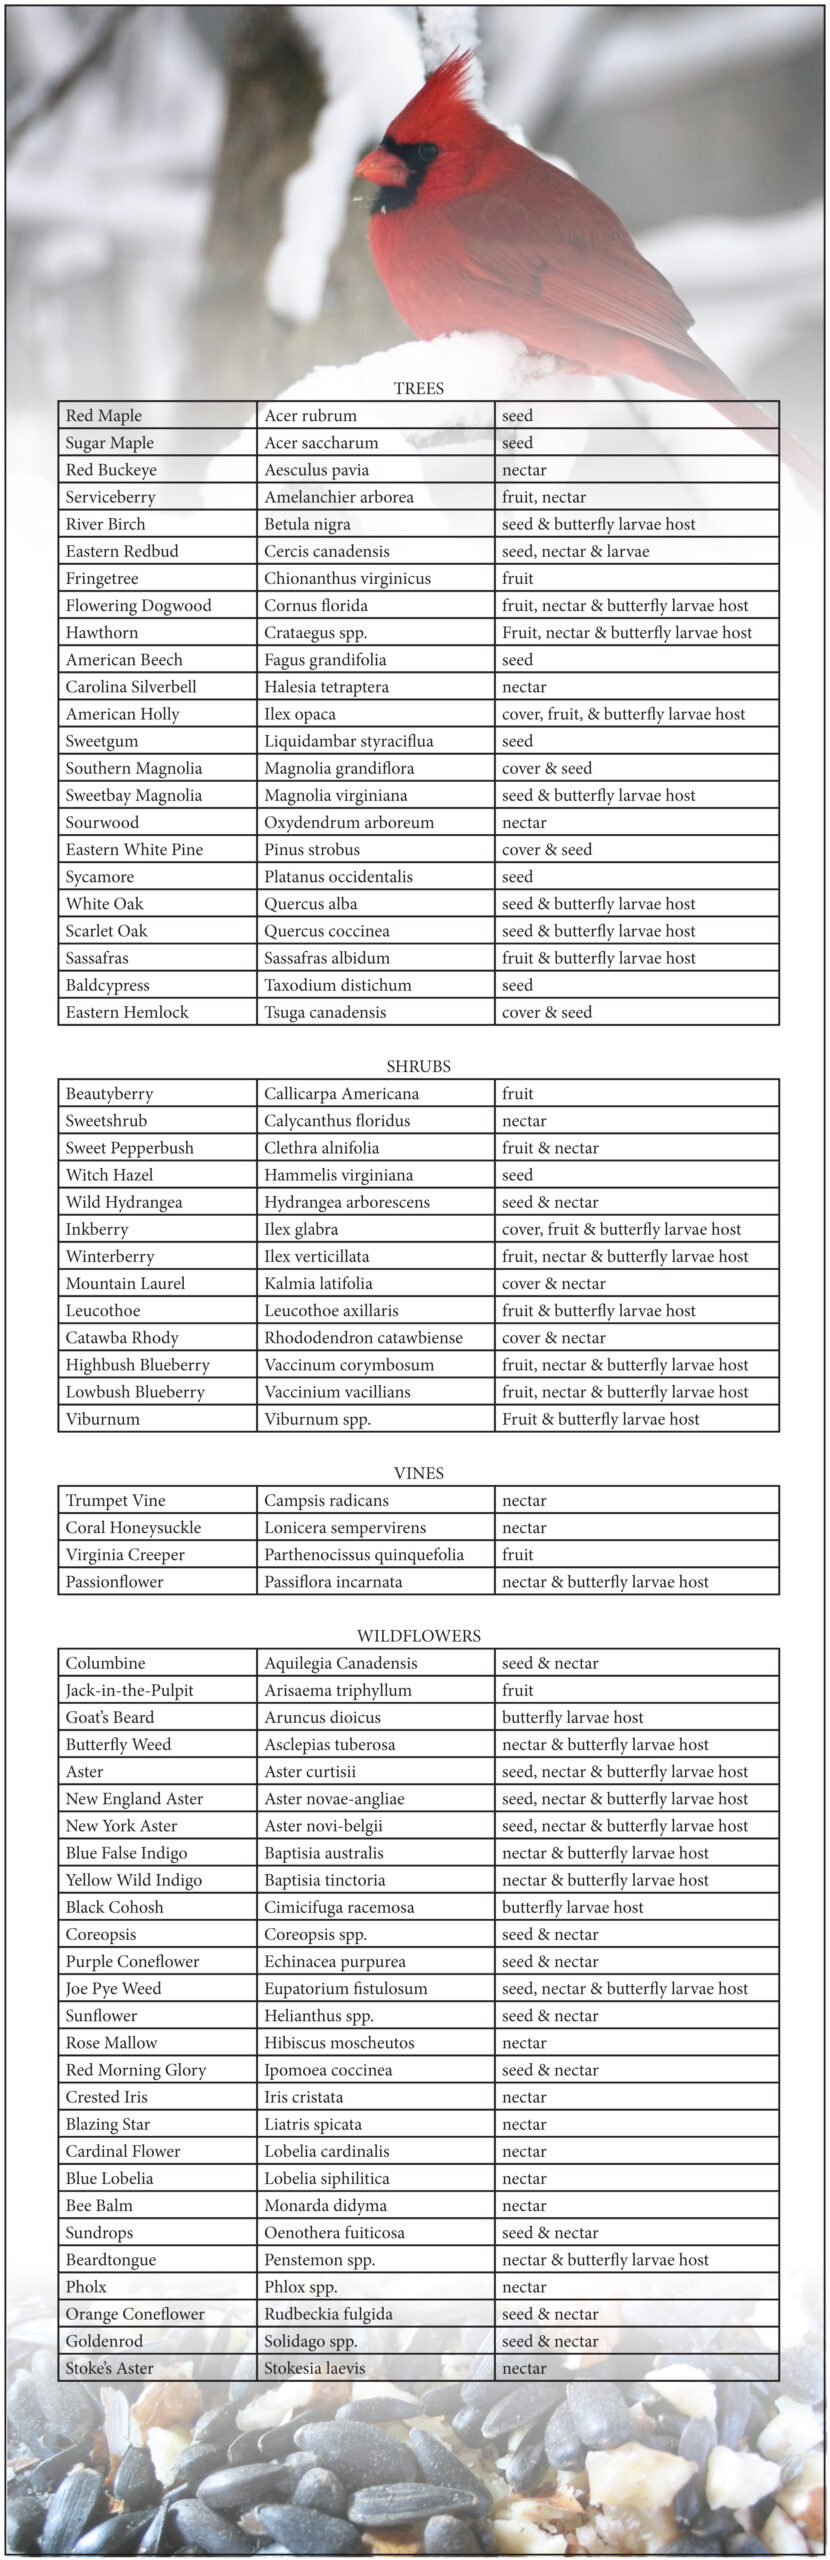
Attracting wildlife to the home garden is an enjoyable and creative way to teach children about nature, evoke their respect for the environment and provide meaningful family together time. Many things that are good for wildlife are equally good for a wholesome, thoughtful garden – win-win!

 Covering the Basics

 All wildlife – butterflies, birds, squirrels, snakes, deer, etc. – requires three things for survival: food, water and cover. When you meet these basic needs in the garden, you can expect a variety of visitors.

  • Food
    Native trees, shrubs, vines and wildflowers provide the foliage, nectar, pollen, berries, seeds and nuts that wildlife requires to survive and thrive. As an added advantage, natives are well adapted to their particular geographic area and therefore are more disease and pest-resistant and generally require little extra fertilization, supplemental watering or other maintenance.There will be times when natural food sources are not readily available, especially in late winter when many stores of food are exhausted or early spring before natural supplies are replenished. This is when it is most important to provide supplemental sources of food using bird, squirrel and butterfly feeders to add to the native food sources for resident and migrating wildlife.
  • Water
    All wildlife requires a source of clean water for drinking and bathing. Many of us do not have a natural water source on our properties but this situation is easily remedied by adding a garden bird bath or water dish. With larger landscapes, adding a pond, fountain or pondless waterfall is an ambitious and rewarding project that will greatly enhance your efforts to increase the wildlife population. If space and your budget permits, you might even consider a tiered stream or other extensive feature.
  • Cover
    Wildlife requires a place to hide from predators, shelter in inclement weather and a secluded place to birth their young. Trees, both dead and alive, are perfect for hiding, nesting and perching. Leafy and thorny shrubs also provide wildlife protection and a suitable hiding place. Tiers of plants are most desirable, and thicker, denser plantings such as thickets or groves will be very attractive. Even if you have plenty of vegetation already, the addition of bird and bat houses will increase areas of wildlife safety in your landscape.

Native Plants to Benefit Wildlife

All types of plants, from trees to vines to shrubs to flowers, can provide food, water and cover to wildlife, but some plants are more useful than others. These handy lists can help you choose the best options for your landscape and the type of help you want to give backyard birds, butterflies, squirrels, deer and other visitors.

Note: “Seed” denotes abundant seeds that are attractive and nourishing for wildlife; “Nectar” denotes blooms butterflies and hummingbirds will sip from; “Fruit” denotes berries or other small fruits to feed wildlife; “Host” denotes a nourishing host plant for butterfly larvae.

Still not sure about the best plants for your backyard wildlife? Come on in and we’ll help you select just the plants you need for the wildlife you want to welcome to your yard!

Our product availability varies each day, so if you’re looking for something specific, feel free to give us a call ahead of your visit. 


Seed Starting

Starting seeds indoors is a rewarding gardening experience and can help extend your growing season to include more plant varieties than your outdoor season may permit. Furthermore, a larger selection of seed varieties doesn’t limit your opportunities to growing only those transplants that are available at planting time. The key to success in growing seedlings is in creating the proper environment.

What Seeds Need

Seeds are generally hardy, but to start them properly they do need gentle nurturing so they can produce healthy, vibrant plants. In general, seeds should be started 4-6 weeks before the recommended planting time so the seedlings will be large and strong enough to withstand the stresses of transplanting. Use a sterile growing mix which is light enough to encourage rich root growth. Sow the seeds thinly and cover lightly with sphagnum peat moss. Water using a fine spray but do not soak the seeds – they also need oxygen to germinate, and if they are overwatered they will drown. Cover the container with clear plastic to hold the moisture and increase humidity. Place the containers in a warm (70-80 degrees) spot and watch daily for germination. The top of the refrigerator is often an ideal location. When the first seeds germinate, place the seedlings in bright light or under artificial lights (tube lights should be 2-3″ from seedling tops) for several hours each day, since late winter sunlight will not usually be sufficient to prevent weak, leggy seedlings. Daytime temperatures should range from 70-75 degrees. Night time temperatures should range from 60-65 degrees.

As Seeds Grow

When the seedlings develop their first true sets of leaves, add half-strength water soluble fertilizer to their water – organic fish emulsion or seaweed fertilizers are great to use. Repeat every second week to provide good nourishment. Thin the seedlings or transplant them to larger containers as they grow. Before planting outdoors, harden-off the plants at least one week before the planting date. Take the transplants outdoors in the daytime and bring them in at night if frost is likely. Gradually expose them to lower temperatures and more sunlight. The use of hotcaps and frost blankets to cover early plantings will also aid in the hardening off process so the seedlings can adjust well to their new outdoor environment.

Transplanting Seeds

Transplant seedlings into the garden after the safe planting date on a calm, overcast day. Pack the soil around the transplant with as little root disturbance as possible. Sprinkle the plants with water, keeping the soil moist until the plants become established.

Popular Indoor Seed Start Dates

The exact dates you want to start seeds will vary depending on your local growing season, the varieties of plants you choose and what their needs are. In general, dates for the most popular produce include…

Vegetable Seed Starting Dates

  • February – Asparagus, celery, onion
  • March 1 – Broccoli, Brussels sprouts, cabbage, cauliflower, collards, kale, lettuce
  • March 15 – Eggplant, peppers, tomatoes
  • April 1 – Summer squash
  • April 15 – Cantaloupes, cucumbers, winter squash

Flower Seed Starting Dates

  • January/February – Begonia, carnation, geranium, impatiens, nicotiana, pansy, rudbeckia, salvia, snapdragon, verbena, vinca
  • March 1 – Ageratum, dahlia, dianthus, petunia
  • April 15 – Aster, calendula, celosia, marigold, zinnia

Use seed starting dates as a general guide to ensure your seeds have plenty of time to reach their full harvest potential before the weather turns in autumn. At the same time, consider staggering seed starting every few days to lengthen your harvest and keep your favorite vegetables and flowers coming even longer during the growing season. As you gain more experience with starting seeds, you’ll be able to carefully plan your seed calendar to ensure a lush, rich, long harvest season.


Daylilies… Easy to Grow, Fun to Collect!

Few perennials can match the daylily (Hemerocallis) for versatility and durability. One of the most popular perennials, daylilies have become a collector plant for novice and experienced gardeners alike. Thousands of named cultivars are trouble-free to grow and adaptable to many conditions, which makes daylily collecting fun and easy. Although each lily-like flower lasts only one day, there are always more buds to open which provide summer color and a subtly changing garden for many weeks.

Using Daylilies

Just as there are many different daylilies to try, there are many different ways to try them. Plant them individually for a pop of color, or create a mixed border with other plants or multiple daylily types. Daylilies can be a fun surprise when naturalized in a grassy area or grouped in a mass as a groundcover over larger areas. Taller varieties can even become simple screens or create gentle privacy surrounds. The creative gardener may even use multiple daylilies to create fun patterns or pictures in a themed flowerbed.

Daylily Care

Daylilies tolerate dry, poor soil, but perform best and reach their full potential in rich well-drained beds. Different cultivars have different needs for sunlight, moisture and fertilizing, and while these flowers do well even if somewhat neglected, it is best to try to meet their needs so each bloom can flourish. Some will tolerate drought and frost better than others, while certain cultivars need more attention. All are quite low-maintenance, however, and will thrive for years even in marginal conditions.

Daylily Fun Fact:

The American Hemerocallis Society has classified daylilies by flower size. A miniature has flowers less than 3” in diameter, small-flowered cultivars have flowers from 3-4.5” and large-flowered cultivars have flowers 4.5” or larger.

Daylilies
Daylilies
Daylilies