Monthly Archives: July 2024

Summer Lavenders

Do you enjoy making herbal or floral bouquets and wands to scent the house? Maybe you’re into the lavender cooking trend or like to infuse playful summer drinks with a floral touch. Perhaps you recognize the aromatherapy or medicinal qualities of lavender.

In other words, do you love lavender and are frustrated because the bloom season is so short?

Whatever you do with your lavender, you may have planted one and it bloomed for a few weeks. Now you think you have to wait another year to enjoy the beauty and fragrance. That’s no fun! But here’s a secret to prolong your passion during lavender season…

About Lavenders

There are actually three groups of lavenders. Members of each group bloom around the same length of time, but each group blooms at different times. By planting at least one member of each group, you can enjoy lavender from early spring to mid-summer (and sometimes even longer with careful watering).

Members of the “Non-English Lavenders” bloom from early to late spring. “English Lavenders” follow and bloom from late spring to early summer. True summer lavenders, known as “Lavendins,” continue blooming into the hottest days of summer.

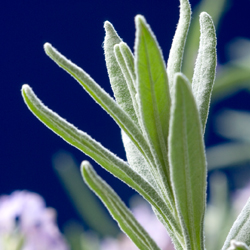
Also called “English Lavender hybrids,” the varieties in this summer group are crosses between the Portuguese and English Lavenders. They all have large gray leaves, grow into large plants, and grow best in the heat. They are all very fragrant, making them welcome additions to any lavender garden.

Abriali Lavender was one of the first hybrids. It produced cosmetic-grade oil until Grosso Lavender replaced it with superior oil production. Happily, gardeners can also enjoy Grosso in their gardens, as it’s frequently available at garden centers.

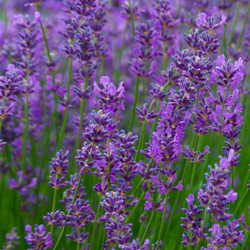
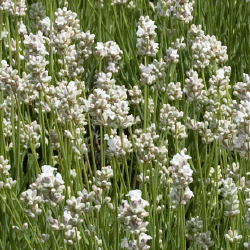
White Grosso Lavender, with the same beauty and fragrance, provides a nice background for a mixed flower border. Edelweiss Lavender, a smaller white lavender, mixes nicely in the garden, without a reduction of fragrance.

Hidcote Giant Lavender and Provence Lavender are garden center favorites. Approximately the same size, the Hidcote Giant has darker flowers than the Provence, which has a longer flower wand. Sachets usually contain Provance buds because they are exceptionally easy to remove from the stalk. Other popular varieties include Grappenhall, Dutch Mill, Seal and Fred Boutin lavenders.

Lavenders In the Garden

Growing lavenders could not be easier. All thrive in full sun in warm, well-drained, average quality soil. Dampness, either through poor drainage or humidity, will kill them. They grow well in pots with good drainage and fair soil. Prune after blooming to shape the plants and promote future blooming. While lavender is drought resistant, if the soil is dry, it is necessary to water well. Water again only when the soil is dry. Using compost as fertilizer will provide critical nutrients and improve soil drainage.

Using Lavender

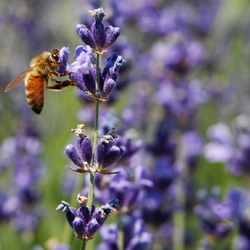
Lavenders are very attractive to bees. They happily buzz from flower to flower while collecting pollen. Some honey producers site their hives in the middle of lavender fields to produce lavender-scented honey. The honey’s aroma is a great way to start the day!

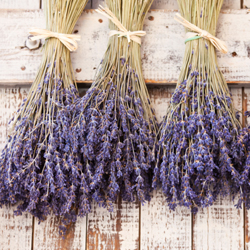
Drying lavender for future use is easy. Cut bundles of wands from the plants without cutting into the older woody part of the plant. Use a rubber band to hold the bundles together and hang them upside down in a dark, dry room such as an attic or closet. The darkness helps retain the bloom color. The bundle should be dry in 7-10 days.

Although lavender’s taste isn’t the same as its fragrance, lavender dishes appear in many trendy restaurants. Lavender martinis and teas, ice cream, cookies and other desserts accompany lavender-sauced meats and vegetarian dishes. Lavender is an ingredient in the herbs de Provence mix and replaces strong tasting herbs such as rosemary, thyme or mint in many cookbooks for meats, breads and general seasonings.

Some folks even use lavender as an antibacterial antiseptic to treat wounds and insect stings.

Even if you just want to enjoy lavender for the sake of its beauty and ease of maintenance, remember… Planting one of each of the three groups lets you love your lavender for three times as long. Enjoy!
Summer Lavenders

Summer Lavenders

Summer Lavenders

Summer Lavenders

Summer Lavenders

Growing Zucchini

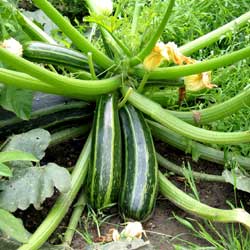
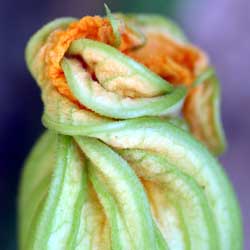
Zucchini is one of the most popular vegetables choices for growing in the home garden. Not only is zucchini easy to grow, it is also tasty and nutritious, as well as versatile in a number of recipes. All summer squash, including zucchini, are rich in beta-carotene, folic acid, vitamins C and E and numerous healthful minerals. Zucchini can be eaten fresh, baked into bread, roasted, grilled, added to salads and so much more. So, grow zucchini, eat up and get healthy – we’ll supply the tips you need for successful growing and a bountiful harvest.

Planting

Sow zucchini seeds or seedlings about 2 weeks after the last frost date in full sun and well-drained, nutritious garden soil. It is best to plant zucchini in hills, three plants in each, to ensure warm soil and good drainage. Hills should be about 8 inches high and 12 inches in diameter. Set hills at least three feet apart, as these plants are dense and require plenty of room for good air circulation.

Care

Zucchini plants will thrive in regular garden soil. If your soil is poor then you may wish to fertilize or amend the soil with compost. Keep zucchini plants evenly watered throughout the season. Mulch the garden bed with salt hay to keep it free of weeds and to retain soil moisture. If growing zucchini horizontally, mulch will keep the fruit clean by preventing it from coming into contact with the soil.

Staking

Zucchini is a vine and may be grown vertically, with assistance, on vegetable netting or a fence, trellis or lattice. Plants and fruit are heavy, so be certain to secure the vine carefully as it grows and watch for any signs of breakage that could damage maturing vegetables.

Harvesting

Zucchini is best and has the best flavor if it is harvested when young and tender, about 6 inches long. Use pruning shears or a garden knife to cut zucchini from the vine. Never pull the fruit off, which can damage the vine as well as the vegetable.

Pests

A number of pests will like zucchini just as much as you do, but there are steps you can take to keep your zucchini patch pest-free.

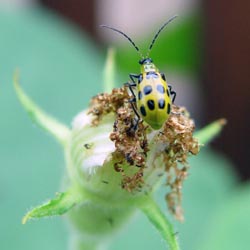
  • Cucumber Beetle: These insects will skeletonize the zucchini leaves, resulting in lower yields and smaller vegetables. Plant resistant varieties and hand pick the beetles.
  • Squash Bugs: Yellow spotting on zucchini leaves that turn brown identifies squash bug damage. Eventually the leaves then turn black and crispy. Control this pest when plants are young. Look for eggs on the underside of zucchini leaves and crush them.
  • Squash Vine Borer: This pest first presents itself with wilting leaves. Upon inspection you will see orange ‘sawdust’ at the base of the plant. Use floating row covers if planting early or hold off on planting zucchini until after July 4th when the insect egg laying is completed.
  • Blossom End Rot: This disease appears as a dark, leathery patch on the blossom end of the zucchini. It is caused by either uneven soil moisture or a soil calcium deficiency. Do not allow soil to dry out between watering, and add calcium to the soil with dolomitic lime or gypsum to ensure proper nutrition.

Recipes

Try these delicious treats to make the most of your zucchini harvest!

Grilled Zucchini

Ingredients

  • 1 large zucchini
  • 1/4 cup Italian-style salad dressing

Directions

  • Slice zucchini into 1/4 inch thick slices (peel first if desired). Toss in a bowl with Italian dressing.
  • Place on a hot grill about 4 to 5 minutes or until nice grill marks appear and the zucchini is slightly limp. Serve and enjoy.

Zucchini Bread

Ingredients

  • 3 cups all-purpose flour
  • 1 teaspoon salt
  • 1 teaspoon baking soda
  • 1 teaspoon baking powder
  • 3 teaspoons ground cinnamon
  • 3 eggs
  • 1 cup vegetable oil
  • 2 1/4 cups white sugar
  • 3 teaspoons vanilla extract
  • 2 cups peeled, grated zucchini
  • 1 cup chopped walnuts (optional)

Directions

  • Preheat oven to 325 degrees F.
  • Grease and flour two 8 x 4 inch bread pans.
  • Sift flour, salt, baking powder, soda and cinnamon together in a bowl.
  • Beat eggs, oil, vanilla and sugar together in a large bowl.
  • Add sifted ingredients to the creamed mixture and beat well.
  • Stir in zucchini and nuts (if desired) until well combined.
  • Pour batter into prepared pans.
  • Bake for 40-60 minutes or until tester inserted in the center comes out clean.
  • Cool in pan on rack for 20 minutes.

Remove bread from pan, and cool completely.

Growing Zucchini

Growing Zucchini

Summer Watering Tips

As the days heat up, watering can become a dreaded garden chore and too many gardeners use wasteful techniques that use plenty of water but don’t give their plants the moisture they really need. Make watering plants easier and more efficient with the proper practices and tools…

    • Mulches not only make plantings look more attractive, but their most important functions are to help retain soil moisture and minimize weeds, which would also usurp moisture from your plants. Mulch around plants to a depth of 2-4 inches, refreshing mulch as needed to maintain that depth and attractiveness.
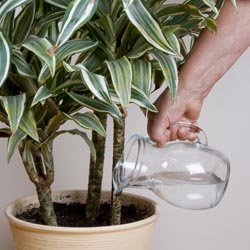
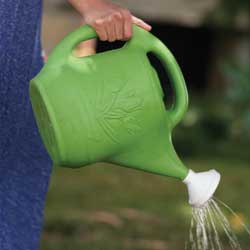
    • Watering cans and small containers work great for spot watering plants with different watering needs by hand. You don’t always need to get out a hose or sprinkler to get the watering done.
    • Check to make sure that you have the proper length hose(s) to reach every corner of your garden. Take into account any obstacles in the way, and be sure you aren’t dragging the hose over any delicate plantings to reach more distant dry spots.
  • Add a water wand to the hose to get the water where it’s most needed – the base of the plants – without needing to bend over repeatedly, which can cause back strain.
  • The best time to water is during the early morning hours of a sunny day. This will allow plants to absorb more water before it evaporates when temperatures rise, but won’t leave water to sit on plants overnight when mold can develop.
  • Always water plants and container gardens thoroughly and deeply to encourage deeper, more drought-tolerant root systems. It is better to water less frequently but more deeply rather than more often but with less water.
  • In the landscape, a good rule of thumb is to provide an inch of water per week minimum. Keep track of precipitation with a rain gauge to avoid wasting water by overwatering when Mother Nature does the job.
  • New individual plants that are set out, direct sown seed beds, sodding, etc. often require daily care, including watering, until established. Check moisture levels carefully during this period so the plants are well cared for.
  • Use soaker hoses to provide slow drip watering. This allows plants to absorb water easily without wasting water by evaporating from foliage or spraying into the air. Soaker hoses can even be layered beneath mulch to preserve as much moisture as possible.
  • Pay extra attention to plants in containers and hanging baskets as they tend to dry out faster and with greater frequency. These plantings will likely need to be watered daily or even multiple times a day during heat waves.
  • Place Tree Gators, a drip irrigation bag, on newly planted trees for slow, steady watering that will soak down to the root system without draining away along the surface of the soil.

If you’ll be away on an extended vacation, or even just for a few days, make arrangements with a trusted friend or neighbor to “plant sit” while you are gone. There’s nothing worse than worrying about your garden while you’re away – except coming home to crisp plants that haven’t been watered properly!

Summer Watering Tips

Growing and Storing Herbs

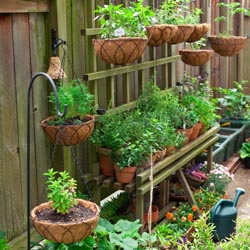
Growing herbs, whether inside or out, may be one of gardening’s most gratifying experiences. Because of their beauty and versatility, herbs may be grown amid vegetables, ornamentals or in a garden dedicated strictly to their kind. They may be nurtured in a sunny window box, strawberry pot, whiskey barrel or just about any container you choose. Situate your herbs for easy access: on the patio, deck, a sunny windowsill or in the kitchen garden. Herbs are relatively carefree and have a multitude of uses that include but are not limited to: culinary, aromatic, ornamental, medicinal and insect control.

Herb Growing Tips

Choose a full sun location, 4-6 hours per day is best. Herbs will grow in a shadier location, but plants will be weak and thin. Most herbs are not demanding of soil fertility. One thing that they will not tolerate, however, is wet or poorly drained soil, so be sure not to overwater your herbs.

Locate herbs in or near the kitchen for easy access when cooking. Be aware of the ultimate size, height and spread of the herbs that you plan to grow. If you take this into consideration you can assure room for the plants to reach their full potential. Position taller herbs to the back of the garden or container and shorter herbs to the front; this will allow for easier access and prevent shading.

Water pots before planting. Remove plants from their pots and loosen roots to stimulate new root growth. Place plants at the same soil depth that they were in the pot, or slightly higher to avoid rotting. Gently firm soil around each plant, water carefully and mulch if desired. Feed monthly with a mild, organic fertilizer such as Espoma Vegetable or Tomato Tone.

Some herbs, such as mints, have a tendency to be invasive and may take over an entire herb garden or even spread into the lawn or other parts of the landscaping. Sink aggressive potted herbs directly into the garden to minimize this overgrowth. Pull up pots each spring to replenish their soil, then sink the containers back into the garden for another season.

Growing herbs indoors is also quite simple. Choose herbs that will not get too large to handle inside. The same soil requirements apply for both indoor and outdoor planting. Select a south or west window to situate your plants so they receive adequate sunlight. It may be beneficial or necessary to supplement with artificial lighting during the winter months. Provide humidity by grouping plants together and misting daily. Another option is placing potted herbs on a humidity tray. Fertilize monthly to provide the best nutrition.

Harvesting

Fresh herb leaves are ready to be harvested as soon as there is enough foliage to maintain the plant. Try to harvest in the morning, after the dew has dried but before the sun becomes too hot, using a sharp knife or scissors to make each cut. It is a good idea to harvest only what you plan to use at time of cutting, as herbs do not store well in the refrigerator. With most herbs it is beneficial to harvest before the plants go to flower, as the taste is better at this stage of growth. Rinse with cold water and pat dry before using.

Drying

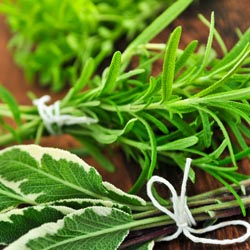
If you have excess herbs, you may want to dry them for future use. After gently rinsing the harvested herbs, drain them on absorbent towels, tie in bunches and dry thoroughly by hanging bunches up in the sun just until all water evaporates from the surface of the herbs. Remove plants from sun and hang in a clean, dark, dry location with good air circulation for 1-2 weeks until herbs are completely dry and brittle. If not dried completely the herbs will become moldy in storage. Remove leaves from the stem and store them in an airtight container in a cool, dry, low light environment. Check container in a few days for condensation. If there is any moisture in the container you must start the drying process again, after checking carefully for any mold or mildew.

You can also dry herbs in a conventional or microwave oven. With a conventional oven, position clean herbs in a single layer on a shallow pan. Place baking pan in a 180°F oven for 2 to 4 hours. When using a microwave, place clean herbs in a single layer on a paper towel or plate. Cook herbs on high for 1 to 3 minutes, rotating the plate every 30 seconds or moving the leaves around on the plate until thoroughly dry. Store these herbs just as you would air-dried herbs.

Freezing

Freezing herbs is also easy to accomplish. Wash herbs and blanch them in boiling water for one minute. Cool herbs very quickly in ice water then drain. Package herbs in airtight plastic bags and store in the freezer.

Herbs can be delightfully easy to grow and they are an even more delightful addition to salads, sauces, pastas, teas and many other treats you can enjoy year-round.

Storing Herbs

Storing Herbs

Storing Herbs

Dealing with Powdery Mildew

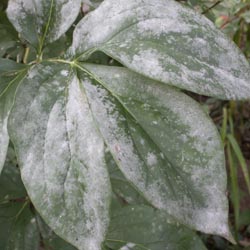
One of the most common and easy to recognize plant diseases, powdery mildew, is caused by fungus spores that overwinter in garden debris and are spread by wind the following season. In late spring and early summer, the warmer days and high humidity provide perfect conditions for spore germination. The disease spreads over the surface of leaves of plants like Bee Balm, Lilac, Rose and Phlox. While the plant may look extremely unattractive, its overall health is not affected. Although we can’t change the conditions that favor powdery mildew, we can stop or slow its spread to keep your plants looking their best.

To control powdery mildew…

  • Place susceptible plants in locations where they receive early morning sun. This allows the dew to dry quickly from their leaves to inhibit the spread of mildew spores.
  • Increase the plants’ resistance by minimizing stress and providing adequate water, sun and soil requirements. This will help the plants naturally resist powdery mildew and other common diseases.
  • Give plants plenty of room for good air circulation. This helps leaves dry more quickly and lowers humidity so conditions are not as favorable for the mildew spores.
  • Water the soil not the leaves of susceptible plants. Use soaker hoses, drip systems or watering wands to get water just to the base of the plant and out to the drip line without watering the foliage.
  • Select mildew-resistant varieties of plants. These will vary in different areas and depend on your soil conditions and landscaping needs.
  • Prevent the disease from effecting susceptible plants by spraying with a fungicide like Bonide Fung-onyl, Bonide Infuse Systemic Disease Control or Safer Garden Fungicide every 7-14 days while conditions are favorable. Always read fungicide labels completely before applying and follow instructions carefully to prevent mishaps that could damage your plants.
  • Eliminate the breeding grounds for powdery mildew by cleaning up the garden and yard each fall, removing leaf litter, pruning branches and replacing old mulch. This will minimize the areas where spores can overwinter, reducing the chances of more mildew spreading in the spring.

Powdery mildew may not be pretty, but it can be pretty easy to control if the right steps are taken to protect your plants. Using multiple techniques will be the most effective way to reduce the spread of the mildew and keep it under control or completely eliminated so your plants always look their best.

Powdery Mildew

Vegetable Gardening Tidbits

Are you ready to make the most of your vegetable garden? Try these tips and tidbits for everything from easier weeding to stopping pests to enjoying a hearty harvest!

  • Reducing Weeds
    Minimize weeds in your garden by covering the soil between planting rows with mulch. Several sheets of moistened newspaper topped with hay or straw works very well, especially if you move your planting areas around a bit from year to year. You can even use carpet scraps placed upside-down. Landscape fabric topped with wood chips or gravel is a good choice if the walkways are permanent. Try to avoid the habit of tilling to remove weeds because this process brings up weed seeds from deeper in the soil and exposes them to the light they need to grow.
  • Increase Tomato and Pepper Production
    Fruiting of your tomatoes and peppers may be improved by applying Epsom salts, which contain sulfur and magnesium. Apply one tablespoon of granules around each transplant, or spray a solution of one tablespoon Epsom salts per gallon of water at transplanting, first flowering and fruit set. You can find Epsom salts at drug and grocery stores.
  • Supporting Tomato Plants
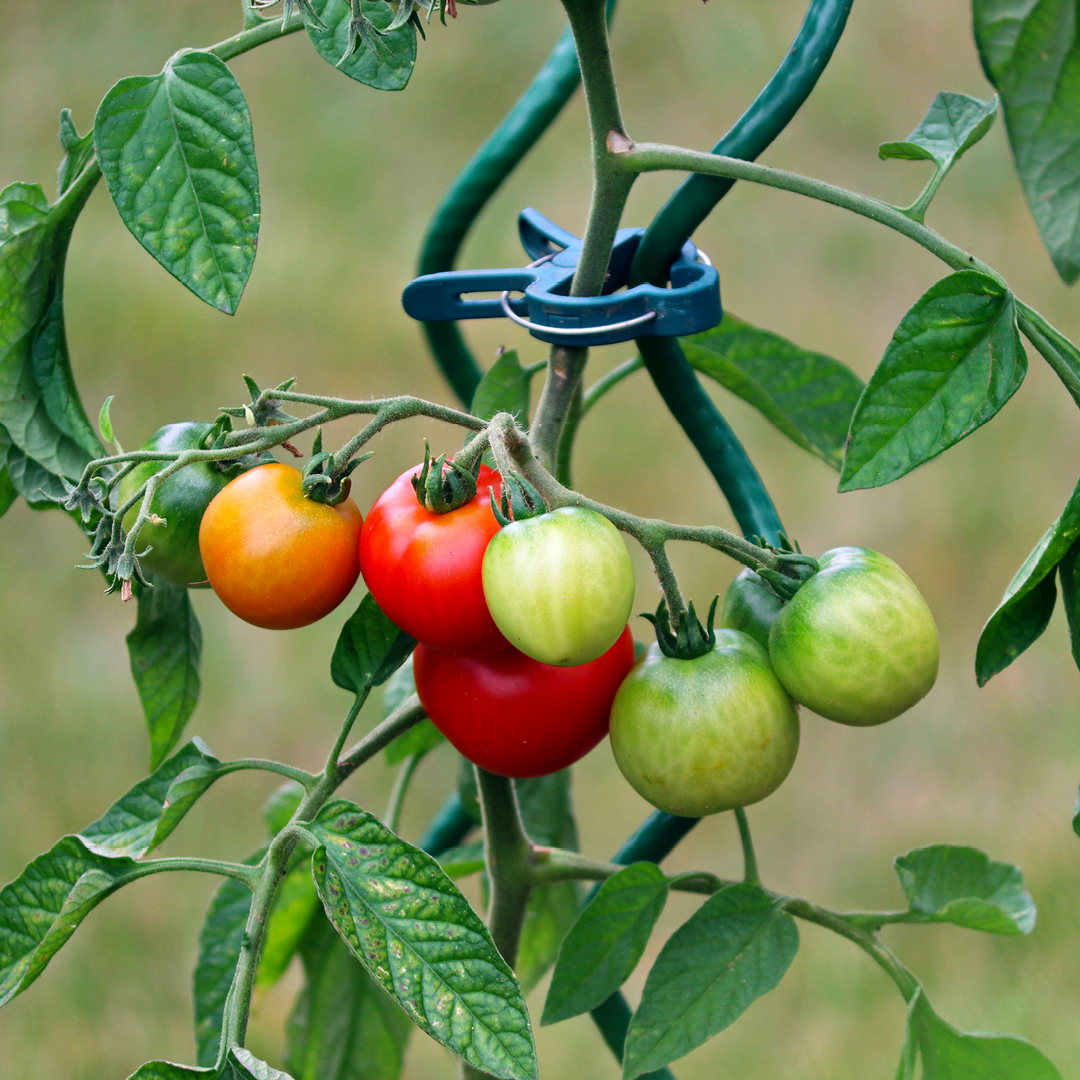
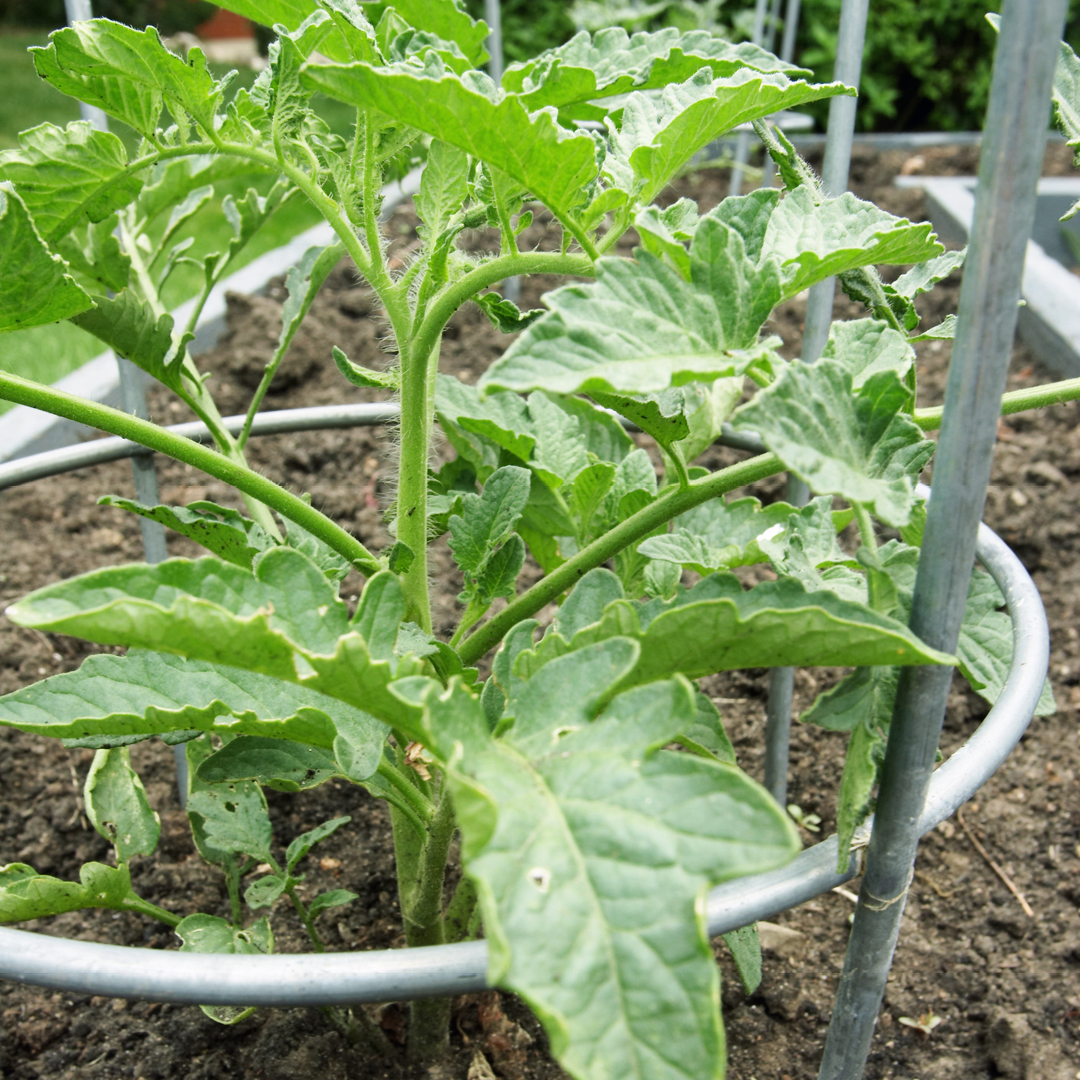
    Set your tomato supports in place before plants get too large. Smaller determinate (bushy) varieties can be supported with small cages, but larger indeterminate (vining) varieties need large cages or tall stakes. Secure cages with stakes so they don’t fall over as plants grow larger and heavier.
  • Growing Larger Tomatoes
    Indeterminate tomato plants, such as ‘Better Boy’, will produce many suckers. A sucker is a new shoot that starts where a branch connects with the main trunk. Removing suckers will decrease the number of fruits produced, but the remaining tomatoes will be larger and will ripen sooner.
  • Ending Blossom End Rot
    To minimize blossom end rot, keep soil evenly moist, apply a layer of mulch to conserve moisture, don’t over-fertilize (especially avoid high-nitrogen fertilizer) and avoid damaging plant roots while cultivating. Blossom end rot shows up as dark sunken spots on the blossom or non-stem end of tomatoes, peppers and squash. It’s caused by a calcium imbalance in the plant. The soil may have adequate calcium, but the plant isn’t able to take up enough to supply the rapidly developing fruit.
  • Stop Slugs and Snails
    Slugs and snails may be deterred with coffee grounds, diatomaceous earth and even sharp gravel. Spread any of these materials in a ring around individual plants. Wrap pots with copper tape to keep slugs from crawling up. Inspect foliage and pick off any insects that have already passed the barriers.
  • Keep Cucumber Beetles at Bay
    Young cucumber, melon and squash plants are easy prey for cucumber beetles. As the seedlings grow, these yellow-striped or spotted beetles emerge to feed on their foliage. The beetles also spread bacterial wilt disease. To control cucumber beetles use a portable vacuum cleaner to suck up them up in early evening, spray beneficial nematodes on the soil or try planting broccoli, calendula, catnip, nasturtium, radish, rue or tansy, which naturally repel these insects. If you want to try marigolds to repel them use the more pungent varieties like African, French or Mexican marigolds. The more common marigolds may actually attract these pests.
  • Plan for Late Summer Harvests
    It’s not too late to sow lettuce, beets, carrots, radishes and other short-season crops for a late summer harvest. Shade lettuce, if possible, during late afternoon to keep young plants cooler, or grow them next to larger plants that provide some shade. You’ll need to water more often on these hot days than you did in spring and early summer, but you can easily extend their growing season for later harvesting.
  • Grow More Tomatoes, Zucchini and Beans
    Harvest tomatoes, zucchini, beans and other fruiting crops frequently to encourage continued production. Don’t allow any fruits that you won’t be harvesting to remain on your plants, because when mature seeds are produced it’s a signal for the plant to slow down fruit production. Instead, consider sharing, selling, preserving or trading extra produce so you can continue to harvest and extend the growing season.
  • When to Harvest Herbs
    Herbs are best harvested just as they are beginning to flower. That’s when they have the highest concentration of essential oils and flavor in their leaves. Harvest entire branches back to within a few inches of the main stem to encourage new, bushy growth.
  • Harvesting and Storing Onions
    Begin harvesting onions when about half to three-quarters of the leaves have died back. Then gently dig or pull the onions and store them in a dry, shady place with good ventilation, such as an outdoor shed or barn, for 10-14 days. After the onions have cured, put them in slatted crates or mesh bags and store them indoors in an area with low humidity and temperatures between 33-45 degrees F.
  • Enjoying Green Tomatoes
    When daytime temperatures no longer rise above 65 degrees F in late summer and early fall, it’s time to pick the green tomatoes. Wrap them individually in newspaper and let them ripen indoors, or try some fried or in other recipes that call for under-ripe tomatoes.

Vegetable Garden Tidbits

Vegetable Garden Tidbits

Vegetable Garden Tidbits

Vegetable Garden Tidbits

Tent Caterpillars

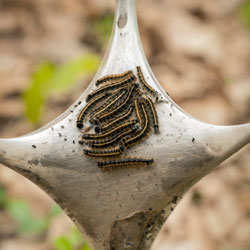
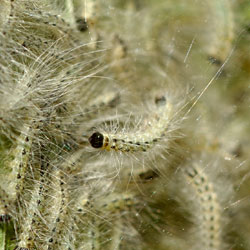
“Ugly” “disgusting” “gross” and “creepy” are just a few things gardeners say when they see tent caterpillars. Not only are they visually unattractive, but the hundreds of caterpillars within a tent can defoliate a shrub or tree in a matter of days. Fortunately, the attack is seldom fatal.

About Tent Caterpillars

The Eastern tent caterpillar, Malacosoma americanum, one of the 26 species of tent caterpillars or tent worms, emerges from its egg in early spring as the leaves of the host plant, generally a member of the Rosaceae family, begin to open. Along with other emerging caterpillars, it climbs up the plant and begins building a silken nest in branch forks to provide group protection from predators, maintain warmth and act as a staging site prior to leaving the tent. The worms quickly consume any leaves within the nest, forcing them to forage outside of the nest during the day. At night, they return to the protective nest to rest and stay warm. In fall, the individual caterpillars spin cocoons and two weeks later emerge as snout moths. As adults, they mate, lay eggs and die. Thus, the cycle starts again.

Eliminating Tent Caterpillars

Methods to deal effectively with tent caterpillars…

  1. Bacillus thuringiensis (Bt) effectively kills this pest when young. Following directions, directly spray onto surrounding leaves and onto the tent. The unsightly nest will remain, but the caterpillars will die. In time, the nest will decay and disappear, or it can be removed manually if desired.
  2. Removing the tent removes the eyesore and the worms, if the tent isn’t too large. In the early morning or evening, when the worms have not yet left the tent or have already returned, thrust a stick into the middle of the web and twist until the tent is on the stake and off the tree, and then plunge it into soapy water to kill the worms. Or, remove it by pruning the branches and twigs going into and out of, the tent, but be sure to dispose of it properly so the caterpillars do not move on to another nearby location.
  3. In the fall, after deciduous leaves have fallen, remove any egg masses. Look for them on or near any trees previously infested. They’re usually 6-18″ from the tips of branches.

Tent Caterpillars

Tent Caterpillars

Gardening With Children

By gardening with your children or grandchildren, you can give them an awareness and appreciation of nature and the world around them that will stay with them for the rest of their lives. Even very young children enjoy helping with simple garden chores such as weeding, spreading mulch and harvesting. Older children love to have their own special garden to look after. This could be as small as several containers on the deck or as big as your whole yard, depending on their (and your) time, willingness and patience. To start out, you might give them a section of your garden to plant and look after.

First, be sure to teach your budding gardener the value of improving the soil with organic material before they begin planting. Explain how organic material improves the texture of the soil and adds some food for the plants as well.

Since improving the soil will make them more successful, they’ll be willing to garden again next spring. There are special kid-friendly tools available, just right for small hands to manipulate and since children love getting dirty, you’ll not be short of volunteers when the digging begins!

Next, help your child select a combination of plants that will make their garden interesting and exciting throughout the year. You can do this by considering all five senses:

  • Sight
    Many colorful blooming plants as well as plants with unusual flowers, oddly-shaped leaves or crazy seeds will appeal to a child’s imagination.
  • Touch
    Stroke the silky-soft, silver leaves of lamb’s ears (Stachys byzantina) – now you’ll know how it got its name. Or, feel the papery flowers of thrift (Armeria maritima) or strawflowers, the ferny foliage of yarrow or the succulent foliage of sedum. Even thorny plants such as raspberries or roses can engage a child’s sense of touch – carefully of course!
  • Taste
    Growing vegetables is always fun and rewarding for children. If you have the space, it’s always exciting to grow pumpkins for Halloween or weird and wonderful gourds. Other easy to grow vegetables include radishes, carrots, peas, lettuce and cherry tomatoes. And don’t forget fruits like strawberries, rhubarb and watermelon. At harvest time let your child host a ‘salad party’ to share their bounty with family and friends.
  • Smell
    There are many scented flowers to choose from, including perennial peonies and lilies, as well as annual sweet alyssum and heliotrope. Let kids select herbs with fragrant foliage too. Mint is always popular but be sure to allow room for it to spread. Choose varieties with interesting names like chocolate, apple or grapefruit to capture a young gardener’s imagination. Use the pineapple-flavored leaves of pineapple sage in iced tea and watch the hummingbirds gather around this herb’s bright red flowers!
  • Sound
    The whirring of hummingbird wings, the song of a bird, the rustling of foliage or flowers in a breeze – these are all sounds that you and your child can share in a garden. Take time out from your gardening chores every now and then to listen.

So, bring in your child and let us help you get started on that most special garden of all, a child’s garden.

Gardening with Children

Supporting and Training Tomato Plants

Tomatoes are the unparalleled beloved staple of the summer veggie garden, but to get the best yield and quality, proper support and training are essential. These techniques not only help maximize fruit production but also ensure the health of the plants. Allow us to walk you through various methods to help you achieve the greatest success this season.

Understanding the Basics

Before diving into the various methods, it’s important to understand why the supporting and training of tomato plants are necessary:

  • Preventing Disease: Keeping foliage off the ground reduces the risk of soil-borne diseases.
  • Improving Air Circulation: Proper spacing and support improve airflow, reducing the likelihood of fungal infections.
  • Maximizing Sunlight Exposure: Trained plants have better exposure to sunlight, enhancing photosynthesis and fruit ripening.
  • Easier Harvesting: Supported plants are more accessible, making it easier to pick ripe tomatoes without damaging the plant.
  • Increased Yield: Training and trellising can lead to higher fruit production by encouraging healthy growth.

Methods of Supporting Tomato Plants

 There are a number of support methods employed to keep Tomato plants from laying on the ground. Offering the pros and cons of each will make it easier to select the method that best suits your particular situation. 

  • Staking
    Pros: Simple, cost-effective, great for small spaces.
    Cons: Requires regular tying and pruning, less support for heavy fruiting varieties.
    Materials Needed: Wooden or metal stakes, garden twine, or ties.For the single-stake method, drive a sturdy stake (6-8 feet tall) into the ground about 12 inches deep and 2-3 inches away from the tomato plant. As the plant grows, tie the main stem to the stake with garden twine, stretchy fabric, or soft ties every 10-12 inches. Remove suckers (the small shoots that grow in the crotch between the stem and a branch) to focus energy on the main stem.
  • Caging
    Pros: Less maintenance than staking, supports multiple branches and heavy fruit.
    Cons: Bulkier, can be expensive if purchasing many cages, not ideal for indeterminate varieties that grow very tall.
    Materials Needed: Tomato cages (purchased ready-made or homemade from concrete reinforcing wire), garden stakes (for additional support if needed).Place a tomato cage over the young plant, ensuring it’s centered, and the plant can grow upwards through the cage. Push the cage firmly into the soil. For larger cages, additional stakes may be needed for extra stability. As the plant grows, direct the plant branches through the cage openings.
  • Trellising
    Pros: Great for rows of tomatoes, maximizes space, supports heavy crops well.
    Cons: Requires setup and regular maintenance, may need additional pruning.
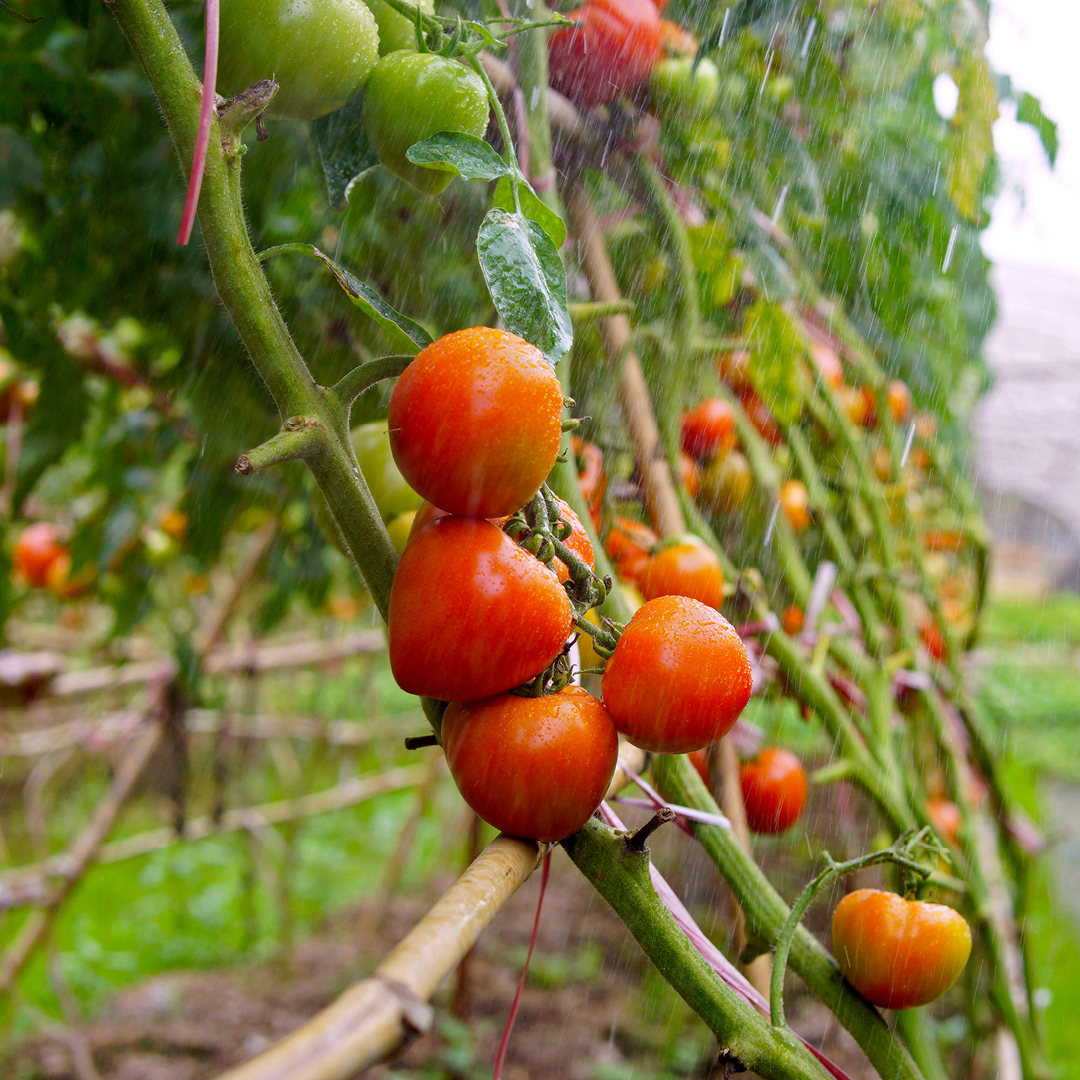
    Materials Needed: Stakes or posts, wire, twine, or netting.For vertical Trellising, install two sturdy posts at either end of your tomato row. Stretch wire or heavy twine between the posts at several levels (every 12-18 inches).For the weaving method, weave individual tomato plants between the wires as they grow, securing with additional ties if necessary.
  • Florida Weave
    Pros: Cost-effective, supports multiple plants, great for determinate varieties.
    Cons: Needs regular weaving and tightening, less effective for very tall plants.
    Materials Needed: Stakes, twine. Place stakes at both ends of a row of tomatoes and every few plants in between. Starting at the bottom, weave twine in a figure-eight pattern around each plant, securing it to the stakes. Add new rows of twine every 12 inches as the plants grow.
  • Spiral Stakes
    Pros: No need for tying, supports plant naturally.
    Cons: Best for smaller tomato varieties, less support for heavy fruit loads.
    Materials Needed: Spiral stakes.Spiral stakes provide a helical structure for the tomato plant to grow around. Insert the spiral stake into the ground near the base of the plant. As the plant grows, guide the main stem around the spiral.
  • Arbors and Arches
    Pros: Visually appealing, maximizes vertical space.
    Cons: Requires strong support structure, can be labor-intensive.
    Materials Needed: Arbor or tunnel structure, ties.For a more decorative approach, consider growing tomatoes on arbors or arches. Install a sturdy arbor or tunnel in your garden. Guide the tomato plants up and over the structure, securing with ties as needed.

Training Tomato Plants

Training is about guiding the plant’s growth to maximize air circulation, sunlight exposure, and fruit production. Here are some common training techniques:

  • Pruning
    Pros: Improves air circulation, reduces disease risk, focuses plant energy on fruit production.
    Cons: Time-consuming, needs to be done regularly, risk of over-pruning.
    Materials Needed: Scissors or pruning shears.Pruning entails removing particular parts of the plant to improve its overall health and productivity. Identify suckers, look for small shoots growing from the axil (where the leaf stem meets the main stem). Pinch or cut suckers off with clean scissors to encourage a strong, single-stem growth habit. For larger suckers, use pruning shears to avoid damaging the plant.
  • String Training
    Pros: Saves space, excellent for indeterminate varieties, easy to manage growth direction.
    Cons: Requires sturdy overhead support, regular training needed.
    Materials Needed: Overhead support (such as a strong wire or pole), wooden frame (to support the wire or pole), garden twine or string.Run a strong wire or pole horizontally above your tomato plants, securing it firmly to the wooden frame. Attach a piece of twine to the base of the plant and tie it to the overhead wire. As the plant grows, wrap the main stem around the twine. Regularly prune side shoots and suckers to maintain a single stem. String training doubles are a method of support.

Supporting and training tomato plants are crucial steps to ensure a bountiful harvest. Each method has its advantages and drawbacks, so choose the one that best fits your garden space, tomato variety, and personal gardening style. Regular maintenance, such as pruning and tying, is essential to keep your plants healthy and productive. With the right support system, your tomato plants will thrive, providing you with delicious, home-grown tomatoes all season long.


Sedum: A Sunny Ground Cover Solution

Is your landscape afflicted with poor, low-quality soil? Areas of scorching sun? A problematic bank or steep drop? Sedums can be the answer!

Why You Will Love Sedums

There is no reason any area of your landscape should go bare when there are so many spreading sedums that thrive under what would otherwise be adverse conditions. Easy-to-grow, sedums are available in a wide variety of leaf textures and heights to fit even awkward corners, narrow terraces or thin alleyways. Low-growing sedums not only act as a great ground cover for problem areas but also work well in unusual landscape designs such as rock gardens or on green roofs. Taller sedums look great when planted with ornamental grasses and easy perennials such as cone flowers and black-eyed-susans.

The thick, lush succulent can have any shade of green, gold, purple, red and even blue leaves, adding stunning color to your yard. Variegated foliage varieties add visual interest even when the plant is not blooming, ensuring a beautiful plant for a much longer season. Once planted, sedum varieties require very little care and do well even if neglected.

Our Favorite Sedums

Because sedums come in a variety of sizes, be sure to choose a plant with a mature size that will match your landscaping space. In addition to considering the plant’s horizontal spread, also consider its height to get the full visual impact of these great landscape additions.

So come in and see us, and we will be glad to show you sedum and help you with your selection.  No matter what your landscaping needs and preferences – filling an awkward area, opting for an easy-care plant, adding drama and color to your garden plan – sedums can be the perfect solution.


Basil: King of the Herbs

It’s edible, a member of the mint family and ornamental. Grown for over 5,000 years, it flavors foods around the world and is well-known in many household kitchens… Have you guessed yet?

Of course, it’s BASIL!

A flavorful ingredient of foods from Italy to India and Thailand and America, basil adds flavor and flair to any recipe. Add fresh or dried basil just before serving for the most intense flavor. However, the kitchen isn’t the only place it reigns as king… Give it a throne in your garden, too!

Growing Basil

Like other mints, basil is easy to grow. Choose young, bushy, compact plants that show no signs of diseases or pests. Plant in full or partial sun, in well-draining soil and provide adequate moisture. As an annual, it’s also easy to grow from seed, just follow the package instructions.

The most difficult decision about basil is deciding which basil you want to grow and eat. The basil family, Basilicum, has a natural variety of colors, growth shapes and fragrances. Plant breeders complicated the decision by creating over 30 hybrids commonly used today.

For ornamental gardening use, four “shapes” are commonly available. All are deliciously edible.

  • Sweet Green Basil: 2′ tall, with large leaves and white flower spikes. The clove/anise taste is typical of many types of basil. Others in this group include lettuce-leaf, Genovese, Thai (spicy) and the intensely fragrant and flavored Siam queen.
  • Dwarf Basil: Up to 12″ tall, small leaves, white flowers. This group includes well known Spicy Globe and Boxwood basil (perfect edging plants due to rounded growth) and Green Bouquet.
  • Purple-Leafed Basil: Favorite varieties include Dark Opal, Purple Ruffle and Red Rubin, all with “fancy” leaves, very aromatic, with pink to lavender-purple flowers.
  • Scented-Leaf Basils: This group includes varieties of stronger aromas. Lemon basil (gray green leaves, white flowers) is aptly named as are cinnamon basil (dark pink flowers), and anise basil (blue purple flowers).

Basil, especially the purple-leafed, is wonderful in containers. Design as you would with any ornamental. Don’t overlook the value of placing a container near the BBQ and kitchen for easy use while cooking. It’s said that planting basil, especially aromatic varieties, around the patio or deck will deter flies… It certainly can’t hurt!

Enjoying Basil

Used throughout the world with different regional foods, basil truly reigns in many different cultures and cuisines. Although pesto is probably one of the best-known uses here in the United States, basil is great in soups, sauces, pastas or in salads, vegetables and martinis. Remember to harvest before flowering for the best flavor. This also keeps the plant bushy and compact. Simply cut the entire stem just above a pair of leaves to promote new shoots. If you plan to use some leaves as garnish, cut with scissors to reduce bruising. Store unused basil in the refrigerator to retain its flavor and freshness.

Extra basil can easily be dried for future use. Cut the plant at ground level, hang upside down in an airy room and let dry. After it’s fully dry, remove the leaves from stems and store in airtight jars away from direct light.

Benefits of Basil

Did you know using basil is also very good for you? For many reasons basil is called the “holy herb” in other cultures. Research now shows it has strong anti-oxidant, anti-inflammatory and anti-bacterial qualities. Additionally, it is rich in essential nutrients, minerals and vitamins including beta-carotene, vitamins A and K and iron. Need we say more? Add basil to your healthy, delicious diet today!


Garden Accents

Landscape accents have become increasingly popular as many of us have discovered the joys of outdoor living. Used creatively, accents can turn your garden into a magical wonderland. This summer, we invite you to view our many new and exciting garden accent product lines, including popular items such as…

  • Gazing Globes and Stands
    Old-fashioned Victorian gazing globes have made a comeback and we carry them in an assortment of colors and sizes. In addition, numerous gazing globe stands, in both metal and resin, are available.
  • Bird Baths
    A wide assortment of bird baths are available in a variety of materials: concrete, cast aluminum and terra cotta. Place your bird bath in a location where you can kick back, relax and quietly observe the bathers.
  • Statuary
    Set against a simple green background or placed on a garden pedestal amongst the flower, statues become a striking accent in the garden. Stop by and enjoy our wide variety of statuary with many different themes in durable resin and cast stone.
  • Garden Furniture
    Just the sight of our line of garden benches will tempt you to sit down and rest a spell. Choose from several styles of benches made of cast iron, eucalyptus wood, concrete and bamboo to add a sweet seat to your garden.
  • Trellises and Arbors
    Traditionally, trellises and arbors have primarily been used for their functional purpose, support. Today, no garden is complete without one of these structures. They may be used for their designed intention or simply as an ornamental accent, pathway definition or focal point. We carry pvc, wood, powder-coated metal and forged iron trellises and arbors.
  • Pots and Planting Containers
    We have a wide variety of planting containers available, including…

    • Hanging Baskets – Choose from willow, moss, metal, plastic and ceramic.
    • Pots – We have pots from Italy, Malaysia, China and more. Choose from our selection of clay, plastic, cement, tin, zinc, lightweight insulated and self-watering pots.
    • Planters– Choose from lined hayracks, cradle planters and cauldrons. We also carry plastic railing/fence/deck planters and plastic or glazed ceramic wall planters.
    • Window Boxes – Available in cedar, pvc, plastic, metal and light weight insulated material with different sizes for different windows.
    • Wind Chimes
      The soothing and melodious sound of a wind chime is sure to enhance your outdoor experience. Indulge with wind chimes in aluminum, pewter or bamboo.
    • Lighting
      Lanterns and torches are a gentle way to light areas for entertainment in the garden. Candles add a serene ambiance that is unmatched by any artificial light. Lanterns, torches and candles are captivating as their flame flickers in the evening breeze.
    • Garden Novelties
      Add a little whimsy to your garden with the addition of garden novelties. Choose from garden pixies, toadstools, Victorian water bells, wall plaques, glass bee catchers and much more. Stop by and see our great selection.

No matter what your garden size, style or theme, we have the accents to give it a personal, fun touch all your own!

Crazy for Coneflowers

Beautiful and dependable, Echinacea purpurea, or purple coneflower, is the crowning glory of the summer perennial garden. A member of the Aster family, all Echinacea species are native to North America. The genus Echinacea is derived from the Greek ‘echino’ meaning hedgehog, a reference to the spiny center disc flowers.

Coneflowers are practical as well as gorgeous. They have long been used as an herbal remedy to stimulate the body’s natural immune system. Both plant roots and tops are used in the production of herbal medicines. Echinacea purpurea has traditionally been used for this purpose, but research is being conducted on the nine other species to determine their usefulness for homeopathic treatments.

Cultivating Coneflowers

Coneflowers will thrive in a sunny location, planted in well-drained soil. They are tolerant of nutrient-poor soil, heat and humidity. Echinacea purpurea grows on thick sturdy stems from 3-5 feet tall and generally does not require staking. Coneflowers are long-blooming, the flowers are fragrant and they make a long-lasting cut flower. This is one of the top ten perennials for attracting butterflies to the garden. You may deadhead plants after the blooms have faded to improve their appearance and to encourage a second, but smaller, bloom. You may also leave seed heads in place. In the summer and fall, they attract and provide food for goldfinches and other seed-loving birds. In the winter, the black spent flower heads add ornamental interest as they contrast dramatically with pure white snow.

This perennial is not invasive, but will self-seed if flower heads are left to mature. Cut plants down to the basal foliage, the low growing rosette of leaves, in the spring. Plants should be lifted and divided about every four years or as crowns become crowded.

Where to Place Coneflowers

Purple coneflower is a great addition to the back of any sunny perennial border. Its rose-purple flowers, with their coppery-orange centers, look great with ornamental grasses, Black-Eyed Susan (Rudbeckia) and Sedum ‘Autumn Joy.’ Appropriate usage ideas include: cottage, meadow, prairie, wildflower, native and herb gardens, as well as butterfly gardens and any containers that serve similar purposes.

Favorite Coneflowers

America is having a love affair with Echinacea and several new cultivars are released each year, while popular favorites continue to be top choices.

Popular Echinacea Varieties

  • ‘Baby White Swan’ – Dwarf ‘White Swan’
  • ‘Bright Star’– Petals are pale purple-pink on the edge and darker toward disc
  • ‘Coconut Lime’ – New for 2007, first double white coneflower
  • ‘Doubledecker’ – Unusual two-tiered coneflower with ray petals in disc
  • ‘Fancy Frills’ – Petals are frilled on the edge
  • ‘Fatal Attraction’ – Vivid purple-pink flowers with 2 rows of petals
  • ‘Fragrant Angle’ – Large, fragrant, snow white flowers
  • ‘Green Envy’ – Unusual rounded green petals with magenta veining near the cone
  • ‘Green Eyes’ – Magenta flower with a green center disc
  • ‘Hope’ – Pale pink flower named in honor of a cure for breast cancer
  • ‘Kim’s Knee High’ – Dwarf with recurved ray petals and large orange cone
  • ‘Kim’s Mophead’ – Compact plant with white flowers
  • ‘Magnus’ – 1998 Perennial Plant of the Year, purple-pink flowers, 3’ tall
  • ‘Mars’ – Large orange cones surrounded by brilliant rose-purple petals
  • ‘Merlot’ – Large rose-pink flowers on wine colored, sturdy stems
  • ‘Pink Double Delight’ – Similar to ‘Razzmatazz’ with a more compact habit
  • ‘Razzmatazz’ – Double, bright pink flower on very sturdy stems
  • ‘Ruby Giant’ – Large, rich ruby-pink flowers that are highly fragrant
  • ‘Ruby Star’ – Reddish-purple flowers held horizontally
  • ‘Sparkler’ – Rose-pink flowers, white-splashed variegated foliage
  • ‘Tiki Torch’ – Large, bright orange flowers
  • ‘White Swan’ – White coneflower with downward reflexed petals

Echinacea Big Sky Series

  • ‘After Midnight’ – Dwarf plant with brilliant magenta, highly fragrant blooms
  • ‘Harvest Moon’ – Gold flower with golden-orange cone
  • ‘Summer Sky’ – Bicolor flower, soft peach and rose petals
  • ‘Sundown’ – Russet-orange with a prominent brown central cone
  • ‘Sunrise’ – Lemon-yellow flowers
  • ‘Sunset’ – Orange flowers with prominent brown central cone
  • ‘Twilight’ – Vibrant rose-red with a deep red cone

Echinacea Meadowbrite Series

  • ‘Mango Meadowbrite’ – Mango color, paler than orange meadowbright
  • ‘Orange Meadowbrite’ – Large single blooms of rich sunset orange
  • ‘Pixie Meadowbrite’ – A true dwarf, only 18” high, bright pink flowers

The list that we have provided is not all-inclusive, nor an accurate representation of every coneflower variety we carry. Please stop by often as we continue to provide standard, new and unusual perennials, including many new types of coneflowers.


Bringing Butterflies to the Backyard

In spring, female butterflies will be mostly concerned with finding their species’ specific host plants on which to lay fertilized eggs. Instinctively, they know they must find plants to ensure that their caterpillars will have appropriate food for survival after hatching. Both male and female butterflies will be looking for flowers with nectar for their own survival. And, they will be searching for shelter from rainy or windy weather, a sunny place for basking, and a source of water. Because many natural butterfly habitats in North America are disappearing at an alarming rate, it is becoming increasingly difficult for butterflies to find these necessities of life.

Starting a butterfly garden can be simple and rewarding if you follow these pointers. The most important thing you can do as a gardener is to plant both nectar and host plants in your garden. Providing host plants for caterpillars to feed on, will allow you to watch the metamorphosis from caterpillar to chrysalis to butterfly. So, do not discourage caterpillars. They may make your garden plants look bad but it’s usually only temporary. Most important – do not use pesticides! You may be killing off the very insects you made the garden for. And, you don’t have to have a large area to get a response. Just a few select plants will spur some action. Choose the sunniest spot possible for your butterfly garden. It could be any size or shape; even a short border will work. A combination of woody shrubs, perennials and annual flowers works best, but using just a couple of plants can still yield results. Planting a section of wildflowers is an easy way to cover a problem area and lure some butterflies to your yard. If you don’t have the room for a garden, fuchsia, petunia or impatiens hanging baskets will attract butterflies as well as hummingbirds.

The following is a list of plants that attract butterflies:

Woody shrubs:

  • Glossy Abelia
  • Butterfly Bush
  • Weigela
  • Spiraea
  • Lilac
  • Deutzia

Perennials:

  • Achillea (Yarrow)
  • Butterfly Weed
  • Aster
  • Shasta Daisy
  • Carnation
  • Coneflower
  • Joe-Pye weed

Annuals and Tender

Perennials:

  • Heliotrope
  • Lantana
  • Rosemary
  • Marigolds
  • Petunias
  • Geraniums
  • Snapdragons
  • Portulaca
  • Zinnias
  • Allysum
  • Fucshia
  • Vinca
  • Dahlia
  • Impatiens
  • Salvia
  • Verbena


Versatile Hydrangeas

Tall or short, red, pink, purple, blue, white and shades in between, few shrubs provide the versatility of hydrangeas. Generations of gardeners have loved and designed their gardens using these showy shrubs as summer privacy screens, landscape focal points and beautiful cut flowers. Now, thanks to new hydrangea introductions, there are even more ways to use them.

Discover the Newest Hydrangeas

New types of hydrangeas are being introduced every year, and these showstoppers are fast favorites among both experienced hydrangea aficionados as well as newcomers to the hydrangea craze.

  • ‘Endless Summer’
    Termed “the best new flowering shrub of the decade” by some gardeners, this cultivar has gained a reputation as the first “reblooming” hydrangea. Blooming from early summer to first frost on both new and old wood, it is unfazed by high heat or extreme cold. Now gardeners in colder microclimates can grow beautiful low maintenance 3-5’ tall and wide hydrangeas. The 8″ diameter mophead balls of light blue or pink flowers bloom the entire summer.
  • ‘Bloomstruck’
    A dwarf ‘Endless Summer’ this hydrangea grows to only 2-4’ tall and wide with pink or blue 4-5″ diameter mopheads on upright red-purple stems. Perfect for containers, in smaller gardens or in the front of cutting beds, it also graces balconies and decks. In fall, red-purple colored leaves extend the beauty.

Color Tip: Change the flower colors of ‘Endless Summer’ and ‘Bloomstruck.’ The soil pH affects the flower color of many hydrangeas. To intensify the pink color, decrease the acidity by adding hydrated lime. To intensify the blue color, increase the acidity by adding sulfur. Our staff can suggest products to help you determine your soil pH and the amount of lime or sulfur to use.

  • ‘Quickfire’
    Also known as Hydrangea paniculata, this variety blooms earlier than most other hydrangeas and has flowers along an elongated stalk. The flowers, blooming on new wood, open as white, gradually turning to pink in the summer and darker rose in the fall. The soil pH does not affect the flower color. As one of the hardiest hydrangeas, this beauty grows to 6′ tall in most soils, full sun or dappled shade and tolerates drought conditions.
  • ‘Little Quickfire’
    A dwarf form of ‘Quickfire,’ this tiny powerhouse has all the beauty and benefits of its bigger relative but in a small package. Growing only to 3-4′ tall with a slightly larger spread, this hydrangea makes a big statement in a little space when covered with blooms and can be an ideal choice to start out with hydrangeas.
  • ‘Bobo’
    Another paniculata hydrangea, this variety creates huge drama for such a little plant. Growing only to 3′ tall and wide, it’s a thriller in containers, and easily won the Gold Florall medal for best novelty plant. ‘Bobo’s early season white flowers also bloom on new wood and cover the plant on strong overhead stems. Unaffected by soil type or pH, this hardy hydrangea steals the show wherever it is planted.

No matter how you use these newcomers in your landscape – larger varieties in the back of beds or as borders, smaller options in the front or in containers – their long-lasting flowers will make you think summer truly is endless.


Pruning Red Raspberries

There’s an unfounded rumor that raspberries are difficult to prune. This isn’t true if you understand the type of raspberry in your garden. Summer-bearing raspberries produce only one harvest per year while everbearing, or fall-bearing, raspberries can produce two harvests.

Raspberry Types

Summer-bearing raspberries plants bear fruit on one type of cane, a floricane. These large, thick canes grow fruiting lateral branches. Most of the purple and black raspberry varieties and some red varieties are summer-bearing plants.

Everbearing raspberries grow two types of fruiting canes, floricanes and primocanes. The floricanes are similar those of the summer-bearing raspberry. However, the primocane has no lateral branches. Instead, the fruit buds are located on the thick cane. Most red and yellow raspberry varieties are everbearing.

No matter what type of raspberry you grow, proper pruning improves production and the taste of the fruit, the appearance of your garden and makes it easier to harvest the delicious fruit.

Raspberry Pruning Tips

If you are growing summer-bearing raspberries, you will follow a cycle of pruning out the older floricanes, which already bore fruit. If you are growing ever-bearing raspberries, you will prune out floricanes and the top one-third of the primocanes where fruit developed in the fall. However, you can choose a second option for pruning everbearing raspberries. Simply cut the entire plant to the ground in early spring to produce berries from fall until the first frost. This sacrifices the summer harvest, but puts all plant energy into fruit production for fall harvest, creating a larger, more robust crop. It also protects the canes from any extreme winter conditions and reduces insect damage. Using row covers or greenhouses to maintain a warmer temperature easily extends the harvest season later into the fall.

To simplify the pruning process…

When you grow your own berries, you know exactly how they were grown, you save money, and best of all, they taste great, even with dirt under your fingernails!

Gussy Up the Veggie Garden

A vegetable garden is the ultimate in practical landscaping, and a thriving veggie patch can not only be a bountiful supplement to a grocery budget, but also an enjoyable hobby and great exercise as you sow seeds, nurture plants and take up your delicious harvest. One thing a vegetable garden does not need to be, however, is drab, and there are many fun ways to gussy up the veggie garden to show off your personal flair and gardening charisma.

Why Beautify a Vegetable Patch?

As more gardeners expand their cultivated plots into side yards and even front yards, keeping a vegetable garden attractive is essential. Not only can a lovely vegetable garden be attractive to the neighborhood, but it increases curb appeal for your home, raises awareness about the beauty of vegetables and allows you to take just as much pride in your garden’s appearance as you do in your harvest. Adding more personality to your vegetable garden is also a fun way to discover more gardening techniques and show off your more colorful side.

Fun Ways to Gussy Up the Veggie Garden

There are many different ways you can give your garden a more colorful personality, and we have everything you need to do so. While you may not want to use every technique in your garden depending on the veggies you grow and the space you have available, trying just one or two fun tactics can give your garden a great makeover.

  • Liven Up the Lines
    Instead of planting vegetables in straight rows, embrace the twists, turns and curves of your landscape with a curvy garden. You can create a pattern of colors and shapes, or use different edging options to delineate the sections of your garden in more visible ways.
  • Pretty Up Your Paths
    You don’t have to use plain dirt paths in your garden when there are colorful mulches, unique stepping stones and other options to create more interesting pathways. Try river rocks, multi-colored gravel, crushed shells, bricks or other options to define paths more beautifully.
  • Build a Beautiful Border
    Define your garden’s edge with a beautiful border. Decorative fences can be quaint, or you can plant flowers all around the garden for extra color. Use deer- and rabbit-resistant flowers such as poppies, marigolds, zinnia and verbena to help protect your garden at the same time.
  • Create Bursts of Color
    Add more color to your garden with whimsical touches such as colorful tomato cages or painted support stakes. You can also add a brilliant gazing ball, a fun seasonal decorative flag or other colorful accents to add instant vibrancy to your veggie garden.
  • Add an Amazing Arbor
    An arbor or pergola can be an amazing architectural accent in your garden. This structure can be functional as well when it provides a bit of protection for shade-loving veggies or includes a bench with hidden storage for your favorite garden tools, hoses or other equipment.
  • Verticalize Your Veggies
    Go up, up, up with your veggie garden space when you embrace vertical gardening. You can hang baskets from an arbor, trellis or poles, or create a green wall or other vertical gardening space that climbing plants will love, and you’ll see your harvest multiply.
  • Secret Spaces to Make You Smile
    Your vegetable garden doesn’t need to be nothing but growing space, and you can add a whimsical garden gnome, fairy garden setup or other secret space to the garden. You might even include a small bench or meditation fountain for extra enjoyment.
  • Welcome Beneficial Wildlife
    Bring helpful visitors to your veggie garden when you add a bee house, butterfly feeder, hummingbird feeder or bird bath to the garden. These helpful pollinators will appreciate the assistance and will repay your generosity as they increase the yield of all your veggies.
  • Select Stunning Seedlings
    The seedlings you add to your veggie patch can go a long way toward beautification when you choose plants with colorful foliage or unique produce. This also gives you a chance to experiment with new plants, and you might discover a new favorite vegetable along the way.
  • Fill In With Flowers
    Quickly add color and texture to your vegetable garden when you fill in short rows and corners with extra flowers. This is a great way to expand your garden and avoid thin or bare patches that detract from your garden’s beauty.
  • Make Magnificent Markers
    Marking plant rows and types keeps your garden organized, and you can do it with flair when you choose colorful or whimsical plant markers. Painted rocks, fun signs, cheerful flags and other options can denote your plants while adding beauty to your garden.
  • Class It Up With Containers
    A bright pot or planter box can be an attractive addition to your veggie patch, and will add extra color as well. This is a great way to add herbs, mints, berries or other fun plants to your garden. Elevate smaller pots with plant stands or pot feet to give more dimension to the garden.

With so many fun options to gussy up your veggie garden, your gardening patch can be just as beautiful as any carefully cultivated flowerbed or meticulously groomed lawn – and more delicious!