Monthly Archives: October 2024

Fall Chrysanthemums

No flower is more iconic of autumn than the chrysanthemum, and these beautiful mounding perennials are ideal for fall flowerbeds, pots, window boxes, borders, and many other uses. How will
you get creative with chrysanthemums this fall?

Why We Love Chrysanthemums

Just when many other flowers are fading at the end of summer, chrysanthemums, or mums, are coming into their glory with a range of stunning autumn colors. Depending on the cultivar, these plants sport yellow, white, red, orange, bronze, pink, peach, wine, purple, and bicolored blooms. The flowers range from small, button-like blossoms to larger blooms reminiscent of daisies. Mum blooms are long-lasting when cut and they’re just as lovely in floral arrangements and bouquets as they are planted in containers, flowerbeds, and the landscape. This makes mums extremely useful for all manner of autumn décor.

Chrysanthemums are native to east Asia and northern Europe and were first domestically cultivated in China nearly 600 years ago. Today, there are more than 20,000 chrysanthemum cultivars worldwide. They are deer- and rabbit-resistant, making them a hardy option for landscaping beds, and with a bit of thoughtful care, these tender perennials can be a wonderful addition to any flower garden or fall containers.

Caring for Chrysanthemums

The hardiness of chrysanthemums depends on the cultivar as well as the local climate and even the microclimate in your landscape. These flowers prefer well-drained, rich soil with a neutral pH, so it is best to use a good quality potting soil in containers. When planting chrysanthemums in the garden or landscape, mixing compost or peat moss in the planting hole will help increase drainage and nourish the soil to promote the best blooms. A good rule of thumb is that if soil is good for vegetables, it will also be good for mums – making them a wonderful choice to refresh a garden after the summer harvest has finished.

Chrysanthemums grow best in full sun requiring a minimum of six hours per day. If mums are planted in containers, consider using a mobile plant cart or a stand with casters so  that the pots may be moved to brighter areas, if needed, as the season progresses.

Chrysanthemums prefer evenly moist, but not soggy, soil. Because of their thick, mounding habit, it is best to water mums from below suing a soaker hose or irrigation drip system in garden beds. In pots, mums should again be watered from below the plant but above the soil line. A watering wand will make this job direct and easy. Be sure to drain excess water from saucers after watering so the roots do not remain continually wet.

Fertilizing chrysanthemums every month through the spring and early summer, with a balanced fertilizer, will help them grow and bloom well, but if mums are planted in the Fall, they should not need extra feeding as long as they were planted in rich, nutritious soil. Deadheading spent blooms by pinching them back can encourage more flowering and help mums maintain their compact, mounding habit.

Decorating with Fall Mums

Chrysanthemums are a beautiful choice not only in the garden, but are equally lovely in welcoming porch pots, deck or patio containers, or even small indoor pots and arrangements. Add an extra touch of fall with rustic containers, such as wine barrels, baskets, or terra cotta pots, or glam up your mums in hammered copper or bronze pots that will accentuate their color. A burlap ribbon or bow can be a charming accent, and you can give more seasonal flair to mum arrangements or flowerbeds by adding pumpkins and gourds as fun decorations. Indoors, use small pails or pots for petit mum arrangements, or add them to larger arrangements with grain sprigs, dried pods, colorful leaves, or twists of grapevine for additional texture.

Fall chrysanthemums can be a pleasant burst of autumn color, whether they are part of the landscape or are used in containers, pots, or arrangements and we carry a wide selection to make your fall home suit the season!


Fall Mulching Pros

Mulch can add a protective layer to any fall garden, flowerbeds, or shrubs, but is it best for your landscape? Understanding the pros and cons of fall mulching can help you better prepare all your plants for the changing season.

Benefits of Fall Mulching

There’s no denying that when done properly, mulching in fall can provide enormous benefits to the landscape. The biggest pros of fall mulching include:

  • Insulating the soil.
    Fall mulching preserves heat that will keep microbes, earthworms, and other life active and thriving in the soil longer to improve the soil condition. The insulation mulch provides will also help moderate temperature swings that can damage tender roots, especially those of newly planted plant material.
  • Saving time with spring chores.
    Spring is a hectic season in the garden, but if mulching is already done in the fall, it doesn’t need to be redone in the spring and there will be more time to spend with other planting and gardening tasks when the weather warms.
  • Easier climate for working.
    The milder temperatures of autumn make it more enjoyable to spend time outdoors with the heavy labor of spreading mulch. This is especially true if you will be mulching multiple flowerbeds, tree rings, borders, and other spaces throughout the landscape.
  • Simpler to spread.
    If you mulch in spring, you may need to be delicately working around emerging sprouts and blooming bulbs. In fall, however, the work is less delicate after beds have already been cleaned out, and you can spread mulch much more quickly and efficiently.
  • Weed suppression.
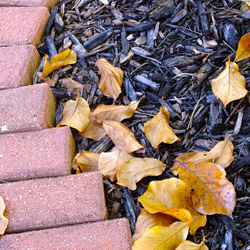
    Weeds don’t stop growing when summer ends, and just like spring mulching, spreading mulch in fall will help minimize weeds. This will make it easier to keep weeds under control when spring arrives again, and growth is renewed.
  • Preventing soil erosion.
    Soils on sloped beds can quickly erode in autumn and winter weather as rain and snow batter the slopes. A good layer of mulch will protect the soil and keep it in place throughout the season, so it is ready to work again in the spring.
  • Nourishing the soil.
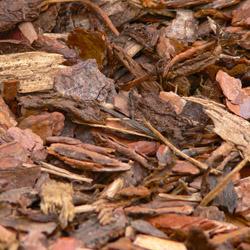
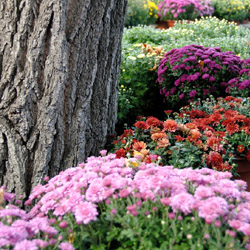
    Organic mulches that are spread in autumn will have several months to settle and begin decaying. This will introduce more nutrients into the top layer of soil, so it is richer and healthier for spring planting.
  • Tidy Appearance
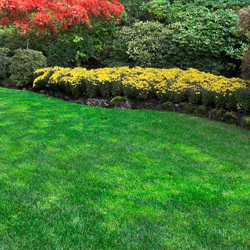
    A fresh layer of mulch will always make the landscape and garden look well-tended.

Fall Mulching Tips

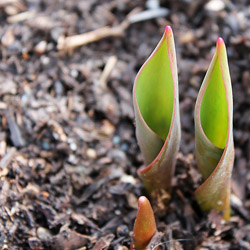
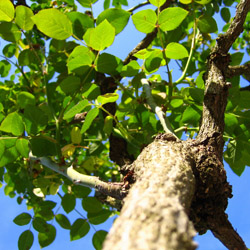
Every gardener must decide when to mulch, and if you do want to take advantage of the benefits of fall mulching, doing so carefully can help prevent many of the cons. First, adjust the mulch depth to match the requirements of your local climate and plant needs – a layer 2-4 inches deep is typically adequate. Apply fall mulch after the first hard freeze when perennials can be cut back easily but take care not to pile it against tree trunks or shrub bases where it may invite gnawing pests or induce bark rot.

Mulching can be a very productive fall chore for flowerbeds, garden spaces, borders, and other parts of the landscape. It has to potential to save you time and energy and help keep your property looking its very best not only in autumn, but through the winter and into spring once again.

Autumn: Why Plant Now?

Although many gardeners plant trees and shrubs in the spring, knowledgeable gardeners plant in the fall to take advantage of all this fabulous season has to offer. But why is fall planting better than spring planting?

  • Stress Reduction
    Transplanting causes stress as plants are removed from containers, balls or established locations and changed to new locations. Planting in the fall, when a plant is entering dormancy and is generally hardier and sturdier, reduces this stress so the plant can thrive.
  • Establishing Strong Roots
    Fall planting “establishes” trees and shrubs by encouraging root growth. Because the soil is still warm, the roots continue to develop until freezing, though the upper parts of the plant are already dormant. When transplanting in the spring, the developed roots are active and delicate tips or rootlets, as well as buds and new leaves, are more easily damaged.
  • Weather Resiliency
    Trees and shrubs planted in the fall are better able to withstand the rigors of the next summer’s heat and dry conditions because they have much longer to develop healthy roots systems and become thoroughly established. This is especially critical in dry climates or areas prone to drought or irregular rainfall.
  • Faster Maturity
    The “head-start” of fall planting results in a larger plant in less time, helping create a mature landscape without waiting for smaller plants to catch up. This can be especially critical when replacing dead or damaged plants in a mature landscape to avoid a gap or uneven look.
  • Water Conservation
    Planting in the fall saves watering time and promotes conservation by eliminating daily watering. Cooler temperatures with the addition of both morning and evening dew contribute greatly to soil moisture availability in fall without as much supplemental watering.
  • Color Confirmation
    Fall is the best time to see a plant’s autumnal color. Planting in the fall eliminates the surprise of the wrong color or unexpected shades that may not coordinate with nearby plants. By planting in autumn, you’ll know exactly what you’re purchasing and planting, and you will be able to match better with your existing landscape.

Autumn can be the ideal time to plant trees and shrubs, whether you are adding to your landscape, replacing plants or starting a whole new look. If you plant in autumn, you’ll be amazed at how lovely your landscape will look next spring.


Plant a Tree This Fall

There are so many reasons to add a new tree to your landscape this fall that it’s hard to find a reason not to.

Just think about it, trees will…

  • Beautify the Environment
    Trees add texture and color to the landscape. They soften the harsh lines of buildings and driveways, while their foliage and blooms add seasonal color changes and variety.
  • Stabilize Soil
    Tree roots prevent soil from blowing or washing away, minimizing erosion and providing protection for the surrounding landscape.
  • Provide Wildlife Habitat
    Trees provide shelter and food for birds and numerous small animals, including squirrels, raccoons, insects and more.
  • Make Food
    Many trees provide fruits, nuts, seeds, sap and berries for human consumption. Wildlife will also rely on the food provided by trees.
  • Create Oxygen
    Through photosynthesis, trees take in carbon dioxide, carbon monoxide, sulfur dioxide and other poisons from our air and release pure oxygen for us to breathe. One tree can produce enough oxygen for 10 humans for one year!
  • Filter the Air
    Trees act as giant filters trapping dust and pollution particles with their leaves and bark until the rain washes the particles away.
  • Cool the Air
    Air will remain several degrees cooler in the shade of a tree canopy. This is accomplished by not only by blocking the sun’s rays but also through transpiration. Tree leave transpire, or release moisture, which cools the surrounding air. A large tree can release as much as 400 gallons of moisture from its leaves daily.
  • Reduce Utility Bills
    Deciduous trees planted on the south and southwest sides of a home will shade the structure during hot summer months and reduce air conditioning or other cooling needs. In the winter, with the leaves fallen, the sun is able to warm the structure, reducing heating bills.
  • Reduce Noise Pollution
    Strategically planted, trees can dramatically reduce the volume of unwanted noise from loud neighbors, nearby businesses or car traffic.
  • Hide undesirable views
    Purposefully sited, trees can camouflage unattractive views and create privacy, providing a natural sanctuary in your yard.

In our area, fall is just about the best time of year to purchase and plant a tree. The soil is warm, air temperature is cool and morning and evening dew increase available moisture to nurture a new tree. Stop in and see our extensive collection, and we can assist you in choosing the tree that is perfect for your landscape and lifestyle needs.


Fall Lawn Care

Fall is the best time of the year to overseed your existing lawn or establish a new lawn. If your lawn is a bit thin, has bare patches or needs good care, now is the time to take care of it so it can become thoroughly established before warm temperatures arrive in spring.

Overseeding A Weak Lawn

A weak lawn may have thin or scraggly patches, seem overrun with weeds or have bare patches that are difficult to keep green and lush. Overseeding can help eliminate these problem areas and create a more consistent, luxurious lawn.

  1. Spray broadleaf weeds with a selective herbicide and wait 2 weeks for the weeds to disappear. Several treatments may be necessary if the yard is thick with weeds.
  2. Take a soil sample of your lawn to determine the pH. A garden extension service can help determine pH levels, or home test kits are available.
  3. Mow shorter than normal and rake clean to remove unnecessary debris that may keep seeds from reaching the soil.
  4. Core aerate if you have compacted soil or heavy thatch. Remove the cores and dispose of them properly to keep the soil light and airy for seeding.
  5. Apply starter fertilizer and lime if determined to be needed by the pH test, or choose a grass type that will thrive in your soil’s conditions.
  6. Dethatch your lawn if thatch is thicker than ½ inch. This can be done with heavy raking or a special dethatching rake may be necessary in extreme cases.
  7. Overseed with the proper seed. If core aerating, lightly topdress with topsoil or humus. Cover with straw to retain water.
  8. Water daily until grass has germinated, then soak once a week to encourage deep root growth.
  9. Fertilize in late fall with fall fertilizer.

Seeding A New Lawn

If you have no existing lawn or the entire ground is overrun with nothing but weeds, it may be best to start from scratch and create the lawn of your dreams.

  1. Kill existing vegetation with nonselective herbicide. If you want to preserve nearby trees or shrubs, take steps to protect that vegetation from the treatment.
  2. Take a soil sample of your lawn to determine the pH. A testing kit can provide a good pH estimate, or a gardening center or garden extension service can provide a more precise evaluation.
  3. Prepare soil by breaking up the surface with a rake or spade using a crisscross pattern. All large lumps should be broken up, and any large rocks should be removed.
  4. Broadcast starter fertilizer, lime and gypsum as determined by the pH test. This will provide a nutrition boost for fresh seeds.
  5. Spread topsoil or humus to a ½ inch depth for appropriate planting.
  6. Rototill to a depth of 4 inches and grade smooth. This will mix all the top layers together for uniform soil and nutrition, ensuring even turf growth.
  7. Sow proper seed and mulch lightly with salt hay to control erosion and conserve moisture.
  8. Water daily until grass has germinated, then soak once a week to encourage deeper root growth to resist droughts and repel weeds.
  9. Fertilize in late fall with fall fertilizer to provide nutrition throughout the season.

Which Seed?

Not every lawn will thrive with the same type of grass seed. Allow our staff to help you select the seed that best suits your needs, soil type and planting conditions. Apply at the recommended rate and incorporate into the top ¼” of soil. Do not bury the seed or it may not germinate evenly.

No matter what the condition of your lawn, fall is the best time to take steps to help it rejuvenate so you have an amazing lawn to enjoy in spring.

Repotting Houseplants

Fall is an excellent time to repot many houseplants. Potted plants that have been growing outdoors during the summer have probably grown quite vigorously due to the high light levels and greater humidity. If the top growth of the plant has increased in size by 20 percent or more, it probably should be transplanted into a larger container so the roots can stretch and settle comfortably.

Before You Repot

Before repotting, check the plant and the soil carefully for insects.  Add systemic granules to the soil and spray the leaves with an insecticidal soap to remove any unwanted pests. If an insect infestation is particularly bad, it may be necessary to remove most of the plant’s soil and replace it with fresh potting soil. Avoid using soil from the garden, however, which will harbor insect larvae and eggs as well as weed seeds and other material you do not want in your houseplants.

Acclimating Plants

Bring your plants indoors well before any danger of frost for proper acclimation to the indoor environment. The change in light levels and humidity could shock more delicate plants, and they may wilt temporarily or drop leaves before they adjust to the new conditions. If possible, bring them in just a few minutes at a time for several days, gradually increasing their indoor time to several hours before keeping them indoors all the time. Flowering tropicals will also benefit from cutting back some of their foliage to avoid shock before being brought indoors.

To help houseplants overcome the transition from outdoors to indoors, position them in a bright, sunny area and consider adjusting indoor temperature and humidity controls to more closely mimic outdoor conditions. Make adjustments slowly and gradually, and the plants will adjust.

Time to Repot

Once your houseplants are adjusted to their indoor fall and winter environment, they can be safely repotted without adding to their stress. Repot the plants early in the day, and move them to a slightly larger pot. Avoid jumping several pot sizes, which could lead to excessive root growth while the foliage is neglected. Be sure to fertilize and water the plants appropriately to provide them proper nourishment as they settle into new pots. Do not expect luxuriant foliage growth right away, however, as it will take some time for the plants to begin growing again, especially in fall and winter when most houseplants are entering a dormant, slow growth period.

By repotting your houseplants in fall, you can help healthy, vigorously growing plants adjust to a new environment and continue their growth with ease in a new, larger, more comfortable pot.

Bringing Your Tropical Plants Indoors for the Winter

As the summer comes to an end and autumn approaches, the days get shorter and cooler temperatures signal the time to ready your plants for winter. How can you protect your treasured tropicals from winter damage?

Overwintering Tropical Plants

Don’t wait until frost warnings or freezes occur to bring tropical plants inside, especially since these plants are more susceptible to dropping temperatures. Try to have all of your plants acclimated to the new indoor environment by the end of October. Avoid the temptation to move your tropicals back outside if it suddenly gets warm, because they will have to re-acclimate when you bring them back inside again. With a little extra care even exotic hibiscus can be over-wintered inside the house.

First, it’s a good idea to prune approximately one-eighth to one-fourth off the total height of the plant’s foliage. This helps reduce the shock that the plant receives with the change of conditions when bringing them indoors. Check the plants for signs of insects and treat them with insecticidal soap or pyrethrin spray as well as a systemic insecticide that will provide protection for up to six weeks.

Position indoor tropical plants in a very bright location that receives no less than 6 hours of light per day. If the winter is very cloudy, supplement your plants with an artificial light source. Be sure the room is warm, but avoid putting the plants too close to a heating vent, which can dry them out drastically.

Because they are tropical plants, they will need good humidity which can be achieved by using a humidity tray. Use a saucer that is at least 3-4 inches larger than the pot and fill it with an inch of stones. Pour water over the stones until they are half covered, then place the pot on top of the stones. The humidity immediately around the plant will be increased, but avoid setting the pot directly in any water, which can lead to fungus and rotting. Grouping several plants close together can also help them preserve humidity for more luxuriant growth.

Fertilizing should be continued throughout the winter, but at a rate of once per week. You will find the plant will not utilize as much water in the winter because its growth has slowed. Generally, plants should be watered every 4-7 days depending on location, pot size, soil type and plant type.

If you have any questions about winter care of your plants, our staff will be glad to help you keep your tropicals in good condition all winter long.

Over-Wintering Container Plants Outdoors

All containerized plants that are considered hardy in your zone can spend the winter outdoors, but you do need to take a little special care to keep them safe and comfortable as temperatures drop. Despite their hardiness, winter is still a challenging season, but it is possible to keep your container plants healthy until the days grow longer and warmer again.

Options to Overwinter Your Container Plants

  • In the late summer or fall, removed the plant from its container and plant it in the ground while the soil is still warm. Another method is to bury the pot, with the plant in it, in the garden and remove the pot following spring. Both of these methods will help insulate the root system, preventing it from freezing solid and killing the root system.
  • Place containerized plants in an unheated garage but along a heated wall. This is an excellent method for very large pots or porous pots that tend to break apart from the constant cycle of freezing and thawing, and so would not be very hardy if buried. For extra root protection and insulation, wrap the pots in plastic bubble wrap or wrap an old comforter or quilt around the pots.
  • Group pots together along the sunny side of your house or shed. If this area is windy, create a windscreen with stakes and burlap. Place bales of straw or hay around the perimeter of the grouping up against the pots to further protect plants from cold winds. Fill in areas between pots with mulch, shredded leaves, grass clippings or hay for insulation. Lay evergreen branches or place a layer of mulch on top of the pots for additional protection.
  • Use a cold frame covered with plastic or Reemay fabric to help control temperatures and reduce light as well, helping plants stay dormant in winter. It will still be necessary to use mulch, shredded leaves or hay around and in-between pots for insulation. Rodent control, such as Havahart traps, may be necessary when using this method.

Watering Container Plants in Winter

Make sure that plants go into the winter with moist soil so that there is water available to plant roots. Check soil moisture occasionally, never allowing it to dry completely. It is also a very good idea to spray needled and broadleaf evergreens with an anti-desiccant. This acts as a protective coating for plant foliage and stems as it helps them retain moisture.

With just a little care and forethought, you can easily prepare containers for winter without risking the plants and arrangements you have so carefully cultivated.


Fall Has Arrived But Spring Is Already in Our Sight

It’s a sure sign that fall has arrived when dozen of boxes and crates, adorned with brilliant images of spring-blooming bulbs, appear on garden center shelves. Take a closer look through the pretty packaging, however, and what you see may seem totally unimpressive. It is hard to believe that in just a few short months these diminutive, subterranean dynamos will blossom into amazing forms of living art. What is even more incredible is how very simple and absolutely foolproof it is to achieve this beauty, no matter what shade of green, brown or black your garden thumb may be. These petite organic parcels encapsulate everything necessary to burst into astonishing flowers, and even the most inexperienced gardener can be a floral artist with spring bulbs.

Bulb Varieties

The only difficult thing about growing spring-flowering bulbs is choosing which blooms to showcase in your yard. The sheer variety of flower types, colors, sizes and bloom times is outstanding and virtually limitless, which can be overwhelming. Tulips alone are available in early, mid- and late-blooming varieties in just about every color under the sun, including multi-colored and variegated shades. The stems can be short or long, and the petal count may be single or double. The petals may be colorfully veined, like the ever popular parrot tulip, or fringed on the edges for a lacy look. Some tulips resemble peonies and some resemble crocuses. And that’s just tulips – other spring-blooming bulbs can have just as many varieties to choose from!

This fall, just about every garden center will be carrying at least a few varieties of ever-popular, widespread favorites, such as…

  • Allium
  • Crocus
  • Daffodil
  • Dutch Iris
  • German Bearded Iris
  • Grape Hyacinth
  • Hyacinth
  • Narcissus
  • Tulip

These are just a few examples of the amazing variety of bulbs available. Which new ones will be the showstoppers in your yard next spring?

Growing Bulbs

What’s most exciting is that if you’ve got soil and sunlight you can grow bulbs. It is absolutely that simple. Where you garden makes no difference at all, whether it is in the city, suburbs or countryside. Bulbs look fantastic blooming in a large landscape, small garden or simply in a pretty pot. They can be planted around trees and bushes, alongside driveways or sidewalks, or even in broad, flowing beds. Because they require very little care and maintenance, bulbs are ideal for busy gardeners or anyone who wants to stick their thumb in the soil but may not have much time to devote to an intensive flower garden or elaborate layout. There are just three steps to growing bulbs…

  1. Dig: Dig the hole of an appropriate depth for the bulb size – but they aren’t too picky!
  2. Drop: Drop the bulb in the hole, covering it firmly with soil and a layer of mulch if desired.
  3. Done! That’s it – the bulb will do the rest with the nutrients it has stored. Just be sure it has water at the appropriate time, and the blooms will amaze you.

So why not get out there and explore this big beautiful world of bulbs? Plan now for your spring floral explosion, and ask your local garden center staff for ideas for the best bulbs to suit your landscape, soil type and climate. Use the web resources, like Pinterest or Instagram, for information and inspiration. Get to your garden center early for the best bulb selection and get excited for unbelievable blooms!