Monthly Archives: December 2024

Trimming a Rosemary Christmas Tree

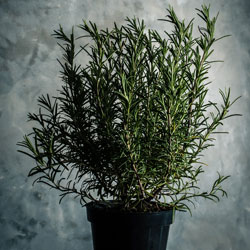
Rosemary is a popular indoor herb plant used for culinary purposes and to enhance the décor for the holiday season. Thanks to their upright growth and needle-like foliage, these fragrant herbs make perfect miniature Christmas trees, but how can you help your plant keep its shape and be a beautiful home accent all year round?

Buying and Growing a Rosemary Christmas Tree

Rosemary herb plants are easy to find during the holiday season, and are the ideal size for trimming into tree shapes. We carry the healthiest selection of rosemary bushes, including varieties of rosemary that can be difficult to find elsewhere. Another option is growing your own rosemary from a smaller plant, starting several months before you want to decorate the miniature tree – making this an ideal spring or summer project too. Choose a proper pot, ensuring it has plenty of drainage, and use nutritious potting soil to nurture the young rosemary. Provide it with proper lighting and good air circulation to minimize the risk of powdery mildew or other problems, and water it appropriately for lush growth. A small stake may be necessary to encourage straight, upright growth to ensure a tree-like shape, and regular pruning will be needed to coax the plant into a preferred form.

Pruning Rosemary

Pruning rosemary into a tree form is no more difficult than clipping fresh herbs for use, but you do need to have the proper tools for clean, safe cuts. A small pair of pruning shears or set of floral clippers is ideal. Clean them between each pruning so there are no bacteria or fungus that can be transferred around the plant, and it may be wise to reserve the pair only for your rosemary bush for extra protection, especially if you plan to give the shaped plant as a gift or use it as a holiday centerpiece.

To achieve the cone-like shape typical of a Christmas tree, leave the base of your rosemary plant full and bushy, while gradually tapering toward the top of the plant to create the pyramidal structure. If you’ve started with a smaller plant, it will be necessary to let several larger branches grow, then choose the strongest, most upright specimen to be the “trunk” of your rosemary bush. Trim all the other sprigs away, allowing that central section to thicken and grow so it can support the bush’s shape. Over time, additional branches will grow – trim the very bottom sprigs away several times before allowing them to reach out and form the bottom of the tree shape. More frequent pruning will encourage a fuller, thicker shape, while pruning less often will give your bush a more open structure. Both styles can become lovely decorations, but bear in mind the types of decorations you want to add to your rosemary tree so you can prune and train it accordingly.

Decorating a Rosemary Tree for Every Holiday

Rosemary bushes look lovely as holiday decorations if they are simply shaped and accented with a festive foil cover or bow on the pot. Canvas or decorated cloth covers with ribbons are other easy options, but many people want to jazz up their plants even more. Adding a miniature string of light-weight fairy lights, a few tiny ornaments or even a small strand of beads are easy ways to give your rosemary bush extra holiday flair, but you don’t have to confine your decorating excitement to just the Christmas season. Why not cut out felt triangles to create a jack-o-lantern face on the bush for Halloween, or stick pheasant feathers or mini pinecones into the pot to give it a harvest look for Thanksgiving? Red, white, and blue ribbons or streamers are a great Fourth of July option, and festive plant picks are available for any holiday. You can even create a small fairy hut or miniature scene in the pot with your rosemary to give it a whimsical touch all year long.

Rosemary trees may be most closely associated with the holiday season, but you can make every day a holiday when you trim your own rosemary and decorate it for any special day you wish.
Rosemary Tree

Stuff a Gardener’s Stocking

Stocking stuffers don’t have to be useless, jokey items that are quickly forgotten after the holidays. Instead, choose the appropriate stocking stuffers with a gardening twist, and even the smallest stocking will be filled with gardening fun for that special gardener in your life. No matter what type of gardener you want to buy for, we’ve got the right stocking stuffers for their green thumb!

Your gardener will love:

  • Weather stations, rain gauges
  • Window thermometers or barometers
  • Quality hand tools such as bulb diggers, trowels, pruners, and cultivators
  • Fresh gardening gloves
  • A soil pH reader
  • Soft wire and garden tie tape
  • Watering cans or wands
  • Whimsical wind chimes
  • Fairy garden accessories – new just came in!
  • Interesting  varieties of succulents
  • Garden gnomes and pink flamingos
  • Themed stepping stones or small garden statues
  • Bird feeders and ornate houses
  • Bird foods such as suet cakes or hummingbird nectar
  • A squirrel corn cob feeder
  • Songbird suet

No matter what type of gardener is on your shopping list this holiday season, there are plenty of stocking stuffer options to meet their gardening style. Stop in and finish off that shopping list today!

Outdoor Ornamentation

Do you miss the vibrancy of your flowerbeds and the rich, lush colors of your landscape once winter sets in? With warm weather pots, window boxes and hanging baskets already in place, decorating the outside of your house this winter will be a cinch!

  1. Use only containers that are winter safe. Porous pots, like terra cotta, are not a good choice as they tend to crack when they freeze. Better choices include frost proof pots, concrete urns, fiberglass or foam containers and cocoa-lined wire hanging baskets. For a truly holiday look, consider containers that may have red-and-green coloration or other holiday hues, or look for whimsical holiday-themed designs.
  2. Use the soil that is already in your containers. Remove just the tops from your previous plantings, allowing their roots to remain in the soil as an anchor for your winter arrangement. We also suggest mixing with play sand to allow water to reach the cuttings. You may also need some plant or gardening pins to help keep your arrangement in place and secure.
  3. Begin by adding greens to your container (note: your greens will last longer if soaked in Bonide Wilt-Stop for 24 hours before using). Cut branches to the desired length. Create a dense base for your arrangement using either cedar, pine or spruce. Consider allowing some boughs to trail over the edge of the arrangement for more visual interest, or mix up different types of greens for interesting texture.
  4. Create a focal point for your arrangement with the addition of a few tall branches of curly willow, red twig dogwood or white painted birch. Position these taller elements near the back of the arrangement to allow more room for additional plants and decorative items. To add more magic to the arrangement, consider painting taller branches gold or silver.
  5. To include additional color and texture, incorporate more winter-themed plants into the arrangement. Holly, incense cedar, winterberry, or juniper are all top choices. Go for a lush, tiered look with at least five differing textures for the best effect.
  6. To bring your arrangement to life add mini white or colored lights, desired ornaments and weather-proof ribbon. For a more whimsical look, consider garlands, candy canes, cranberry strings or even a fairy gingerbread house. Remove these when the holiday season ends and leave the arrangement intact until time for spring planting.
  7. You might spruce up around the pot to bring even more notice to your arrangement. Consider a ribbon around the pot, or add light-up gift boxes or wrapped boxes around the pot to create a larger focus.

With just a few steps, the outdoor containers you enjoy in spring, summer and fall can continue to be lovely accents for holiday and winter decoration. Stop in to pick up a festive new pot, evergreen bundles and Wilt-Proof for your porch pot project!

Applying Horticultural Oil or Neem Oil

Autumn is an excellent time to apply All Seasons Horticultural Oil or Neem Oil. The oil smothers many soft-bodied insects and hard-shelled scales that are impenetrable to many insecticides, and can therefore help control some of the most stubborn insect populations. But is it right for your plants?

About Horticultural and Neem Oils

Horticultural oil, or hort oil, is typically derived from petroleum, and is a type of ecologically-friendly mineral oil. Some cottonseed and soybean oils can also be effective horticultural oils. Emulsifying agents are typically added to these oils so they can be mixed with water and used as a spray, which helps distribute them evenly over plant foliage to be most effective.

Neem oil can control pests that are trying to overwinter in your potted plants. You can apply it on upper and lower leaves. Use neem oil as a preventative for established infestations and horticultural oil to eliminate eggs.

Pests That Don’t Like Horticultural Oils

Different types of horticultural oils can be effective against many unwanted garden pests, including…

  • Spider mites
  • Aphids
  • Whiteflies
  • Mealy bugs
  • Psyllids
  • Lace bugs
  • Caterpillars

In addition to smothering the larvae or insects directly, the heavy oil also makes it difficult for many insects to crawl therefore starving them to death and preventing them from spreading diseases from plant to plant. Additionally, the oil repels many insects looking for winter homes. The oils also act as fungicide against powdery mildew, rust and leaf spot on some plants.

Applying Horticultural Oils

Application of horticultural oils is easy, requiring only a simple hose-attached sprayer. Because oil and water do not mix, frequent agitation by shaking is required even if the oils are mixed with other agents to be more sprayable. These products are most effective if applied when plants are dormant, since oil-based products can burn and harm actively growing foliage, buds, flowers and fruit. Some lighter weight, summer-formulated oils are available, but they should be used only sparingly and only if absolutely necessary. Autumn and winter are the best seasons to apply horticultural oils when insects are a problem, though autumn applications can occasionally cause problems with plants dying back and other winter damage. Because the oils can evaporate and dissipate quickly, they should only be used when insects are present, otherwise they will be ineffective. In freezing weather the oil coverage will be inconsistent, so cool but not bitterly cold temperatures are best.

Of course, always follow the instructions for proper application rates, plant sensitivity and ideal weather conditions to ensure the most effective treatment. Because these oils are still pesticides, protective gear such as gloves and goggles should also be worn to avoid accidental irritation or more severe contamination.

Using  oils can be a great way to control insects on your plants, but only if the oils are used appropriately. Come in for a consultation to see if these products can help end your insect problems.

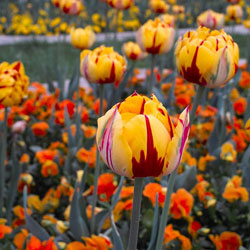
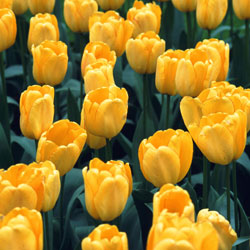
Tulips: Spring Starts Now!

Tips for Planting Tulips

Tulips are an easy care addition to any landscape, and they are easier to plant than many gardeners realize.

  1. Choose only top-sized bulbs without any bruises or obvious damage. Bigger bulbs generally indicate better quality and bigger flowers.
  2. Plant bulbs as soon as purchased or store in a cool, dry location.
  3. Choose a sunny (or part sun) location with well-drained, rich soil.
  4. Plant 2″ deeper than recommended to promote re-blooming each year.
  5. Apply bone meal 3 times a year – in fall when you plant, in spring as bulbs emerge from the ground and after flowering has finished. This will provide food for the foliage and bulb growth for next year’s flowers.
  6. Mulch and water the bed thoroughly after planting.
  7. Plant before the ground freezes.
  8. Deadhead flowers after they have faded, but leave the foliage to die back naturally. Do not cut off the leaves until they have turned brown, or else they will not develop large enough bulbs for a good show the next year.


Holiday “Cactus” (Schlumbergera varieties)

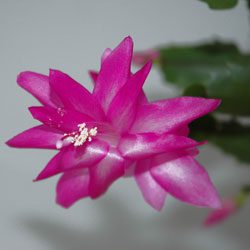
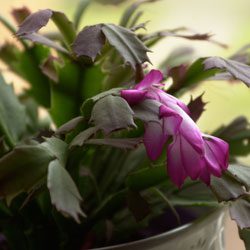
Have you noticed the odd-looking plants with neon bright flowers blooming since Halloween? You may know them as Thanksgiving cactus, Christmas cactus or Crab Cactus. Whatever you call them, they’re certainly bright and cheerful, and bring a bold bloom of color indoors during the winter months.

These plants don’t resemble their cactus cousins. Native to forests and jungles rather than desert regions, these plants are generally epiphytic, growing on trees or rocks. Distinctly flattened claw-like joints approximately 1″ long form the arched and hanging stems. The 2.5 – 3″ tubular blossoms emerge from the stem tips.

In case you’re wondering, the Easter cactus is a close relative but a different genus. However, in addition to blooming in the spring, another difference is the blossoms also form at the stem joints. Hybrids now bloom at different times of the year and new introductions create a wider variety of colors including pink, reddish, white, orange, purple and even multicolored blooms on the same plant. You can actually create a blooming rainbow effect over the entire year, with proper care and diligent upkeep.

The Christmas cactus usually begins flowering when night temperatures are around 55° Fahrenheit. After the buds are set, night temperatures of 60-70° Fahrenheit and slightly higher during the day are ideal. Many people summer their plants outdoors in a shady location and bring them indoors after bud set to enjoy during the holidays.
Caring for Holiday Cacti

Holiday cacti are as easy to grow as most houseplants. These easy instructions can help your Christmas cactus become part of your holiday traditions for years to come.

  1. Use general all-purpose container potting soil and a pot with sufficient drainage to protect the roots.
  2. Keep the soil moist while the cactus is blooming and allow it to become mostly dry while resting before watering again.
  3. Fertilize “weakly, weekly” while flowering. Otherwise, water every other month without fertilization.
  4. Place the cactus where it will receive bright indirect light for 6-8 hours a day. Avoid direct sunlight that can burn the plant.
  5. Transplant the cactus to a larger container when roots are very tight and blooming is less vigorous.

A holiday cactus can be a fine addition to any winter decorations, or by itself it will brighten any room for weeks with its bold, colorful blooms. With proper care, you’ll enjoy your cactus for many holiday seasons.


Christmas Fairy Gardens

Let the magic of miniature fairy gardens give you the Christmas you’ve always wanted. You can create the garden and entry of your dreams without breaking the bank, redoing your landscaping or remodeling your home!

Are you feeling nostalgic for a Victorian Christmas? Create your own Christmas outdoor scene. Start with a shallow container and choose a Victorian house. Then, from our exciting assortment of diminutive plants, miniature pots and small-but-realistic lawn ornaments, create your own holiday front yard, walkway, porch and entrance. Use tiny containers to flank the doors, a decorated dwarf conifer as an outdoor Christmas tree, ribbons over the windows and colored sand or mini-pavers along the pathway. You can even add a decorated doghouse, shed, or teensy wrought iron table under a gazebo.

Maybe a white picketed seashore cottage is your dream. Create it in miniature! Add a rustic mailbox, vine twig furniture and a tiny surfboard in the sandy surface and you can almost hear the ocean. Twinkling LED lights add a festive touch, or opt for a tiny palm tree strung with holiday ornaments.

Perhaps you’re an apartment dweller, dreaming of having your own veggie garden. Assemble a miniature garden with realistic tiny vegetables, tool shed and tools. Add a wishing well, a wheelbarrow and scarecrow. Put in a chicken coop with tiny chickens. Your friends will be looking for Peter Rabbit! For a winter touch, add a fun snowman to the scene.

Maybe you’re not looking for something for yourself. Are you seeking a unique hostess gift? Consider planting a tiny Japanese garden with a moon bridge arching over a pond stocked with koi. A simple miniature garden with a few personalized items your host will love such as a lawn swing, bicycle, or fairy hiding in a small bush is sure to bring a smile to their face.

Give the gift of time by constructing a miniature garden with a child or shut-in. A shared miniature garden is an ongoing fun project, and you can rearrange the garden and create new scenes with very visit or for every season. Create a wonderful opportunity to share stories and imaginative fun while fostering a love of gardening.

Stocked with a huge assortment of miniature and fairy garden accessories, our gift shop offers everything you need to make your Christmas miniature garden. If you need visual ideas, our bookshelves are stocked with beautifully illustrated books chock full of mini-decorating and gardening ideas. Come on in and get ideas, choose your items and make your Christmas dreams come true.  Check out the new product that just arrived!

Forcing Bulbs for the Holidays and Beyond

Blooming baskets and pots of brightly colored forced bulbs make a fabulous holiday or winter gift for others and ourselves. What better way to dress up the holiday home or cheer up a long, cold winter, reminding us of impending spring?

The forcing process should begin in September or early October if you want the bulbs to be blooming when given in late November or December. If you are starting late, no worries, just print these easy instructions to give with your potted bulbs and let the recipient do the rest.

Forcing Bulbs in 10 Easy Steps

  1. Count backwards from the desired bloom date the number of weeks required for bloom plus the number of weeks required for cooling. This is the planting date. To use your forced bulbs as a blooming Christmas gift, you will have to plant in September.
  2. Select a container that has drainage holes and is at least twice as tall as the unplanted bulb. There is an exception for paperwhites that you plan to grow in stone. These should be placed in a container without drainage holes.
  3. Mix a good bulb fertilizer into your potting soil according to directions on the package.
  4. Fill enough of your container with potting soil so that when the bulb is placed on top of the soil the tip of the bulb sits slightly above the lip.
  5. Place your bulbs on top of the soil. Keep them close without touching each other or the container.
  6. Continue to fill the area between the bulbs with soil. Fill until slightly below the lip.
  7. Water the soil gently, allowing excess to drain.
  8. Refrigerate potted bulbs for the appropriate amount of time. Check frequently and water as necessary to keep the soil moist.
  9. Gradually acclimate planted bulbs to a warm, bright location when their required cooling time has been completed. Move back out of direct sun and into a cooler location when the bulbs finally flower to prolong the blooms.
  10.  Rotate container frequently to produce straight stems.

Post Bloom

After flowering, cut back flower stems and place your containers back in full sun. Continue to water until the foliage dies back naturally. When the foliage is completely spent, place containers in a cool, dry place until early next fall when the bulbs may be safely planted into the garden. Forced bulbs cannot be forced a second time. Paperwhites will never bloom again and should be discarded after forcing. Previously forced bulbs, after planting in the ground, may skip a year’s bloom but will eventually return to their former beauty and regular schedule.


Birdscaping

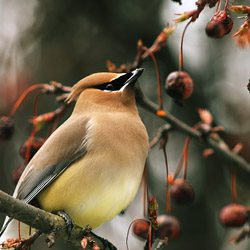
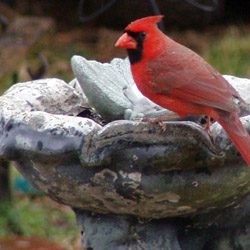
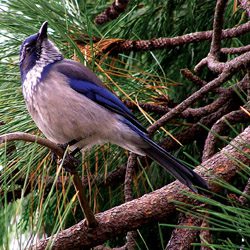
As wildlife habitats are threatened by development, the creation of a bird-friendly environment that provides food, water and shelter is crucial to the existence of our wild bird population. Caring for our feathered-friends is an educational and enjoyable activity for the entire family that brings beauty and song to our lives.

Benefits of Wild Birds

Birds are great guests to have in your yard, garden or landscape, and they provide more benefits than many homeowners and gardeners realize. Wild birds can…

  • Control insects by feasting on both flying and crawling insects, as well as spiders, slugs, snails and other creepy-crawlies.
  • Pollinate plants by flitting from flower to flower as they seek out insects or eat seeds, taking pollen along between blooms.
  • Manage weeds as they consume copious amounts of weed seeds before the seeds ever have a chance to sprout.
  • Control rodents when raptors visit the yard in search of mice, rats, gophers, voles or other unwanted pests.

Attracting Backyard Birds

Fortunately, it is easy to attract a wide variety of backyard birds when you offer them what they need most – food, water and shelter.

Food for Birds

Wild birds rely on both natural and supplemental food supplies so it is important to consider both when birdscaping. Feeding the birds is most important in the winter when natural food is scarcer, but they will visit feeders at any time of year. Migratory birds require additional food in the spring and fall as they pass through the region and nesting birds will utilize feeders in the summer.

Tips:

  • Provide a variety of natural foods for birds by planting berry bushes, seed-bearing flowers, nectar-rich flowers and sunflowers. Leave windfall fruit on the ground for birds to nibble. Minimize pesticide use so birds can feast on insects as well.
  • Add supplemental feeders to your yard, such as birdseed feeders, suet feeders and nectar feeders. Clean feeders weekly to avoid mold that can be dangerous to birds, and be sure feeders are full when birds need them most.

Water

Improve your backyard bird habitat by adding water. Birds require a constant supply of clean water for drinking and bathing. This is especially important in late summer, when water is scarce, and in the winter, when it is frequently frozen.

Tips:

  • Place bird baths in a protected location safe from predators, and keep the baths filled at all times so a fresh supply of water is constantly available.
  • Scrub off algae as soon as it is appears and thoroughly was the bird bath each week to minimize feces contamination or other messes in the water.
  • Provide motion for greater attraction by using a bubbler, wiggler, dripper or fountain. Birds will see the sparkles of the moving water and will hear the splashes from great distances, so more birds will visit.
  • Use Mosquito Dunks to safely prevent mosquito larvae in warm weather. A clean bird bath with moving water will also harbor fewer insects.
  • Add an outdoor-safe submersible heater to the bath in winter to keep the water liquid instead of frozen, or consider using a fully heated bird bath during the coldest months.

Shelter

It is important to offer safe and comfortable shelter for your wild birds to nurture their young, protect them from predators and shield them from the elements. Planting evergreen trees and shrubs and providing bird houses, along with roosting boxes and pockets, are all beneficial additions to your birdscape.

Tips:

  • Choose both deciduous and evergreen landscaping trees and shrubs to offer birds different types of shelter in all seasons.
  • Minimize pruning to give birds denser, more secure shelter to take advantage of when they feel threatened.
  • Plant in layers and create thicket-like pockets or corridors in your landscape so birds can move around freely without feeling exposed.
  • Supplement the shelter in your yard with good quality bird houses, winter roost boxes or nesting pockets to give birds even more options to stay safe and secure.

When you meet birds’ needs for food, water and shelter, your birdscape will soon be home to a fun and friendly flock of backyard birds.

All About Amaryllis

A bold, flowering bulb, amaryllis is popular for its winter blooming habit and makes a colorful indoor plant as well as a great gift for anyone with a green thumb. But how much do you really know about these familiar flowers?

What Is Amaryllis?

These plants are part of the flowering bulb genus Hippeastrum, which is native to South America, Central America, Mexico and the Caribbean in tropical and subtropical regions. It must be noted that the familiar amaryllis can easily be confused with the genus Amaryllis, which is actually native to southern Africa and is most successful only when grown outdoors. Hippeastrum flowers, on the other hand, thrive indoors and are widely sold as gifts and houseplants in the winter months.

Hippeastrum bulbs range from 2-5 inches in diameter and are relatively fleshy. Each bulb will produce several spear-like, stiff leaves that can reach 12-20 inches long. Along with the foliage, each bulb can produce 1-2 long stems that will yield 2-12 trumpet-shaped flowers with large, triangular petals. The bloom colors range from white, red, orange, salmon, pink and peach to deeper hues of burgundy and purple. Variegated and striped blooms are also popular.

Blooms may last for several weeks, and the foliage can persist long after the blooms die.

Potting and Caring for Amaryllis

Unpotted, dormant bulbs should be stored in a cool (55 degrees Fahrenheit), dark, dry location. Before planting, the bulbs should be brought to room temperature, and the roots can be lightly rehydrated in lukewarm water for an hour or two before planting, but the base of the bulb itself should be kept dry to minimize the risk of rot. While these bulbs will bloom in water – they’re often sold in clear, decorative vases with the roots reaching into water and pebbles used as a planting medium – they will do better when properly planted, which will also encourage reblooming.

The best pot for a single amaryllis bulb will be just an inch wider than the bulb’s diameter, or several bulbs can be planted together in a larger pot for a more dramatic display. Because these flowers grow so tall, however, the pot should be heavy enough to support their size. If necessary, adding several rocks or a layer of gravel to the bottom of the pot before planting will help balance the weight to keep the arrangement stable, and a deeper pot will also provide adequate room for root growth. It may also be necessary to add a stake to support the tall flower stems, but be sure not to damage the bulb when adding a stake to the pot.

Rich potting soil is essential for the best amaryllis blooms, as these bulbs grow vigorously and require adequate nutrition to reach their full potential. When planting a bulb, it should be submerged in the soil up to its neck, but leaving the top quarter of the bulb uncovered. The soil should be tamped firmly to support the bulb. Place the pot in a warm, sunny spot when foliage emerges, and rotate the pot daily as the plant grows taller to ensure straight, upright growth that will better support heavy flowers.

Gently water the bulb until the first stems appear, but take care not to overwater the pot or the bulb and roots may rot. As the plant grows taller and the blooms emerge, more watering will be needed to keep it adequately moisturized.

It may take 7-12 weeks for an amaryllis to bloom, depending on the type and size of bulb, its growing conditions and the care it receives. Larger bulbs that produce more flowers will generally take longer to bloom, while smaller bulbs will have shorter flowers but will bloom more quickly.

After the Bloom

Because these plants are popular every holiday season, many people discard amaryllis bulbs after they have stopped blooming. It is possible, however, to encourage reblooming with the proper care.

After the flowers have faded, deadhead the blooms but leave the foliage intact. Sharp flower-pruning shears are best to avoid tearing the stem or causing it to bend or break. Your Amaryllis should be placed in the sunniest spot available, continue to water as necessary and monthly feeding should ensue. This will encourage leaf production which with photosynthesize adding nourishment to the bulb enabling it to produce flowers again next winter. Move the plant outside once all danger of frost has passed to a sunny location. Continue to water and begin fertilizing every other week.

If you want to control when your amaryllis blooms again, you will need to encourage the bulb to go dormant. This is done by stopping fertilization, allowing the soil to gradually dry out, and reducing sunlight and temperature so leaf production slows and eventually stops. The dormant period will generally last 8-10 weeks, so, if you would like your Amaryllis to bloom for Christmas, mid-August is the time to begin this process. When leaves brown naturally, cut them back, remove the bulb from the dry soil, wrap it in newspaper and store it at around 55 degrees Fahrenheit for 8 to 10 weeks. After this dormant period, repot the bulb in fresh soil and begin watering again. The bulb will start to produce leaves and flowers won’t be far behind. With the proper conditions and care, you can keep your amaryllis blooming for years to come.

Amaryllis flowers are attractive and bold, perfect for brightening any indoor landscape during a cold and dreary winter. By understanding these flowers and their needs, you can provide them with proper care to ensure they always look their best.