Monthly Archives: March 2025

Herbs As Companion Plants

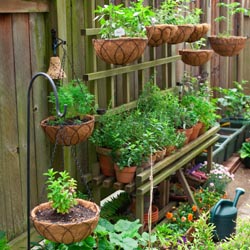
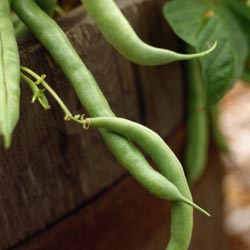
Practiced by organic gardeners for years, companion planting has become very popular for all gardeners. The concept is to plant together species that will benefit each other, to help prevent disease and insect infestation without the use of chemicals. In general, herbs and other aromatic plants like tomatoes, marigolds and onions are helpful in warding off insects. Certain colors, like the orange of nasturtium flowers, are thought to repel flying insects. While these practices have not been scientifically proven, many gardeners have been using them for years with positive results. Try it – and see if it works for you!

Best Companion Herbs

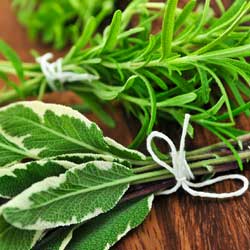
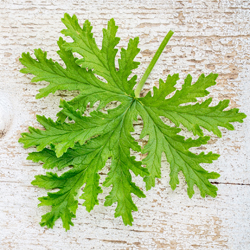
The exact herbs you choose to pair with other plants will depend on what you want to grow and what problems you want to eradicate. The most common herbs and their purported benefits include…

  • Basil – Enhances the growth of tomatoes and peppers. Dislikes rue. Repels flies and mosquitoes.
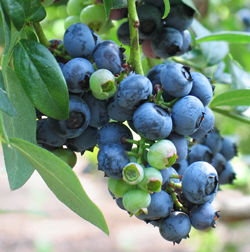
  • Borage – Companion to tomatoes, squash and strawberries. Deters tomato worm.
  • Chamomile – Companion to cabbages and onions. Improves the growth of all garden plants.
  • Chives – Companion to carrots. Deters Japanese beetles, blackspot on roses, scab on apples and mildew on cucurbits.
  • Dill – Improves the growth of lettuce, cabbage and onions. Dislikes carrots.
  • Fennel – Most plants dislike it – avoid using it as a companion herb and instead plant it away from the garden.
  • Garlic – Plant near roses and raspberries. Deters Japanese beetles.
  • Horseradish – Plant at the corners of your potato patch; deters potato bug.
  • Hyssop – Companion to cabbage and grapes. Deters flea beetles and cabbage moths. Dislikes radishes.
  • Marigolds – Plant throughout the garden as they discourage nematodes and other insects.
  • Mints (esp. Spearmint and Peppermint) – Companion to cabbages and tomatoes. Deters aphids, flea beetles and many types of cabbage pests.
  • Nasturtium – Companion to radishes, cabbage and cucurbits. Plant under fruit trees. Deters aphids and squash bugs.
  • Onion – Repels cabbage loopers, potato beetles, carrot flies and imported cabbage moths.
  • Oregano – Improves the growth of beans.
  • Parsley – Enhances the growth of roses. Repels asparagus beetles.
  • Pot Marigold – Companion to tomatoes, but plant elsewhere, too. Deters tomato worm, asparagus beetles and other pests.
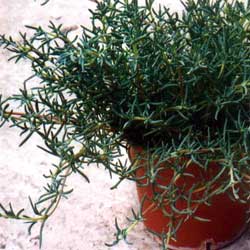
  • Rosemary – Companion to cabbage, bean, carrots and sage. Deters cabbage moth, bean beetles and carrot fly.
  • Rue – Companion to roses and raspberries, dislikes sweet basil. Deters Japanese beetles.
  • Sage – Plant with rosemary, tomatoes, strawberries, cabbage and carrots. Dislikes cucumbers. Deters cabbage moth and carrot fly.
  • Summer Savory – Companion to beans and onions. Deters bean beetles.
  • Tarragon (French) – Enhances the growth of all vegetables.
  • Thyme – Improves the growth of tomatoes, potatoes and eggplant. Repels whiteflies and cabbageworms.
  • Wormwood – Use as a border, keeps animals from the garden.
  • Yarrow – Plant along borders, paths and near aromatic herbs. Enhances production of essential oils. Attracts beneficial insects including ladybugs and predatory wasps.

Exactly how much benefit companion plants give to one another will vary; be sure to choose varieties to group that have similar soil, light, water and fertilization needs. Even if their companion benefits may not pan out, you’re sure to enjoy a more diverse and vibrant garden filled with delicious vegetables and herbs!

herbs_companion_3

herbs_companion_1

herbs_companion_2

Dianthus ‘Firewitch’

Are you looking for new perennials to add to your landscape but are tired of the same old plants with dull blooms, predictable foliage and raggedy forms? Dianthus ‘Firewitch’ can be the answer that will bring unique texture, brilliant color and clean lines to your flowerbeds.

About the Plant

Dianthus plants – also called sweet williams or pinks – are well known in landscaping, but ‘Firewitch’ is even more spectacular than most of these familiar perennials.

Dianthus ‘Firewitch’ (sometimes called cheddar pink) is a low growing, mat-forming plant with evergreen, narrow, bluish-gray foliage with a spikey texture that adds a bold statement to the landscape. Growing 3-4 inches tall, this perennial forms a mature clump at 6-12 inches wide. Brilliant purplish-pink flowers reach 6-8 inches high and cover the plant at bloom time. The petals are also spiked, which gives this plant an even more stunning, sharp appearance.

Described as hot pink, purple red or magenta, the flowers provide a striking contrast with the foliage during peak bloom in early spring. The flowers perfume the air with a spicy, clove-like fragrance that is even more noticeable in large beds or borders. ‘Firewitch’ is also tops in offering a re-bloom throughout the season, bringing brilliant color to the landscape for far longer than many other cultivars, even into mid-summer.

Growing Dianthus ‘Firewitch’

This perennial does best in full sun in well-drained, slightly alkaline soils, and can even thrive in sandy soils and is tolerant of moderate humidity as well as occasional drought conditions. Dianthus ‘Firewitch’ is excellent as a border edger, in a rock garden, planted in wall crevices or as a ground cover on a sunny slope. It is at home in the herb garden, a formal border or a cottage garden, where butterflies will also welcome the beautiful blooms. Because this plant is deer-resistant, it is also a good option for landscapes that may be visited by unwelcome wildlife. Deadheading the plant after blooms fade will help encourage reblooming, and blooms may be produced up to 4-5 weeks in optimal conditions. ‘Firewitch’ is not typically plagued by pests or diseases, but crown rot can be a problem if the plants are too moist or planted in poorly-drained areas.

Low maintenance, easy-to-grow and brilliantly colorful, what’s not to love about Dianthus ‘Firewitch’? Add some to your landscape today and you’ll love the sparkle it brings to your yard!

Dianthus Firewitch

Sweet Peas, the “Queen of Annuals”

For many gardeners, it’s not the tulip or daffodil to forward to at the end of winter, it’s the sweet pea (Lathyrus odoratus) that declares, “spring is here!” The colors and sweet fragrance of these climbers announce the coming of warmer days like no other.

Choosing Sweet Peas

The hardest part of growing sweet peas is choosing from the riot of colors. From the palest of pastels to the most vivid of hues (including stripes), reds, pinks, white, blues, purples, yellows… the list seems endless. Many gardeners buy mixed packages of seeds to avoid the decision and to add a riot of spring color to the garden and landscape.

Beyond color, it is important to carefully consider different types of sweet peas. If the seed package says “tendril” this means the plants have small green growths to attach to a surface or netting to help the vine grow upright. This is how the taller sweet pea vines support themselves as they grow to 6′ (or even taller!), and they will need an appropriate trellis, arbor, arch or other structure to reach their full beauty. The varieties with no tendrils remain more compact, making them great in containers. Some of these will trail downward, creating a beautiful draping effect. Other dwarf non-vining varieties act as annual fillers in the mixed garden bed or as borders.

Growing Sweet Peas

These beauties are super easy to grow. To improve the germination rate, especially of the darker colors, use nail clippers to gently nick the seed coat and soak overnight before planting. This will allow thin shoots to pierce through the thick seed covering more easily so they can grow effectively. Sow the seeds 2″ deep in rich, well-draining soil in a full to partial sun location. If the soil is heavy, add compost to improve the texture and nutrition. Keep the soil moist, but avoid saturated soil that can drown small seeds or delicate roots. Germination should occur within 10-28 days. Continue even and consistent watering. When seedlings are 4-5″ tall, thin them to create 5-6″ spacing between plants. To encourage bushy and compact plants, pinch the tips when three sets of leaves form. Generally, do not provide additional fertilizer, otherwise the plants may be lush but the flowers will be sparse.

Impatient gardeners or those who may have a shorter growing season may also be able to purchase seedlings from a garden center. This way there will be fragrant sweet pea bouquets a month earlier, and there’s no need to miss out on the sweetness if the ideal seed planting date has passed. Removing flowers when transplanting will encourage stronger root growth to produce larger flowers later if desired.

Seeds for perennial sweet peas are also available. Unlike annual sweet peas, the perennial plant will continue to bloom throughout warm, humid summers. Be aware, however, that annual sweet peas tend to have a gloriously heady scent, but this is a feature sorely lacking in the perennial form.

Enjoy the Beauty

Those long-lasting, colorful and fragrant flowers are so sweet in large loose arrangements. They’ll easily last a week if the water is changed daily and a bit of the stem is snipped off each time to improve water uptake. Remember, the best way to extend the sweet pea blooming season is by daily picking early in the day. Or, simply enjoy these beautiful blooms by walking through the garden each day and relaxing in their delicious scent and colorful blooms.

Fall Flowers – Really!

Gardeners who just can’t get enough of annual sweet peas don’t have to mourn their loss in spring. Instead, grow them again in the autumn! These fast-growing flowers will thrive just as well in the cool autumn as they did in the early days of spring. Just remember to provide enough time for flowering before the first frost hits, and you’ll love using sweet peas to say goodbye to the gardening season in fall just as you said hello to them in spring.

Sweet Pea
Sweet Pea
Sweet Pea
Sweet Pea

Dividing Hybrid Hellebores

Hybrid hellebores bring us all sorts of happiness. These are one of the first plants to bloom in the late winter and early spring and are available in flower colors of chartreuse, cream, white, pink, red and deep purple. Hybrid hellebores are also those rare and treasured perennials that provide year-round interest, giving you the most bang for your buck and brightening your landscape in every season. As evergreens, they never lose their luster, and their flower shapes and textures are quite varied for even more interest, with a cultivar to suit any gardener’s taste. What’s not to be happy about?

A Love Divided

To keep these plants healthy and thriving, and to increase your quantity, division is a necessity. It is important to divide these plants carefully, however, or else you risk sadness with fewer blooms, lopsided plants or even losing these gems. Fortunately, it’s possible for even a novice hellebore lover to divide their plants with confidence.

  1. Divide hybrid hellebores in the spring when it is in bloom. This will also let you see how the blooms are positioned on the plant so you can divide shapes appropriately.
  2. Choose a plant that has at least 5 flower stems. Each one represents a division and will give you great new plants to bloom.
  3. Dig your hellebores up with a garden spade by inserting it deeply into the soil around the perimeter of the plant about 6 inches away from the outer stems of the clump. This will keep the root system largely intact and uninjured.
  4. Lift the clump and shake off loose soil or any trapped rocks or ensnared mulch. You can gently loosen clumps with your fingers, but take care not to damage the roots.
  5. With a garden hose, wash away any additional soil from the clump so the plant roots are exposed. This will help them get established in their new location more quickly.
  6. Divide the clump by cutting through the roots with a heavy-duty serrated knife. Make your root cuts where you see obvious natural divisions between the flower stalks.
  7. Replant your divisions at their original depth, in a shady location. Include plenty of compost in the planting hole for good nourishment. Water well and continue to keep soil from drying out until your new plants are well established.

Before you know it, you’ll have many more hybrid hellebores to enjoy! If you have a few too many, be sure to share the happiness by giving them to family members, friends, neighbors and anyone else who can fall in love with these beauties.

Helleborus orientalis

Pre-Emergent Control of Crabgrass

Did you have a crabgrass problem last year? Well, chances are, it’s gonna be even worse this year! Crabgrass is an annual lawn weed that dies once a hard frost hits. The main problem with this pest is the tenacious seed that it leaves behind after it blooms.

Early spring is the season to control crabgrass with a pre-emergent herbicide like Fertilome Crabgrass Preventer Plus Lawn Food or Bonide Weed Beater Complete.

This chemical works by killing the crabgrass seedlings as they germinate. Here’s what you need to do:

  • Apply the pre-emergent as the forsythia is going out of bloom.
  • For newly seeded lawns, wait until you have mowed your lawn three times before applying the herbicide. This will help to avoid killing the new grass.
  • Use a spreader to apply the herbicide uniformly across your lawn.
  • Apply your pre-emergent before a light rain. This will knock the chemical off the grass blades and down to the soil surface where the crabgrass seed is germinating.
  • Do not de-thatch or aerate the lawn after applying the herbicide, as this disruption will break the chemical barrier.
  • Wait two to four months to re-seed the lawn after applying.
  • Repeat this same procedure year after year.
  • Keep you and your lawn safe. Always follow the manufacturers’ instructions.
crabgrass

Pruning Forsythia

Forsythia is a true spring favorite and never disappoints with its shocking yellow blooms atop a mass of unruly branches. This early-flowering shrub can thrive for decades on neglect but there will come a time, whether out of want or necessity, that your forsythia will require pruning. But how can you do so without dampening the ferocious spring flame these spring shrubs produce?

Why Prune Forsythia?

When this shrub does so well without detailed care, why is it necessary to prune it at all? In many landscapes, if the shrub is properly sited, it may not need pruning. Unfortunately, many people underestimate the vigorous growth of these beauties, and in just a few years it may seem crowded and overgrown in a corner, narrow bed or border. A large, unruly forsythia may also seem overwhelming in a smaller space or when paired with less vigorous plants. Damage or illness may also create a misshapen or unbalanced plant that is no longer so pleasing to the eye. In these cases, judicious pruning can rejuvenate and refresh the shrub and give new life to its part of the landscape.

Pruning and Rejuvenating Forsythia

Pruning out of shape and poorly flowering forsythia is simple. After the shrub has finished flowering in late spring, cut all the branches back to within one foot of the ground. When branches put on new growth, reaching two feet from the ground, prune all branch tips to the first set of side shoots. This will help develop a fuller, thicker shrub for a more lush look. Be aware, however, that it will take until the second bloom season for a severely pruned forsythia to return to its former splendor.

A newer forsythia that is just a few years old can be kept in tip-top shape a bit more easily. Each spring, after it flowers, cut up to one-third of the branches back to the ground. Choose dead branches, branches thicker than your thumb and all crossed or inward facing branches. This will help create a good form with healthy air circulation and pleasing growth for years of beauty and enjoyment.

It’s easy to keep forsythia looking stunning for many years. Whether you want to make the most of the forsythia already in your yard or want to add this beauty to your landscape, stop by – our landscaping experts can help you choose the best species for your yard and needs so you can enjoy its beauty for many springs to come.

forsythia-1

Growing Veggies in Containers

Do you dream of a delicious, homegrown harvest but don’t have the land to use? No longer should a shortage of garden space prevent you from growing your own fresh vegetables. As long as you have a sunny location you can have your own mini-farm on your porch, patio, deck, balcony, roof-top or doorstep!

Why Use Containers?

The benefits of growing containerized vegetables go beyond the issue of space. There are plenty of other compelling reasons to plant your veggies in pots, including…

  1. Vegetables are amazingly ornamental and can be just as decorative as any other container plants or flowers.
  2. There are fewer problems with pests such as groundhogs, deer and rabbits and soil borne diseases.
  3. The soil in pots warms up more quickly in the spring allowing for earlier planting and an extended growing season.
  4. Less bending, squatting and kneeling is required for gardeners with limited mobility.

Vegetables can be grown in any vessel that can hold soil, has adequate drainage and is large enough to hold a plant. There are endless options available on the market or you may recycle items that you already have as long as they meet these requirements. Use your imagination – try a wheelbarrow, wine barrel or just a plastic bin, and you’re ready to plant!

Best Vegetables for Containers

While all veggies can be grown in containers, some are better suited than others. Plants that grow particularly large, that sprawl or that must be grown in large numbers to ensure an adequate yield may take more effort and careful site planning with an adequate container. Similarly, vining plants need not be avoided. Trellis these plants up against a wall or fence or allow them to cascade down from a taller pot or a container placed up high like on a stone wall. For smaller selections, a hanging basket or window box may be used. Many sprawling and vining vegetables are now available by seed in dwarf, compact or bush varieties. These are bred specifically for small spaces and containers and are worth seeking out.

Tips for Container Vegetable Gardens

Growing vegetables in containers does take some unique thought and isn’t quite the same as planting in a traditional garden. When planning your delicious container garden, consider…

  • Containers: Size matters when planting in containers. The bigger the container, the more soil it can hold. More soil more and more moisture means less watering. Take note that porous containers like terra cotta dry out more quickly and will therefore require more frequent watering.
  • Soil: Choose a good quality poting soil such as Fox Farm Ocean Forest Soil. Soil from the ground may contain insects or disease or may be too heavy. Add an all-purpose balanced fertilizer at time of planting. It is also good idea to mix water absorbing polymers into the soil. These granules can hold up to 400 times their weight in water and help reduce watering from 30-50 percent.
  • Plants: Some of the vegetables that you select may be directly seeded into your container; these would include peas, beans, radishes and corn. With most vegetables you may wish to transplant seedlings into your container, either home-grown or garden center purchased. You will generally find a wider selection of vegetable varieties and unique options available in seed as opposed to purchased seedlings, if you want to use your containers experimentally.
  • Supports: Supports should be placed at time of planting for large or vining plants. This will ensure the young plants are not disturbed or damaged with supports added at a later time. If the supports are outside the container, however, they can be added only when they are needed.
  • Location: Your vegetables will require at least 6 hours of direct sun a day. If this is not possible you may try placing your pots on dollies or carts and moving them to a sunnier location as the sun moves throughout the day. Note that good air circulation is important for disease control.
  • Watering: Test soil frequently for water to make sure that you keep it evenly moist. Water the soil, not the plants, to avoid the spread of disease. Check soil moisture more frequently during the summer months when evaporation is faster. Mulching your containers with salt hay or grass clippings will help keep soil cool during the summer months and reduce the frequency of watering. If possible, a drip system can be a great option for keeping containers watered.
  • Fertilization:  Fox Farm Ocean Forest Soil contains fertilizer.  However, with frequent watering, fertilizer leaches through pots. Fertilize containerized vegetables at least once a week with  Miracle Gro for Tomatoes and Vegetables, a water soluble fertilizer. Always be careful to follow the directions on the fertilizer package and follow the recommended rate. Too much fertilizer may burn or kill your plants, but too little will result in undernourished, underperforming plants.

With appropriate care that caters to the needs of containers, your small-scale vegetable garden can be just as lush and productive as any larger, more intensive space, and you’ll soon have a bountiful harvest to enjoy.

Veggies in Containers

Basics of Balcony Gardens

Whether you live in an apartment, condominium or townhome, you don’t need to give up on gardening just because you don’t have a conventional yard. Balcony gardens are ideal for urban gardeners and can yield just as bountiful a harvest as any more spacious, ground-level plot.

What Kind of Garden Can You Have?

To ensure good growth, beautiful color and a vigorous harvest, you first need to assess the type of garden you can have based on the microclimate of your specific balcony. The overall space available on your balcony, including room to move around and tend your plants, can restrict some larger plantings. You should also track how much sunlight your balcony receives throughout the day, taking into account any shadows cast by nearby buildings and how the light changes in different seasons. Temperatures, breezes and general climate can all vary from balcony to balcony, even on the same building. Do not rely on local forecasts or general tips, since balcony gardens can be dramatically different from ground-level landscapes and gardens, even if your building is not overly tall.

Balcony-Friendly Plants

Just about any plant you can grow in a standard garden can also be grown in a balcony garden, so long as the climate conditions are appropriate. Herbs, fruits, vegetables and flowers are all popular, and even dwarf trees can thrive on the right balcony. Choose plant types that are intended for containers or small spaces for the best results, and use high quality potting soil and nutritious compost to nourish your garden.

Maximize Your Space

Space is at a premium in any balcony garden, and there are easy ways you can maximize your space for a lush garden. Choose larger containers that can support several plants and group your plants in layers and arrangements that will thrive together so you do not need to crowd your space with too many pots. Think vertically for extra planting space, installing a trellis or green wall to support climbing plants or vines, which will have the added benefit of giving you more privacy from adjacent balconies or close-set buildings. Hanging pots can also add vertical growing space, multiplying the number of plants in your garden. Window boxes designed to rest securely on railings can give you even more planting space, and don’t forget a small pot that can be a centerpiece for a patio table, if you have furniture on your balcony.

Caring for a Balcony Garden

A balcony garden is no more difficult to care for than a traditional garden, but there are tricks to be sure it will thrive. Because you will be planting exclusively in containers, they will need more frequent watering, and they are not likely to get adequate water no matter how much it may rain, since most balconies are covered. Provide plants with proper drainage to minimize the risk of rot, since excess water will not be able to drain away, but take steps to avoid staining the balcony’s floor by using saucers, floor mats or other coverings as needed. Using pot feet or raised stands can also help protect the balcony floor while keeping air circulating around the plants to minimize rot.

Because containerized balcony plants need more frequent watering, they will also need regular fertilizing, as the water gradually washes nutrients out of the limited potting soil. Weekly fertilizing can also help ensure your balcony garden has all the nutrition it needs. Choose fertilizer blends that are specially formulated for your plants for the best results, whether you’re growing herbs, flowers, fruits or vegetables.

Rotating plants regularly can help give them enough sunlight even when corners may be shaded, and it is easy to rotate even the heaviest pots if you place them on rolling stands or casters. This can also help you keep the plants growing evenly and will help you more easily change the arrangements of plants as their needs change or seasonal sunlight patterns shift.

As the seasons change, so will the microclimate of your balcony garden. Change the plants you use each season to keep your garden blooming, or move some plants indoors to prevent excess stress and extend their growing season as much as possible.

You also need to be sure you have the proper tools to care for your balcony garden. Hand tools are best for gently working with containers and tight spaces. Try different tools to find those that fit most comfortably in your hand and are the easiest to control for precise pruning cuts, easy digging and managing the other tasks you will need to keep your garden at its best.

Beautify Your Balcony Garden

Because your balcony is a key part of your living space, you want your garden to be beautiful as well as functional. Opt for colorful pots, but avoid too many mismatched styles and colors that can be overwhelming. Consider adding a wind chime, small tabletop fountain, gazing ball or sun catchers to the space as well. You might even be able to add a small bird feeder to your balcony, inviting wildlife to share your natural space. Nectar feeders are especially popular, and hummingbirds will be welcome visitors to your balcony garden when they also sip from any flowers you’ve planted.

You will also need to keep your balcony garden tidy. Keep plants pruned and trimmed appropriately, removing dead foliage and spent blooms regularly to encourage more growth. Clean up any soil or water spills right away to prevent stains, and keep your tools, fertilizer and other equipment stored safely.

Remember Your Neighbors

Because balconies are found in tight spaces and you likely share walls or railings with neighbors, keep your garden in its place and avoid intruding on your neighbors’ space with water drips, drooping foliage or falling seeds. Consider sharing your harvest with your neighbors – a bundle of fresh, fragrant herbs, a bouquet of homegrown flowers or even some tasty fruits and vegetables can spread goodwill and encourage even more balcony gardening in your community.

A balcony garden can be a remarkable use of space and a great way to add nature into your life, no matter how high up your outdoor space may be.

Balcony Garden
Balcony Garden
Balcony Garden
Balcony Garden
Balcony Garden
Balcony Garden

Scented Geraniums

Unmatched for fragrance and beauty in the garden, scented geraniums are undoubtedly showstoppers. With many to choose from, each with its own distinctive habit and fragrance, scented geraniums are also great for hanging baskets, window boxes or any type of container. Although the colorful flowers are small, the leaves of the scented geranium are the most spectacular part of this unusual herb.

A Bouquet of Scents

Scented geraniums come in a wide range of distinctive aromas. Some of the most popular varieties include…

  • Rose Geranium: This cultivar has spicy rose-scented foliage with small clusters of pink flowers among the dark green leaves.
  • Peppermint Geranium: This is a fast growing geranium that spreads to a 4-6 foot mound with clusters of white flowers appearing in summer. Leaves are lobed and medium green. This is a particularly good one for hanging baskets.
  • Lime Geranium: This geranium shows off beautiful lavender flowers in summer and its leaves are serrated, round and light green. These can become quite bushy.
  • Apple Geranium: Apple-scented geranium is another good one for a hanging basket. Clusters of white flowers appear on trailing stems and leaves are round and ruffled.
  • Lemon Geranium: This geranium has tiny purplish flowers and small wrinkled leaves. This one features a nice clean lemon scent that freshens a room quickly.
  • Coconut Geranium: This plant has a trailing habit that works nicely as a ground cover or in a hanging basket. Its flowers are in small clusters and its leaves are round and dark green.

Other popular scented geraniums include chocolate, nutmeg, orange, apricot and almond.

Growing Tips

Scented geraniums are not particular about soil, as long as it is drained – they do not tolerate wet roots well. These plants enjoy full sun and cool climates, with partial shade in warm areas. Pinching off end leaves will encourage bushiness to help keep a fuller, more compact form.

The leaves can be harvested any time and used fresh or dried.

Harvesting and Use

One of the real joys of scented geraniums is harvesting the leaves and using their fragrance in a variety of ways. The leaves can be harvested at any time, and they may be used fresh or dried, though the fragrance may change somewhat or its potency may change as it is dried. Experiment with both fresh and dried leaves to find the aromas you like best.

Scented geraniums can be used in some jellies, puddings, stuffing, punches, teas and vinegars. The oils in leaves are often distilled to make perfume, and the leaves make a sweet addition to sachets and potpourris. No matter how you use them, or even if you simply enjoy them in the garden, these lovely plants are sure to be a welcome addition to your garden and landscaping.

Scented Geranium

What is “pH?” Why Is It Important?

Devised in 1909, the pH scale measures the concentration of hydrogen ions in a solution. The scale ranges from 0-14. Pure water is “neutral” and has a pH of 7, midway between 0 and 14. If a solution has a low concentration of hydrogen ions, the rating will be a higher number and is considered basic or alkaline. Likewise, a high concentration of hydrogen ions rates a lower number and is considered acidic.

What pH Means to Your Garden

There are four important reasons to monitor your soil’s pH level:

  1. pH affects the availability of other nutrients in the soil. If the nutrients are not available because they are chemically bound to something else, plants can’t use that nutrient.
  2. A high or low pH level in the soil allows some plant diseases to multiply more quickly, infecting an entire landscape or garden.
  3. Most organisms living in the soil have pH preferences. For example, earthworms are not as plentiful in acidic soil.
  4. Most plants have specific pH requirements to flourish. Those specific requirements are what the plants need to absorb nutrients more efficiently and resist pests more effectively.

Where Soil pH Occurs

Acidic soil generally occurs in heavy rainfall areas, as the rain will pull acidic compounds from the air and allow them to leach into the soil. Alkaline soil, then, is more common where there is less rain. However, this is just a generalization and neighbors across the street from each other may have a large pH difference. Reasons could include the origin of topsoil brought in, the tillage done in the area and prior occupants’ gardening habits. Even simple changes like how drain spouts are positioned or a watering schedule can impact pH.

The pH Your Plants Need

In Indiana, most plants will grow well in the neutral zone of 6.4-7.0. However, some plants grow best in specific soil pH conditions. By knowing the pH, you may choose the best plants for your site. You may also decide to amend your soil to increase or decrease the pH to grow a wider variety of plants.

We offer several inexpensive and easy-to-use pH test kits. We also offer amendment advice and can help you choose the best plants for your soil’s condition. Stop in for pH help today and we’ll help you make the most of the natural acidity or alkalinity of your soil, or else help you turn that soil into just the pH you desire!

Soil pH
Soil pH
Soil pH
Soil pH