Monthly Archives: May 2025

Wild About Window Boxes

Window boxes can be an amazing addition to your home landscape, and they’re much more flexible and versatile than many gardeners realize. Take advantage of this great space and you’ll soon be wild about window boxes!

Choosing a Window Box

There are many types of window boxes available, from classic rectangles to wire frames with coir or sphagnum moss inserts. Wood and plastic boxes are also available, and they can be half-circles, have rounded ends on a longer box or may even be smaller boxes with pointed bottoms, a cone shape, suitable for just one or two favorite plants. While most window boxes are designed to be mounted beneath a window, they can also be positioned on a fence, deck railing or even a sunny patch of wall to add more beauty and growing space.

When choosing the best window box for your home, coordinate with the architecture of your house for a smooth, elegant look. Ideally, the box should be the same length as the window or just slightly shorter, but not so short that it looks out of place or unbalanced.

Window boxes come in a variety of popular or neutral colors, and some boxes can be painted to match your house’s window trim or siding exactly. When mounting the box, be sure it is securely supported so it will not tip or fall. Larger, heavier boxes may need additional brackets underneath to support the weight of a full box, taking into account not just the weight of the box itself, but also of the soil, water and mature plants.

Plants for Window Boxes

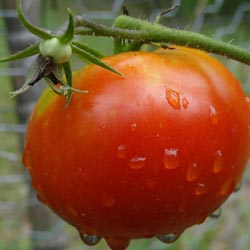
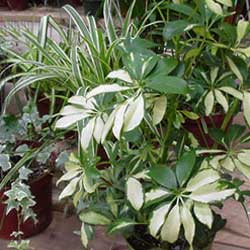
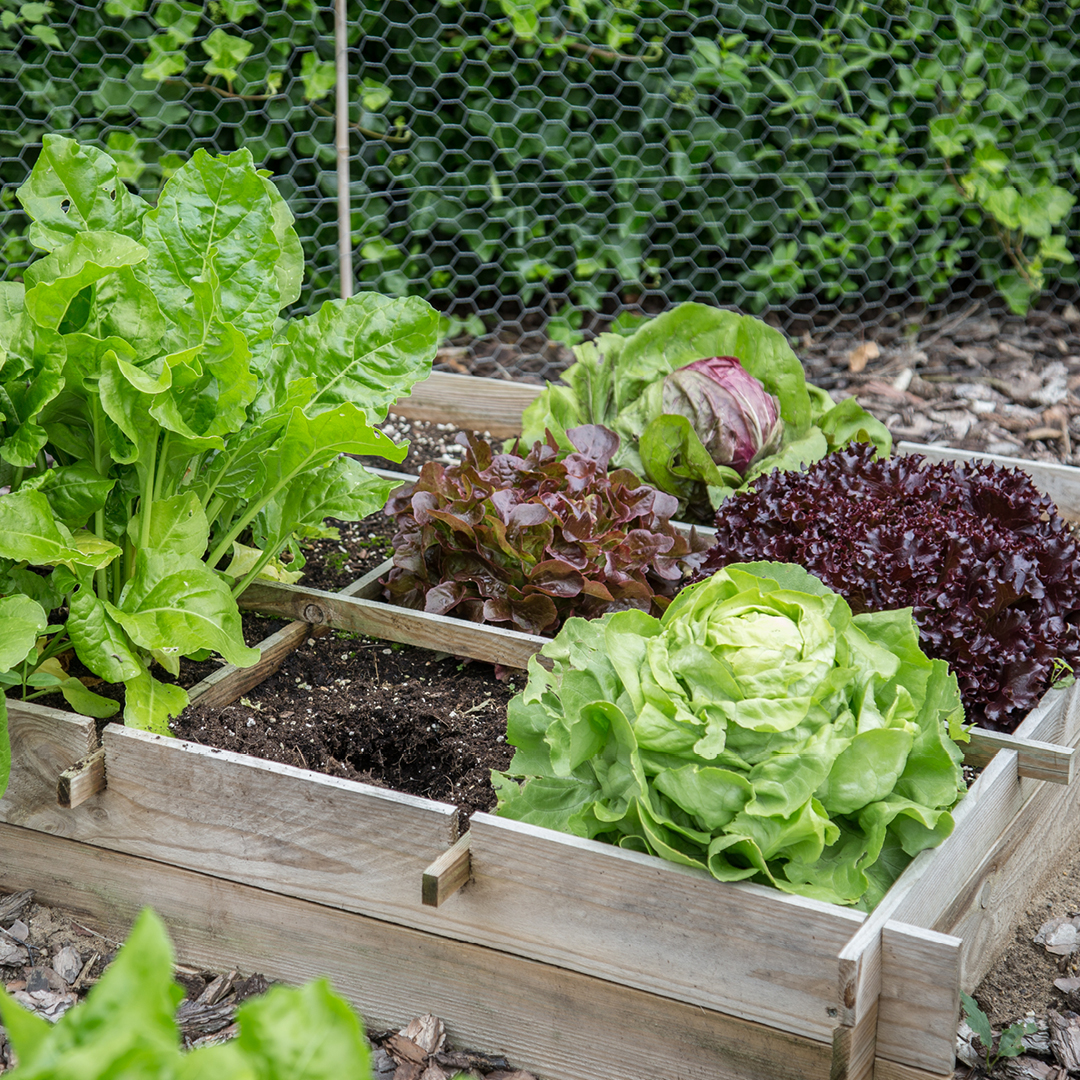
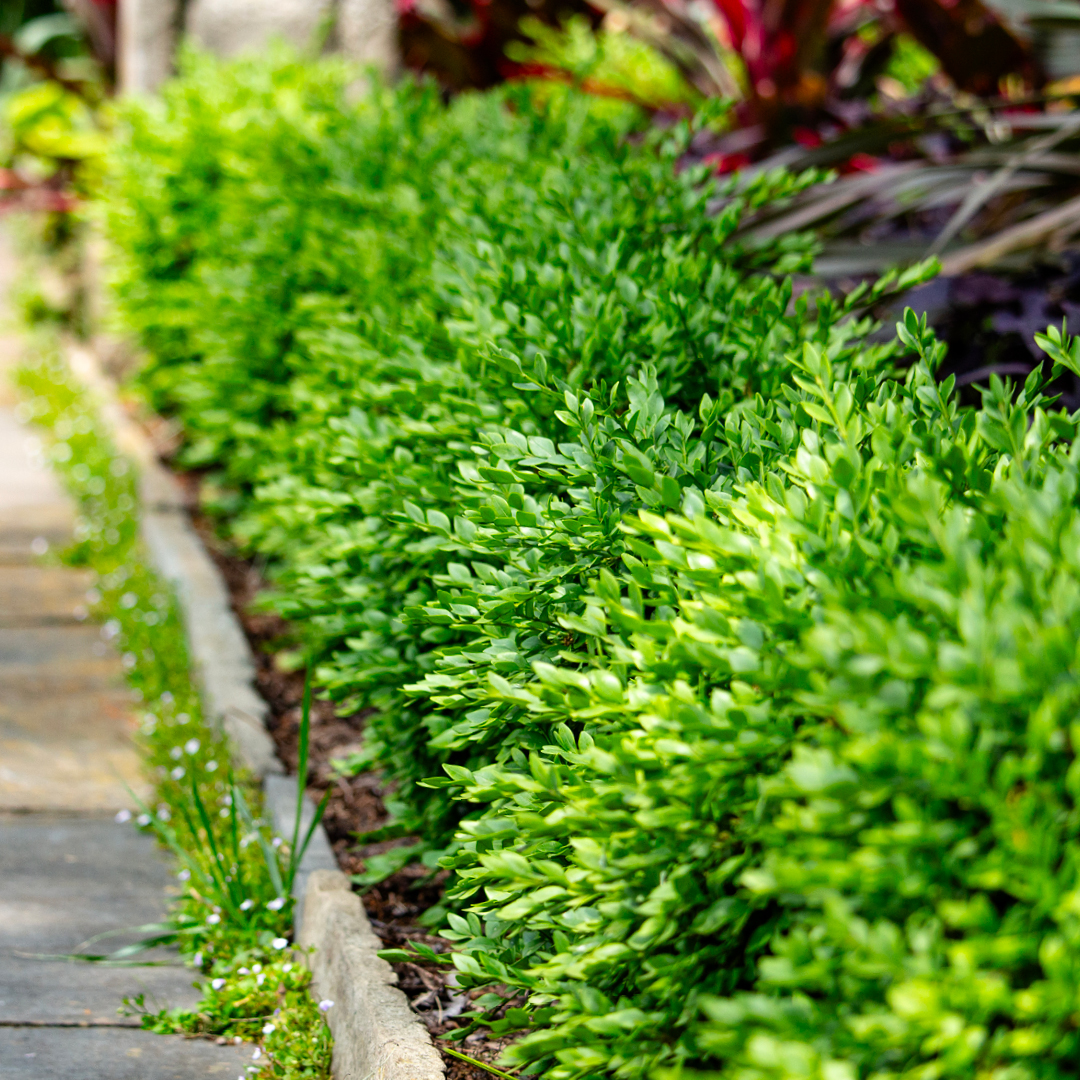
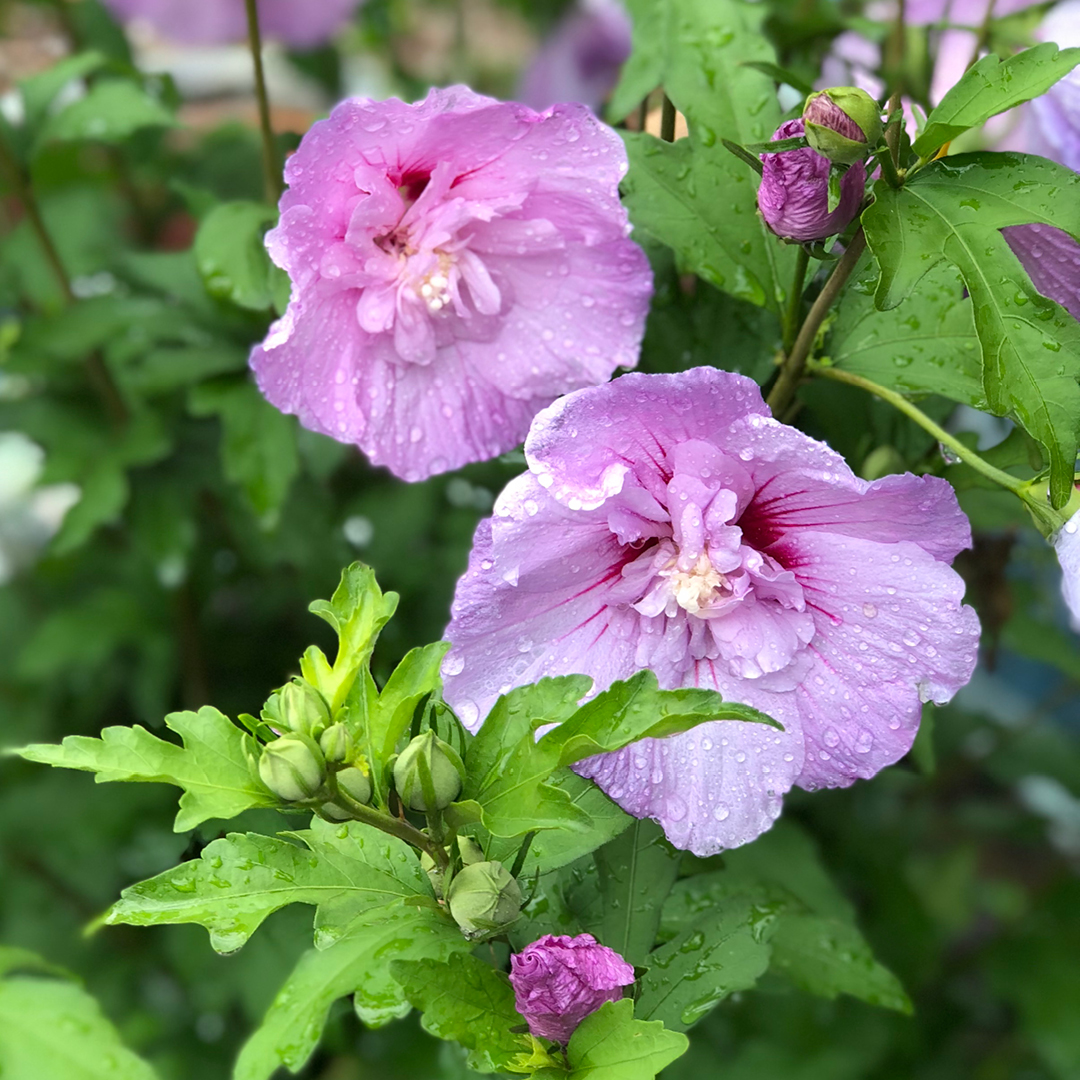
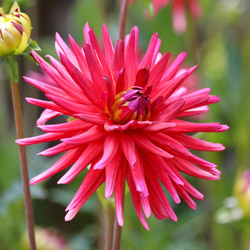
Any plants that are comfortable in small or medium-sized containers can thrive in window boxes. You may want to opt for flowers for a colorful accent to your home, or choose herbs, berries or even lettuce for a kitchen window box that will be easy to harvest. Small ornamental grasses and spreading ferns or spider plants are ideal choices for a green window box.

No matter what plants you choose, be sure they are suitable for the climate of the window box. Consider the amount of sun the box receives and when it may be shadowed throughout the day. Also note that window boxes against walls or fences, as opposed to boxes on railings, will receive more heat if the wall is dark in color. If the wall is white, it will reflect more light onto the plants.  Take not of overhanging roofs that will prevent rain from reaching your window box. Supplemental water will be a necessity in this case.

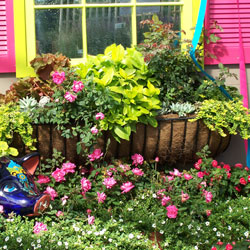
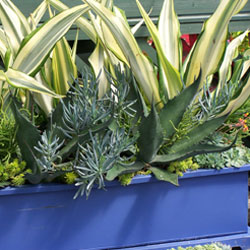
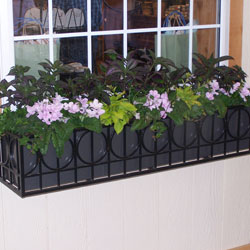
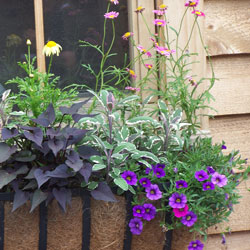
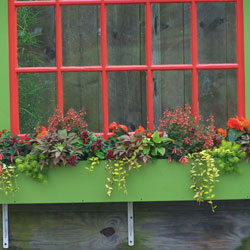
You can use just one type of plant in a window box for a bold statement, or you may prefer a mixed container that combines textures, shapes and color for a more dramatic look. Consider mounding plants that will easily be seen above the edge of the box, or trailing varieties that will gracefully drape over the box and soften any harsh edges. Symmetry and balance can be important in window boxes, so be sure to envision how the plants will look when mature so the entire arrangement will complement your home and other nearby landscaping.

Best Window Box Care

Just like any container, window boxes require unique care to allow plants to reach their full potential. Fortunately, if you mount a window box outside a window that can be opened, it’s easy to open the window for watering, weeding and pruning as needed. Use a rich potting soil that will provide abundant nutrition for the plants, and fertilize as needed for the type of plants you’re growing. A nitrogen-rich fertilizer is best for leafy plants and dramatic foliage, while a fertilizer that is heavier in potassium will encourage brighter blooms and more flowering.

Because window boxes are containers, they will need more frequent watering, even daily or twice a day depending on the climate and how thirsty the plants may be. To make watering less of a chore, consider using automatic waterers such as watering bulb that will keep your window box properly hydrated. When you water by hand, a small watering can with a thin spout is best, as you’ll be able to get water directly to the soil without wasting precious water on plant foliage where it will do no good and has the potential to burn delicate foliage in a sunny situation.

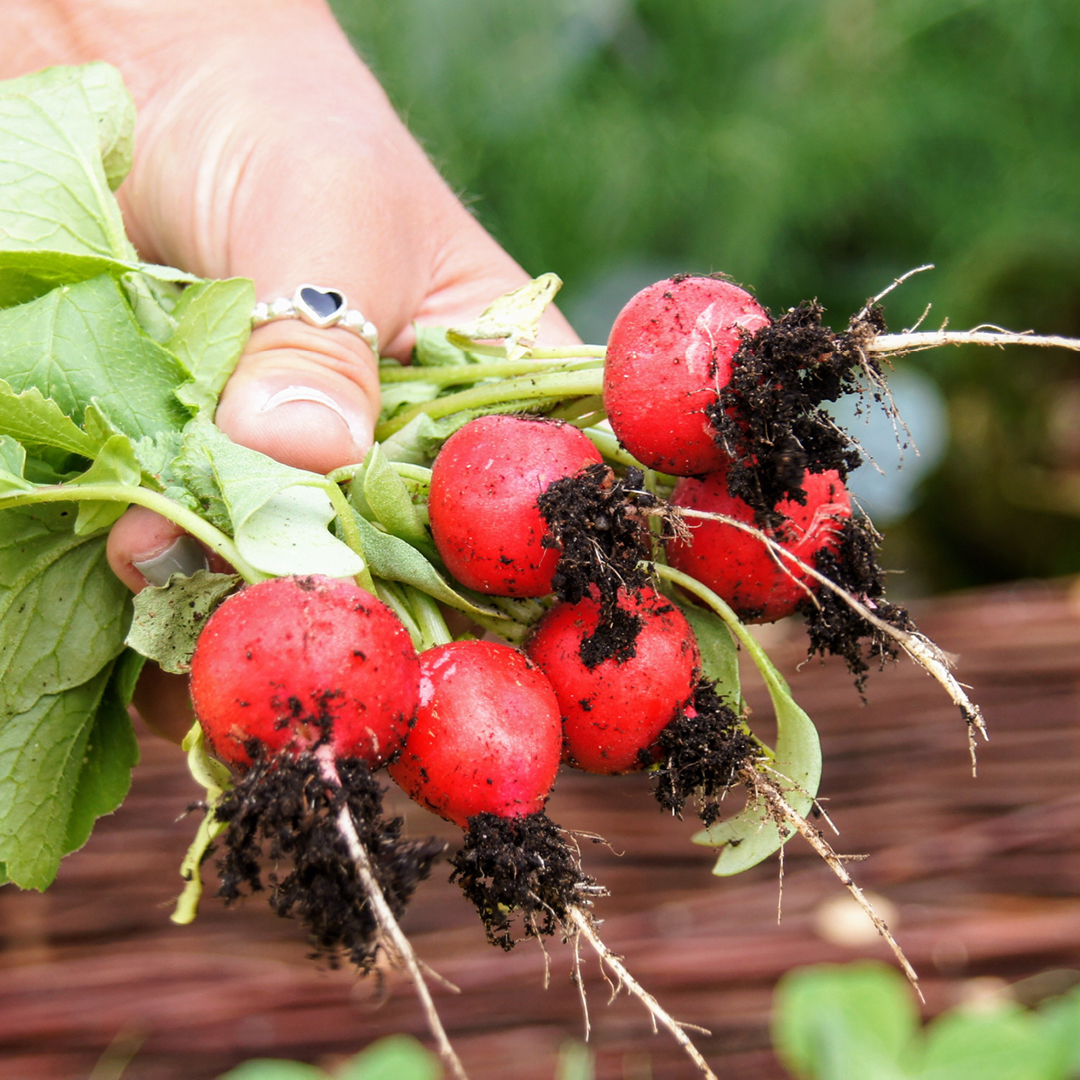
When tending window boxes, use small, hand-sized tools that won’t disrupt other plants in the crowded space. Thinning or pruning the plants regularly will help encourage new growth to keep the plants lush and the box full. If you’ve planted an edible window box with herbs or veggies, harvesting when the plants are ready will provide richer flavors and spur new growth to lengthen the growing season and increase the plants’ yield.

Decorating a Window Box

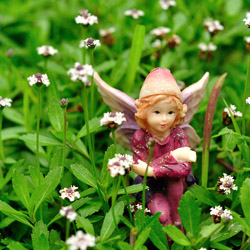
While the plants in your box may be decoration enough, a window box can also be a great space to add extra decorative flair to your home. The box itself can be wrapped with a ribbon to add more color or coordinate with the current holiday. Decorative plant stakes or small garden flags provide bright accents that can be switched out with different seasons and holidays. You might even create a small fairy garden in a window box, with a quirky gnome or other whimsical figure peeking out from the fun foliage. In winter, pine boughs can be layered in the box for ongoing greenery along with colored or natural branches, and a small strand of lights can even be strung along the box for a glittering twinkle. If you prefer to light your box up year-round, you might even carefully place a solar plant stake or two in the box to highlight the arrangement.

Window boxes are far more than just small planting containers – they can be beautiful accents to your home, an extension to your growing space and even a spot for fun whimsy in your yard. You can make them into whatever you like – don’t be afraid to go wild!


Clematis

Beautiful, showy clematis are not as difficult to grow as you might think. Learning when to prune your clematis and giving a little attention to their few requirements will reward you with a magnificent show of colorful blooms.

Planting Clematis

A beautiful clematis starts with proper planting. Clematis prefer to have their roots in the shade and their tops in the sun. Keep the roots cool with a well-drained rich soil with added compost, peat moss or composted manure and a good layer of mulch. Planting ground cover or other low growing perennials around the base of your clematis will also help to keep the soil cool and minimize weed growth. Organic amendments will help to retain moisture when added to the soil. Feed monthly with a liquid fertilizer or use a slow release fertilizer which can last for up to six months.

A Note About Bloom Rates

For the first few years, clematis may be slow to grow. Just keep in mind that it is establishing its root system, which is essential to a healthy, vibrant plant. In its first year, your clematis may produce very few flowers or even none at all. By the second year there will be more growth and a few flowers. By the third year you should see substantial growth and many lovely blooms.

Planting Clematis

For the best chance of success if you are new to gardening with clematis, buy plants in larger containers. While smaller starts will be less expensive to buy, they will take a little more work to establish and can be more delicate and prone to failure. If you purchase a pot of any size and are not planting it in the ground immediately, be sure not to allow the soil in the container to dry out or the plant may be overly stressed and vulnerable.

Keep the climbing habit of clematis in mind when selecting your planting site. Allow your plants to grow up into large shrubs and trees, or on a trellis against a sunny wall. Select varieties with growth that will not exceed your shrub or trellis; a 20-foot vine may overwhelm a smaller shrub or a weak trellis and will look overgrown and out of place.

Proper Pruning

Clematis are divided into three distinctive groups. Knowing what group your clematis falls under will guide you on when and how to prune.

These pruning suggestions are for established vines that have been in the ground for at least three years. Young vines should all be pruned to 12 inches the second spring and to 18 inches the third spring. This helps to develop more shoots, a fuller vine and a better root system.

  • Group 1
    This group includes certain species clematis and their cultivars which bloom early in the year. Some of the more familiar representatives of this group include the Montanas, varieties of C. alpina and C. macropetala. All of the Group 1 clematis bloom on growth made the previous year. They can be pruned to keep them within their allotted space or to remove dead and unsightly foliage. If they are pruned late in the season or before they flower, however, the cuts may remove potential flower buds and reduce that year’s flowering. To prevent this, prune Group 1 clematis right after flowering.
  • Group 2
    These are the large flowered hybrids. They are often divided again into two subgroups – 2a and 2b. All of the clematis in Group 2 bloom on ‘old wood’ (actually on short shoots from old wood) and should not be pruned except for deadwood pruning in early spring after the leaf buds open slightly.
  • Group 3
    These are the summer-blooming varieties such as the viticellas and Jackmanii types that bloom on new wood and the late bloomers such as Sweet Autumn Clematis (C. terniflora) and orientalis types. Clematis in Group 3 mainly flower on new wood produced in the current year and should be pruned back severely every year in late winter, when they are completely dormant, to about 12-14 inches. Leave at least two pairs of buds on each stem of the plant. Most clematis in this group are very fast growing and will reach their full height before blooming every summer.

Once you know how to properly care for clematis, you will find it to be a welcome addition to your landscape. If you aren’t sure just what your clematis needs to thrive, our expert staff will be glad to help be sure you and your plants have a great relationship!


Watering Tomato Plants

Proper watering plays a significant role in producing a healthy tomato plant with tasty, meaty, juicy fruit. So, what’s the secret, and how can you be sure you are watering your tomatoes the right way?

Watering Location

Always water tomatoes at the root zone; never overhead water your tomato plant. Watering directly at the soil level will strengthen the plant’s root system and ensure the maximum amount of moisture reaches the roots. When you overhead water, much of the water will not make it to the roots as it evaporates before reaching the soil. Water droplets on plant leaves act as a magnifying glass and can burn tender plant tissue, damaging foliage that is essential to keep the plant healthy. Water dripping from leaf to leaf can also spread disease, infecting an entire crop. To be sure tomatoes are not being watered inappropriately, keep plants out of reach of lawn sprinkler systems or other inadvertent watering.

Watering Speed

Slow watering is essential to properly distribute moisture to a tomato plant. Allow the water to drip slowly into the soil, giving the plant roots time to absorb the moisture. A drip system is best and will also help with water conservation. Avoid using a hand held hose, as it is easy to either underwater or overwater using this method. Water to a depth of 8 inches to ensure all roots have access to adequate moisture. You can also use a watering reservoir, such as a gallon jug with several small holes in its bottom, to slowly and carefully water the plants without flooding the root zone.

Watering Frequency

A regular watering schedule is essential for the healthiest, most productive tomato plants. Water consistently to produce larger fruits and to avoid split and cracked fruit and blossom end rot. Tomato plants should be watered 2-3 times a week in the height of summer or when natural rain is lacking. A deep soaking rain counts and supplemental watering should be adjusted whenever Mother Nature lends a hand with watering chores. The top inch or two of soil should dry out between watering to be sure the plant is not getting too much moisture.

Watering Adjustments

There are several times when it may be necessary to adjust where, when and how much you water your tomatoes. Changes in local rainfall – increasing spring or summer rains, a sudden storm, an unexpected drought – can require changes in supplemental watering to keep the moisture to your tomatoes consistent. As plants grow and more fruit appears, more water may be needed to meet the plant’s watering needs and keep it lush and healthy.

By understanding the basics of watering tomatoes, you can keep your plants well hydrated without risk of either overwatering or underwatering, both of which could be disastrous for your tomato crop.

Let Me Out! Moving Houseplants Outside for the Season

Are your house plants looking a little peaked after a long winter of being cooped-up inside? Getting out for some fresh air during the warm months is healthy for all living things, including your potted plants. It is important to move plants safely and thoughtfully, however, or else you risk shock and damage that can destroy your carefully cultivated houseplants. With the right steps, you can move your houseplants to outdoor accommodations for the spring and summer while still protecting them from unfavorable conditions, pests and wildlife.

Tips for Moving Houseplants Outdoors

When you are ready to move your houseplants outside…

  • Wait until there is no longer any danger of freezing or frost before setting houseplants outside.
  • Before you place plants outdoors, acclimate them to the spring temperatures. Set them outside for short periods of time and bring them inside at night.
  • Over a period of two weeks, lengthen the plants’ outdoor exposure time gradually. Continue to bring plants inside at night if temperatures are not consistently above 55 degrees Fahrenheit.
  • Do not place plants directly in the sun or else the leaves may burn.
  • Set plants on pot feet or a suitable plant stand to prevent sow bugs.
  • Arrange plants in groups for increased humidity, being careful to promote good air circulation within the foliage.
  • Check soil often for moisture levels, as warmer days and breezes may dry pots out more quickly.
  • Empty saucers of excess water to prevent root rot and minimize standing water that will attract biting insects.
  • While away on vacation, use a self-regulating plant watering system.
  • Mulch the surface of the soil to retain moisture and keep weed seeds from invading the soil.
  • Keep squirrels from digging in pots by placing a layer of crushed oyster shells or chicken wire on top of the soil.
  • Use a slow-release fertilizer to save you time and energy on frequent fertilizing. Or, use a water soluble fertilizer every other week. Follow the manufacturer’s instructions so as not to burn tender plant roots.
  • Groom plants by clipping off damaged stems, yellow leaves and spent flowers. This will also improve air circulation and sunlight reach.
  • Trellis or stake plants that get too tall to prevent them from flopping over.

As they enjoy their time outdoors, you’ll see healthier, more robust houseplants with plentiful new growth and vigor. Why not give all your plants a great spring and summer getaway by moving them outdoors?

Square Foot Gardening

Square foot gardening is a highly efficient method that maximizes space, minimizes waste, and simplifies the gardening process. Mel Bartholomew popularized it in his book “Square Foot Gardening,” which was first published in 1981. Since then, it has gained widespread acclaim for its simplicity and productivity. Still widely used and as popular as ever, allow us to give you some insight into this resourceful and fun form of gardening.

The What and Why of Square Foot Gardening

Square foot gardening is a method of intensive gardening that utilizes space by dividing a garden bed into small, manageable squares. Each square foot section is carefully planned and planted with specific crops, allowing for efficient use of space and resources. This technique emphasizes close spacing, weed control, and soil conservation, making it an ideal option for urban spaces or anyone looking to grow a lot in a limited area. Here are some of the many benefits of square foot gardening.

Space Efficiency

Traditional row gardening can be space-intensive and inefficient. Square foot gardening optimizes space by growing plants in a grid layout, allowing you to grow more in less space.

Weed and Pest Control

With square foot gardening, the close spacing between plants helps to naturally suppress weeds by shading the soil and minimizing open space where weeds can take root. Additionally, it’s easier to spot and manage pests in a small, densely planted area.

Water Conservation

By concentrating plants in small, defined areas, square foot gardening reduces water waste by minimizing runoff and evaporation. This makes it an environmentally friendly option, especially in drought-prone areas.

Accessibility

Raised square foot garden beds are typically elevated off the ground, making them more accessible for individuals with mobility issues. Their size, no wider than 4 feet, also makes it easier to reach across, reducing the need for bending and kneeling.

Simplicity and Manageability

Square foot gardening is easy to learn and requires minimal upkeep. Its structured layout makes for efficient use of time and resources.

Steps to Start and Grow a Thriving Square Foot Garden

The first and most important consideration when beginning a square foot garden is its size. It should be manageable and easily accessible from all sides. A width of around 4 feet is often recommended to ensure you can reach the garden’s center without stepping on the soil or plants. In addition to width recommendations, the overall size of your square foot garden can vary based on factors such as space availability, personal preference, and maintenance considerations. Start with a size that fits your needs and gardening goals, and don’t hesitate to adjust or expand your garden as you gain experience and discover what works best for you.

After considering the size, the following list will help you establish your first-ever square foot garden.

  • Prepare
    Build or purchase a raised garden bed. Fill it with a high-quality soil mix containing equal parts of compost, peat moss, and vermiculite or perlite, or simply look for an already prepared, high-quality raised bed soil mix.
  • Divide
    Using a grid system, divide the surface of your garden bed into square foot sections. You can mark these sections using string, wooden slats, or other suitable material.
  • Plan
    Plan your planting arrangement, keeping plants with similar growing requirements together to simplify watering and maintenance. For example, place all lettuce squares together, all herb squares together, etc. Vertical space is exploitable growing space. Utilize trellises, cages, or stakes for vining crops like tomatoes, cucumbers, or pole beans to maximize vertical growing space. Plan for succession planting by staggering plantings of quick-maturing crops throughout the growing season. This ensures a continuous harvest and maximizes garden productivity.
  • Plant
    Each square foot section can accommodate a certain number of plants, depending on their size. Consult an online square foot planting guide to determine the appropriate spacing for each type of vegetable or herb. For example, a single tomato plant may occupy one square foot, while several smaller plants like lettuce or carrots can be planted more densely. Don’t forget to tag your plants. Use labels and plant markers to identify each square foot section and keep track of what you’ve planted. We’ve provided a beginner’s growing guide below.
  • Maintain
    Regular maintenance tasks include watering, weeding, and fertilizing as needed. Since square foot gardens are typically smaller, these tasks are more manageable and require less time and effort than traditional gardens.

Also worthy of consideration:

  • Succession Planting
    As you harvest crops throughout the season, replant empty squares with new crops to maximize your garden’s productivity. Succession planting ensures a continuous harvest and keeps your garden thriving throughout the growing season.
  • Crop Rotation
    Rotate crops within your square foot garden yearly to prevent soil nutrient depletion and minimize pest and disease problems. This involves planting different types of crops in each square foot section to maintain soil health and balance.
  • Season Extension
    Consider using techniques such as row covers, cold frames, or hoop houses to extend the growing season and protect your crops from frost. This will allow you to enjoy fresh produce for a longer period.

Beginner’s Growing Guide: Easy Plants for the Square Foot Garden

For beginners starting with square foot gardening, it’s best to begin with easy-to-grow and versatile vegetables and herbs. Here’s a list of beginner-friendly plants and a simple layout to get started:

Lettuce: Varieties like leaf lettuce or butterhead lettuce are quick-growing and can be harvested multiple times throughout the season. Plant 4 plants per square foot, spacing them about 6 inches apart in a grid pattern.

Spinach: This nutrient-rich green is cold-hardy and can be harvested multiple times as baby greens or allowed to mature. Plant 9 spinach plants per square foot, spacing them about 4 inches apart in a grid pattern.

Radishes: Fast-growing and low-maintenance, radishes are perfect for beginners and add a peppery crunch to salads and snacks. Sow radish seeds thinly across the square foot section, allowing about 16 plants per square foot.

Carrots: Choose smaller varieties like ‘Thumbelina’ or ‘Paris Market.’ These are best for compact spaces. Carrots thrive in loose, well-drained soil. Sow carrot seeds thinly across the square foot section, aiming for about 16 plants per square foot. Thin out seedlings to ensure proper spacing as they grow.

Cherry Tomatoes: Compact varieties like ‘Patio’ or ‘Tiny Tim’ are well-suited for small spaces. Plant 1 cherry tomato plant per square foot. Support the plant as it grows using a cage or trellis.

Green Beans: Bush varieties of green beans are easy to grow and produce abundant yields. Pole beans are grown vertically to save space. Plant 9 bush bean plants per square foot, spacing them about 4 inches apart in a grid pattern. Plant 4 pole bean plants per square foot. Provide a trellis or support structure for the beans to climb as they grow. Space the plants evenly within the square foot section, allowing them enough room to spread out and climb the support structure without overcrowding.

Herbs: Basil, parsley, cilantro, and chives are among the easiest herbs to grow and are versatile in the kitchen. Plant 4 herb plants per square foot, ensuring they have enough space to grow and flourish.

Square foot gardening offers a practical and efficient way to grow a variety of vegetables and herbs in a limited space. As you gain confidence and experience with this gardening method, you can experiment with a wider variety of crops to suit your taste and perhaps even expand your growing space. These principles will assist you in creating a thriving garden that provides bountiful harvests year after year.

Be sure to come into the store and chat with Melanie, our expert on square gardening.  She will be glad to get your started!


Enhance Your Garden with A Hedge Border

As avid gardeners, we tend to focus on individual plants’ colorful blooms and lush foliage: that specimen tree, the rare perennial, or the colorful flowering shrub. However, there’s one often-overlooked garden feature that can significantly enhance the beauty, functionality, and biodiversity of your outdoor space: the hedge. Hedges are not just for grand estates or formal gardens; they can be a valuable addition to any size property, adding structure, privacy, and habitat for wildlife. Here’s why you should consider planting hedges in your home garden:

Definition and Structure

Hedges may be short or tall and provide a sense of definition and structure to your garden. They can delineate boundaries, create outdoor rooms, or frame specific areas within your garden. By defining spaces, hedges add visual interest and help organize the landscape, making your garden feel more cohesive and intentional.

Privacy and Screening

In an era where outdoor living spaces are becoming increasingly important, hedges offer natural privacy and screening from neighboring properties or busy streets. Unlike fences or walls, hedges soften the landscape and create a green barrier that not only provides privacy but also absorbs noise and reduces pollution. Whether enjoying a morning coffee on the patio or hosting a backyard barbecue, hedges can create a secluded retreat right in your own backyard.

Wildlife Habitat

Hedges act as valuable wildlife habitats, providing food, shelter, and nesting sites for birds, insects, and other small creatures. Native species such as hawthorn, holly, and viburnum are particularly beneficial, offering berries for birds and nectar for pollinators. By planting a diverse mix of native shrubs, you can attract a variety of wildlife to your garden, creating a thriving ecosystem right outside your door.

Seasonal Interest

Many hedge plants offer year-round interest, with evergreen species providing structure and color even in the depths of winter. Deciduous hedges, on the other hand, provide a changing tapestry of foliage, flowers, and berries throughout the seasons. The traditional, formal monoculture hedge still has a place in the landscape; however, a mixed hedge allows you to select a combination of plants with varying textures, colors, and bloom times. The mixed hedge can provide visual interest and beauty year-round.

Low Maintenance

Once established, carefully selected species are generally low-maintenance, requiring minimal pruning and care compared to many other garden plants. Regular trimming will help maintain the desired shape and density, but beyond that, most hedges are relatively self-sufficient.

Plant Selection

Creating a mixed hedge border is like composing a beautiful symphony of flowers, foliage, fruit, and such, with each plant playing its own unique role. We’ve provided some guidance on selecting and arranging plants for a harmonious mixed hedge border, incorporating short, medium, and tall plants to achieve a pleasant balance.

Before diving into plant selection, consider the purpose of your hedge. Are you looking for privacy, wind protection, or a garden structure, or are you simply looking to add aesthetic appeal? Knowing your purpose will help you choose the right plants for your hedge. It is best to first lay your design out on paper. This will ensure that you have enough room for your desired selections.

Also, while in the planning stages, consider factors such as sunlight and soil. Choose species well-suited to your climate and growing conditions, and aim for a mix of plants to maximize biodiversity and resilience. Consider incorporating fruiting and flowering species to attract pollinators and beneficial insects.

Medium Plants (3 to 6 feet)

Medium-sized plants form the middle layer of the hedge, adding depth and texture. They provide a transition between the shorter and taller plants, and this is where many flowering species may be incorporated.

  • Spirea (Spiraea spp.)
  • Viburnum (Viburnum spp.)
  • Forsythia (Forsythia spp.)
  • Mock Orange (Philadelphus coronarius)
  • Potentilla (Potentilla fruticosa)
  • Weigela (Weigela florida)
  • Rose of Sharon (Hibiscus syriacus)
  • Dogwood (Cornus spp.)

Tall Plants (Over 6 feet)

Tall plants are positioned at the back of the hedge border, providing structure, height, and a backdrop for the garden.

  • Arborvitae (Thuja occidentalis)
  • Elderberry (Sambucus spp.)
  • Summersweet Clethra (Clethra alnifolia)
  • Tall Fescue Grass (Festuca arundinacea)
  • Red Twig Dogwood (Cornus sericea)

Hedges are a versatile and valuable addition to the home landscape, offering beauty, function, and ecological benefits in equal measure. Whether you’re looking to create privacy, attract wildlife, or add structure to your landscape, planting a hedge is a worthwhile choice. So why wait? Get out there and start planning and planting your hedge today, and watch as your garden transforms into a vibrant and biodiverse oasis for both you and your local wildlife to enjoy.


Great Gifts for Mom

Spring is the perfect gardening season and as Mother’s Day approaches right at the height of spring, why not celebrate Mom with a gardening gift? The garden center is packed with great gifts for Mom that are ideal for Mother’s Day, birthdays, or any occasion to tell Mom just how much she means and how appreciated she is.

Garden Center Gifts for Mom

There are many gift ideas that can come from the garden center. When choosing the best gift for Mom, consider her preferences, needs, and favorites to find a gift that suits her gardening style. The most popular gift ideas include…

  • Tools – Help Mom make the most of her gardening with all the best tools to get the job done. Smaller hand tools that will be more comfortable in her hand are a great choice, or choose ergonomic tools for a more comfortable grip. Is Mom a lefty? Choose left-handed tools that will be more efficient for her to use.
  • Signs – Mom has always been welcoming, so why not extend that hospitality into the garden with a welcoming sign? Personalized wooden signs can declare the space as “Mom’s Garden” or can be customized with her name or initials. Fun garden flags are another option to add a greeting to the garden’s entrance.
  • Fairies – Help Mom add a whimsical touch to her garden or containers with fairy accents. Small props such as charming houses, sweet little swings, quirky toadstools, and other decorations can be a fun addition to a garden of any size, from simple containers to a more extensive plot. Garden gnomes can also be a fun choice.
  • Plants – Give Mom something new to grow with a gift of seeds, bulbs, or seedlings. Choose her favorites or splurge on a new exotic variety she’s always wanted to try. If spring hasn’t quite sprung, you can also opt for houseplants or indoor garden options such as herbs to let her enjoy her green thumb even in poor weather.
  • Feeders – Let Mom welcome wildlife into her gardening space with a feeder for feathered guests. Hummingbird feeders are especially popular, as well as oriole feeders. Regular birdseed feeders can also be a great choice for the Mom who welcomes all sorts of visitors and may not mind a bit of spilled seed in her garden.
  • Houses – Another way Mom can welcome wildlife into the garden is by providing suitable homes for guests. Bird houses, bat houses, bee houses, toad shelters, and butterfly houses are all great options that can not only give Mom joy when she sees new residents move in, but they are beneficial to the garden with pest control and pollination.
  • Stepping Stones – Add a personalized touch to Mom’s garden with a homemade stepping stone that includes the names of children, grandchildren, or pets. Handprint or pawprint kits are other meaningful choices, and the stones can be decorated with colored pebbles, embedded jewels, and other creative accents.
  • Containers – If Mom has trouble containing her excitement for gardening, new containers can help expand her gardening space. Choose colorful pots, stackable gardening systems, hanging pots, or wall containers for more space. If Mom has a bit of trouble getting down to the dirt, an elevated planter can be a perfect gift.
  • Décor – Add a bit of flair to Mom’s garden with a decorative gift such as a gazing ball, whimsical statue, wind chimes, or wind socks. Decorations can even have a practical side if you choose a barometer, rain gauge, plant identification stakes, bird bath, or other gift ideas that bring both beauty and functionality to the garden

The Best Gift of All

The very best gardening gift you can give Mom is just to appreciate her and her garden. Compliment the beauty of her flowerbeds or the tastiness of her herbs and vegetables, or admire how she manages to bring a plant back from the brink or coax a bigger harvest from a smaller plant. Better still, offer to help in the garden with less enjoyable chores or just spend time with Mom and all she loves about gardening. That time will become a memory you can both enjoy, and will be a gift not just for Mom, but for you as well.


Our Favorite Edible Flowers

Flowers are more than just the beautiful beds, colorful borders, or attractive containers that make up your garden and landscape. Edible flowers can also be surprising and delicious accents to a wide variety of tasty dishes. But which flowers are safe to eat, and how can you add blooms to your culinary creations?

Edible Flower Safety

Before consuming any flowers, it is essential that you properly verify the bloom’s identity. Some flowers can look very similar to one another, and though they may look alike, each bloom isn’t necessarily safe to eat. If you cannot be positive on the flower’s identity, it is safest to skip the snack and simply enjoy the flower’s beauty instead of its taste.

Identifying flowers is easier if you only use blooms you have grown yourself from a well-known source, such as heirloom seeds or your own cuttings from familiar flowers.

Choose only organically grown flowers for edible delights, avoiding blooms that may have been treated with pesticides, insecticides, or other chemicals. As with identification, this is easiest to do if you’ve grown the flowers yourself and know exactly how they’ve been cultivated. When harvesting blooms for cooking and eating, use clean pruners or clippers reserved just for edible flowers to prevent any cross-contamination from other plants in your garden. Choose only the healthiest blooms, without any signs of spotting, pests, and disease.

Before eating any flowers, wash them carefully in fresh, clean water and allow them to air dry. It is safest to only eat the petals of flowers, which is where the best flavor will be concentrated, unless you know for certain that other parts of the plant are edible.

Delicious Edible Flowers to Try

Many familiar flower varieties are edible. The most popular and tastiest options include…

  • Allium – These colorful blooms have a mild oniony flavor that goes well with savory dishes but take care not to use too much or the taste can be overwhelming.
  • Dandelion – More often considered a weed than a desirable flower, dandelions have a sweet, honey-like taste when young, but grow bitter as the blooms mature.
  • Daylily – While the white base of these flowers is strongly bitter, the rest of the petals have a mild vegetal taste similar to asparagus or zucchini.
  • Hibiscus – A compelling combination of tart and sweet, hibiscus has a tantalizing flavor similar to cranberries. Some blooms also have citrus notes.
  • Lavender – A potent flavoring choice, lavender gives dishes a floral note with hints reminiscent of rosemary or mint. This flower should be used sparingly as it could overpower a dish.
  • Marigold – A range of tastes are found in marigolds, from peppery to tangy to spicy. Experiment with different cultivars to find your favorite flavor.
  • Nasturtium – All parts of nasturtiums are edible, and they impart a peppery or spicy flavor to dishes, similar to radishes.
  • Rose – Rose flavors vary based on cultivar, soil conditions, and care. Flavors range from sweet or spicy notes to fruity tones similar to strawberries or green apples.
  • Sorrel – These blooms have a very strong, lemony flavor that adds a punch of citrus to any dish but can easily become overwhelming. Use sorrel sparingly for the best effect.
  • Violet – Along with pansies and violas, these flowers have a sweeter taste with grassy notes, and may have a somewhat mint-like flavor as well.

Tips for Using Edible Flowers

No matter which tastes you prefer, there are many different ways to incorporate edible flowers into your favorite dishes. More savory tastes, such as flowers with spicy, peppery, or vegetable-like notes, can be great in salads, sauces, and stews, either incorporated into the dish or used as a finishing garnish. Some potent tastes are also delicious when infused into drinks, such as adding flowers to tea, lemonade, or even champagne for a unique flavor. Flower petals can even be frozen in ice cubes for a whimsical accent.

For more floral or fruity flavors, flowers can be delicious garnishes for salads, cakes, and cookies. Petals can be sprinkled over desserts, or whole blooms or larger petals can be sugared for a glittering accent on a decadent treat. A single flower makes a beautiful statement on a cupcake, or can be a tasty accent on a mousse, sherbet, or sorbet.

When you first start trying edible flowers, use them sparingly until you are accustomed to their flavors and can adjust your recipes to your tastes. It’s easy to enjoy delicious blooms in all your favorite recipes, bringing beauty to the plate and palate just as flowers can bring beauty to your landscape.


A Guide to Home-Grown Blackberries

Transform your garden into a sanctuary of sweetness with home-grown blackberries. Picture plucking ripe, juicy berries straight from the vine, indulging in their unmatched flavor while reaping their nutritional benefits. With minimal maintenance, these resilient plants provide a convenient, sustainable source of delicious fruit, fostering a deeper connection with nature and promoting a healthy lifestyle through gardening and proper nutrition.

Blackberry Dictionary

Some terms used in blackberry cultivation are not immediately understood by the home gardener. Our blackberry dictionary is meant to help you better understand these words to support your blackberry selection and cultivation efforts.

Cane: Refers to the long, woody stems that emerge from the crown of a blackberry plant. Canes can be either primocanes or floricanes, depending on their age and stage of growth.

Floricane: Refers to the second-year canes or shoots of a blackberry plant that have already borne fruit. Floricanes typically produce flowers and fruit in the current growing season.

Hardiness: A plant’s ability to withstand cold temperatures.

Primocane: Refers to the first-year canes or shoots that emerge from the crown of a blackberry plant. Primocanes typically do not produce fruit in their first year but develop fruiting laterals that bear fruit in the subsequent year.

Suckers: Adventitious shoots that emerge from the base of a blackberry plant, often arising from the roots or crown. Suckers can contribute to the spread of blackberry plants but may need to be managed to prevent overcrowding.

Thornless: This term describes blackberry varieties that lack thorns or have greatly reduced thorniness, making them easier to handle and harvest compared to thorny varieties.

Tipping: Tipping is pruning or removing the terminal portion of primocanes to encourage lateral branching and increase fruiting potential. It can help improve fruit yield and quality in some blackberry varieties.

Trellis: A support structure consisting of posts, wires, or other materials used to support and train blackberry canes for better growth, airflow, and ease of harvest.

These terms are commonly used in blackberry cultivation and can help growers better understand the practices and techniques involved in successfully growing blackberries.

Planting and Care Tips

Now that you’re familiar with blackberry terms and recommended varieties for your climate, it’s time to get planting! Follow these tips for successful growth and abundant harvests:

Site Selection
Choose a sunny location with well-drained soil for planting blackberries. Avoid low-lying areas prone to frost or poor drainage, as these can hinder plant growth.

Soil Preparation
Before planting, amend the soil with organic matter such as compost or aged manure to improve drainage and fertility. For optimal blackberry growth, aim for a slightly acidic soil pH of 5.5 to 6.5.

Planting Technique
Space blackberry plants 3-4 feet apart in rows, ensuring adequate airflow and room for growth. Plant them at the same depth as they were in their nursery containers, and water thoroughly after planting to settle the soil.

Pruning and Training
Blackberries require regular pruning to remove old canes and promote new growth. In late winter or early spring, prune out any dead or diseased canes, as well as any weak or overcrowded growth. Train the remaining canes onto a trellis or support system to encourage upright growth and easier harvesting.

Watering and Fertilizing
Keep blackberry plants consistently moist, especially during hot summer months. Apply a balanced fertilizer in early spring before new growth emerges, top-dress with compost, and add a layer of mulch to retain soil moisture and suppress weeds.

Harvesting and Enjoying
Blackberry plants typically begin bearing fruit in their second year and reach peak production by their third year. Harvest ripe berries when they easily detach from the stem with a gentle tug, usually from mid to late summer. Enjoy your freshly picked blackberries straight from the vine, or incorporate them into delicious recipes such as jams, pies, or smoothies.

Try adding blackberries to your fruiting favorites list this year. Not only are blackberries considered a superfood, loaded with vitamins, minerals, fiber, and antioxidants, but they are also easy and enjoyable to grow.