Monthly Archives: June 2025

Heavenly Hosta

Hostas are amazing plants, truly glorious with heavenly foliage that is stunning as a specimen or in mass plantings. The thin spikes of purple or white, trumpet shaped flowers appear for several weeks in the summer and are an added benefit to this divine perennial. But how much do you know about hostas, and which can you add to your landscape?

Phenomenal Foliage

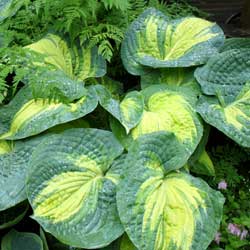
Hostas are praised by many for their magnificent variety of leaf sizes, colors and textures. These angels will grace your garden with heart-shaped, lance-shaped, oval or nearly round leaves, and leaf sizes vary as well. Smooth, quilted or puckered textures, with either a matte or glossy sheen, add to the glory and hostas’ radiant glow.

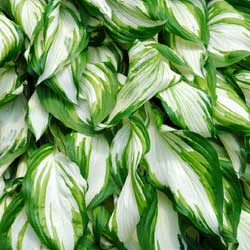
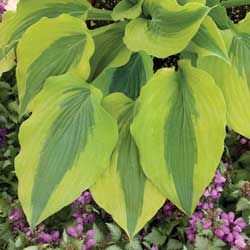
The leaf margins can be either smooth or wavy and range in color from light to dark green. Foliage colors also include chartreuse, gray and blue, depending on the cultivar. Variegated hostas with cream, white or yellow margins will radiate in a dark area of your garden.

Where to Plant Hostas

While most hostas are shade worshippers, some types will tolerate sun, depending on the overall climate and moisture levels. Hostas remain attractive from spring until frost and can withstand a wide range of growing conditions.

As choice groundcovers or single specimens in the landscape, hostas are certainly divine. Some hostas are quite unusual and rare and may increase in value each year, especially as the plants thrive and can be divided and transplanted with ease.

Best Hosta Care

Little maintenance is required to care for hostas. Cut off old flower stalks after flowers have faded. Divide plants occasionally to increase their quantity. Keep an eye out for pests, especially slugs and snails that munch on the foliage.

Types of Hostas

With so many selections and varieties, you can find a hosta the will fit into almost any garden situation. The most popular options include…

  • Dwarf & Small Hostas: In addition to being planted in secret little pockets throughout your garden or next to paths, dwarf and small hostas can be used in difficult places. Plant them among tree roots, on a slope or terrace or in rocky places containing little soil.
  • Edger Hostas: These hostas are 12” or less in height and have more horizontal growth. They are able to control weeds as they leave no light, when well established, or room for weeds to grow.
  • Groundcover Hostas: This group of hostas grows to 18” or less in height. They do a great job in areas difficult to weed or maintain. If you are in need of a hosta for use as a groundcover, keep in mind it works great to plant spring-flowering bulbs among them. The hosta comes up after the show of flowers and covers the fading foliage of the bulbs.
  • Background Hostas: Selections from this group grow to 24” or taller at maturity. They can be used to increase privacy where you sit and relax or to provide definition to your property line as a unique hedge.
  • Specimen Hostas: Specimens may be any size. Choose a site close to where the plant will be viewed so that every detail (texture, color pattern, buds, flowers and fragrance) may be enjoyed.

Not sure which hosta is right for you? Come in today and let our landscape and garden experts help you choose the right heavenly hosta to add a bit of the divine to your yard!
Hosta

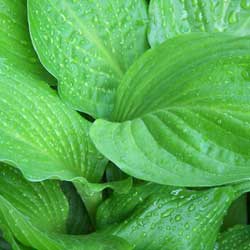
Close water droplets on Hosta

Brother Stefan Hosta

Hosta Undulata

Growing Exotic Citrus

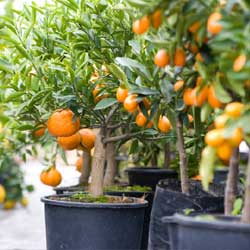
Citrus trees grown in fancy terra cotta pots, light-weight decorative containers or wooden planters can be used to adorn your garden, no matter how small it is. Use a potted citrus as a centerpiece for an herb garden, place several in a series on your steps or decorate your deck with these grand-looking accent plants. Dark, glossy green leaves look beautiful all season long while colorful, healthy fruit dangles enticingly from the branches. Although citrus plants are not winter hardy in the north, they may be moved indoors during this time. For added pleasure, citrus offers weeks of fragrant flowers in the spring.

Citrus Care

Place citrus plants in a sunny location where they will receive a minimum of 6 hours of sun to ensure the best possible fruit. Water regularly and feed with Espoma Citrus-tone as directed per package. During the summer months, citrus plants will produce a lot of new growth. In the early fall, before bringing plants indoors, prune citrus plants back about 1/8 of their existing size. This will help to minimize the shock that plants often experience when being moved. Use a humidity tray indoors or mist daily. Avoid placing your plant in a drafty area or by a heating vent. Provide a minimum of 6-8 hours of daily sun or very bright light in the winter months. It may be necessary to supplement with an artificial light source at this time of the year to keep the plant at its best.

It may seem unusual to have strange citrus trees in your yard or even right inside your home, but with a little care, you’ll be amazed at how much fun these plants can be to grow, and their sweet fruit is a wonderful reward for your efforts.

Potted Citrus Plants

Vegetable Garden Weed Control

You may want to grow many different things in your vegetable garden, but weeds probably aren’t on your favorite edibles list. Weeding can be an enormous time-drain and is one of the the least liked gardening chores. What’s wonderful is that we have so many weed control methods to choose from; there’s a solution for every type of gardener and their schedule.

Safe Control Methods in Edible Gardens

When it comes to vegetable gardening, many gardeners are very particular about what goes into their soil and onto their plants, as it will eventually end up on their plates and in their bodies. Here are some indisputable safe and effective ways to control weeds, without chemicals, in your veggie or any other garden for that matter.

  • Apply corn gluten meal to prevent weed seeds from germinating (don’t use if direct seeding your garden as all seeds will be affected).
  • Plan your garden to crowd edible plants together, effectively crowding out weeds because there isn’t space left for them to grow.
  • Manually pull weeds when the soil is wet and roots are looser. This can be done after a natural rainfall or after supplemental watering.
  • Hoe when the soil is dry to break apart weeds and damage their roots. Pick up larger weeds after hoeing so they cannot reestablish themselves.
  • Mulch with salt hay which contains no weed seeds. The hay will shield weed seeds from the sunlight and moisture they need for germinating.
  • Lay biodegradable and compostable mulch film down to create a firm barrier to keep weeds out or to prevent existing weed seeds from germinating.
  • Attract seed-loving birds such as finches and sparrows, which will happily eat hundreds of weed seeds each day for natural control.
  • Consider raised beds or container gardening to more effectively control weeds and make any remaining weeding easier.
  • Use fire (with all appropriate safety precautions) to burn out unwanted weeds, especially in pathway areas or along garden borders.
  • Treat exposed weeds with boiling water – the hotter the better – to cook and kill them. Several treatments may be needed for the best effects.

Weeds can be some of our worst enemies in the garden, and it is impossible to eliminate every single weed all the time. By using multiple methods and keeping on top of the task, however, it is possible to minimize weeds and make this chore less onerous, without resorting to harsh chemicals.

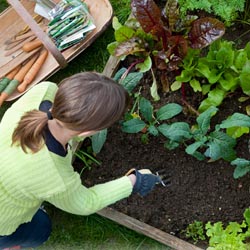
Veggie Weed Control

Summer Sizzles With Crocosmia

There is an excellent assortment of bulbs available for planting this time of year that promise a bounty of summer blooms. The thing is, many of these bulbs are not winter hardy. This can create a predicament for gardeners anxious for easy summer flowers but short on time and space to dig and store tender bulbs. Crocosmia can be the answer.

Introducing Crocosmia

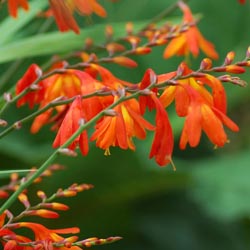
Native to South Africa, Crocosmia – also known as montbretia, coppertips or falling stars – sizzles all summer long in colors of yellow, orange and red. The numerous small florets are tubular in shape and borne along a long, gracefully arching stem rising above sword-like foliage. Together, this formidable combination creates exotic elegance sure to be a showstopper in the garden or landscape. Hummingbirds and butterflies also find it irresistible when in bloom, and the fall seedpods are delectable for many seed-loving finches and sparrows.

Planting Crocosmia

Plant Crocosmia corms now, while they are available. Plant them in well-drained soil in full sun, 2-3 inches deep and 8-10 inches apart. A south-facing location is best, or in colder regions, add Crocosmia next to a wall that will help warm the soil. The pointy side of the bulb should be facing up. Place a handful of bone meal in the planting hole and water the soil well when done planting. These are drought-tolerant flowers, but supplemental water will still be welcome in extremely dry conditions.

Crocosmia look best when planted en masse. A grouping on either side of a sunny entrance way can be stunning, and they look equally fetching when tucked into the perennial border. This plant performs well in containers and makes an excellent cut flower – in fact, cutting the flowers will encourage even more beautiful blooms to form.

Blooms will first appear in May or June and will continue blooming throughout the summer. Flower spikes can stretch 2-3 feet tall, adding a bold burst of color to the landscape. Even without the flowers, the blade-like foliage is attractive, and some cultivars show pleats or rippling for more textural interest.

After flowers have finished blooming, simply snip off the faded flower stalks. Leave the foliage to fade naturally as you would with any other bulb. These leaves continue to produce food to provide nourishment for next year’s flowers. Leaves may be cut back to the ground once they are completely yellow, and a thick layer of mulch should be added for winter protection. Once established, these bulbs are winter-hardy and will return year after year to heat up the spring and summer with their gorgeous colors and forms.

Crocosmia

Worrisome Weeds

Gardeners spend hours carefully cultivating their favorite plants, whether they are delicious veggies, flavorful herbs, sweet fruits, stunning flowers or luxurious grasses. It hardly seems fair that unwanted weeds barge in and take advantage of all that work, and seem to sprout up without any effort. Fortunately, there are many ways to control weeds without losing your mind or your garden to their influence.

Stopped Before They Start

The easiest way to stop weeds from invading your lawn and garden is preventing them in the first place. Proper practices can discourage weeds from growing. Helpful tips to achieve a beautiful, weed-free lawn and garden include…

  • Buy only high quality, certified grass seed and select a variety that is best suited for the amount of sunlight and traffic expected in the area, as well as its ability to withstand drought, insects and disease. The healthier the lawn is, the less room there will be for invading weeds to use.
  • Avoid light, frequent watering or overwatering. Plants that receive deep, infrequent watering generate extensive root systems. Strong roots foster thick, hearty plants and lawns that withstand stress, preventing invasions from pests, weeds and disease.
  • Fertilize your lawn and garden on a regular basis. Be sure to first test your soil to determine its pH and add any soil amendments necessary to ensure ideal growing conditions. This will help keep your turf, garden and plants healthy so they crowd out any unwelcome weeds.
  • Always cut lawns at the proper mowing height. Never cut off more than 1/3 of the grass blade at one time. Keep mower blades sharp to avoid tearing plant leaves. Scalping or mowing too closely will stress your lawn, while weeds thrive under these conditions. A dense, healthy, vigorous lawn will resist the intrusion of weeds.
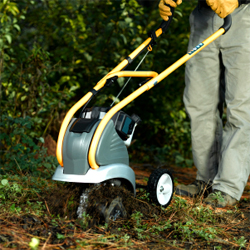
  • Properly cultivate lawns and gardens. By routinely tilling flower beds and aerating lawns, you reduce compaction and thatch. This allows air, water and nutrients to flow freely through the soil, making them more available to plants. Healthier plants will grow more vigorously, taking room and nutrients away from weeds.
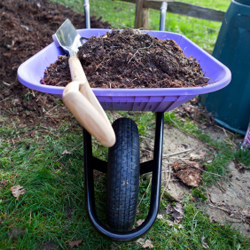
  • Densely plant and generously mulch flowers, trees and ornamentals. By eliminating space and sunlight, weeds won’t have the needed room or nutrients to gain a foothold in beds and gardens. Always be careful mulch does not come in contact with plant stems and trunks as this can create areas of excessive moisture where fungus and disease problems can arise.
  • Plant ground cover or landscape hard to grow areas. If weeds are a persistent problem and you have difficulty growing grass in certain areas of your yard, consider alternative plants or decorative material such as landscape rock or other hardscaping.
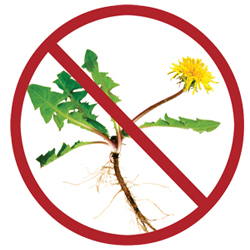
  • Stop weeds before they can seed or develop extensive root structures. Remove existing weeds by pulling or hoeing them or use an all-purpose weed killer of your choice. Then apply Preen, corn gluten or similar pre-emergent controls to prevent new weeds from germinating.

Weeds may be a problem in any landscape, lawn or garden, but the more steps you take to eliminate them, the more successful your efforts will be and the fewer weeds you’ll see.

Attracting Hummingbirds

It is an awesome sight to capture a glimpse of a ruby-throated hummingbird hovering over the flower garden on a sunny summer morning. One or two a year may be seen seeking food in the landscape, sampling everything in their path. Unfortunately, they leave as rapidly as they arrive. This season, attract more of these miniature avian anomalies and keep them returning year after year.

What Hummingbirds Want

You can charm hummingbirds to your yard with a selection of their favorite nectar-producing flowers. Hummingbirds are not attracted by scent but by color. Red happens to be their favorite, however, pink, purple, blue, orange and yellow will also catch their eye. Tubular flowers accommodate these birds’ long, narrow bills. Select a wide variety of plants that bloom at different times to keep hummers well fed all season long. Refrain from using insecticides when attracting hummingbirds, as they rely on insects for protein in their diets – especially during the summer nesting season when young hummers need extra protein for healthy growth.

Hanging a feeder is another way to encourage these visitors. Choose one with red parts to resemble the flowers that they prefer. Fill the feeder with a mixture of one part sugar to four parts hot water to help the sugar dissolve. Fill the feeders after the mixture has cooled. Easier yet, fill with instant nectar purchased at our store. Clean feeders every 2-3 days early and late in the season, and daily in hot weather.

Plants That Attract Hummingbirds

The easiest way to keep hummingbirds fed without the hassle of refilling and cleaning feeders is to provide a lush landscape filled with their favorite flowers. Fortunately, that’s easy to do because these birds will sample nectar from a wide variety of blooms. No matter what your yard size, soil type, sun exposure or moisture levels, there are plants you can add to the landscape to entice hungry hummers to stop for a snack.

Annuals

  • Four-O-Clocks
  • Fuchsia
  • Geraniums
  • Impatiens
  •  Sage
  • Nasturtium
  • Petunia
  • Pineapple Sage
  • Red Salvia
  • Zinnia

Bulbs

  • Canna
  • Gladiolus

Perennials & Biennials

  • Bugleweed
  • Bee Balm
  • Beard Tongue
  • Cardinal Flower
  • Columbine
  • Coral Bells
  • Daylily
  • Delphinium
  • Gaura
  • Hollyhocks
  • Hosta
  • Phlox
  • Spiked Gayfeather
  • Lily
  • Rose Mallow
  • Russell Hybrid Lupine

Vines

  • Candy Corn
  • Morning Glory

Shrubs

  • Butterfly Bush
  • Glossy Abelia
  • Lilac
  • Weigela

Fun Hummingbird Facts

Why not learn a little more about these fascinating birds? The more you know about their amazing abilities and unique characteristics, the more you’ll appreciate having them visit your yard!

  •  Hummingbirds are the smallest birds in the world.
  • There are over 340 species of hummingbirds and they are found only in the western hemisphere. Most species are found in the tropics.
  • Hummers can hover as well as fly straight up and down, sideways, backwards and even upside down.
  • Hummingbirds beat their wings about 75 times per second.
  • They can drink eight times their body weight and consume about 500 insects daily.

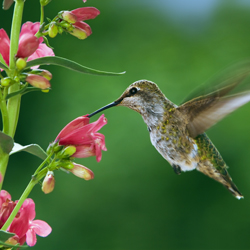
Hummingbird and flowers
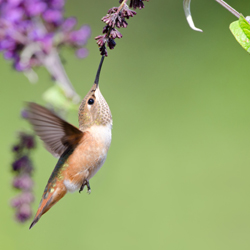
Hummingbird
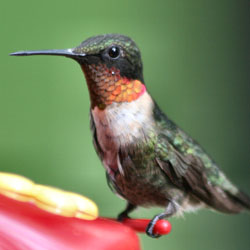
Hummingbird perched on Hummingbird Feeder

Raising Root Crops

Root crops are among the easiest vegetables to grow, and often the first and last vegetables in the garden to mature. Your garden may produce enough vegetables to take you through the entire year and, if kept correctly, root crops will last a long time in storage. These vegetables are great to grow, even in a small space. Many root crops are frost tolerant and with most, the tops, or greens, are also edible.

What Root Crops Need

To get the best harvest of root crops, no matter which types you opt to add to your garden, you need to meet their cultivation needs.

  • Soil
    Root crops grow best in deep, loose, rock-free soil that will allow the roots to form and grow easily. To nourish the plants, supplement the soil with plenty of organic matter.
  • Fertilization
    Root crops require a high phosphorus fertilizer for optimum growth, but check the needs of individual crop types to choose the best mixture. Always apply fertilizer according to the proper directions to prevent burning.
  • Temperature
    Most root crops are considered cool season vegetables and are planted both early and late in the growing season. Warm days and cool nights are most beneficial for root expansion.
  • Light
    Full sun is best.
  • Planting
    Seeds should be sown 2-3 weeks before the last expected frost date and subsequent plantings made every three weeks thereafter as weather permits (some exceptions apply). Planting depth varies depending on the type of plant; follow the directions on the seed packet. After seedlings emerge, thin to desired spacing as determined by the diameter of the root at harvest time. Beet and turnip tops that are thinned are edible raw as salad greens or they may be cooked. Root crops are generally not transplantable because they have a tap root.
  • Mulch
    Mulch plants that have already been thinned with salt marsh hay to retain soil moisture and minimize weed growth.
  • Pest Control
    Maintaining appropriate cultivation requirements will reduce or eliminate the need for pest control. As with all vegetables, it is important to rotate crops each year. Rotating root crops will discourage root weevils.
  • Basic Storage
    All root crops may be stored for a time before being eaten. In general, store at 32 degrees Fahrenheit and 95 percent humidity. Leave the crops in the garden as long as weather permits, then dig. Store the harvest in a root cellar or refrigerator.

Tips for Favorite Root Vegetables

  • Carrots – Plant in sandy soil if you want the classic, long, narrow type.
  • Beets – You may harvest 1/3 of the tops without affecting the root.
  • Garlic – Best planted in the fall.
  • Horseradish – Use caution when planting this aggressive perennial.
  • Kohlrabi – Has a mild, sweet cabbage flavor.
  • Leeks – Flavor is best if harvested after a light frost.
  • Onions & Shallots – Plant from seed or sets.
  • Potatoes – Best planted from ‘seed potatoes’ to match variety.
  • Radishes – Mature in as little as three weeks.
  • Sweet Potatoes – Warm weather root crop, will not withstand a frost.
  • Turnips – For a fall crop, sow seeds in midsummer.
Radishes and carrots

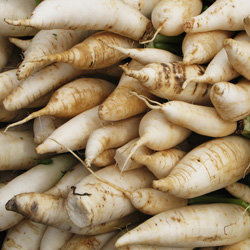
Daikon Radishes

Potatoes

Green Gardening

Planting a vegetable or flower garden seems like the perfect thing to do when you are looking for ways to adopt a greener, more environmentally-friendly lifestyle. Some traditional gardening practices, however, may not be quite as “green” as you might think. Planning your gardens with the environment in mind and choosing some practices that maintain healthy ecosystems can help you create a truly “green” garden.

Tips for a Green Garden

There are easy, effective steps you can take in your garden to go green, including…

  • Plant local and native species of trees and shrubs which are naturally adapted to the conditions in your area, thus requiring less watering and having natural defenses for local insect pests and plant diseases.
  • Collect rainwater for watering your container gardens and new transplants, and adjust your irrigation schedule to compensate for whenever Mother Nature does the watering for you.
  • Use organic compost and mulch to improve soil health and reduce the need for pesticides and fertilizers. Better yet, make your own compost so you can adjust it to exactly what your plants need while keeping more waste out of landfills.
  • Opt for disease-resistant and pest-resistant plants rather than trying to force plants into an unfriendly area where they will need chemical assistance and extra maintenance to thrive.
  • Try to use natural products instead of chemical fertilizers and pesticides. Use traps, parasites and natural predators such as ladybugs and lacewings. Plants that repel insects – basil, chives, mint, marigolds or mums – mixed in with other plants can help keep pests away.
  • Choose wildlife-friendly plants such as flowerbeds that will attract hummingbirds, butterflies, bees and other pollinators, and don’t be upset to share some of your garden space with other critters.

These are just a few of the simple changes you can make in your gardening practices that will benefit the environment.

Green Products

More and more “green” products are readily available to help you maintain the natural health of your garden. Before using a product, however, be sure it is suitable for your situation, and follow all application and use instructions. Even organic or eco-friendly products can become toxic contaminants if they are improperly used.

Popular options for green gardening products include…

  • Dr. Earth contains probiotic beneficial soil microbes, plus ecto- and endo- mycorrhizae which feed the fiber of the living soil by releasing natural organic matter. People and pet safe.
  • Dr. Earth pest controls are organic controls for all of your pest problems, including all types of unwanted or troublesome insects. People and pet safe.
  • Espoma Organic Traditions line of products includes bone meal, kelp meal, garden sulphur, potash and garden lime for helping to improve your soil without artificial chemical compounds.
  • Bonide offers organic fertilizers as well as organic formulas for pest and plant disease control, such as fruit tree sprays.
  • Scotts Organic Choice lawn care products provide more environmentally friendly choices for your yard.

Developing “green” gardening practices benefits you and your family, your garden, your native plants and animals, your water supply – our world, all of us.

Flowers and bumblebee

Protect Your Japanese Maples

Beautiful additions to any landscape, Japanese Maples will look their best when given some protection during hot, dry summers. As the weather becomes hotter and drier, your these trees may show signs of heat stress with the development of crispy leaf edges or, as conditions get even more extreme, leaf drop. This diminishes their stunning beauty and shrivels their leaves, but fortunately, there are several ways you can minimize this problem no matter what the weather. From planting these trees in the right spot to mulching the roots appropriately to using anti-transpirants, you can shield Japanese Maples from drought-like conditions.

Protective Planting

When planting a Japanese Maple, choose a location that receives morning sun only and has some protection from strong winds. Full afternoon sun and windy conditions will quickly stress plants and reduce leaf color. Planting a Japanese Maple in front of a western or southwestern windbreak of conifers or other evergreens will provide good shielding, or plant these trees on the eastern side of the house, garage or other structure to provide that essential barrier.

Save Moisture With Mulch

Mulching will help to retain moisture and cool root zones to protect these trees. Apply 2-4 inches of mulch under your Japanese Maples, extending out to the drip line for complete protection. Be sure to keep the mulch several inches away from the tree’s trunk to avoid fungus problems and crown rot. Ideally, install a drip watering system or other slow-release watering under the mulch to retain the most moisture with less water lost to evaporation.

Anti-Transpirant Sprays

Another way to keep your Japanese Maples looking their best is to use an anti-transpirant to helps minimize moisture loss from leaves. The best time to apply an anti-transpirant is in early summer when Japanese Maples are in peak condition, before they start showing signs of suffering from heat stress. Make your applications early in the day or on a cooler, overcast day to avoid leaf burn. Apply monthly through the hottest part of the year and your beautiful trees will look gorgeous heading into the fall season.

Japanese Maples are popular landscaping trees and make stunning specimen plants in any yard, but they can be subject to heat stress that will reduce their beauty and vitality. By taking several steps to protect them, however, you can enjoy the beauty of these trees even when summers are hot and dry, and properly protected, your Japanese Maple will look brilliant throughout the summer.

Japanese Maple

Edging and Trimming

Edging and trimming the lawn is like having a manicure after cutting your fingernails. It smooths out any roughness and adds an elegant finishing touch to your landscape, and everything is just more perfect! But which lawn care activity is which, and how do you do them properly to give your lawn that manicured look?

Edging or Trimming – Which is Which?

Before you pull out the lawn tools, it’s important to know which activity you need to do to create the look you want.

  • Edging
    When you are edging, you define the line between a hard surface (sidewalks, driveways and curbing) and a growing area such as a flower bed, garden or lawn. To achieve this, a vertical cut is made between the two using a spade or edging tool. Some have mastered the art of using the string trimmer to do this. This creates a crease-like separation between the organic (growing) and inorganic (non-growing) surfaces. Properly done, edging will help minimize weed growth in these cracks and crevices and gives the landscaping a smooth, formal appearance.
  • Trimming
    Trimming removes the grass, weeds and other plants from areas a lawnmower can’t reach. Long wisps of grass along the side of the house, fence or other structure aren’t very attractive, and trimming them away will give a finished, uniform look to the landscaping. Most people use a string-trimmer or bladed trimmer for this work, but hand shears also do the job. Trimming is also often done around trees or in tight corners where a lawnmower is less effective.

When to Do Edging and Trimming

How often should trimming and edging be done? This depends upon your own personality. Some people feel edging and trimming is a requirement of every mowing. Others do edging and trimming every third or fourth time they mow, or whenever it may look necessary to give the lawn and landscape a uniform look.

Edging and Trimming Tips

No matter how often you choose to do edging and trimming, it is important to do it effectively!

  • Use only the proper tools for these landscaping tasks. This will help prevent injuries or strain on your hands, wrists and elbows, and will get the job done more quickly and efficiently.
  • Check edgers and trimmers regularly to be sure they are sharp, well-oiled and in good functioning condition. Keep extra string for a trimmer on hand so you can quickly replace the spool when it runs out.
  • Always practice good safety measures when edging and trimming. Wear safety goggles if there is risk of flying debris (as there often is), and keep the tools away from children and pets.

For many people, edging and trimming is all part of good lawn maintenance. Once you know the differences between them and how to do them well, you’ll be amazed at the difference these tasks make to the beauty of your lawn.