Monthly Archives: August 2025

Surviving the Summer Heat

Even when it is sweltering outside, the garden will still require your care. Gardening in extreme temperatures has the potential to become a serious health risk if we are not careful. Understanding the potential heat-related problems and knowing how to protect yourself can ensure that your gardening remains a safe place this summer. Here are some common heat-related issues gardeners might face and tips on preventing and recovering from them.

Common Heat-Related Problems

  • Heat Exhaustion
    • Symptoms: Heavy sweating, weakness, cold, pale and clammy skin, fast and weak pulse, nausea or vomiting, and fainting.
    • Prevention: Stay hydrated, take frequent breaks in the shade, wear lightweight and light-colored clothing, and avoid gardening during the hottest parts of the day.
    • Recovery: Move to a cooler environment, lie down, and elevate your legs. Drink cool water and apply cool, wet cloths to your skin.
  • Heat Stroke
    • Symptoms: High body temperature (above 103°F), hot, red, dry or damp skin, rapid and strong pulse, headache, dizziness, nausea, confusion, and unconsciousness.
    • Prevention: This is similar to preventing heat exhaustion but emphasizes recognizing the signs early. If you experience symptoms, seek immediate medical attention.
    • Recovery: This is a medical emergency. Call 911 immediately. While waiting for medical help, try to cool the person down with whatever means are available – cold packs, a cool bath, or wet cloths.
  • Dehydration
    • Symptoms: Thirst, dry mouth, dark-colored urine, fatigue, dizziness, and confusion.
    • Prevention: Drink water consistently, not just when you feel thirsty. Aim for at least 8 ounces every 20 minutes during intense activity.
    • Recovery: Drink water or sports drinks that replace lost electrolytes. Avoid sugary, caffeinated, and alcoholic beverages, as they can exacerbate dehydration.
  • Sunburn
    • Symptoms: Red, painful, and warm skin, blistering in severe cases.
    • Prevention: Sunburn is often not felt until it is too late. Take precautions. Apply a broad-spectrum sunscreen with at least SPF 30, reapply every two hours, and wear a wide-brimmed hat and long sleeves if possible.
    • Recovery: Apply aloe vera or a soothing lotion to the affected areas. Cool baths and over-the-counter pain relief can also help. Avoid further sun exposure until the skin has healed. Seek medical advice if the burn is extreme and you are experiencing fever, chills, and nausea.
  • Heat Rash
    • Symptoms: Red clusters of pimples or small blisters, usually in areas where clothing causes friction.
    • Prevention: Keep the skin cool and dry, wear loose-fitting clothing, and try to avoid heavy sweating.
    • Recovery: Keep the affected area dry and cool. Use powder to soothe the rash and avoid using ointments or creams that can trap heat in the skin.

Self-Protection Strategies

  • Hydration: Always keep a water bottle within reach. Avoid beverages that dehydrate, such as alcohol and caffeine.
  • Appropriate Clothing: Light-colored, loose-fitting clothes made of natural fibers like cotton help keep your body cool. A wide-brimmed hat and UV-blocking sunglasses are also crucial.
  • Timing Your Work: Plan your gardening activities early in the morning or late in the afternoon when temperatures are lower.
  • Shady Spots: Set up shaded areas where you can take breaks. Umbrellas or portable canopies can provide instant relief from direct sunlight.
  • Pace Yourself: Don’t try to accomplish too much at once. Break your tasks into smaller, manageable chunks, and rest frequently.
  • Sunscreen: Apply generously to all exposed skin 15 minutes before going outside and reapply every two hours or more often if you’re sweating heavily.

Gardening, or all outdoor work in high temperatures, requires awareness and preparation. Recognizing the signs of heat-related issues and taking proactive steps to protect yourself, you can enjoy your garden safely, even in the hottest weather. Stay hydrated, take breaks, and listen to your body to ensure that your gardening remains a source of joy, not a cause for concern.

Surviving Summer Heat

Surviving Summer Heat

Surviving Summer Heat

Butterfly Bush

What could be more enjoyable than relaxing in your favorite lawn chair or hammock, your sunglasses on and a cool beverage in hand, staring at an enchanting array of colorful butterflies milling around their favorite plant? What could possibly be an easier way to accomplish this vision than by planting a simple butterfly bush?

About Butterfly Bush

Buddleia davidii, the butterfly bush, is a flowering maniac. It pushes its proliferation of perfumed blooms straight through summer and well into fall, providing nourishment to butterflies all season long. Available in a multitude of colors ranging from white to pink to red to purple, there are colorful butterfly bushes to match any garden or landscape color scheme. The fragrant, long, spiked panicles are borne in profusion on long, gracefully arching branches that add drama and elegance to the yard. And it really is a butterfly magnet!

Growing Butterfly Bush

This quick growing, deciduous, woody shrub is winter hardy in zones 5-10. In the northernmost areas of its hardiness range, Buddleia behaves like a herbaceous perennial, dying back to the ground in very cold winters. In the southernmost areas, Buddleia is grown as large shrub and can flourish all year. In either location, however, you should treat this plant as a cut back shrub. Because butterfly bush blooms on new wood, it benefits the plant to be cut back to the ground each spring. This judicious pruning will stimulate lavish new growth and an abundance of flowers. It will also keep some of the larger varieties at a manageable size, particularly in smaller yards, corners or other confined spaces.

Plant your butterfly bush in full sun in just about any type of soil and it will thrive. Don’t worry about fertilizing as over-fertilization can encourage too much leaf growth over flower formation. Deadheading will encourage additional growth and new flower buds to extend the blooming season. Buddleia has a good tolerance for drought once established, but should be carefully watered when young. A good, thick layer of mulch will help maintain soil moisture and keep weeds down to keep the shrub healthy. Just be sure not to use insecticides or pesticides on your butterfly bush or you may be harming the very fluttering fliers you hope to attract.


Fabulous Hydrangeas for Show-Stopping Summer Color

Hydrangeas and are widely acclaimed for their large, showy blossoms that lend fabulous color to gardens from mid- to late summer. Their luxuriant dark green foliage offers a striking background to their large round or smooth blossoms. All hydrangeas are deciduous, and it’s a sure sign of spring when their tender green leaves begin to appear. Hydrangeas are spectacular when grown as single specimens and are equally fabulous when planted in mixed shrub borders. Some of our favorites…

  • Bobo Panicle Hydrangea: Loads of white flowers on a tiny plant. 3′ x 3′
  • Little Lime Panicle Hydrangea: A dwarf form of the Limelight. 5′ x 5′
  • Quick Fire Panicle Hydrangea: Pure white flowers turn pink; then dark rosy-pink in the
    fall. 3-5′ x 3-5′
  • Endless Summer Bloomstruck Hydrangea: Color range of jewel tones from rich, clear
    pink to glorious purple to royal blue. 3-4′ x 4-5′
  • Oakleaf Hydrangea – An upright, irregular shrub that grows 4-6’ tall. Large leaves have excellent fall color. Creamy white flowers in July. Tolerates shade well.
  • Bigleaf (macrophylla) Hydrangea – Blue or pink flower clusters (5-10” across) appear in August. Flower color depends on the pH of the soil. Acid soils produce blue flowers, whereas alkaline soils produce pink blossoms. In garden settings, their colors can be changed by adding either sulfur or lime, depending on the color you want to achieve. Blossoms are produced on last year’s growth, so prune just after blooming.
  • Many Other Popular Varieties Available

Mopheads and Lacecaps – Which is Which?

Before you get the urge to dash out and buy the first hydrangeas that catch your eye, it’s wise to learn the difference between “mopheads” and “lacecaps.” As peculiar as these names sound, they truly are the names designated to two cultivar groups of macrophylla hydrangeas, and understanding the difference between them can help you choose the flowers you prefer.

  • Mopheads
    Garden hydrangeas, also known as ‘mopheads,’ feature large round flowerheads resembling pom-poms and bloom from mid- to late summer. Mopheads bloom in solid masses, their clusters often so heavy that they cause their stems to droop and bend with elegant arches.
  • Lacecaps
    Lacecap hydrangeas bear flat round flowerheads with centers of fertile flowers surrounded by outer rings of sterile flowers. The fascinating flowerheads of lacecap hydrangeas are also somewhat reminiscent of pinwheels.

You will be delighted with the versatility of these lovely shrubs, so relax and enjoy their beauty!


Best Fruits for the Urban Garden

With the right plant picks, you can grow a bountiful feast of fruit in your urban garden. From your favorite fruit trees to succulent vines to bushes bursting with berry goodness, your urban garden can be  highly productive, supplying delicious fruit for your nourishment and enjoyment.

What Fruits Need

Fruit-bearing plants need well-drained, loamy soil, adequate water for appropriate juiciness, and abundant sunlight for rich, productive growth. It can be a challenge to meet those needs in an urban environment, but your space may offer more resources than you realize. Study how sunlight moves through your garden space, including how shaded and sun-drenched areas change over time so you can best plan which plants to position for the best growth. Choose good quality potting soil if you’re planting in window boxes, pots, or containers, or amend your natural soil with appropriate compost and add the correct fertilizer to nourish hungry plants. Be prepared to water your plants adequately, particularly if natural rainfall isn’t enough for the plants’ needs. Regardless of the size of your garden space, you can meet fruits’ needs for a delicious and abundant harvest.

Best Fruits for Urban Gardening

The best fruits for urban gardens are those that keep compact shapes and adapt well to smaller spaces. They are also flexible with their sunlight needs, though most fruits require at least some full sun for the best production. Fruits that are well-suited to urban spaces include…

  • Apples
  • Blueberries
  • Bush cherries
  • Figs
  • Grapes
  • Peaches
  • pears
  • Plums
  • Raspberries
  • Strawberries

The exact fruits that will do well in your space will vary depending on your gardening zone and climate conditions. Pay particular attention to the number of chill hours fruits may need in order to produce, as this is critical to ensure a good harvest. Depending on the type of plant and its needs, you may even be able to move your gardening efforts indoors and cultivate some fruit plants without any outdoor gardening space at all!

Tips for Urban Garden Fruits

There are different ways to ensure your fruit plants, bushes, trees, and vines thrive in your unique space. To encourage the best growth and healthiest plants…

  • Choose plant cultivars that are self-pollinating and don’t require multiple plants in order to produce fruit.
  • Opt for berry cultivars that are everbearing or repeat-bearing to extend the harvest and get the most fruit from the fewest plants.
  • Provide adequate support with trellises, arbors, pergolas, or other structures that are sturdy enough to handle the mature plants’ size and the fruits’ weight.
  • Create layers of gardening space by using hanging pots and vertical structures that will give you even more room for planting.
  • Use plant stands on casters so you are able to move sun-loving plants around to take advantage of shifting light angles and maximize the plants’ productivity.
  • Choose dwarf or super-dwarf tree varieties that will not only thrive in smaller spaces but will also produce fruit when younger, so your first harvest is not delayed.
  • Dwarf fruit trees are perfect for espalier against a sunny wall.
  • Take steps to encourage bees and hummingbirds in your garden to aid pollination and keep your plants productive.
  • Use netting, reflectors, or other tactics to discourage birds that may raid your harvest even before the fruit has fully ripened.
  • Be alert for pests that may threaten your plants’ health and productivity, as they can find their way into any garden space – even indoors.

Growing fruit in the urban garden can be a tasty and enjoyable pastime, so long as you opt for fruits that will do best with the resources your space provides. By making the most of your space, you’ll easily have a fruitful harvest for all your favorite fresh fruits, homemade jams, preserves, sweet salads, baked goods, and other treats.

Fruit for Urban Garden

Fruit for Urban Garden

Fruit for Urban Garden

Fruit for Urban Garden

Indoor Succulent Container Garden

Have you noticed how a container garden can really jazz up a front entryway or sunny room in your home? Perhaps you’ve thought twice about including this addition to your plantscaping because you just don’t have time every day to water.

Cheer up! You can plant a container with succulents (plants with fleshy or thickened leaves, stems or roots) and you will not have to worry about watering frequently. Succulent container gardens are relatively carefree, and they’re so easy that you don’t have to limit yourself to just one. If one container makes a statement, several will create a conversation!

Indoor Succulent Container Garden Tips and Tricks

To have the greatest success with your new succulent container garden, consider…

  • Exposure
    Full sun is a must for all succulents and will help show off their subtle colors and textures. If your viewing location has less than adequate sun, place your succulent garden in a full sun area for the majority of the day and move to your desired location when you have company or time to enjoy it yourself. Remember to move it back out into the sun when company leaves.
  • Containers
    Because succulents do not have extensive root systems, your chosen containers may be shallow. Too much soil can hold excessive water causing the succulent’s roots to rot. Perhaps a strawberry pot would make the perfect focal point just inside your front door or on a coffee table.
  • Height
    Think about varying the heights of your containers. Perhaps your containers will require a pedestal or something else for elevation. This could be an inverted pot, a table, shelf or even pot feet. You may even consider hanging your container for elevated elegance. Whatever you choose, it’s important to remember succulents require excellent drainage. Therefore, the containers must have holes.
  • Soil
    All succulents need fast draining soil. Pre-mixed soil is available that is specifically blended for succulent container plantings. You may also use a general all-purpose potting mix and add perlite, coir or sand to increase the drainage sufficiently. We recommend Fertilome Succulent Soil.

Plants for Your Succulent Container Garden

When making your plant selection, it is fun to let your imagination go wild and embrace the full range of amazing succulents available. As a good container gardening rule of thumb, Use a thriller (something stunning to catch the eye), a filler (a sturdy, reliable choice to fill in bare spots) and a spiller (a trailing plant to blur the container edges) and you’ll never go wrong.

Succulents come in an extensive variety of colors, striking shapes and varying sizes. As when planting any container, evaluate plant color, texture and shape when making your selections. You may feel overwhelmed when choosing your plants. If you can’t decide, here is a simple “recipe” for planting one 16″ container to be seen from all sides. Maybe it will give you some ideas:

  • 1-thriller (Euphorbia tirucalliSticks on Fire‘) planted in the middle.
  • 3-fillers (Kalanchoe blossfeldiana) to surround the thriller and provide texture or color contrast
  • 5-spillers (Sempervivum arachnoideum) to drape over the container’s edge.

As an extra bonus, many succulents bloom, adding extra unexpected beauty. Blooms can be few and far between, however, but they will be exciting and rewarding when they are spotted.

The Importance of Topdressing

After planting, gently brush off any residual soil from the succulents’ leaves. Add more interest by topdressing the container. This is a layer of material will give your container garden a finished appearance. Desert type plants look great with a thin layer of light tan-colored gravel or red lava rocks. Create sparkle with sea-glass toppings or add a clean, contemporary look to Zen-like or Asian inspired plantings with smooth black river stones. Other popular top dressings include glass marbles, colored aquarium gravel or tiny seashells. You might even add a fairy garden surprise in the container, such as a miniature hut, hidden gnome or other quaint character who will call your succulent garden home.

Most importantly, have fun!

Suculent

Suculent

Suculent

Spider Mites

Spider mites are one of the most common pests in landscapes and gardens and feed on many fruit trees, vines, berries, vegetables and ornamental plants, as well as houseplants. These tiny mites are just large enough to be seen with the naked eye, but may just look like tiny, moving dots. For tiny creatures, they can do considerable damage to plants if left unchecked.

How Spider Mites Hurt Plants

Spider mites cause damage by sucking cell fluids from plant leaves. A small number of mites usually isn’t a reason for concern, but plants can sustain heavy damage if populations are high and the infestation spreads. You may notice a stippling of light or yellowish spots on affected leaves and often the webbing of mites can be seen on leaves and stems. As the damage continues, leaves may turn completely yellow, dry up and fall off the plant.

Controlling Spider Mites

Spider mites reproduce rapidly in hot, dry weather, therefore, keeping plants well watered is a good deterrent to heavy infestations. There are also many natural enemies to these pernicious bugs, such as lacewing larvae and some lady beetles that help to keep mite populations under control. Cultivating these helpful insects may be all that is necessary to minimize spider mite activity unless the infestation has already increased and spread.

Because spider mites are too tiny to pick off infected plants, judicious pruning or trimming of infested plants can help remove these pests. In heavy infestations, it may be necessary to discard an entire plant to take the mites with it. Do not put these clippings or removed plants in compost piles, however, or the mites will continue to thrive and will return to healthier plants.

At times, it may be necessary to use chemicals to deter spider mites. Be careful when using broad spectrum insecticides, however, as these will kill any beneficial insects as well as the spider mites, which can disrupt the delicate balance of a garden’s ecology. Simply spraying plant leaves with a blast of water, taking care to spray the undersides as well, can help to reduce mite populations by physically removing the spider mites. Insecticidal soaps and neem oil are also good choices when dealing with spider mites.

Once the mites have been removed, damaged plants may look bedraggled, but they will generally recover within a season or two, especially if the pests were recognized and treated quickly. Don’t let spider mites catch you in their webs – get rid of them today!

Spider Mites

Blossom End Rot

Nothing is more disheartening than grabbing a beautiful tomato only to find the entire bottom is soft, black and rotten. Blossom end rot (BER) affects tomatoes, peppers, eggplant, squash and melons. Caused by insufficient calcium and uneven water during the rapid growth of the plant and its fruit, BER is easily avoidable with the proper precautions.

All vegetables need calcium for healthy development. When tomatoes, peppers, melons and eggplant can’t get enough, the tissues on the blossom end of the fruit break down. By testing your soil to determine its pH and calcium content, regularly watering and curbing fertilizer use, your susceptible veggies should be free of BER.

The best prevention occurs before planting. The soil pH determines the amount of calcium available to a plant. At lower pH levels, less calcium is available for the plant to absorb because it becomes chemically tied up in the soil. Most vegetables grow well in soils with a pH of 6.2-6.8. However, vegetables susceptible to BER require a pH of 6.5-6.8, where more calcium is available and it can be more easily absorbed, especially during rapid growth and fruiting periods. If the pH is lower than 6.5, the crop is likely to develop BER. This can also occur when the pH is correct, but the soil contains an insufficient amount of calcium.

Water fluctuations and excessive fertilizer also affect nutrient absorption. A plant requires water to absorb nutrients. If no water is present, no nutrients can be absorbed, and in addition to blossom end rot, plants may be small and weak as well as more susceptible to other pests, diseases and deficiencies.

Additionally, too much fertilizer can cause a plant to grow so quickly that the nutrient uptake cannot meet the demands of growth, leading to BER. In these cases, the plants grow so rapidly and develop produce so quickly that there isn’t time for the proper nutrient balance to be absorbed, including the right amount of calcium. Because of this accelerated growth and insufficient nutrition for the growth pace, plants will be more susceptible to blossom end rot.

Unfortunately, simply adding calcium to the soil will not stop BER this year, but it can help your soil become better conditioned for next year. However, we do carry several products to help with this year’s crop as well. Easy-to-use calcium sprays can save much of this year’s crop of tomatoes or other vulnerable produce. Come on in and our knowledgeable staff will help you find the best product for your situation, as well as for tips on how to improve your soil’s pH levels, calcium content, moisture retention and overall nutrition so blossom end rot is never a problem in your garden again.

End Rot

End Rot

Small Shrubs for the Perennial Border

Adding structure and an aspect of year-round permanence to any yard, small shrubs are excellent for enhancing the perennial border. Thought of as the spine and bones of good landscaping, small shrubs hold the soft body of flowers together and add consistency between areas. Well-chosen selections integrate with perennials to add interest for more than just one season. Not only do they add support for perennials in late summer but also they provide definition to the bed throughout the year. Though shrubs take longer to reach maturity, their outstanding foliage, lovely flowers and attractive shapes and forms add to the beauty of the garden.

Choose Shrubs That Promise Year-Long Interest

The ideal shrub for the mixed border has outstanding foliage – deep green, purple, gold, silver, or even variegated. Its leaves may be glossy, soft or even fuzzy to touch. Colorful veins or other variations may mark its foliage to seize your interest throughout the seasons. And, certainly, the ideal shrub has flowers. Late-blooming flowers liven up the border during the tired end-of-summer days, while early-blooming varieties add excitement to a garden just bursting into spring. You’ll also want to take into account flower color when working shrubs into a planting scheme. White is a delightful and safe choice because it harmonizes with all other colors. Consider also mellow blues, pinks and other pastel shades to add a peaceful mood to the garden. Bold colors of yellow, orange or red will add a warm, daring feeling and dramatic interest. In fall, colorful leaves cover the ideal shrub before falling to the ground. And in winter, twisted, colorful branches and bright berries provide visual interest even under a layer of frost or snow.

Top Border Shrub Choices

Name Height Interest
Background and Mid-Border Shrubs
Cornus alba cultivars (red twig dogwood)* 8-10 ft. Variegated or golden foliage; red winter branches
Cornus stolonifera cultivars 7-9 ft. Variegated foliage; red or yellow winter branches (red osier dogwood)*
Cotinus coggygria ‘Velvet Cloak’ or ‘Royal Purple’ (Smokebush)* 10-15 ft. Dark purple foliage
Deutzia ‘Mont Rose’ and ‘Magician’ 4-5 ft. and 6-8 ft. Pink spring flowers; graceful, arching habit
Hydrangea cultivars 4-12 ft. Late summer blue, white or pink flowers, variegated or unusual leaves
Viburnum macrocephalum 6-15 ft. White flowers in spring fading to buff, seed heads
Viburnum plicatum var. momentous 5-10 ft. Bright white lace-cap flowers summer, ‘Summer Snowflake’ (doublefile viburnum)
through fall
Viburnum sargentii ‘Onondaga’ 5-12 ft. Dark green or maroon-tinged foliage; ‘Susquehanna’ (Sargent viburnum) late
spring flowers; bright red winter fruit
Weigela W. florida 4-6 ft. Golden or purple foliage; late spring, ‘White Knight’ and ‘Wine and Roses’ pink
or white flowers
Focal Point Shrubs
Buxus sempervirens ‘Graham Blandy’ (boxwood) 4-6 ft. Narrow, upright habit
Buxus microphylla cvs. (littleleaf boxwood) 3-4 ft. Dense, rounded shape
Ilex crenata ‘Sky Pencil’ (Japanese holly) 4 ft. Extremely narrow, columnar form
Front-of-the-Border Shrubs
Berberis thunbergii ‘Atropurpurea Nana’, ‘Aurea’ 1-4 ft. Golden or purple foliage; dense, rounded form and ‘Bagatelle’ (Japanese barberry)
Caryopteris clandonensis ‘Worcester Gold’ 2-4 ft. Golden foliage; late summer lavender flowers (blue mist shrub)
Fothergilla gardenni 2-3 ft. Creamy flowers stick up like bottlebrushes on bare tips in early spring
Hypericum androsaemum ‘Albury Purple’ (tutsan) 2-3 ft. Purple-tinged leaves; yellow summer flowers; red berries
Spiraea japonica (Japanese spiraea) 1-4 ft. Golden foliage; pink spring flowers
Spiraea ‘Goldflame’ 2-3 ft. Pink flowers, red spring leaves tinged with bronze, changing to gold
Symphoricarpos orbiculatus ‘Foliis Variegatis’ 2-5 ft. Yellow-edged variegated leaves (coralberry)

*Prune hard in late winter to control height in mid-border positions.

Shrubs

Shrubs

Shrubs

The Power of Mulching for Gardens and Yards

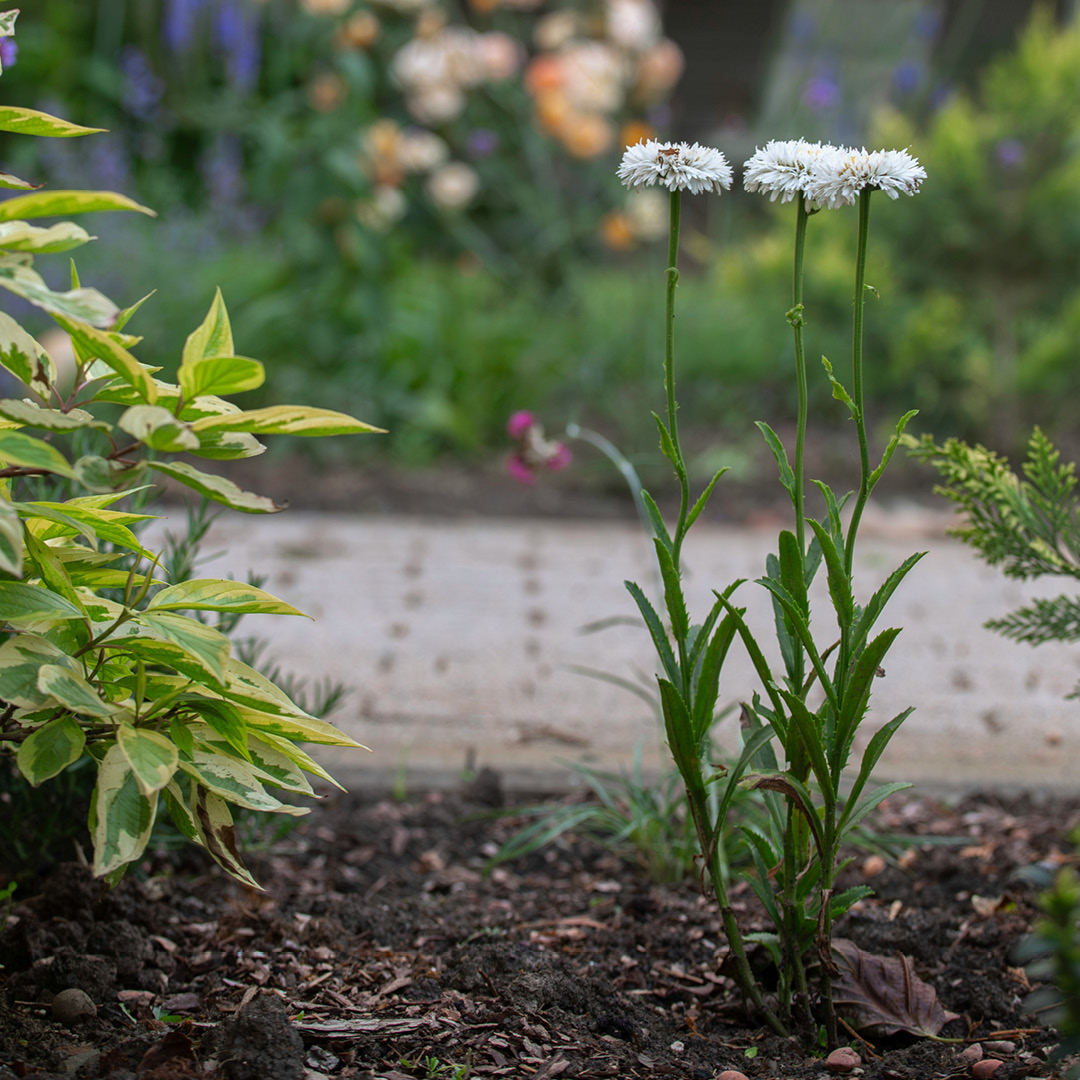
Imagine stepping into a lush, healthy garden where every plant is thriving, the soil feels rich and cool to the touch, and weeds are nowhere to be seen. What’s the secret behind this picture-perfect scene? Often, you’ll find a thick, tidy layer of mulch at the heart of a flourishing landscape.

At first, mulch may seem like just a finishing touch. Many gardeners, especially beginners, view it as a cosmetic choice that makes flower beds pop. But dig a little deeper (literally and figuratively), and you’ll discover that mulching is one of the most versatile, powerful tools available for anyone who loves their yard. From saving water to feeding the earth, mulching goes well beyond surface-level beauty.

Why Mulch Matters More Than You Think

Mulching does far more than clean up the edges of garden beds. It acts as a multitasking shield for your soil and plants, offering an impressive array of benefits that any homeowner or gardener can appreciate:

  • Moisture Retention: Cuts down on watering by keeping precious moisture locked in.
  • Weed Suppression: Reduces the time and energy you’ll spend pulling pesky weeds.
  • Temperature Regulation: Shields roots from summer heat and winter cold snaps.
  • Nutrient Boost: Organic mulch breaks down to feed your soil naturally.
  • Erosion Control: Keeps valuable topsoil from washing away during heavy rain.
  • Enhanced Visual Appeal: Ties your garden together for a crisp, cohesive look.
  • Pest Mitigation: Some mulches even help deter certain insect pests and diseases.
  • Biodiversity Support: Mulch provides habitat for beneficial insects and microbes.

Moisture Retention: Keep Water Where Your Plants Need It

Water is a lifeline for every garden, but it can be elusive during droughts or hot summers. Mulch provides a powerful barrier against evaporation, allowing water to penetrate the soil while preventing it from escaping as easily. A properly mulched bed needs less frequent watering, which protects roots and saves you time, money, and resources.

  • Tip: Lay mulch after rain or watering to trap existing moisture.
  • Bonus: Less surface water also means fewer muddy shoes and splashes on house siding.

Weed Suppression: Enjoy More Beauty with Less Work

Few things frustrate gardeners like relentless weeds. Mulch directly addresses this pain point by blocking sunlight from weed seeds, reducing both the number and strength of unwanted plants. While it won’t prevent every single weed, a 2-4 inch layer can cut the workload by more than half.

  • Tip: Before adding fresh mulch, pull existing weeds and smooth the soil to set a weed-resistant foundation.
  • Pro Insight: Try double-mulching (using a layer of newspaper or biodegradable weed barrier beneath organic mulch) for especially stubborn areas.

Temperature Regulation: Create a Year-Round Comfort Zone

Wild temperature swings stress even the hardiest plants. Mulch is like a cozy blanket, insulating the ground so roots don’t freeze in winter or bake in summer. This stability is key for perennials and young plants with delicate root systems. You’ll notice more robust and resilient growth, with fewer casualties, following harsh seasons.

  • Tip: Apply mulch in early spring and fall to buffer your plants during seasonal transitions.
  • Real-World Example: At our garden center, we have found that even city gardens with unpredictable microclimates benefit from this protective touch.

Soil Improvement: Feed Your Soil and Fuel Your Garden

Organic mulches are the solution for those looking to nurture the earth as much as their flowers and vegetables. Over time, materials such as shredded bark, straw, compost, or leaves break down, replenishing your soil with valuable nutrients and organic matter. This natural process improves drainage, aeration, and soil structure, leading to healthier roots and more vibrant results.

  • Did you know? Healthy soil attracts beneficial worms and microbes that turbocharge decomposition and plant growth.

Erosion Control: Keep Your Garden Intact

Heavy rains can wash away precious topsoil. Mulch reduces the impact of water runoff and shields bare soil, preventing erosion on slopes, hillsides, and in new plantings. If your yard is on an incline or prone to heavy storms, don’t skip this step!

  • Smart Move: Start mulching bare patches early, even before planting, to stabilize the ground.

Visual Impact: Show Off Your Style

Let’s admit it, a mulched garden just looks incredible. Whether you’re into rustic bark, bold colors, or sleek river stones, mulch sets the tone for your entire landscape. Choose a hue and material that complements your home and plant palette for instant curb appeal.

Types of Mulch- What’s Right for Your Garden

Choosing the ideal mulch depends on many factors, including your plant choices, local climate, soil needs, and personal style. Here’s a deep-dive into common and creative options:

Hardwood Mulch: The All-Purpose Favorite

  • Made From: Shredded bark or wood (often oak or maple).
  • Ideal For: Perennials, trees, shrubs, and general landscaping.
  • Pros: Durable, slow to decompose, great value. Creates a polished, even surface.
  • Tip: Double or triple-ground hardwood is less likely to blow or wash away.

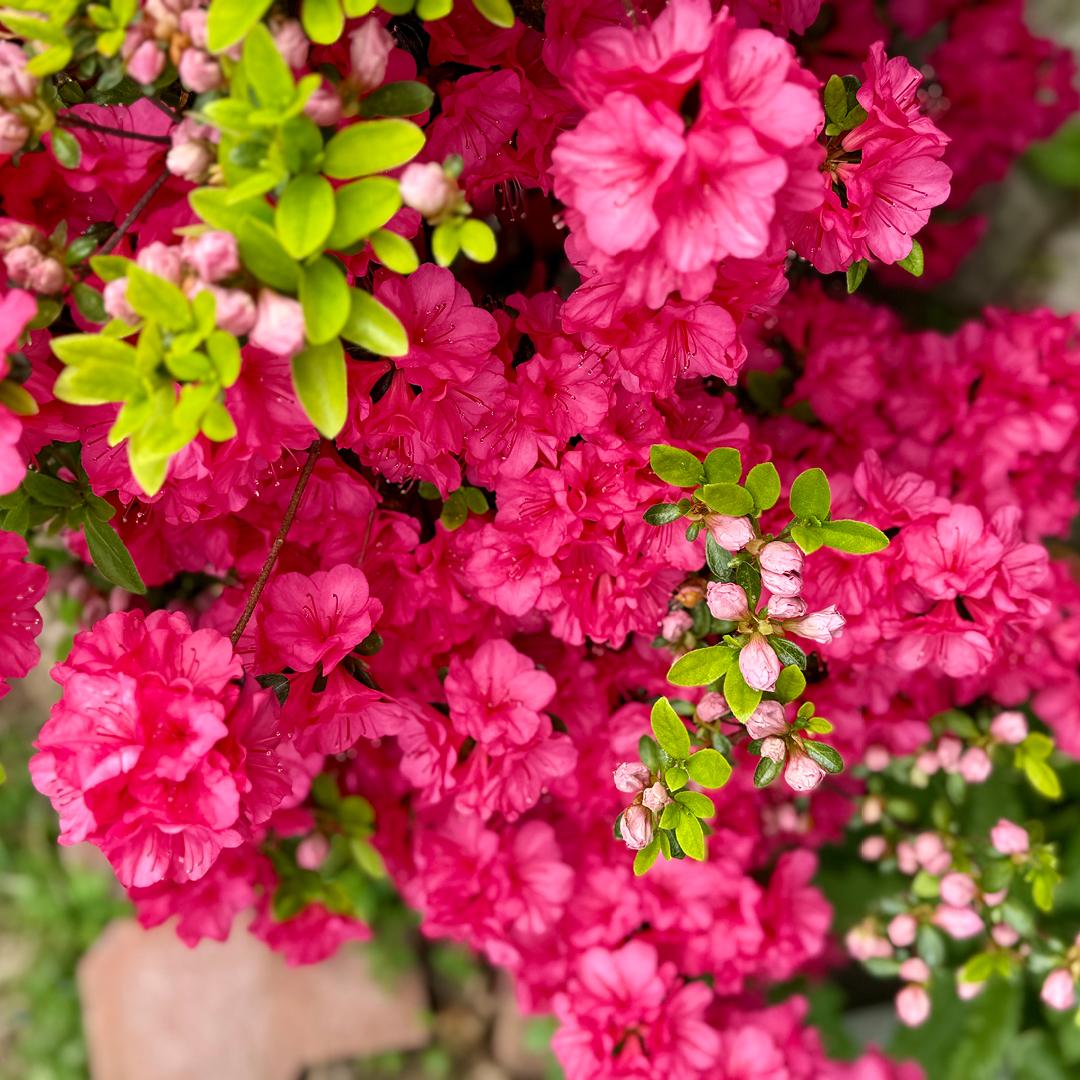
Pine Mulch: A Match for Acid-Loving Plants

  • Made From: Pine bark chunks or needles.
  • Best Use: Around azaleas, blueberries, rhododendrons, or anywhere you want a looser texture.
  • Pros: Lightweight, simple to spread; adds acidity as it breaks down.
  • Watch Out: May float during rain and doesn’t suppress weeds as firmly if not applied thick enough.

Cedar Mulch: Aromatic and Long-Lasting

  • Standout Features: Pleasant smell, naturally deters pests, and resists rot thanks to its oils.
  • Perfect For: High-traffic spots, patios, or beds near decks and seating areas.
  • Benefits: Holds color and structure longer than most organic mulches. Adds a unique scent to outdoor spaces.
  • Downside: Slower breakdown means less immediate soil improvement and higher upfront cost.

Dyed Mulch Adds Drama and Definition

  • Options: Bold reds, deep blacks, or chocolate browns.
  • Why Choose It: Color stays vibrant longer, perfect for making beds pop or defining pathways.
  • Quality Tip: Only purchase from trusted suppliers who use safe, vegetable-based dyes. Verify that the wood source is not from treated pallets or waste.
  • Note: Color will fade over time, but mulch can be refreshed annually.

Natural & Living Mulch: Go Green and Get Creative

  • Natural Mulch: Undyed wood chips, compost, straw, or shredded leaves. Earthy look, improves soil fast.
  • Living Mulch: Low groundcovers like clover or creeping thyme. Suppresses weeds and provides habitat for pollinators.
  • When to Use: Vegetable gardens, wildlife-friendly landscapes, or anywhere you want rapid soil enrichment.

Rubber Mulch & Stone Mulch: Long-Lasting, Low Maintenance

  • Rubber Mulch: Made from recycled tires, great for playgrounds, dog runs, or non-plant areas. Won’t decompose or blow away.
  • Cautions: No soil benefits, may get hot in direct sun, should not be used near edible gardens or delicate plants.
  • Stone or Gravel Mulch: Ideal for arid gardens, around cacti or succulents, or in permanent xeriscape installations. Prevents weed growth and delivers a striking visual contrast.

Specialty Mulches: Uncommon Solutions

  • Cocoa Hulls: Smells like chocolate, breaks down fast, improves soil, but can be toxic to dogs.
  • Straw/Grass Clippings: Superb for veggie beds, boosts fertility fast, but must be free of weed seeds and pesticides.

Tips for the Best Results

  • Start with weed-free, slightly damp soil for optimal application.
  • Spread mulch evenly, 2-4 inches deep, and keep it clear of plant stems or trunks to prevent rot.
  • Replenish mulch as needed, typically once per year; organic mulch will naturally settle and decompose.
  • For sloped areas, try heavier mulches or use edging to keep material in place.
  • Pay special attention to moisture and airflow in humid climates to prevent fungal growth.

Mulch with Purpose and Confidence

Mulching isn’t just a finishing touch; it’s a strategy that pays dividends all season. When you select the right mulch and apply it with care, you save water, reduce weeds, build healthier soil, and instantly improve your garden’s appearance. Whether you’re refreshing your backyard beds or designing a front-yard oasis, mulching adds resilience, style, and sustainability to every corner.

Need help choosing the perfect mulch for your yard? Stop by Dammann’s for friendly expert advice, the widest selection of top-quality mulches, and all the tools you need to mulch like a pro. Your future garden is waiting, and it’s guaranteed to look (and grow) better with the right mulch.

Power of MulchingPower of Mulching

Power of Mulching

Power of Mulching

Selecting the Right Plant for the Right Place

More often than not, our landscape renovation wish lists include the desire for a picturesque, thriving, low-maintenance outdoor space to enjoy year-round for many years to come. Creating a flourishing landscape, however, isn’t simply about picking pretty plants. It’s about understanding your garden’s own unique environmental conditions and matching plant selection to them. This concept, known as “right plant, right place,” is a foundational principle in horticulture that ensures healthier plants, reduced maintenance, more sustainable gardening practices, and, therefore, greater garden longevity and homeowner happiness!

Why Choosing the Right Plant Matters

  • Healthier Plants: When plants are placed in environments suited to their needs, they grow healthier and stronger and are better able to resist pests and diseases.
  • Reduced Maintenance: Plants that thrive in their location require less intervention from the gardener. This translates to less work and more time to enjoy your garden.
  • Resource Efficiency: Using plants adapted to your local conditions means less water and fewer resources are needed, promoting sustainable gardening.
  • Enhanced Aesthetics: A well-planned and planted landscape will not only perform well but also look lush and beautiful. Planting in the correct environment enables landscape plants to grow to their full potential in size and bloom capacity.
  • Environmental Benefits: Native plants and those well-suited to the conditions in which they are planted support biodiversity, attract pollinators, and contribute to a balanced ecosystem.

How to Select the Right Plant for the Right Place

Assess Sunlight Exposure

Determine how much sunlight each part of your garden receives throughout the day and match plant selections to these conditions.

  • Full Sun– Direct sunlight for at least 6 to 8 hours daily. It is ideal for sun-loving plants like vegetables, roses, and most flowering perennials.
  • Partial Sun4 to 6 hours of direct sunlight daily, usually in the morning or afternoon. Plants labeled as “partial sun” prefer more light rather than less.
  • Partial Shade4 to 6 hours of sunlight, but these plants benefit from protection from the intense afternoon sun. It is best for plants that thrive in morning light and dappled conditions.
  • Dappled (Mottled) Shade– Sunlight filters through tree branches or structures, creating a shifting pattern of light and shade throughout the day. Common in woodland gardens.
  • Light Shade– Indirect sunlight for most of the day, with occasional brief periods of direct sun. It is found in areas near open structures or under high tree canopies.
  • Full ShadeLess than 4 hours of direct sun, typically in the early morning or late afternoon, with the rest of the day in indirect or reflected light.
  • Deep Shade (Dense Shade)Little to no direct sunlight, often due to dense tree cover, walls, or structures blocking light.

Understand Soil Conditions

The Mid-Atlantic region has a diverse range of soil. Here are the primary soil types found in this:

  • Clay Soil– Heavy and dense clay soil holds water well but can become compacted, making drainage a challenge. It tends to be nutrient-rich but often needs amendments like compost or sand to improve structure and aeration.
  • Sandy Soil– Light and well-draining, sandy soil warms up quickly in spring but dries out just as fast. It’s great for plants that need good drainage but often requires organic matter like compost or peat moss to help retain moisture and nutrients.
  • Silty Soil – Smooth and slippery when wet, silty soil holds moisture better than sandy soil and contains more nutrients. It’s great for gardening but can become compacted over time, so adding organic matter helps maintain its structure.
  • Loamy Soil– The ideal garden soil! Loam is a balanced mix of clay, sand, and silt, providing good drainage, moisture retention, and nutrients. This type of soil supports a wide variety of plants and is found in many well-maintained gardens.
  • Rocky or Stony Soil– This type of soil can make digging a challenge. It drains well but often lacks organic matter, so adding compost and topsoil helps improve its texture and fertility.
  • Peaty Soil– Dark, rich, and high in organic matter, peaty soil is found in wetland areas. It holds a lot of moisture, which can be beneficial, but may need drainage improvements for most garden plants.
  • Chalky Soil– Found in some limestone-heavy areas, chalky soil tends to be alkaline and drains well. It can limit the growth of acid-loving plants.

Soil pH Level

Soil pH is crucial when selecting garden plants because it affects nutrient availability and plant health. Some plants thrive in acidic soil, while others prefer neutral or alkaline conditions. If the pH is too high or too low, essential nutrients may become unavailable, leading to poor plant growth. Testing your soil pH is vital to growing healthy plants.

Here’s a breakdown of soil pH levels:

  • Acidic Soil
    Range: 4.5-6.5
    Acidic soils are often found in regions with high rainfall, as rain can leach out calcium and other alkaline minerals. These soils can be rich in organic matter but may lack nutrients like calcium and magnesium.
  • Neutral Soil
    Range: 6.5-7.5
    Neutral soil is ideal for most garden plants, as nutrients remain readily available. Many vegetable gardens and ornamental plants thrive in neutral soil.
  • Alkaline Soil
    Range: 7.5-8.5
    Alkaline soils, found in areas with low rainfall or limestone-rich soil, can lead to nutrient deficiencies, especially iron, which causes leaves to turn yellow (chlorosis).

Consider Climate and Hardiness Zones

Use the USDA Hardiness Zone map to determine which plants are suitable for your region’s temperature range. Choose plants that can withstand your area’s seasonal extremes, whether it’s harsh winters or scorching summers.

Evaluate Moisture Levels

Some plants thrive in consistently moist environments, while others prefer dry, drought-like conditions. Specifically consider:

  • Boggy or Wet Areas
  • Drought-Prone Areas

Size and Growth Habits

Understand the mature size and growth habits of plants to avoid overcrowding and maintenance issues. Plant trees and shrubs where they have room to grow without interfering with structures or other plants.

Examples of Right Plant, Right Place

Eastern US HARDINESS ZONES 5 – 9

  • Sunny, Dry Spots:
    • Plants: Lavender, Sedum, Yarrow, Russian Sage
    • Why: These plants thrive in full sun and well-drained soils.
  • Shady, Moist Areas:
    • Plants: Hostas, Astilbe, Ferns, Japanese Forest Grass
    • Why: These plants love the cool, damp environment provided by shade.
  • Acidic Soils:
    • Plants: Azaleas, Rhododendrons, Blueberries, Camellias
    • Why: These species prefer lower pH levels and will flourish in acidic conditions.
  • Clay Soils:
    • Plants: Daylilies, Black-Eyed Susans, Switchgrass
    • Why: These plants tolerate heavy, compacted soils and can handle less-than-ideal drainage.
  • Wetlands or Water Features:
    • Plants: Cattails, Iris, Cardinal Flower, Marsh Marigold
    • Why: These moisture-loving plants thrive in saturated conditions.

Landscape design and renovation are both an art and a science. Understanding your garden’s specific conditions will help in choosing plants well-suited to the existing environment. If you need assistance selecting plants for your situation, Dammann’s Garden Center is at your service. Our plant knowledge and selection are outstanding. We can help you match the right plant to the right place, enabling you to significantly reduce maintenance, conserve resources, and promote a healthier, more vibrant landscape that can be enjoyed year-round.

Right Plant, Right Place

Right Plant, Right Place

Right Plant, Right Place