Monthly Archives: September 2025

Mulching: Perfect Timing, Tools, and Technique

Mulching your garden is more than just a seasonal ritual; it’s an investment in the vitality and lasting beauty of your landscape. Done right, mulching protects roots, nurtures the soil, suppresses weeds, and boosts curb appeal. But the real secret isn’t just that you mulch, but when, how, and with what.

If you’ve found yourself eyeing your garden beds and wondering when to refresh your mulch, you’re not alone. Nearly every gardener, from passionate weekend warriors to seasoned pros, wants lush, healthy beds and weed-free paths. The right mulch, applied at just the right time and with the right techniques, can make all the difference.

The Science & Benefits of Mulching

Before you break out the pitchfork, it helps to know why mulching is such a tried-and-true garden practice. Here are just a few real-world benefits:

  • Conserves moisture by reducing evaporation, keeping plants hydrated through hot, dry spells
  • Suppresses weeds by blocking sunlight, making it hard for unwanted plants to sprout
  • Regulates soil temperature, protecting roots from extreme summer heat or winter cold
  • Prevents soil erosion by breaking the impact of rain and wind
  • Adds nutrients (with organic mulches) as the material decomposes
  • Beautifies beds with a tidy, uniform look that boosts landscape aesthetics

Spring or Fall: When Should You Mulch?

You’ve got options, and each season offers unique perks for your plants and property.

Spring Mulching

Early spring mulching is the most popular choice, and for good reason. Applying a fresh layer just as the soil begins to warm in mid-to-late spring locks in the season’s moisture and sets your landscape up for a thriving summer. Here’s why:

  • Conserves water: Keeps roots moist as plants come out of dormancy
  • Prevents early weeds: Suppresses invasive growth before it takes hold
  • Regulates soil temps: Shields new roots from late-spring temperature swings

Pro tip: Wait until the soil has warmed up (mid or late spring). Mulching too soon over cold, wet soil can stifle root development or create a breeding ground for rot.

Fall Mulching

Don’t underestimate the power of a fall mulch! Laying down a layer just after the first frost but before the soil freezes helps:

  • Protect roots: Shields perennials, shrubs, and young trees from freeze-thaw cycles
  • Reduce erosion: Holds soil in place during heavy fall rains or melting snow
  • Maintain beds: Keeps your garden looking tidy and ready for spring

Pro tip: For ultimate protection in regions with especially harsh winters, use both! Apply a lighter layer in spring to control weeds and moisture, then top it up in fall for winter insulation. Just don’t overdo the depth with multiple layers.

Assess: Don’t Automatically Reapply

Heavy rain or the first warm days of spring often leave your mulch looking less than perfect. But resist the urge to simply pile on more. Instead:

  1. Inspect your beds: Has the mulch shifted, compacted, or developed mold?
  2. Fluff and redistribute: Use a rake or pitchfork to lighten and reposition mulch, improving airflow and allowing the soil to breathe and dry.
  3. Remove and refresh: If mulch is extremely soggy, moldy, or waterlogged, scoop out the affected area and allow the soil to dry before adding a new layer.
  4. Spot top-up: If mulch has thinned after winter, just add a light top-dressing. Too much mulch at once can suffocate the roots.

Master the Art of Mulch Application

Proper technique matters as much as timing. Here’s your step-by-step for flawless beds:

  • Prepare the area: Weed thoroughly and install bed edging to keep mulch from spilling.
  • Choose your base: Apply directly to soil or over landscape fabric. Avoid plastic sheeting, which blocks water and air.
  • Depth rules:
    • Coarse materials (like bark nuggets): up to 4 inches
    • Fine shredded mulch or straw: 2-3 inches
  • Steer clear of trouble:
    • Never mound mulch against tree trunks or plant stems.
    • Always leave a 2-4 inch gap to create a donut shape, not a volcano! This promotes airflow, prevents moisture buildup, and protects your plants from disease and pests.

Which Mulch Type is Right for You?

Choosing the right mulch can make all the difference:

  • Organic mulches (shredded bark, compost, straw) enrich the soil as they break down.
  • Inorganic mulches (stones, rubber, landscape fabric) may last longer, but won’t add nutrients.
  • Colored/dyed mulches add visual interest, but be sure to check for plant safety and colorfastness.

Visit our garden center for expert recommendations and eco-friendly options tailored to your specific climate and soil type.

The Ultimate Mulching Toolkit

Having the right tools makes mulching faster, easier, and easier on your body:

  • Wheelbarrow or garden cart: Essential for hauling mulch around efficiently
  • Mulch fork or pitchfork: Perfect for fluffy, bulk mulch materials
  • Flat shovel: Ideal for spreading and edging with precision
  • Garden rake: Evens out layers and helps refresh compacted mulch
  • Gloves: Protects your hands from splinters, dyes, and allergens
  • Mulch mover or scoop: Ergonomic options reduce back strain and speed up the process
  • Landscape edger or edging spade: Keeps borders crisp and mulch where it belongs
  • Mulch blower: For large properties, save time by renting a blower or hiring a pro install team

Beyond the Beds: Additional Mulching Tips for Smarter Gardens

  • Use mulch around vegetable gardens to conserve moisture and reduce weeding (but opt for undyed organic materials).
  • Refresh high-traffic areas: Paths and playgrounds benefit from regular top-ups for safety and appearance.
  • Consider leaf mulch: Shredded leaves from your own yard are a cost-effective, sustainable option.

Common Mulching Mistakes (and How to Avoid Them)

  • Over-mulching: More isn’t always better. Too much can deprive roots of oxygen, leading to poor plant health.
  • Ignoring drainage: Never apply mulch over soggy or saturated soil. Allow for drainage to avoid root rot.
  • Wrong mulch for plants: Certain plants thrive with specific mulches (roses love compost, while acid-lovers benefit from pine needles).

Mulch Intentionally for a Healthy, Thriving Landscape

Mulching is more than a chore. It’s one of the best ways to nurture a healthy, resilient landscape that turns heads and keeps maintenance manageable. Follow these professional tips for timing, materials, and application to make every batch of mulch work smarter for your garden.

Not sure which mulch suits your space? Need help mapping out your next project or want to know exactly how much to order? Visit Your Garden Center or contact our experts for personalized advice and high-quality mulching supplies.

Transform your outdoor space, one layer at a time!

Person spreading mulch from a wheelbarrow onto a garden bed

Gardener kneeling and applying mulch around colorful flower plants

Mulch being poured from a bag onto soil in a garden

Clump of ornamental grass growing in a mulched landscape bed

Bring on the Bulbs for Better Home Value

Many homeowners, whether they just purchased their home or have owned it for years, are interested in increasing the value of their property. A better value leads to greater home equity, a higher resale price and the personal pride of owning a lovely home. Good landscaping can lead to a better home value, and there’s no easier way to improve landscaping than with beautiful bulbs. 

How Landscaping Adds Value to Your Home

A well-groomed, thoughtfully planned and attractively maintained landscape is a great asset to your home. Your home’s exterior, including its landscaping, is the first impression visitors see, and good landscaping creates an attractive, welcoming atmosphere. Colorful landscaping can help attract notice to your property, while larger plantings provide shade and help with temperature control. Borders can conceal fences or unsightly foundations, and flowerbeds soften the edges of the house structure to provide an appealing sense of nature. Unlike interior home improvements that come and go with the latest design trends, good landscaping is a constant asset to your property and your home value.

Why Bulbs Are Best

Bulbs are some of the best options to improve your home’s landscaping and increase your home value. While bulbs won’t grow to provide shade to your yard and don’t yield tasty treats in a garden, they have many benefits that add solid value and enjoyment to any yard.

  • Bulbs Are Familiar
    Unlike exotic tropical plants or little-known cultivars of tree and shrubs, many bulbs are instantly recognizable. That familiarity is comfortable and reassuring, and adds a sense of peace to your landscaping. Tulips, daffodils, hyacinths, crocuses and lilies are some of the most popular and tried-and-true bulbs that can enhance your landscaping.
  • Bulbs Are Versatile
    While many plants can serve only one distinct purpose, bulbs can serve many purposes. Taller varieties can provide an effective screen for privacy or create stunning borders. Dense bulb patches can “paint” your landscape with flowing color, or bulbs can be layered in pots or containers for instant beauty. Bulb flowerbeds can be positioned along your home’s foundation, around trees or lining walkways, driveways or sidewalks. Bulbs can be strategically positioned to fill in thinner areas in your yard or landscaped beds as well.
  • Bulbs Are Beautiful In Different Seasons
    While a spring-blooming annual or a brilliant fall foliage tree may look stunning for one season, many bulbs offer beauty for far longer. Not only are their flowers showstopping beauties, but many bulbs have thick, graceful foliage that is delightful long after blooms may have faded. Furthermore, you can mix-and-match bulbs to keep a bed blooming from early spring to late fall without difficulty.
  • Bulbs Are Perennials
    Annual flowers are gorgeous but need to be replaced every year, a process that can be very time-consuming and labor-intensive. Bulbs, on the other hand, are perennials that will keep coming back year after year with very little extra care. With just basic maintenance – watering and the occasional removal of dead foliage – bulbs will grow back more lush and vibrant each year, continuing to add value to your home.
  • Bulbs Are Easy
    There’s no denying that bulbs are easy to grow and require very little maintenance to look their best. Bulbs can tolerate a wide range of soil types, pH levels and sunlight levels, and they often thrive even when neglected. This makes them an easy addition to any landscape, bringing their proven value to your yard quickly.

Improving Your Landscaping With Bulbs

It’s easy to improve your home’s value by adding bulbs. Simply choose the types and colors of bulbs you want, and you’re just three steps away from a beautiful landscape and a more appealing home.

  1. Dig – Dig the appropriate hole to plant your bulbs, paying attention to the recommended depth for the bulb type. You can dig individual holes for each bulb, or plant an entire bed at once.
  2. Drop – Drop the bulbs in the holes. You can position them in graceful, cultivated rows, or choose a more organic, natural look. Cover the bulbs firmly with soil and a layer of mulch if desired.
  3. Done! You only need to keep a simple eye on moisture levels and the occasional critter that may enjoy a bulb snack, and you’re done with bulb care and maintenance. Before long, both your bulbs and your home value will be blooming!

With so many benefits from landscaping and the ease of bulbs to create a stunning look, why not add to your home’s value today? Get digging – you’ll be done before you know it!

Cluster of bright yellow daffodil flowers blooming outdoors
Colorful garden bed filled with pink and white tulips in bloom
Vibrant tulip field with red, yellow, and pink flowers blooming in rows

Fall Chrysanthemums

No flower is more iconic of autumn than the chrysanthemum, and these beautiful mounding perennials are ideal for fall flowerbeds, pots, window boxes, borders, and many other uses. How will
you get creative with chrysanthemums this fall?

Why We Love Chrysanthemums

Just when many other flowers are fading at the end of summer, chrysanthemums, or mums, are coming into their glory with a range of stunning autumn colors. Depending on the cultivar, these plants sport yellow, white, red, orange, bronze, pink, peach, wine, purple, and bicolored blooms. The flowers range from small, button-like blossoms to larger blooms reminiscent of daisies. Mum blooms are long-lasting when cut and they’re just as lovely in floral arrangements and bouquets as they are planted in containers, flowerbeds, and the landscape. This makes mums extremely useful for all manner of autumn décor.

Chrysanthemums are native to east Asia and northern Europe and were first domestically cultivated in China nearly 600 years ago. Today, there are more than 20,000 chrysanthemum cultivars worldwide. They are deer- and rabbit-resistant, making them a hardy option for landscaping beds, and with a bit of thoughtful care, these tender perennials can be a wonderful addition to any flower garden or fall containers.

Caring for Chrysanthemums

The hardiness of chrysanthemums depends on the cultivar as well as the local climate and even the microclimate in your landscape. These flowers prefer well-drained, rich soil with a neutral pH, so it is best to use a good quality potting soil in containers. When planting chrysanthemums in the garden or landscape, mixing compost or peat moss in the planting hole will help increase drainage and nourish the soil to promote the best blooms. A good rule of thumb is that if soil is good for vegetables, it will also be good for mums – making them a wonderful choice to refresh a garden after the summer harvest has finished.

Chrysanthemums grow best in full sun requiring a minimum of six hours per day. If mums are planted in containers, consider using a mobile plant cart or a stand with casters so  that the pots may be moved to brighter areas, if needed, as the season progresses.

Chrysanthemums prefer evenly moist, but not soggy, soil. Because of their thick, mounding habit, it is best to water mums from below suing a soaker hose or irrigation drip system in garden beds. In pots, mums should again be watered from below the plant but above the soil line. A watering wand will make this job direct and easy. Be sure to drain excess water from saucers after watering so the roots do not remain continually wet.

Fertilizing chrysanthemums every month through the spring and early summer, with a balanced fertilizer, will help them grow and bloom well, but if mums are planted in the Fall, they should not need extra feeding as long as they were planted in rich, nutritious soil. Deadheading spent blooms by pinching them back can encourage more flowering and help mums maintain their compact, mounding habit.

Decorating with Fall Mums

Chrysanthemums are a beautiful choice not only in the garden, but are equally lovely in welcoming porch pots, deck or patio containers, or even small indoor pots and arrangements. Add an extra touch of fall with rustic containers, such as wine barrels, baskets, or terra cotta pots, or glam up your mums in hammered copper or bronze pots that will accentuate their color. A burlap ribbon or bow can be a charming accent, and you can give more seasonal flair to mum arrangements or flowerbeds by adding pumpkins and gourds as fun decorations. Indoors, use small pails or pots for petit mum arrangements, or add them to larger arrangements with grain sprigs, dried pods, colorful leaves, or twists of grapevine for additional texture.

Fall chrysanthemums can be a pleasant burst of autumn color, whether they are part of the landscape or are used in containers, pots, or arrangements and we carry a wide selection to make your fall home suit the season!


Growing Your Favorite Fall Greens

There are many delicious greens perfect for the fall garden, and it is easier to grow them than many gardeners realize. There are even ways to extend the autumn growing season to grow your favorite fall greens for extra weeks, giving you healthy, delicious produce to enjoy long after traditional harvests have ended.

Top Greens to Grow in Fall

A wide variety of greens are hardy in fall and can easily be grown in the garden as well as in containers or window boxes. Depending on your tastes and which greens you would use, try these top favorites.

  • Lettuce – Different varieties of lettuce, particularly leaf and butterhead types, grow well in fall. Plant lettuce 4-8 weeks before the first frost, in loose soil. For a prolonged harvest, stagger plantings every few days for different maturity dates.
  • Kale – A great option for beginning gardeners, kale grows well in loose soil and will taste even sweeter after its leaves have been touched by light fall frost. Plant kale 6-8 weeks before the first frost to allow it to reach its full potential.
  • Collards – A popular southern green through fall and winter, collards should be planted 6-8 weeks before the first frost. These greens have a hefty appetite and do best in rich soil. Like kale, the flavor of collards is improved after a touch of frost.
  • Mustard Greens – A fast growing option, mustard greens should be planted 3-6 weeks before the first frost. Staggering plantings will increase the harvest yield and ensure an ongoing supply of these peppery-tasting leaves.
  • Spinach – Healthy and hearty, spinach will grow best in loose soil and should be planted 4-8 weeks before frost is anticipated. Harvesting the outer leaves will encourage better growth and provide an ongoing supply of deliciousness for salads, soups, and stews.
  • Swiss Chard – This colorful green is best started indoors so it can begin to establish solidly before being transplanted outdoors. Start seeds 9-10 weeks before the first frost and transplant seedlings after a few weeks.
  • Cabbage – Rich and vigorous, cabbage should be started indoors 6-12 weeks before the first frost. The seedlings should then be transplanted outdoors when they are 3-4 weeks old, and they will rapidly take to the new space and produce a bumper crop.

Of course, if starting greens from seed is not your thing, we carry plenty of starter plants in market packs and flats for your convenience, half the work is already accomplished!

Proper Care for Fall Greens

Regardless of which greens you want to add to your fall garden, they all respond well to similar treatment and care. Before planting, clean out spent summer plants, including unpicked produce, weeds, and other debris, just as you would prep the garden area in the spring. You can position fall greens anywhere in the garden, but they will grow best in rich soil, which you can amend with compost or similar organic material for soil improvement. A light application of balanced fertilizer can help keep the plants well-fed as they grow.

Leafy greens will thrive in full or part-sun locations, though they can benefit from some light shade on hot afternoons in late summer. Planting fall greens in sturdy containers on movable carts or plant stands with casters can give you the option to move the plants around as sunlight levels change through the season. If possible, consider planting at the top of slopes or in raised beds, since cooler air will sink into lower landscaping spots as autumn advances. Taking advantage of the microclimates in your own garden space can dramatically impact your fall gardening efforts.

Keep fall greens well-watered, particularly in late summer or on hotter days that can quickly wilt even the hardiest greens. Adequate spacing of plants will promote good air circulation to minimize the potential for disease.

As the plants grow, you can quickly begin harvesting “baby” leaves even before the plants reach full maturity. Use sharp sheers or tear the leaves off by hand. Thinning out smaller leaves is another way to improve air circulation and keep the plant healthy for a more productive harvest.

Autumn is the exact season when different wildlife guests may be visiting the garden more frequently in search of easy foods. Planting garlic, sage, onions, thyme, lavender, or marigolds around and among your fall leafy greens can deter rabbits and deer protecting your late-season harvest.

Extending the Fall Growing Season

You can get even more from your favorite fall greens when you take steps to extend the growing season later into autumn. This is easily done with row covers, cold frames, or cloches, all of which will help sequester heat to keep the soil warm for more vigorous plant growth. As an added bonus, row covers can also help keep many pests, such as beetles and caterpillars as well as deer and rabbits, from ravaging your fall greens.

Summer isn’t the only season for salad, and if you follow these simple steps you can enjoy a delicious, nutritious harvest long past the warm days of summer. Extending your growing season further into fall by covering your greens is also easily accomplished. Stop by to shop our extensive selection of seed and starter plants. Our knowledgeable staff is waiting to serve you.

Swiss chard with vibrant green leaves and red stems growing in the garden

Rows of young lettuce plants sprouting in soil

Close-up of curly kale leaves with deep green texture

Collard green leaves growing in a garden bed

Large green cabbage head with layered leaves in the garden

The Fall Herb Garden

The end of the summer doesn’t mean the end of deliciousness from your garden, not when a fall herb garden can add tantalizing tastes to all your meals. As the season changes, give your herbs a little tender loving care to ensure that they thrive through fall and into winter.

Caring for Perennial Herbs

Perennial herbs that are already established in the garden can easily be winterized, including mint, oregano, thyme, chives, rosemary and sage. So long as the herbs are healthy and thriving as summer wanes, they can be prepared for winter.

First, stop fertilizing herbs in August so they do not continue to produce delicate new growth. Continue to water them adequately, however, as drought stress will make the plants less able to tolerate winter. As their growth slows, trim each plant carefully, using sharp, clean shears for crisp cuts that will minimize strain on the plant. Prune herbs to 4-6 inches in height. It is a good idea to add a layer of mulch to insulate plant roots in colder climates.

Planting Herbs in Autumn

Cool-weather herbs, annual or perennial, can easily be planted in autumn and will be ready to flavor many savory dishes. A container herb garden is an ideal choice for fall herbs since it can be easily moved and protected for the best care. Choose a container with suitable size and depth to nurture the desired herbs, and ensure it has adequate drainage holes to promote good drainage.

Planting several herbs in the same pot will save space and keep them all close by for easy use. You may also consider using smaller pots that can be grouped together in an attractive arrangement. Pots can be positioned right near the kitchen or patio door for easy access, or in a sunny window box.

Protecting Herbs in Winter

Annual herbs or newly planted perennial ones can be at risk if a hard freeze or unexpected storm arrives. Staying alert to weather forecasts and keeping a keen eye on the barometer will help you protect your herb garden as the season deepens. If the temperature is dropping, it is best to shelter your herbs with sturdy covers, cold frames, or cloches. Moving pots or containers temporarily into an insulated garage and near an interior wall that will be warmer can also protect them from cold snaps.

If container herb gardens can safely remain outdoors in the late fall, the pots should be elevated so their drainage holes do not become clogged. Pot feet or plant stands are great options and will help keep the soil from becoming too damp after repeated rains or snows.

Trimming plants into dome shapes is another way to protect the fall herb garden from the onslaught of winter weather. A more compact shape will shed rain and snow more effectively, providing better protection for the plant’s structure and minimizing damage. A dome shape will also be easier to cover if necessary.

Dishes for a Delicious Fall

Fresh herbs add subtle flavors to salads and can be used to season roasts and meats. Infusing soups, sauces, and gravies is another way to create layers of flavor in autumn foods, and herbs can even add unique notes to hot teas, fruit compotes and jellies, or spiced cider. The better you protect your fall herbs, the more you will be able to enjoy them throughout the season and well into winter.

Fresh parsley growing in a wicker pot on a wooden surface

Lush green mint plant growing in a clay pot

Close-up of soft green sage leaves in the garden

Basil plants thriving in terracotta pots outdoors

Mature basil plants growing densely in an outdoor garden bed

Audition Some Autumn Bloomers

Extend the beauty of your garden with vivid autumn-blooming perennials. When you think of fall-blooming plants, don’t stop at mums – there are many perennials that can add color to your yard at this time of year.

Top Autumn Bloomers

While there are different autumn-blooming perennials for different growing zones and climate conditions, some of the most popular and widespread options include…

  • Fall Daisies
    For fall daisies (besides daisy mums!) grow Boltonia or Nippon Daisy. Boltonia is a tall (3-4′) grower, suitable as a background plant. White or pink daisies are borne in profusion atop fine grey-green foliage. The Nippon Daisy (Chrysanthemum nipponicum) is covered with large crisp white daisies in October. Both love lots of sun and make excellent cut flowers.
  • Autumn Sedums
    Bold-foliaged sedums provide texture as well as color in a sunny place. Sedum ‘Autumn Joy’ is the most well known. It has coppery-pink flower heads. Sedums ‘Brilliant’ and ‘Stardust’, with soft pink and white flowers respectively, are also attractive. For a totally different color combination plant sedum ‘Vera Jameson’. It has gray-purple foliage with rose pink blooms and looks stunning when planted with Blue Fescue, Artemesia Silver Mound and other silver-foliaged plants. As an added bonus, all the sedums are attractive to butterflies.
  • Autumn Asters
    Asters are another fall bloomer that butterflies love. These perennials like sun and moist, well-drained soil. There are many colorful aster varieties in shades of pink, purple, blue and white. Some favorites include tall-growing aster ‘Alma Potschke’ with bright pink flowers, blue-flowered aster ‘Professor Kippenburg’ and low-growing aster ‘Purple Dome’ with its deep purple blooms.
  • Autumn Goldenrod
    Sunny yellow goldenrod (Solidago) is another bright addition to the fall garden. Wrongly blamed as the cause of fall allergy problems, goldenrod has rightly taken its place in the fall garden. It looks particularly effective combined with blue flowering plumbago, purple asters and ornamental grasses.

Fall Bloomers for Shade Gardens

Even shade gardeners can enjoy late blooming perennials. Tall growing Japanese Anemones are a stately addition to the perennial garden. Bloom colors range from pure white to various shades of pink, and flowers can be single, semi-double or double blooms. Anemones grow well in light to moderate shade and spread quickly to form large clumps, filling in space vacated by spent summer plants. Turtlehead (Chelone) is another fast spreader for shade. Rose pink flowers cover the tops of the plant from early September to October. For a deeply shaded location, try Toad Lily (Tricyrtis), which has clusters of beautiful cream flowers, spotted with maroon along its upright stems. For light shade, plant Blue Cardinal Flower (Lobelia siphilitica), whose intense blue spikes can be admired from mid-August until frost.

No matter what type of garden you have, the end of summer does not need to mean the end of colorful blooms. Instead, just opt for amazing fall bloomers and enjoy brilliant color even longer!

Red admiral butterfly perched on purple autumn flowers

Cluster of red sedum flowers blooming in autumn

Bright yellow daisy flowers blooming in a fall garden

Fall in Love with Fall Pansies

Ideal for fall gardens, pansies offer a colorful display for almost six months – in the fall when they are planted, in the winter during a stretch of sunny days and again in spring! Winter pansies may be planted anytime starting in mid-September and continuing through October. Multiple plantings spaced a week or two apart can also ensure even more blooms to enjoy throughout otherwise drab months.

Planting Pansies

As with any plant, pansies perform better if the soil that you place them in is well prepared. Choose a planting location that is well-drained and work in 4-6 inches of rich organic matter, such as garden compost, peat moss or Bumper Crop. Plant pansies at about the same level, or slightly higher, than they were growing in their market packs or containers, taking care not to plant too deep or the plants may wilt and rot and the roots could smother. After planting, mulch and water the bed thoroughly. Remember to check the plants often during the first three weeks after planting or until new growth begins, to ensure adequate moisture necessary for healthy growth. Because these plants require very little care, no other maintenance is usually necessary for them to reach their full potential.

Where to Plant Pansies

These versatile blooms can be used in many different parts of your garden or landscape. Add a graceful drift of single-colored pansies or a mass of mixed colors to brighten a border, under a tree or along a fence, pathway, deck or wall. Try tucking single plants in garden beds around perennials and shrubs that have finished blooming to brighten up an otherwise dreary section of the landscape and to help mask older, spent growth. Pansies also do well in containers placed on a deck or patio or next to the entrance of your home to greet your guests with welcoming color. Try pansies in a hanging basket and you can even move them indoors to enjoy when the weather is too poor for outdoor gardening. A small container of fall pansies can also be a great gift for winter holidays, birthdays or just to brighten the day of anyone who could use a touch of color in their life.

With so much color to enjoy in so many ways, fall and winter pansies should be a staple of any garden and will bring great gardening joy to the landscape even during colder, dreary months.

Close-up of orange and yellow pansy flowers with purple edges

Garden bed of yellow pansies with dark centers in full bloom

Container arrangement of pink and purple pansies mixed with white alyssum flowers

Autumn: Why Plant Now?

Although many gardeners plant trees and shrubs in the spring, knowledgeable gardeners plant in the fall to take advantage of all this fabulous season has to offer. But why is fall planting better than spring planting?

  • Stress Reduction
    Transplanting causes stress as plants are removed from containers, balls or established locations and changed to new locations. Planting in the fall, when a plant is entering dormancy and is generally hardier and sturdier, reduces this stress so the plant can thrive.
  • Establishing Strong Roots
    Fall planting “establishes” trees and shrubs by encouraging root growth. Because the soil is still warm, the roots continue to develop until freezing, though the upper parts of the plant are already dormant. When transplanting in the spring, the developed roots are active and delicate tips or rootlets, as well as buds and new leaves, are more easily damaged.
  • Weather Resiliency
    Trees and shrubs planted in the fall are better able to withstand the rigors of the next summer’s heat and dry conditions because they have much longer to develop healthy roots systems and become thoroughly established. This is especially critical in dry climates or areas prone to drought or irregular rainfall.
  • Faster Maturity
    The “head-start” of fall planting results in a larger plant in less time, helping create a mature landscape without waiting for smaller plants to catch up. This can be especially critical when replacing dead or damaged plants in a mature landscape to avoid a gap or uneven look.
  • Water Conservation
    Planting in the fall saves watering time and promotes conservation by eliminating daily watering. Cooler temperatures with the addition of both morning and evening dew contribute greatly to soil moisture availability in fall without as much supplemental watering.
  • Color Confirmation
    Fall is the best time to see a plant’s autumnal color. Planting in the fall eliminates the surprise of the wrong color or unexpected shades that may not coordinate with nearby plants. By planting in autumn, you’ll know exactly what you’re purchasing and planting, and you will be able to match better with your existing landscape.

Autumn can be the ideal time to plant trees and shrubs, whether you are adding to your landscape, replacing plants or starting a whole new look. If you plant in autumn, you’ll be amazed at how lovely your landscape will look next spring.

Gardener planting a tree by positioning its root ball into soil
Tree trunk surrounded by vibrant fall chrysanthemums in bloom

Applying Horticultural Oil or Neem Oil

Autumn is an excellent time to apply All Seasons Horticultural Oil or Neem Oil. The oil smothers many soft-bodied insects and hard-shelled scales that are impenetrable to many insecticides, and can therefore help control some of the most stubborn insect populations. But is it right for your plants?

About Horticultural and Neem Oils

Horticultural oil, or hort oil, is typically derived from petroleum, and is a type of ecologically-friendly mineral oil. Some cottonseed and soybean oils can also be effective horticultural oils. Emulsifying agents are typically added to these oils so they can be mixed with water and used as a spray, which helps distribute them evenly over plant foliage to be most effective.

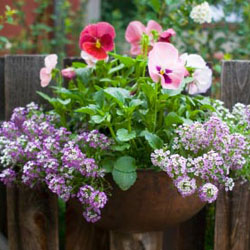
Neem oil can control pests that are trying to overwinter in your potted plants. You can apply it on upper and lower leaves. Use neem oil as a preventative for established infestations and horticultural oil to eliminate eggs. 

Pests That Don’t Like Horticultural Oils

Different types of horticultural oils can be effective against many unwanted garden pests, including…

  • Spider mites
  • Aphids
  • Whiteflies
  • Mealy bugs
  • Psyllids
  • Lace bugs
  • Caterpillars

In addition to smothering the larvae or insects directly, the heavy oil also makes it difficult for many insects to crawl therefore starving them to death and preventing them from spreading diseases from plant to plant. Additionally, the oil repels many insects looking for winter homes. The oils also act as fungicide against powdery mildew, rust and leaf spot on some plants.

Applying Horticultural Oils

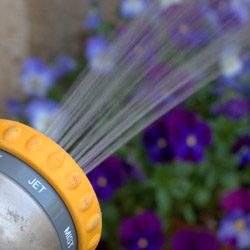
Application of horticultural oils is easy, requiring only a simple hose-attached sprayer. Because oil and water do not mix, frequent agitation by shaking is required even if the oils are mixed with other agents to be more sprayable. These products are most effective if applied when plants are dormant, since oil-based products can burn and harm actively growing foliage, buds, flowers and fruit. Some lighter weight, summer-formulated oils are available, but they should be used only sparingly and only if absolutely necessary. Autumn and winter are the best seasons to apply horticultural oils when insects are a problem, though autumn applications can occasionally cause problems with plants dying back and other winter damage. Because the oils can evaporate and dissipate quickly, they should only be used when insects are present, otherwise they will be ineffective. In freezing weather the oil coverage will be inconsistent, so cool but not bitterly cold temperatures are best.

Of course, always follow the instructions for proper application rates, plant sensitivity and ideal weather conditions to ensure the most effective treatment. Because these oils are still pesticides, protective gear such as gloves and goggles should also be worn to avoid accidental irritation or more severe contamination.

Using  oils can be a great way to control insects on your plants, but only if the oils are used appropriately. Come in for a consultation to see if these products can help end your insect problems.

Garden hose nozzle spraying water over purple pansy flowers