Monthly Archives: January 2026

WINTERIZING THE GARDEN

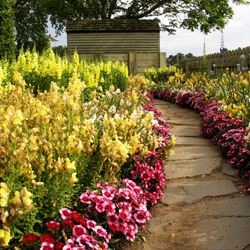
WINTERIZING is the practice of getting the garden and landscape ready for cold temperatures. Winterizing chores include cleanup of dead plant materials and fallen leaves, mulching, fertilizing, digging and storing tender bulbs. Trees and shrubs also need attention at this time and of course the water garden needs to be prepared for winter.

Why winterize?
The effects of winter freezing and thawing are hard on plants, therefore it is wise to spend a little time at the end of the growing season to protect your investment (and hard work). Interestingly, the object is not to keep the cold from reaching the plants but to keep them cold .
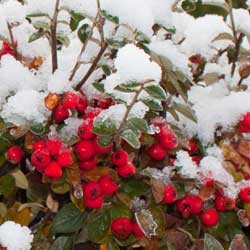
Damage can occur from dehydration as well as the effects of fluctuating temperatures which
freeze and then thaw the ground, causing heaving of the plants . Snow acts as an insulating blanket that protects perennials. However, our zone (5/6) does not normally get a cover of snow through the season. Mulches in the form of shredded leaves, compost, and even topsoil can protect the crowns and roots of your perennials.
With a few exceptions, trees, shrubs and perennials sold by garden centers and nurseries in this
area are chosen based on hardiness for our zone. Hardiness zones are determined by the US
Department of Agriculture based on average low temperatures during the winter. A plant is
considered ‘hardy’ if it is capable of withstanding the average conditions of winter in that zone.
Adventurous gardeners throw caution to the wind and push their zone. Winterizing then becomes extremely important in order to protect these plantings.
Proper care during the growing season will help insure that your permanent plantings winter
successfully. Infrequent, deep watering encourages roots to grow downward in the soil. Give plants only the fertilizer they need. Avoid fertilizing later than mid-August. Plants growing in soggy areas usually have a harder time in winter. Improve drainage with lots of organic matter. Always deal with the problems of pests and diseases immediately.
Adequate moisture content in the soil before it freezes is important. If the soil is dry an inch or two below the surface, give the area a thorough soaking before storing hoses and draining faucets and sprinkler systems.

When should I winterize?
With a few exceptions, the process starts with a killing frost. At this point, tidying the garden of
fallen leaves and the dead and dying leaves and stems of your annuals and herbaceous perennials begin.

Clean-up
To begin with, you need to make some decisions about how much of the garden can be left for
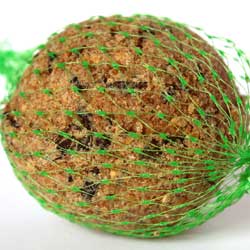
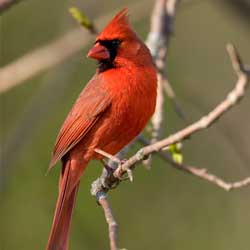
winter interest. It is not necessary to remove all of the dead plant material. Ornamental grasses in particular are very beautiful in the winter landscape. The seed heads of many perennials provide beauty and function as a food source for birds.
Remove annuals from the garden. Special attention should be given to removal of diseased plant material. It is not recommended that they be used in composting or mulching. All other plant material may be taken to the compost pile or left in place for insulating.

Division and Transplanting
Divide spring blooming perennials in the fall. Do not take too many divisions from one plant.
Each division must have enough root to sustain growth. It is recommended that ornamental
grasses be divided in the spring. Irises and daylilies prefer to be divided in August.

Pruning
Be sure what you are pruning in the fall is not your potential blooms for next spring. Do remove
dead branches.

Lawn
Lawn care in the fall will ensure maximum results the following growing season. Mow the lawn
at a lower level , no higher than 1.5-2 inches. As fall arrives, reseed areas as need. Apply
herbicides in September to control weed infestations. The last fertilizer of the year should be
high in phosphorus and potassium and low in nitrogen. Aerate if the soil is compacted or if
thatch is a problem.

Mulching
∙ It is important for the ground to get cold before mulching. Plants should be in a dormant
state before protection is applied.
∙ Fallen leaves (except oak) and saw dust should not be used in mulching since these compact
and actually promote disease. Leaves that have been shredded may be used and actually are a
good idea because as they decompose they add beneficial nutrients to the soil. The exception
is walnut leaves which are to be avoided since they are toxic.
∙ Topsoil and compost are both suitable mulches as are pine needles, evergreen boughs, straw
and hay.
∙ A layer of 4 to 6 inches of mulch is recommended for most perennials.
∙Do not mulch bearded iris. The iris borer seems to be worse on mulched plants.

Trees and shrubs
Fall is an excellent season for planting trees and shrubs. Be sure to apply plenty of water before
the ground freezes. Do not fertilize or prune branches until spring. Trunks of young trees are
susceptible to winter injury, especially those with thin or dark bark. Wrap the trunks with
commercial tree wrap.

Roses
Rake up and collect fallen leaves. Remove old mulch and dispose. Spray plants one final time
with fungicide, making sure to spray all canes and the base of the plant. Cut back canes to about
3 feet. Apply a dot of Elmer’s Glue to cut tip of cane to prevent cane borers. Plants shorter than
2.5 feet should not be cut. Water plants thoroughly unless soil is moist. Add a foot of soil or
mulch down the center of the plant, enough to cover the bud or graft union. Rose collars may be applied and filled with soil or shredded leaves as an alternative. If rose cones are used be sure to poke several small holes in the top for ventilation.
It is difficult to winterize the long canes of climbing roses. Protect the base as with other roses
and tie down long canes so they are not whipping in the wind.

Azaleas and Rhododendrons
Rhododendrons and Azaleas should be well-watered as they go into their dormancy period. If
the fall season is dry, continue a regular watering schedule and soak the plants one last time
around Thanksgiving.
Use mulch on top of the root ball to help conserve water loss and as an insulating medium when the weather gets really cold. If you don’t use mulch, you run the risk of “winter burn”. This
happens when the ground is frozen but the air temperature is not. The leaves start to lose
moisture, call downstairs to ask the roots to send up some more water, but because the water is frozen, it doesn’t get up to the leaves. The leaves dry out and turn brown on the tips. Be sure to pull the mulch away from the trunk of the plant.
Anti-desiccants are wax based products which coat leaves and protect them from moisture loss.
Broadleaf evergreens such as rhododendrons, azaleas, and hollies benefit from anti-desiccant
sprays such as Wilt–Pruf. Do not spray the under side of leaves.
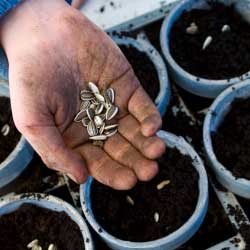
Tender Bulbs
Dig tubers or bulbs with a spade. Don’t worry about cleaning the soil off at this point.. Allow
soil to dry for about a week. Knock off loose soil and dust or spray for pests before storing in
cardboard boxes between layers of vermiculite, sawdust or wood shavings. Be sure to label
bulbs and tubers before storing.
Cannas: Dig before the ground freezes and store as above. Ideal temperature 50-60 degrees
Tuberous Begonias: Dry tuber and store as above. Ideal temperature 50-60 degrees
Dahlias and Tuberoses: After a light frost cut to 4-6 inches above the soil. Dig and store as
above. Ideal storage 35-45 degrees.
Calla Lillies: Dig when leaves have yellowed and died after a killing frost but before the
ground freezes. Store as above.
Gladiolas: Dig corms after foliage has matured and turned brown. Cut tops off one inch above
corm. Remove the old corm which is beneath the new one. Place corms in an onion sack or old
nylon stocking and hang from a wall or ceiling. Ideal storage 35-40 degrees
Caladiums: Dig and store before freezing. Store at temperatures above 60 degrees.
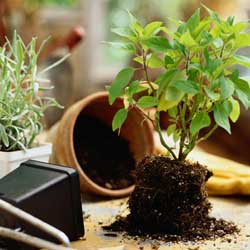
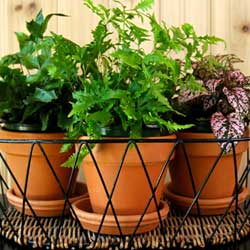
Container Gardens
Terracotta and ceramic planters must be brought inside for the winter. Remove plant material
and soil to the compost pile. If you wish to bring your container grown tropicals indoors, be
sure to treat for insects before moving inside. You might want to remove the plant from the pot
and replace the old potting soil with new.
Potted standard roses could be moved to an enclosed porch or garage. Don’t forget to water
sparingly from time to time. If left outside, lay on their side and cover with a thick layer of
mulch.
Clean and store birdbaths.
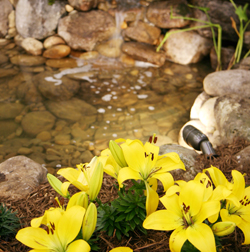
Water Gardens
Don’t let falling leaves accumulate in your pond through the fall. Rotting leaves at the bottom are a major cause of algae. Hardy aquatic plants can be placed at the bottom of the pond to over-winter. Dividing overgrown plants is best left for spring. Tropical water lilies need to be removed, cut back, and stored in a cool basement covered in wet burlap. Don’t let them dry out.
With preformed pools, don’t empty the water because the weight of it will keep the pool firmly
in the ground. You can drain it in the spring and refill it. Be sure to remove equipment like
pumps, jets, lights and the transformer and store in a dry place after cleaning.

Winter Gardener’s Calendar

Winter is a perfect time to plan! Curl up with your gardening books and the gardening magazines and catalogs you’ve received in the mail. Get out the gardening journal and start dreaming.

General Landscape

  • Clean up when you get a break in the weather. Remove fallen branches and downed evergreen clumps. Rake leaves to prevent stains on concrete and dead patches on lawn. If freezing weather is still in the forecast, leave the mulch in place.
  • If your Christmas tree is still around, set it where the dropping needles will provide mulch, use the branches as additional insulation for perennials, or get together with neighbors to rent a chipper and create wood chips for larger mulch.

Houseplants

  • Perk up tired houseplants by removing dead and dying leaves. Wash under a soft shower in the sink or tub.
  • Spider mites love living in warm dry winter homes. Check for mites by looking for tiny speckles on leaves. If so, pick up some Neem Oil or Horticultural Oil or Insecticidal Soap from Bonide.
  • Transplant if roots are growing through the drainage holes or over the pot edge. Pick up some new larger trend-setting colored pots to perk up your décor. Or, if you don’t want to move into a larger pot, untangle the roots and cut back by 1/3, scour the pots and replant with new soil.
  • Remember to turn your plants each week as they begin to grow towards the weaker window light.
  • Plant a terrarium or miniature garden. If you can’t play in the dirt outside, bring the fun indoors!
  • Pick up a potted plant for your valentine. Come in and choose from our thriving greenhouse full of succulents, tropicals and houseplants that are the perfect “I love you!”

Vegetables

  • February: Start vegetable and herb seeds indoors. Pick up some seed trays, heating pads, peat pellets and seed starting mix.
  • Sign up for our February 17th class “Seed Starting and Companion Gardening” and learn and companion gardening and different methods for seed starting.
  • These veggies need an early start indoors:
Broccoli
Cabbage
Celery
Chard
Eggplant
Kale
Leeks
Lettuce
Scallion
Onions, bulb
Peppers
Tomatoes

If you just need a breath of aromatic fresh garden air, stop by and smell ours! The humidity is perfect and will instantly transport you to spring. We’d love to see you!


Bird Feeding 101: Low Maintenance Suet Feeding

Suet is a high-energy brick of animal fat and other ingredients to attract insect-eating birds. Because it is high in fat and calories, it is a quick source of heat and energy for birds and has been used as a good substitute for the insects that birds usually feed upon, but are not plentiful in cold weather. Suet can be offered all year long but is especially important in winter. Why not offer suet to your backyard birds today?

Easy Suet Feeders

Providing suet in a wire basket or mesh bag is an easy, low-maintenance option. Depending on the numbers of birds feeding in your yard, you may only need to add a new cake or ball to the basket or bag once or twice a week. Birds will cling all over the feeder to access the suet, so even as the cake is nibbled away they can still reach the treat. While suet may be most popular in winter, you can leave it in your yard year round and birds will always visit, so there is no need to swap out the feeder or store it during different seasons. For the safest feeding, position any suet feeder 5-6 feet off the ground and near a tree trunk, shrubs or brush for birds to retreat easily if they feel threatened.

It is important to note that squirrels may love suet just as much as birds. Using wide baffles above and below the suet feeder can help keep squirrels away from the food and give birds a better chance to feed without interference. Choosing suet blended with hot pepper can also discourage squirrels, but birds have very limited taste buds and don’t mind the heat.

Birds That Love Suet

Presenting suet in your backyard will also attract a greater variety of birds for your enjoyment. The different birds that enjoy suet include…

  • Bluebirds
  • Bushtits
  • Cardinals
  • Chickadees
  • Jays
  • Kinglets
  • Mockingbirds
  • Nuthatches
  • Starlings
  • Titmice
  • Thrashers
  • Woodpeckers
  • Wrens

As more birds discover your suet feeder, your flock will grow and you may find you need to add a second, third or even fourth feeder to sate all those feathered appetites!


Feng Shui in the Garden

Feng Shui is the ancient Chinese philosophy that believes in attracting and guiding the flow of cosmic energy to influence your health, wealth and happiness. If you are already familiar with Feng Shui, you should know that it is assumed by many that the same fundamental principles that apply to your home also apply to your garden, maybe even more so since the energy in your home is brought in from the outside..

Feng Shui means ‘wind’ and ‘water.’ According to Chinese tradition, everything in the world contains ch’i, the cosmic life force. Ch’i means to flow freely like wind and water, but it is alleged that its movement can be blocked or trapped. This, it is believed, can cause disharmony or misfortune in your life. The movement of ch’i is thought to be influenced by several things such as colors, shapes and sound. The purpose of Feng Shui is to ensure that ch’i is flowing smoothly and gently without being allowed to stagnate or move too quickly. This harmony in your environment is understood to create harmony in your life.

Bringing Harmony to Your Garden

Feng Shui starts with basic gardening maintenance. Ch’i is believed to stagnate in areas where junk accumulates. Clean up your patio or deck and screen your garbage cans from view. Throw away any broken pots, planters or tools. Good cultural practices are also considered important in the flow of ch’i. Mow your lawn, pull up weeds, edge your beds and remove dead plants. Prune any broken or damaged limbs, stake plants and take steps to control insects and disease.

Ch’i requires smooth curves to flow. It is funneled by straight lines but impeded by sharp angles. It does not need to be costly or time consuming to remedy these types of structural problems. A straight walkway can be softened with the addition of curved beds on either side. You may also try planting perennials that mound or spill onto a walkway to break up straight lines. To help ch’i flow gently around corners, consider the addition of a tree, shrub or climbing vine. A curved bench or fountain is another option.

Bright colors, especially red, are used in Feng Shui to attract ch’i. Poor Feng Shui, it is believed, is remedied by placing the five elements recognized by the ancient Chinese – wood, fire, earth, water and metal – in their appropriate direction to beneficially affect the movement of ch’i.

Why not try some of the elemental remedies below in their appropriate directional orientations? They may assist with the flow of ch’i in your garden and perhaps you will reap the benefits of good fortune Feng Shui reportedly imparts.

Feng Shui Remedies

Feng Shui Guide

Feng Shui In The Garden

Kokedama: Easy How-To Instructions

Are you a gardener with a minimalist vibe? Well then, kokedama will give you all the right feels!

What is Kokedama?

Kokedama, loosely translated as “ball of moss,” has become a popular trend in recent years, and for good reason. This Japanese art form eliminates planting pot use by wrapping moss around the root ball to create a beautifully minimalist plant display. If you’re interested in adding some greenery to your home and are looking for a space-saving option, then kokedama is for you.

One reason for kokedama’s recent surge in popularity is its practicality. Unlike traditional potted plants, kokedama is versatile and can be either hung in the home or placed in a saucer or bowl atop a table, shelf, mantle, windowsill, or other surface. Hanging as a display option is perfect for those with limited space. Additionally, kokedama is an enjoyable, easy, and unique way to create a stunning display that can last for years with just a little bit of maintenance. Also, it is an excellent winter gardening project that is fun for the whole family.

Materials

Before you start your kokedama, you’ll want to gather your materials, and it’s important to choose the right ones.

  • Plants
    Most small houseplants will do. We recommend African violet, anthurium, begonia, cyclamen, dracaena, ferns, peperomia, philodendron, pilea, and pothos as great beginner plants. Ease of care is important when selecting your plant, but more importantly, consider where you have the room to display your kokedama. You will want your chosen plant to be displayed where its light, temperature, and humidity needs are met.
  • Moss
    Select sheet moss, either fresh or dried.
  • Soil
    Any good quality potting soil will do. Potting soil with a bit of compost for nutrition and vermiculite for aeration is an extra good choice.
  • String
    It is best to avoid using jute or cotton string. These are attractive with a natural look but break down rather quickly compared to waxed string or fishing line.
  • Incidentals
    Scissors are the only tool necessary to cut the moss and string.

How To Construct

Once you have your materials, it’s time to get kokedama construction.

  1. Premoisten the soil just enough so that it maintains its shape when it is formed into a ball.
  2. Gently remove the selected plant from its pot, shake off excess soil, and mold the moist potting soil ball around the plant roots.
  3. Lay an adequate-sized piece of sheet moss flat and place the soil ball in the middle.
  4. Shroud the soil ball in moss, trimming away any extra.
  5. While holding the moss in place, tie a string loop around the soil ball.
  6. Continue to wrap the string around the ball, tugging as you go to keep it taunt until the moss is secured to the ball. Tie off the line and cut away the excess.
  7. Add a tripod of long strings, as long as you like, and evenly spaced around the ball. Tie them to the line that is wrapped around the moss ball.
  8. Gather the three strings at the top and balance the kodedama so it hangs correctly. You may eliminate this and the following steps if you choose to display it in a saucer or bowl.
  9. Fold the three strings down about three inches and knot them to create a hanger.
  10. Hang your kodedama and enjoy!

After Care

Familiarizing yourself with your chosen kokedama plant will assist you greatly in caring for it correctly. Depending on the type of plant you choose, you’ll want to make sure that all its needs are met.

  • Water
    Water as needed. Check every few days or so by sticking a finger through the moss to assess dryness. Water using a bowl, soak the ball thoroughly, and squeeze out all the excess water before rehanging.
  • Light
    Provide adequate light for your selected plant and position accordingly.
  • Humidity
    Humidity is necessary for all plants, but some more than others. Be sure to have a spray bottle filled with fresh water nearby. Mist your kokedama frequently, especially in the winter when the air indoors is particularly dry.
  • Feed
    Fertilize your kokedama during the growing season with a water-soluble houseplant fertilizer. Use at a quarter strength in the soaking water. Follow the manufacturer’s recommended instructions for frequency.
  • Groom
    Groom your kokedama as necessary, snipping off any browning bit and keeping vining plants in bounds.

In conclusion, kokedama is an easy and trendy way to bring some greenery into your life. With a little time and a few basic supplies, you can create beautiful, pot-less, hanging plant displays that will impress your friends and family.

Note: Succulents may be used for kokedama, requiring more light than most plants but less water, humidity, and fertilizer.

Kokedama
Kokedama
Kokedama

Seed Viability

The perfect way to spend a cold winter’s day is commencing this year’s veggie, herb, and flower gardens. The gardening season begins in earnest in February with seed-starting, and seed-starting begins with an inventory of necessary supplies. To prepare for this endeavor, you will need:

  • Seed-starting mix,
  • containers (flats, peat pots, cell packs, etc.),
  • labels and markers,
  • heat mats,
  • grow lights,
  • spray mister and watering can
  • and, of course, seeds.

If this is not your first seed-starting rodeo, you will already have a number of these supplies on hand and will just need to supplement your inventory where necessary.

But the seeds, what about the seeds? Can last year’s excess be used for this year’s plants? Let’s find out!

Leftover Seed

Don’t throw away leftover seeds! Most vegetable, herb, and flower seeds are viable for much longer than we may anticipate, especially when stored properly.

Instead, test the seeds to assess their viability. Here’s how:

  1. Dampen a paper towel.
  2. Place ten seeds, all from the same pack, on the paper towel.
  3. Gently fold the damp paper towel and slip it into a sealable plastic bag.
  4. Label the bag with the date and the seed name.
  5. Place the bag in a warm area in the home out of direct sun.
  6. For germination time, check the seed pack or look this information up.
  7. Check on seeds twice a week up until about a week after the advised germination timeframe.
  8. If one seed germinates of the ten, then you have a 10% germination rate; if five seeds germinate, then you have a 50% germination rate, and so on and so forth.
  9. Make your decision on using or discarding the seeds based on your personal preference for germination amounts. We recommend purchasing new seeds if germination is under 50%.
  10. Seeds pre-sprouted in paper towels may be planted in pots or cell packs and grown on.

It is important to note that even when stored under perfect conditions, seed viability will decline each year. Therefore, it is wise to test all older seeds every year. The exception is seeds that have already been determined only to germinate when fresh, one year old. These seeds are not worth the effort to test.

Seed Storage

Proper storage plays an important role in future viability when purchasing fresh seed. We recommend:

  • Storing seeds in a cool, dark environment. A refrigerator works well. If a refrigerator is not available, a cool basement will do.
  • Keeping the storage temperature as consistent as possible, avoiding wide fluctuations.
  • The relative humidity be maintained at less than 40% – store seeds in sealed glass jars or plastic bags.
  • Ensuring that the storage area or containers are varmint-proof.

Be sure to clearly and accurately mark your seed containers with the plant name and variety, the purchase or storage date, and any other important information you may find helpful in the future.

Seed Viability Charts
Clear Creek Seeds (https://www.clearcreekseeds.com/seed-viability-chart/)  offers an excellent seed viability chart on their website, which we have included here for easy reference.

New Year Gardening Resolutions

As a new year begins, so do our garden plans. Winter is now halfway through; day length is increasing, and exhilarating notions of having the best garden ever consume our thoughts almost daily. Here are some resolutions to help make your dreams come true this gardening season.

  • PLAN – A little garden planning goes a long way. Layout your garden design for vegetables, herbs, and flowers, even trees and shrubs, to maximize space, efficiency, and beauty.
  • IMPROVE – Healthy soil equals healthy plants. A soil test will tell you what needs improvement. Add the recommended amendments to feed both the soil and plants for a vibrant, beautiful, and productive garden. Resolving to stick to a regular weeding, feeding, and watering schedule will also help improve your garden results.
  • START – There’s just something special about starting seeds indoors. Maybe it’s the improved cultivar selection, the excitement of beginning a new gardening year, or simply getting your hands in the soil during the winter months. Whatever the reason, it’s beneficial to get a jumpstart on the season by starting and growing seedlings under grow lights.
  • TRY – This year, resolve to try something new every season. Experiment with one unusual vegetable, herb, or flower. This is an excellent way to increase both plant and garden knowledge and may result in a delightful, unexpected outcome.
  • ATTRACT – Plant more bee-friendly plants to attract pollinators. Some of the best plants for this purpose are native. Be sure to include early, mid, and late-season bloomers to ensure that veggie plants are pollinated and producing and to keep pollinators active, plump, and happy all growing season long.
  • IMPART – What greater gift can you impart to children than a lifelong love of gardening? This year, involve the whole family, from youngest to oldest, by giving kids their own small plot, raised bed, or container to plant, nurture, and learn from.
  • PRESERVE – Don’t allow your hard work to go to waste. Harvest fruits, vegetables, and herbs at peak ripeness when they are their tastiest. Preserve the abundance. Can, freeze, or dry extra produce so you can enjoy homegrown all year.

This list will start you on your New Year’s gardening journey. Feel free to add to this list to personalize it. Use it to evaluate your successes at the end of the year and for planning purposes next January as you resolve, yet again, to have the best garden ever!

Insects In Winter

Now that we’re in the throes of winter, do you ever stop and think, “Where did all the bugs of summer go?”

With the onslaught of frigid temperatures along with snow and ice, gardeners and homeowners alike hope and pray that these weather extremes will reduce local pest insect populations. But do they?

Well, there’s both good news and not-so-good news on this subject. For some insects, life ends when the cold begins; that’s the good news (well, maybe – read along for more on this). However, insects are known survivors, so for others, over time, they have developed methods of survival; that’s the not-so-good news.

The Good (well, maybe)

Let’s begin with the good news. Some insects die when the cold weather sets in. The only problem with this “good news” is that they have already taken steps to continue their legacy before they expire. Knowing that the end is near, these insects lay their eggs beforehand, ensuring a new generation come spring. If the eggs are laid above ground, there is a greater chance that they will not make it through a particularly harsh winter – this would include insects like bagworms whose egg casings hang from evergreen trees and shrubs where they are offered little protection from the elements. It also includes the red lanternfly, whose egg masses will not survive temperatures below 12 degrees Fahrenheit.

The Bad

As stated earlier in this article, many insects have developed a method for winter survival. Here are some of their tricks:

  • Migration – Just like some birds, some insects migrate to warmer areas to survive the cold.
  • Hibernation – Some insects have the capability of slowing their metabolism, just like a bear, to withstand wild winters.
  • Freeze Tolerance – A few insects that naturally come from areas with harsh winters have developed the ability to create a natural anti-freeze in their bodies to prevent ice from forming, thus ensuring their winter survival.
  • Freeze Avoidance – Still, other bugs simply avoid the bad weather. This is by far the most popular method of insect winter survival. These pests will bury deep into the soil, disappear into rotting logs and leaf piles, or slink into our homes for warmth and comfort.

The Reality

The reality is that you can’t count on winter to make a big difference in yearly pest control, even when the winter is extreme. It is far more effective to have several approaches in place to create an effective pest defense strategy.

  • Familiarize yourself with local pests and their lifecycles. As always, knowledge is power.
  • Make sure you know the difference between a “good” and a “bad” bug before attempting to eliminate them.
  • Monitor your home and garden regularly for pest infestations to gain the upper hand on any potential pest problem.
  • Stop by YOUR GARDEN CENTER for insect identification and the safest treatment recommendations, such as natural repellents, pest management tactics, companion plant suggestions, and beneficial insects.

Insects in Winter
Insects in Winter
Insects in Winter