Author Archives: GCSDev

Summer Lavenders

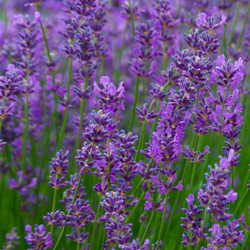
Do you enjoy making herbal or floral bouquets and wands to scent the house? Maybe you’re into the lavender cooking trend or like to infuse playful summer drinks with a floral touch. Perhaps you recognize the aromatherapy or medicinal qualities of lavender.

In other words, do you love lavender and are frustrated because the bloom season is so short?

Whatever you do with your lavender, you may have planted one and it bloomed for a few weeks. Now you think you have to wait another year to enjoy the beauty and fragrance. That’s no fun! But here’s a secret to prolong your passion during lavender season…

About Lavenders

There are actually three groups of lavenders. Members of each group bloom around the same length of time, but each group blooms at different times. By planting at least one member of each group, you can enjoy lavender from early spring to mid-summer (and sometimes even longer with careful watering).

Members of the “Non-English Lavenders” bloom from early to late spring. “English Lavenders” follow and bloom from late spring to early summer. True summer lavenders, known as “Lavendins,” continue blooming into the hottest days of summer.

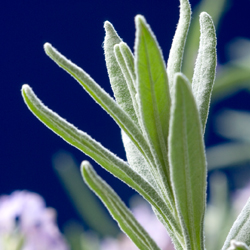
Also called “English Lavender hybrids,” the varieties in this summer group are crosses between the Portuguese and English Lavenders. They all have large gray leaves, grow into large plants, and grow best in the heat. They are all very fragrant, making them welcome additions to any lavender garden.

Abriali Lavender was one of the first hybrids. It produced cosmetic-grade oil until Grosso Lavender replaced it with superior oil production. Happily, gardeners can also enjoy Grosso in their gardens, as it’s frequently available at garden centers.

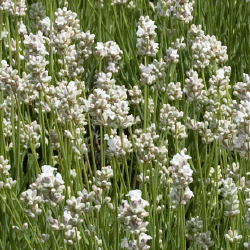
White Grosso Lavender, with the same beauty and fragrance, provides a nice background for a mixed flower border. Edelweiss Lavender, a smaller white lavender, mixes nicely in the garden, without a reduction of fragrance.

Hidcote Giant Lavender and Provence Lavender are garden center favorites. Approximately the same size, the Hidcote Giant has darker flowers than the Provence, which has a longer flower wand. Sachets usually contain Provance buds because they are exceptionally easy to remove from the stalk. Other popular varieties include Grappenhall, Dutch Mill, Seal and Fred Boutin lavenders.

Lavenders In the Garden

Growing lavenders could not be easier. All thrive in full sun in warm, well-drained, average quality soil. Dampness, either through poor drainage or humidity, will kill them. They grow well in pots with good drainage and fair soil. Prune after blooming to shape the plants and promote future blooming. While lavender is drought resistant, if the soil is dry, it is necessary to water well. Water again only when the soil is dry. Using compost as fertilizer will provide critical nutrients and improve soil drainage.

Using Lavender

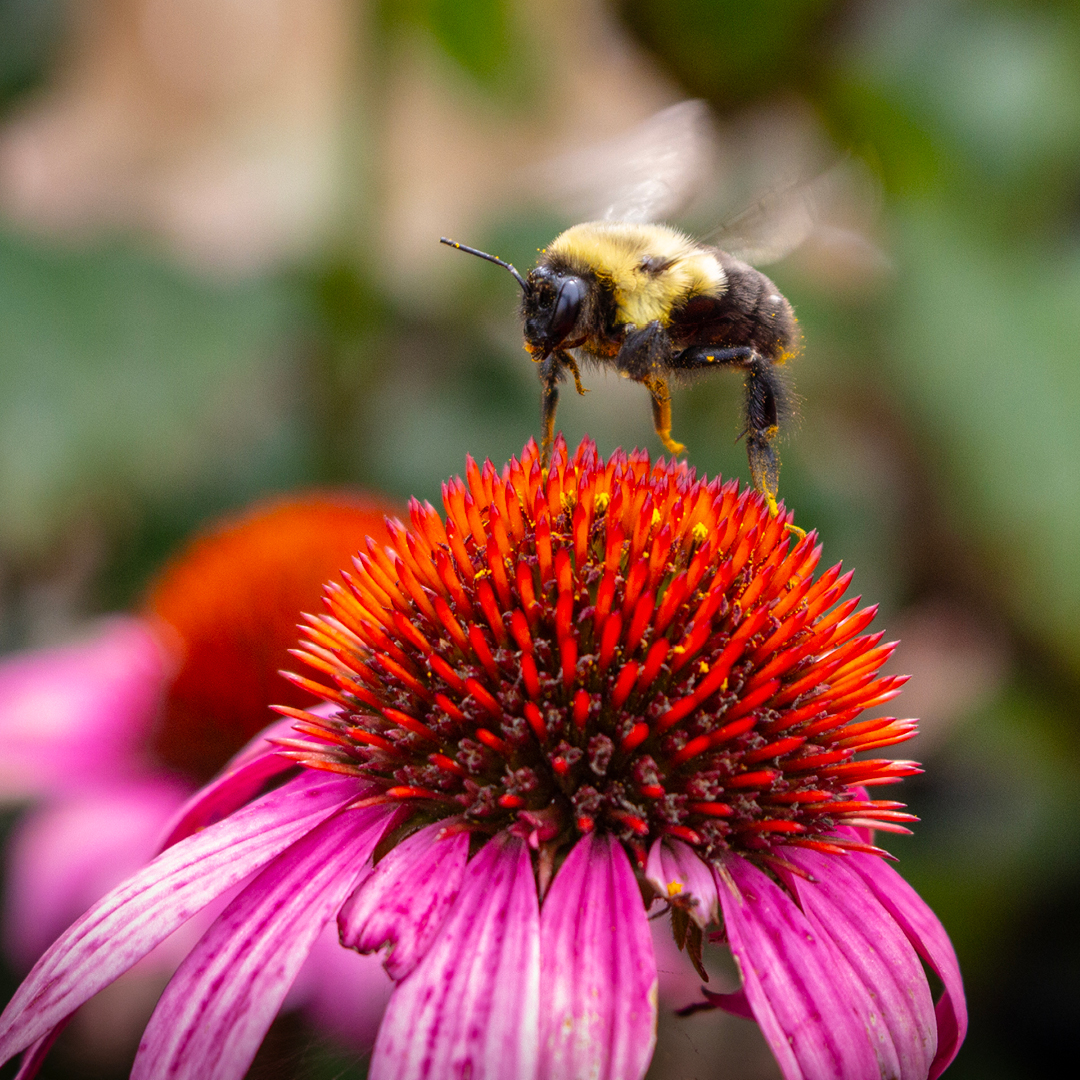
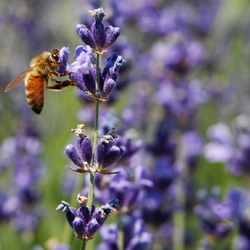
Lavenders are very attractive to bees. They happily buzz from flower to flower while collecting pollen. Some honey producers site their hives in the middle of lavender fields to produce lavender-scented honey. The honey’s aroma is a great way to start the day!

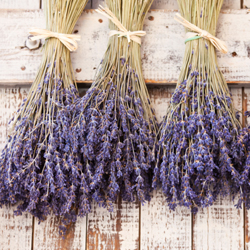
Drying lavender for future use is easy. Cut bundles of wands from the plants without cutting into the older woody part of the plant. Use a rubber band to hold the bundles together and hang them upside down in a dark, dry room such as an attic or closet. The darkness helps retain the bloom color. The bundle should be dry in 7-10 days.

Although lavender’s taste isn’t the same as its fragrance, lavender dishes appear in many trendy restaurants. Lavender martinis and teas, ice cream, cookies and other desserts accompany lavender-sauced meats and vegetarian dishes. Lavender is an ingredient in the herbs de Provence mix and replaces strong tasting herbs such as rosemary, thyme or mint in many cookbooks for meats, breads and general seasonings.

Some folks even use lavender as an antibacterial antiseptic to treat wounds and insect stings.

Even if you just want to enjoy lavender for the sake of its beauty and ease of maintenance, remember… Planting one of each of the three groups lets you love your lavender for three times as long. Enjoy!

Summer Lavenders

Summer Lavenders

Summer Lavenders

Summer Lavenders

Summer Lavenders

Growing Zucchini

Zucchini is one of the most popular vegetables choices for growing in the home garden. Not only is zucchini easy to grow, it is also tasty and nutritious, as well as versatile in a number of recipes. All summer squash, including zucchini, are rich in beta-carotene, folic acid, vitamins C and E and numerous healthful minerals. Zucchini can be eaten fresh, baked into bread, roasted, grilled, added to salads and so much more. So, grow zucchini, eat up and get healthy – we’ll supply the tips you need for successful growing and a bountiful harvest.

Planting

Sow zucchini seeds or seedlings about 2 weeks after the last frost date in full sun and well-drained, nutritious garden soil. It is best to plant zucchini in hills, three plants in each, to ensure warm soil and good drainage. Hills should be about 8 inches high and 12 inches in diameter. Set hills at least three feet apart, as these plants are dense and require plenty of room for good air circulation.

Care

Zucchini plants will thrive in regular garden soil. If your soil is poor then you may wish to fertilize or amend the soil with compost. Keep zucchini plants evenly watered throughout the season. Mulch the garden bed with salt hay to keep it free of weeds and to retain soil moisture. If growing zucchini horizontally, mulch will keep the fruit clean by preventing it from coming into contact with the soil.

Staking

Zucchini is a vine and may be grown vertically, with assistance, on vegetable netting or a fence, trellis or lattice. Plants and fruit are heavy, so be certain to secure the vine carefully as it grows and watch for any signs of breakage that could damage maturing vegetables.

Harvesting

Zucchini is best and has the best flavor if it is harvested when young and tender, about 6 inches long. Use pruning shears or a garden knife to cut zucchini from the vine. Never pull the fruit off, which can damage the vine as well as the vegetable.

Pests

A number of pests will like zucchini just as much as you do, but there are steps you can take to keep your zucchini patch pest-free.

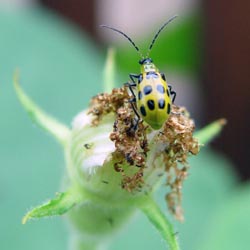
  • Cucumber Beetle: These insects will skeletonize the zucchini leaves, resulting in lower yields and smaller vegetables. Plant resistant varieties and hand pick the beetles.
  • Squash Bugs: Yellow spotting on zucchini leaves that turn brown identifies squash bug damage. Eventually the leaves then turn black and crispy. Control this pest when plants are young. Look for eggs on the underside of zucchini leaves and crush them.
  • Squash Vine Borer: This pest first presents itself with wilting leaves. Upon inspection you will see orange ‘sawdust’ at the base of the plant. Use floating row covers if planting early or hold off on planting zucchini until after July 4th when the insect egg laying is completed.
  • Blossom End Rot: This disease appears as a dark, leathery patch on the blossom end of the zucchini. It is caused by either uneven soil moisture or a soil calcium deficiency. Do not allow soil to dry out between watering, and add calcium to the soil with dolomitic lime or gypsum to ensure proper nutrition.

Recipes

Try these delicious treats to make the most of your zucchini harvest!

Grilled Zucchini

Ingredients

  • 1 large zucchini
  • 1/4 cup Italian-style salad dressing

Directions

  • Slice zucchini into 1/4 inch thick slices (peel first if desired). Toss in a bowl with Italian dressing.
  • Place on a hot grill about 4 to 5 minutes or until nice grill marks appear and the zucchini is slightly limp. Serve and enjoy.

Zucchini Bread

Ingredients

  • 3 cups all-purpose flour
  • 1 teaspoon salt
  • 1 teaspoon baking soda
  • 1 teaspoon baking powder
  • 3 teaspoons ground cinnamon
  • 3 eggs
  • 1 cup vegetable oil
  • 2 1/4 cups white sugar
  • 3 teaspoons vanilla extract
  • 2 cups peeled, grated zucchini
  • 1 cup chopped walnuts (optional)

Directions

  • Preheat oven to 325 degrees F.
  • Grease and flour two 8 x 4 inch bread pans.
  • Sift flour, salt, baking powder, soda and cinnamon together in a bowl.
  • Beat eggs, oil, vanilla and sugar together in a large bowl.
  • Add sifted ingredients to the creamed mixture and beat well.
  • Stir in zucchini and nuts (if desired) until well combined.
  • Pour batter into prepared pans.
  • Bake for 40-60 minutes or until tester inserted in the center comes out clean.
  • Cool in pan on rack for 20 minutes.

Remove bread from pan, and cool completely.

Growing Zucchini

Growing Zucchini

Summer Watering Tips

As the days heat up, watering can become a dreaded garden chore and too many gardeners use wasteful techniques that use plenty of water but don’t give their plants the moisture they really need. Make watering plants easier and more efficient with the proper practices and tools…

    • Mulches not only make plantings look more attractive, but their most important functions are to help retain soil moisture and minimize weeds, which would also usurp moisture from your plants. Mulch around plants to a depth of 2-4 inches, refreshing mulch as needed to maintain that depth and attractiveness.
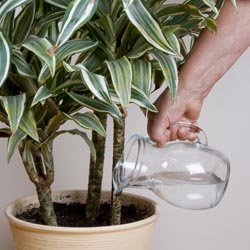
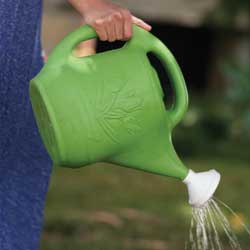
    • Watering cans and small containers work great for spot watering plants with different watering needs by hand. You don’t always need to get out a hose or sprinkler to get the watering done.
    • Check to make sure that you have the proper length hose(s) to reach every corner of your garden. Take into account any obstacles in the way, and be sure you aren’t dragging the hose over any delicate plantings to reach more distant dry spots.
  • Add a water wand to the hose to get the water where it’s most needed – the base of the plants – without needing to bend over repeatedly, which can cause back strain.
  • The best time to water is during the early morning hours of a sunny day. This will allow plants to absorb more water before it evaporates when temperatures rise, but won’t leave water to sit on plants overnight when mold can develop.
  • Always water plants and container gardens thoroughly and deeply to encourage deeper, more drought-tolerant root systems. It is better to water less frequently but more deeply rather than more often but with less water.
  • In the landscape, a good rule of thumb is to provide an inch of water per week minimum. Keep track of precipitation with a rain gauge to avoid wasting water by overwatering when Mother Nature does the job.
  • New individual plants that are set out, direct sown seed beds, sodding, etc. often require daily care, including watering, until established. Check moisture levels carefully during this period so the plants are well cared for.
  • Use soaker hoses to provide slow drip watering. This allows plants to absorb water easily without wasting water by evaporating from foliage or spraying into the air. Soaker hoses can even be layered beneath mulch to preserve as much moisture as possible.
  • Pay extra attention to plants in containers and hanging baskets as they tend to dry out faster and with greater frequency. These plantings will likely need to be watered daily or even multiple times a day during heat waves.
  • Place Tree Gators, a drip irrigation bag, on newly planted trees for slow, steady watering that will soak down to the root system without draining away along the surface of the soil.

If you’ll be away on an extended vacation, or even just for a few days, make arrangements with a trusted friend or neighbor to “plant sit” while you are gone. There’s nothing worse than worrying about your garden while you’re away – except coming home to crisp plants that haven’t been watered properly!

Summer Watering Tips

Growing and Storing Herbs

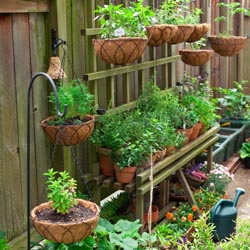
Growing herbs, whether inside or out, may be one of gardening’s most gratifying experiences. Because of their beauty and versatility, herbs may be grown amid vegetables, ornamentals or in a garden dedicated strictly to their kind. They may be nurtured in a sunny window box, strawberry pot, whiskey barrel or just about any container you choose. Situate your herbs for easy access: on the patio, deck, a sunny windowsill or in the kitchen garden. Herbs are relatively carefree and have a multitude of uses that include but are not limited to: culinary, aromatic, ornamental, medicinal and insect control.

Herb Growing Tips

Choose a full sun location, 4-6 hours per day is best. Herbs will grow in a shadier location, but plants will be weak and thin. Most herbs are not demanding of soil fertility. One thing that they will not tolerate, however, is wet or poorly drained soil, so be sure not to overwater your herbs.

Locate herbs in or near the kitchen for easy access when cooking. Be aware of the ultimate size, height and spread of the herbs that you plan to grow. If you take this into consideration you can assure room for the plants to reach their full potential. Position taller herbs to the back of the garden or container and shorter herbs to the front; this will allow for easier access and prevent shading.

Water pots before planting. Remove plants from their pots and loosen roots to stimulate new root growth. Place plants at the same soil depth that they were in the pot, or slightly higher to avoid rotting. Gently firm soil around each plant, water carefully and mulch if desired. Feed monthly with a mild, organic fertilizer such as Espoma Vegetable or Tomato Tone.

Some herbs, such as mints, have a tendency to be invasive and may take over an entire herb garden or even spread into the lawn or other parts of the landscaping. Sink aggressive potted herbs directly into the garden to minimize this overgrowth. Pull up pots each spring to replenish their soil, then sink the containers back into the garden for another season.

Growing herbs indoors is also quite simple. Choose herbs that will not get too large to handle inside. The same soil requirements apply for both indoor and outdoor planting. Select a south or west window to situate your plants so they receive adequate sunlight. It may be beneficial or necessary to supplement with artificial lighting during the winter months. Provide humidity by grouping plants together and misting daily. Another option is placing potted herbs on a humidity tray. Fertilize monthly to provide the best nutrition.

Harvesting

Fresh herb leaves are ready to be harvested as soon as there is enough foliage to maintain the plant. Try to harvest in the morning, after the dew has dried but before the sun becomes too hot, using a sharp knife or scissors to make each cut. It is a good idea to harvest only what you plan to use at time of cutting, as herbs do not store well in the refrigerator. With most herbs it is beneficial to harvest before the plants go to flower, as the taste is better at this stage of growth. Rinse with cold water and pat dry before using.

Drying

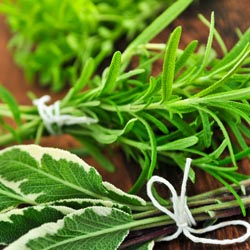
If you have excess herbs, you may want to dry them for future use. After gently rinsing the harvested herbs, drain them on absorbent towels, tie in bunches and dry thoroughly by hanging bunches up in the sun just until all water evaporates from the surface of the herbs. Remove plants from sun and hang in a clean, dark, dry location with good air circulation for 1-2 weeks until herbs are completely dry and brittle. If not dried completely the herbs will become moldy in storage. Remove leaves from the stem and store them in an airtight container in a cool, dry, low light environment. Check container in a few days for condensation. If there is any moisture in the container you must start the drying process again, after checking carefully for any mold or mildew.

You can also dry herbs in a conventional or microwave oven. With a conventional oven, position clean herbs in a single layer on a shallow pan. Place baking pan in a 180°F oven for 2 to 4 hours. When using a microwave, place clean herbs in a single layer on a paper towel or plate. Cook herbs on high for 1 to 3 minutes, rotating the plate every 30 seconds or moving the leaves around on the plate until thoroughly dry. Store these herbs just as you would air-dried herbs.

Freezing

Freezing herbs is also easy to accomplish. Wash herbs and blanch them in boiling water for one minute. Cool herbs very quickly in ice water then drain. Package herbs in airtight plastic bags and store in the freezer.

Herbs can be delightfully easy to grow and they are an even more delightful addition to salads, sauces, pastas, teas and many other treats you can enjoy year-round.

Storing Herbs

Storing Herbs

Storing Herbs

Dealing with Powdery Mildew

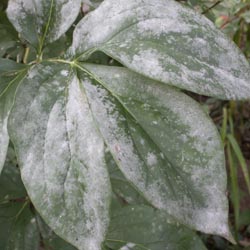
One of the most common and easy to recognize plant diseases, powdery mildew, is caused by fungus spores that overwinter in garden debris and are spread by wind the following season. In late spring and early summer, the warmer days and high humidity provide perfect conditions for spore germination. The disease spreads over the surface of leaves of plants like Bee Balm, Lilac, Rose and Phlox. While the plant may look extremely unattractive, its overall health is not affected. Although we can’t change the conditions that favor powdery mildew, we can stop or slow its spread to keep your plants looking their best.

To control powdery mildew…

  • Place susceptible plants in locations where they receive early morning sun. This allows the dew to dry quickly from their leaves to inhibit the spread of mildew spores.
  • Increase the plants’ resistance by minimizing stress and providing adequate water, sun and soil requirements. This will help the plants naturally resist powdery mildew and other common diseases.
  • Give plants plenty of room for good air circulation. This helps leaves dry more quickly and lowers humidity so conditions are not as favorable for the mildew spores.
  • Water the soil not the leaves of susceptible plants. Use soaker hoses, drip systems or watering wands to get water just to the base of the plant and out to the drip line without watering the foliage.
  • Select mildew-resistant varieties of plants. These will vary in different areas and depend on your soil conditions and landscaping needs.
  • Prevent the disease from effecting susceptible plants by spraying with a fungicide like Bonide Fung-onyl, Bonide Infuse Systemic Disease Control or Safer Garden Fungicide every 7-14 days while conditions are favorable. Always read fungicide labels completely before applying and follow instructions carefully to prevent mishaps that could damage your plants.
  • Eliminate the breeding grounds for powdery mildew by cleaning up the garden and yard each fall, removing leaf litter, pruning branches and replacing old mulch. This will minimize the areas where spores can overwinter, reducing the chances of more mildew spreading in the spring.

Powdery mildew may not be pretty, but it can be pretty easy to control if the right steps are taken to protect your plants. Using multiple techniques will be the most effective way to reduce the spread of the mildew and keep it under control or completely eliminated so your plants always look their best.

Powdery Mildew

Vegetable Gardening Tidbits

Are you ready to make the most of your vegetable garden? Try these tips and tidbits for everything from easier weeding to stopping pests to enjoying a hearty harvest!

  • Reducing Weeds
    Minimize weeds in your garden by covering the soil between planting rows with mulch. Several sheets of moistened newspaper topped with hay or straw works very well, especially if you move your planting areas around a bit from year to year. You can even use carpet scraps placed upside-down. Landscape fabric topped with wood chips or gravel is a good choice if the walkways are permanent. Try to avoid the habit of tilling to remove weeds because this process brings up weed seeds from deeper in the soil and exposes them to the light they need to grow.
  • Increase Tomato and Pepper Production
    Fruiting of your tomatoes and peppers may be improved by applying Epsom salts, which contain sulfur and magnesium. Apply one tablespoon of granules around each transplant, or spray a solution of one tablespoon Epsom salts per gallon of water at transplanting, first flowering and fruit set. You can find Epsom salts at drug and grocery stores.
  • Supporting Tomato Plants
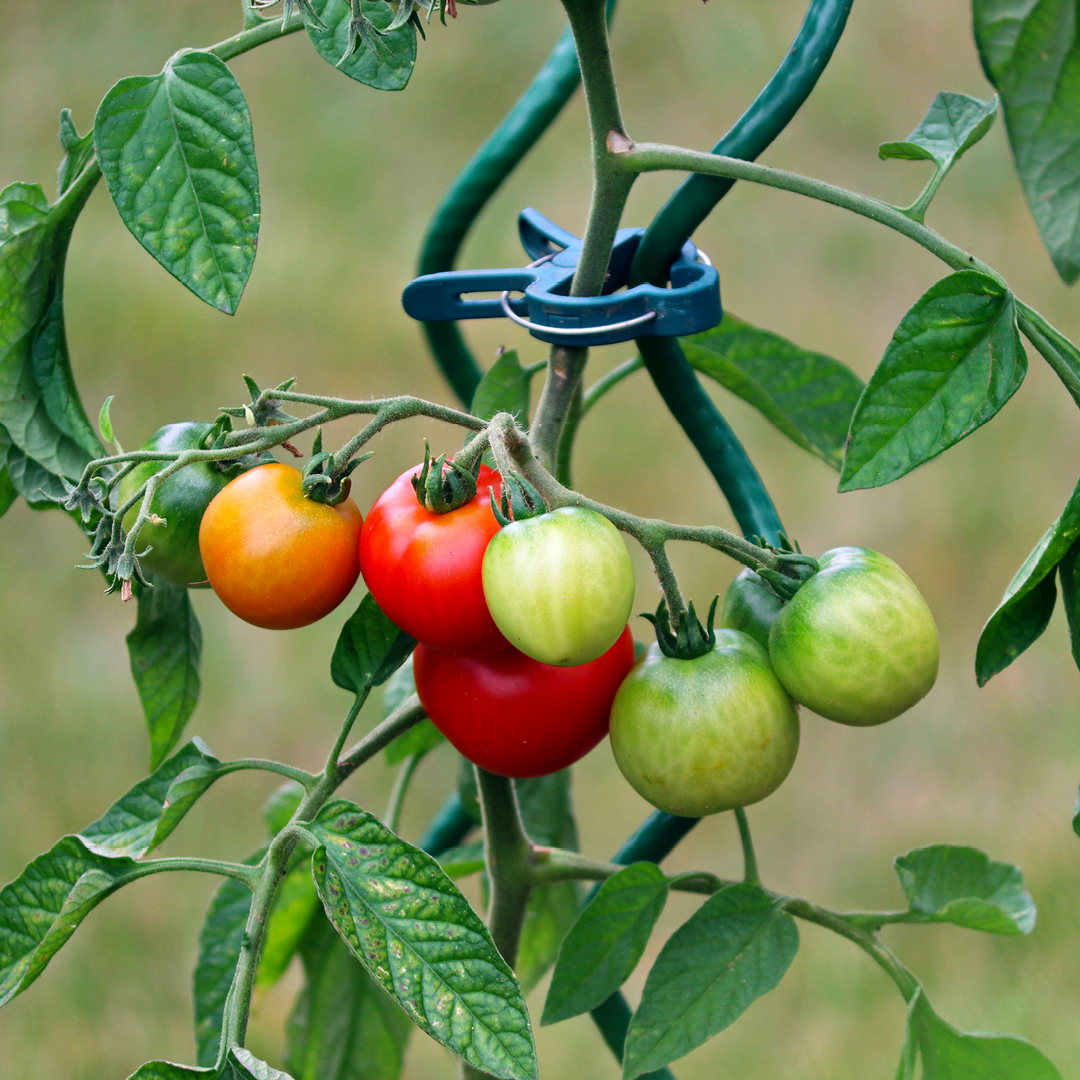
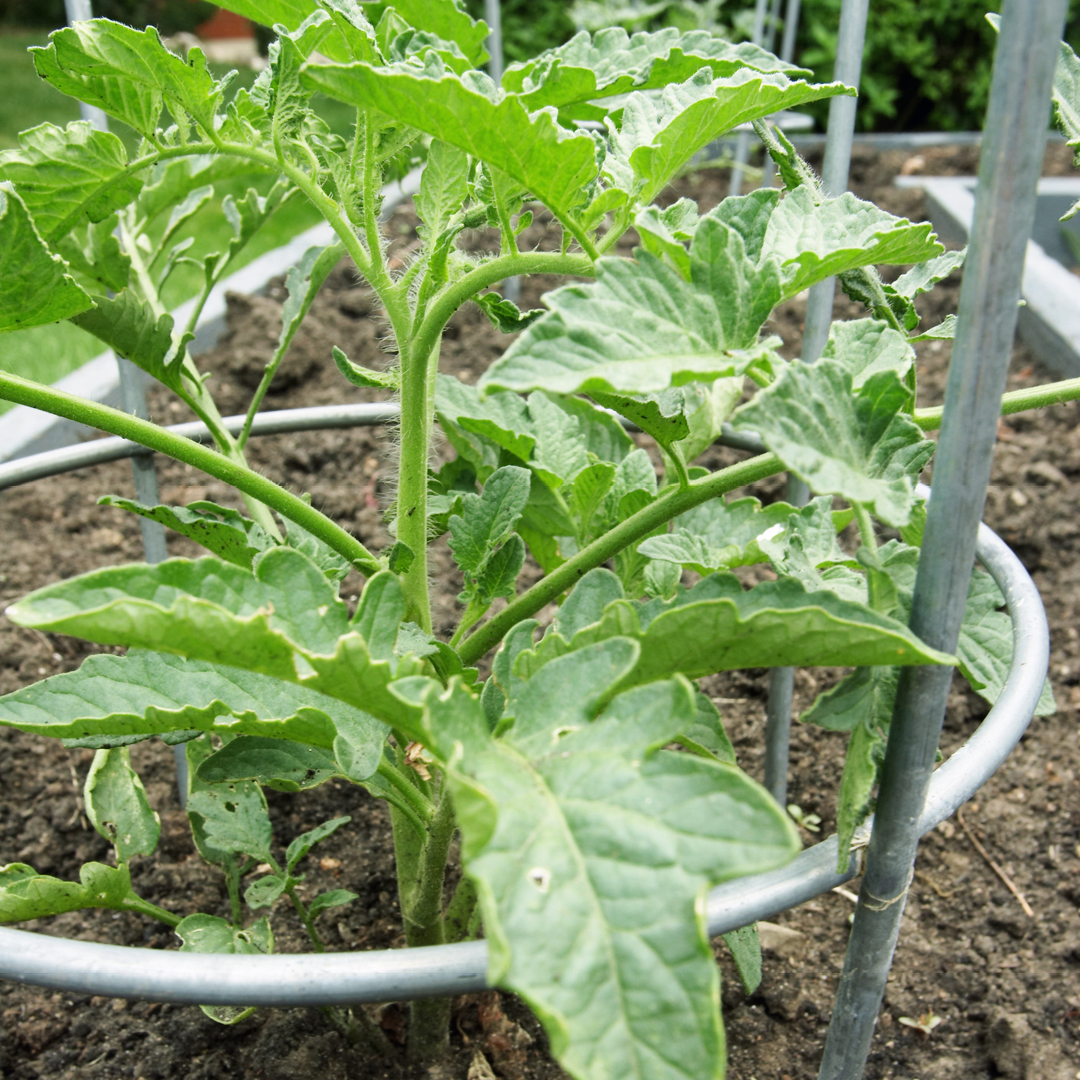
    Set your tomato supports in place before plants get too large. Smaller determinate (bushy) varieties can be supported with small cages, but larger indeterminate (vining) varieties need large cages or tall stakes. Secure cages with stakes so they don’t fall over as plants grow larger and heavier.
  • Growing Larger Tomatoes
    Indeterminate tomato plants, such as ‘Better Boy’, will produce many suckers. A sucker is a new shoot that starts where a branch connects with the main trunk. Removing suckers will decrease the number of fruits produced, but the remaining tomatoes will be larger and will ripen sooner.
  • Ending Blossom End Rot
    To minimize blossom end rot, keep soil evenly moist, apply a layer of mulch to conserve moisture, don’t over-fertilize (especially avoid high-nitrogen fertilizer) and avoid damaging plant roots while cultivating. Blossom end rot shows up as dark sunken spots on the blossom or non-stem end of tomatoes, peppers and squash. It’s caused by a calcium imbalance in the plant. The soil may have adequate calcium, but the plant isn’t able to take up enough to supply the rapidly developing fruit.
  • Stop Slugs and Snails
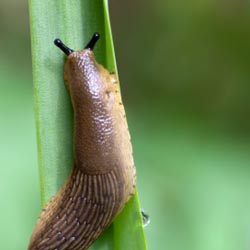
    Slugs and snails may be deterred with coffee grounds, diatomaceous earth and even sharp gravel. Spread any of these materials in a ring around individual plants. Wrap pots with copper tape to keep slugs from crawling up. Inspect foliage and pick off any insects that have already passed the barriers.
  • Keep Cucumber Beetles at Bay
    Young cucumber, melon and squash plants are easy prey for cucumber beetles. As the seedlings grow, these yellow-striped or spotted beetles emerge to feed on their foliage. The beetles also spread bacterial wilt disease. To control cucumber beetles use a portable vacuum cleaner to suck up them up in early evening, spray beneficial nematodes on the soil or try planting broccoli, calendula, catnip, nasturtium, radish, rue or tansy, which naturally repel these insects. If you want to try marigolds to repel them use the more pungent varieties like African, French or Mexican marigolds. The more common marigolds may actually attract these pests.
  • Plan for Late Summer Harvests
    It’s not too late to sow lettuce, beets, carrots, radishes and other short-season crops for a late summer harvest. Shade lettuce, if possible, during late afternoon to keep young plants cooler, or grow them next to larger plants that provide some shade. You’ll need to water more often on these hot days than you did in spring and early summer, but you can easily extend their growing season for later harvesting.
  • Grow More Tomatoes, Zucchini and Beans
    Harvest tomatoes, zucchini, beans and other fruiting crops frequently to encourage continued production. Don’t allow any fruits that you won’t be harvesting to remain on your plants, because when mature seeds are produced it’s a signal for the plant to slow down fruit production. Instead, consider sharing, selling, preserving or trading extra produce so you can continue to harvest and extend the growing season.
  • When to Harvest Herbs
    Herbs are best harvested just as they are beginning to flower. That’s when they have the highest concentration of essential oils and flavor in their leaves. Harvest entire branches back to within a few inches of the main stem to encourage new, bushy growth.
  • Harvesting and Storing Onions
    Begin harvesting onions when about half to three-quarters of the leaves have died back. Then gently dig or pull the onions and store them in a dry, shady place with good ventilation, such as an outdoor shed or barn, for 10-14 days. After the onions have cured, put them in slatted crates or mesh bags and store them indoors in an area with low humidity and temperatures between 33-45 degrees F.
  • Enjoying Green Tomatoes
    When daytime temperatures no longer rise above 65 degrees F in late summer and early fall, it’s time to pick the green tomatoes. Wrap them individually in newspaper and let them ripen indoors, or try some fried or in other recipes that call for under-ripe tomatoes.

Vegetable Garden Tidbits

Vegetable Garden Tidbits

Vegetable Garden Tidbits

Vegetable Garden Tidbits

Tent Caterpillars

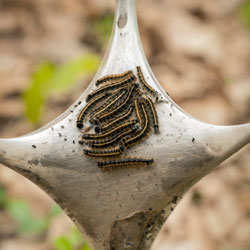
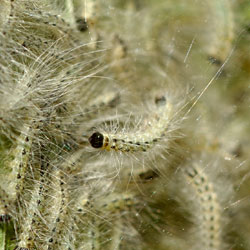
“Ugly” “disgusting” “gross” and “creepy” are just a few things gardeners say when they see tent caterpillars. Not only are they visually unattractive, but the hundreds of caterpillars within a tent can defoliate a shrub or tree in a matter of days. Fortunately, the attack is seldom fatal.

About Tent Caterpillars

The Eastern tent caterpillar, Malacosoma americanum, one of the 26 species of tent caterpillars or tent worms, emerges from its egg in early spring as the leaves of the host plant, generally a member of the Rosaceae family, begin to open. Along with other emerging caterpillars, it climbs up the plant and begins building a silken nest in branch forks to provide group protection from predators, maintain warmth and act as a staging site prior to leaving the tent. The worms quickly consume any leaves within the nest, forcing them to forage outside of the nest during the day. At night, they return to the protective nest to rest and stay warm. In fall, the individual caterpillars spin cocoons and two weeks later emerge as snout moths. As adults, they mate, lay eggs and die. Thus, the cycle starts again.

Eliminating Tent Caterpillars

Methods to deal effectively with tent caterpillars…

  1. Bacillus thuringiensis (Bt) effectively kills this pest when young. Following directions, directly spray onto surrounding leaves and onto the tent. The unsightly nest will remain, but the caterpillars will die. In time, the nest will decay and disappear, or it can be removed manually if desired.
  2. Removing the tent removes the eyesore and the worms, if the tent isn’t too large. In the early morning or evening, when the worms have not yet left the tent or have already returned, thrust a stick into the middle of the web and twist until the tent is on the stake and off the tree, and then plunge it into soapy water to kill the worms. Or, remove it by pruning the branches and twigs going into and out of, the tent, but be sure to dispose of it properly so the caterpillars do not move on to another nearby location.
  3. In the fall, after deciduous leaves have fallen, remove any egg masses. Look for them on or near any trees previously infested. They’re usually 6-18″ from the tips of branches.

Tent Caterpillars

Tent Caterpillars

Gardening With Children

By gardening with your children or grandchildren, you can give them an awareness and appreciation of nature and the world around them that will stay with them for the rest of their lives. Even very young children enjoy helping with simple garden chores such as weeding, spreading mulch and harvesting. Older children love to have their own special garden to look after. This could be as small as several containers on the deck or as big as your whole yard, depending on their (and your) time, willingness and patience. To start out, you might give them a section of your garden to plant and look after.

First, be sure to teach your budding gardener the value of improving the soil with organic material before they begin planting. Explain how organic material improves the texture of the soil and adds some food for the plants as well.

Since improving the soil will make them more successful, they’ll be willing to garden again next spring. There are special kid-friendly tools available, just right for small hands to manipulate and since children love getting dirty, you’ll not be short of volunteers when the digging begins!

Next, help your child select a combination of plants that will make their garden interesting and exciting throughout the year. You can do this by considering all five senses:

  • Sight
    Many colorful blooming plants as well as plants with unusual flowers, oddly-shaped leaves or crazy seeds will appeal to a child’s imagination.
  • Touch
    Stroke the silky-soft, silver leaves of lamb’s ears (Stachys byzantina) – now you’ll know how it got its name. Or, feel the papery flowers of thrift (Armeria maritima) or strawflowers, the ferny foliage of yarrow or the succulent foliage of sedum. Even thorny plants such as raspberries or roses can engage a child’s sense of touch – carefully of course!
  • Taste
    Growing vegetables is always fun and rewarding for children. If you have the space, it’s always exciting to grow pumpkins for Halloween or weird and wonderful gourds. Other easy to grow vegetables include radishes, carrots, peas, lettuce and cherry tomatoes. And don’t forget fruits like strawberries, rhubarb and watermelon. At harvest time let your child host a ‘salad party’ to share their bounty with family and friends.
  • Smell
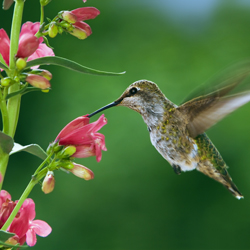
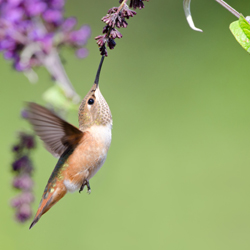
    There are many scented flowers to choose from, including perennial peonies and lilies, as well as annual sweet alyssum and heliotrope. Let kids select herbs with fragrant foliage too. Mint is always popular but be sure to allow room for it to spread. Choose varieties with interesting names like chocolate, apple or grapefruit to capture a young gardener’s imagination. Use the pineapple-flavored leaves of pineapple sage in iced tea and watch the hummingbirds gather around this herb’s bright red flowers!
  • Sound
    The whirring of hummingbird wings, the song of a bird, the rustling of foliage or flowers in a breeze – these are all sounds that you and your child can share in a garden. Take time out from your gardening chores every now and then to listen.

So, bring in your child and let us help you get started on that most special garden of all, a child’s garden.

Gardening with Children

Supporting and Training Tomato Plants

Tomatoes are the unparalleled beloved staple of the summer veggie garden, but to get the best yield and quality, proper support and training are essential. These techniques not only help maximize fruit production but also ensure the health of the plants. Allow us to walk you through various methods to help you achieve the greatest success this season.

Understanding the Basics

Before diving into the various methods, it’s important to understand why the supporting and training of tomato plants are necessary:

  • Preventing Disease: Keeping foliage off the ground reduces the risk of soil-borne diseases.
  • Improving Air Circulation: Proper spacing and support improve airflow, reducing the likelihood of fungal infections.
  • Maximizing Sunlight Exposure: Trained plants have better exposure to sunlight, enhancing photosynthesis and fruit ripening.
  • Easier Harvesting: Supported plants are more accessible, making it easier to pick ripe tomatoes without damaging the plant.
  • Increased Yield: Training and trellising can lead to higher fruit production by encouraging healthy growth.

Methods of Supporting Tomato Plants

 There are a number of support methods employed to keep Tomato plants from laying on the ground. Offering the pros and cons of each will make it easier to select the method that best suits your particular situation. 

  • Staking
    Pros: Simple, cost-effective, great for small spaces.
    Cons: Requires regular tying and pruning, less support for heavy fruiting varieties.
    Materials Needed: Wooden or metal stakes, garden twine, or ties.For the single-stake method, drive a sturdy stake (6-8 feet tall) into the ground about 12 inches deep and 2-3 inches away from the tomato plant. As the plant grows, tie the main stem to the stake with garden twine, stretchy fabric, or soft ties every 10-12 inches. Remove suckers (the small shoots that grow in the crotch between the stem and a branch) to focus energy on the main stem.
  • Caging
    Pros: Less maintenance than staking, supports multiple branches and heavy fruit.
    Cons: Bulkier, can be expensive if purchasing many cages, not ideal for indeterminate varieties that grow very tall.
    Materials Needed: Tomato cages (purchased ready-made or homemade from concrete reinforcing wire), garden stakes (for additional support if needed).Place a tomato cage over the young plant, ensuring it’s centered, and the plant can grow upwards through the cage. Push the cage firmly into the soil. For larger cages, additional stakes may be needed for extra stability. As the plant grows, direct the plant branches through the cage openings.
  • Trellising
    Pros: Great for rows of tomatoes, maximizes space, supports heavy crops well.
    Cons: Requires setup and regular maintenance, may need additional pruning.
    Materials Needed: Stakes or posts, wire, twine, or netting.For vertical Trellising, install two sturdy posts at either end of your tomato row. Stretch wire or heavy twine between the posts at several levels (every 12-18 inches).For the weaving method, weave individual tomato plants between the wires as they grow, securing with additional ties if necessary.
  • Florida Weave
    Pros: Cost-effective, supports multiple plants, great for determinate varieties.
    Cons: Needs regular weaving and tightening, less effective for very tall plants.
    Materials Needed: Stakes, twine. Place stakes at both ends of a row of tomatoes and every few plants in between. Starting at the bottom, weave twine in a figure-eight pattern around each plant, securing it to the stakes. Add new rows of twine every 12 inches as the plants grow.
  • Spiral Stakes
    Pros: No need for tying, supports plant naturally.
    Cons: Best for smaller tomato varieties, less support for heavy fruit loads.
    Materials Needed: Spiral stakes.Spiral stakes provide a helical structure for the tomato plant to grow around. Insert the spiral stake into the ground near the base of the plant. As the plant grows, guide the main stem around the spiral.
  • Arbors and Arches
    Pros: Visually appealing, maximizes vertical space.
    Cons: Requires strong support structure, can be labor-intensive.
    Materials Needed: Arbor or tunnel structure, ties.For a more decorative approach, consider growing tomatoes on arbors or arches. Install a sturdy arbor or tunnel in your garden. Guide the tomato plants up and over the structure, securing with ties as needed.

Training Tomato Plants

Training is about guiding the plant’s growth to maximize air circulation, sunlight exposure, and fruit production. Here are some common training techniques:

  • Pruning
    Pros: Improves air circulation, reduces disease risk, focuses plant energy on fruit production.
    Cons: Time-consuming, needs to be done regularly, risk of over-pruning.
    Materials Needed: Scissors or pruning shears.Pruning entails removing particular parts of the plant to improve its overall health and productivity. Identify suckers, look for small shoots growing from the axil (where the leaf stem meets the main stem). Pinch or cut suckers off with clean scissors to encourage a strong, single-stem growth habit. For larger suckers, use pruning shears to avoid damaging the plant.
  • String Training
    Pros: Saves space, excellent for indeterminate varieties, easy to manage growth direction.
    Cons: Requires sturdy overhead support, regular training needed.
    Materials Needed: Overhead support (such as a strong wire or pole), wooden frame (to support the wire or pole), garden twine or string.Run a strong wire or pole horizontally above your tomato plants, securing it firmly to the wooden frame. Attach a piece of twine to the base of the plant and tie it to the overhead wire. As the plant grows, wrap the main stem around the twine. Regularly prune side shoots and suckers to maintain a single stem. String training doubles are a method of support.

Supporting and training tomato plants are crucial steps to ensure a bountiful harvest. Each method has its advantages and drawbacks, so choose the one that best fits your garden space, tomato variety, and personal gardening style. Regular maintenance, such as pruning and tying, is essential to keep your plants healthy and productive. With the right support system, your tomato plants will thrive, providing you with delicious, home-grown tomatoes all season long.


Sedum: A Sunny Ground Cover Solution

Is your landscape afflicted with poor, low-quality soil? Areas of scorching sun? A problematic bank or steep drop? Sedums can be the answer!

Why You Will Love Sedums

There is no reason any area of your landscape should go bare when there are so many spreading sedums that thrive under what would otherwise be adverse conditions. Easy-to-grow, sedums are available in a wide variety of leaf textures and heights to fit even awkward corners, narrow terraces or thin alleyways. Low-growing sedums not only act as a great ground cover for problem areas but also work well in unusual landscape designs such as rock gardens or on green roofs. Taller sedums look great when planted with ornamental grasses and easy perennials such as cone flowers and black-eyed-susans.

The thick, lush succulent can have any shade of green, gold, purple, red and even blue leaves, adding stunning color to your yard. Variegated foliage varieties add visual interest even when the plant is not blooming, ensuring a beautiful plant for a much longer season. Once planted, sedum varieties require very little care and do well even if neglected.

Our Favorite Sedums

Because sedums come in a variety of sizes, be sure to choose a plant with a mature size that will match your landscaping space. In addition to considering the plant’s horizontal spread, also consider its height to get the full visual impact of these great landscape additions.

So come in and see us, and we will be glad to show you sedum and help you with your selection.  No matter what your landscaping needs and preferences – filling an awkward area, opting for an easy-care plant, adding drama and color to your garden plan – sedums can be the perfect solution.


Basil: King of the Herbs

It’s edible, a member of the mint family and ornamental. Grown for over 5,000 years, it flavors foods around the world and is well-known in many household kitchens… Have you guessed yet?

Of course, it’s BASIL!

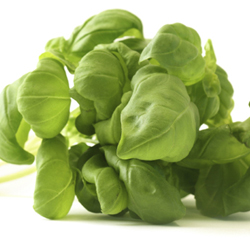
A flavorful ingredient of foods from Italy to India and Thailand and America, basil adds flavor and flair to any recipe. Add fresh or dried basil just before serving for the most intense flavor. However, the kitchen isn’t the only place it reigns as king… Give it a throne in your garden, too!

Growing Basil

Like other mints, basil is easy to grow. Choose young, bushy, compact plants that show no signs of diseases or pests. Plant in full or partial sun, in well-draining soil and provide adequate moisture. As an annual, it’s also easy to grow from seed, just follow the package instructions.

The most difficult decision about basil is deciding which basil you want to grow and eat. The basil family, Basilicum, has a natural variety of colors, growth shapes and fragrances. Plant breeders complicated the decision by creating over 30 hybrids commonly used today.

For ornamental gardening use, four “shapes” are commonly available. All are deliciously edible.

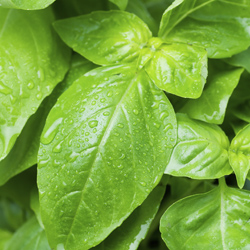
  • Sweet Green Basil: 2′ tall, with large leaves and white flower spikes. The clove/anise taste is typical of many types of basil. Others in this group include lettuce-leaf, Genovese, Thai (spicy) and the intensely fragrant and flavored Siam queen.
  • Dwarf Basil: Up to 12″ tall, small leaves, white flowers. This group includes well known Spicy Globe and Boxwood basil (perfect edging plants due to rounded growth) and Green Bouquet.
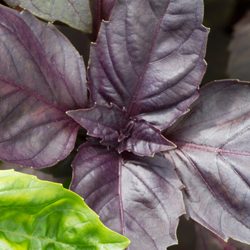
  • Purple-Leafed Basil: Favorite varieties include Dark Opal, Purple Ruffle and Red Rubin, all with “fancy” leaves, very aromatic, with pink to lavender-purple flowers.
  • Scented-Leaf Basils: This group includes varieties of stronger aromas. Lemon basil (gray green leaves, white flowers) is aptly named as are cinnamon basil (dark pink flowers), and anise basil (blue purple flowers).

Basil, especially the purple-leafed, is wonderful in containers. Design as you would with any ornamental. Don’t overlook the value of placing a container near the BBQ and kitchen for easy use while cooking. It’s said that planting basil, especially aromatic varieties, around the patio or deck will deter flies… It certainly can’t hurt!

Enjoying Basil

Used throughout the world with different regional foods, basil truly reigns in many different cultures and cuisines. Although pesto is probably one of the best-known uses here in the United States, basil is great in soups, sauces, pastas or in salads, vegetables and martinis. Remember to harvest before flowering for the best flavor. This also keeps the plant bushy and compact. Simply cut the entire stem just above a pair of leaves to promote new shoots. If you plan to use some leaves as garnish, cut with scissors to reduce bruising. Store unused basil in the refrigerator to retain its flavor and freshness.

Extra basil can easily be dried for future use. Cut the plant at ground level, hang upside down in an airy room and let dry. After it’s fully dry, remove the leaves from stems and store in airtight jars away from direct light.

Benefits of Basil

Did you know using basil is also very good for you? For many reasons basil is called the “holy herb” in other cultures. Research now shows it has strong anti-oxidant, anti-inflammatory and anti-bacterial qualities. Additionally, it is rich in essential nutrients, minerals and vitamins including beta-carotene, vitamins A and K and iron. Need we say more? Add basil to your healthy, delicious diet today!


Garden Accents

Landscape accents have become increasingly popular as many of us have discovered the joys of outdoor living. Used creatively, accents can turn your garden into a magical wonderland. This summer, we invite you to view our many new and exciting garden accent product lines, including popular items such as…

  • Gazing Globes and Stands
    Old-fashioned Victorian gazing globes have made a comeback and we carry them in an assortment of colors and sizes. In addition, numerous gazing globe stands, in both metal and resin, are available.
  • Bird Baths
    A wide assortment of bird baths are available in a variety of materials: concrete, cast aluminum and terra cotta. Place your bird bath in a location where you can kick back, relax and quietly observe the bathers.
  • Statuary
    Set against a simple green background or placed on a garden pedestal amongst the flower, statues become a striking accent in the garden. Stop by and enjoy our wide variety of statuary with many different themes in durable resin and cast stone.
  • Garden Furniture
    Just the sight of our line of garden benches will tempt you to sit down and rest a spell. Choose from several styles of benches made of cast iron, eucalyptus wood, concrete and bamboo to add a sweet seat to your garden.
  • Trellises and Arbors
    Traditionally, trellises and arbors have primarily been used for their functional purpose, support. Today, no garden is complete without one of these structures. They may be used for their designed intention or simply as an ornamental accent, pathway definition or focal point. We carry pvc, wood, powder-coated metal and forged iron trellises and arbors.
  • Pots and Planting Containers
    We have a wide variety of planting containers available, including…

    • Hanging Baskets – Choose from willow, moss, metal, plastic and ceramic.
    • Pots – We have pots from Italy, Malaysia, China and more. Choose from our selection of clay, plastic, cement, tin, zinc, lightweight insulated and self-watering pots.
    • Planters– Choose from lined hayracks, cradle planters and cauldrons. We also carry plastic railing/fence/deck planters and plastic or glazed ceramic wall planters.
    • Window Boxes – Available in cedar, pvc, plastic, metal and light weight insulated material with different sizes for different windows.
    • Wind Chimes
      The soothing and melodious sound of a wind chime is sure to enhance your outdoor experience. Indulge with wind chimes in aluminum, pewter or bamboo.
    • Lighting
      Lanterns and torches are a gentle way to light areas for entertainment in the garden. Candles add a serene ambiance that is unmatched by any artificial light. Lanterns, torches and candles are captivating as their flame flickers in the evening breeze.
    • Garden Novelties
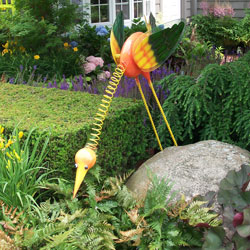
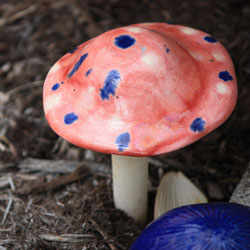
      Add a little whimsy to your garden with the addition of garden novelties. Choose from garden pixies, toadstools, Victorian water bells, wall plaques, glass bee catchers and much more. Stop by and see our great selection.

No matter what your garden size, style or theme, we have the accents to give it a personal, fun touch all your own!

Crazy for Coneflowers

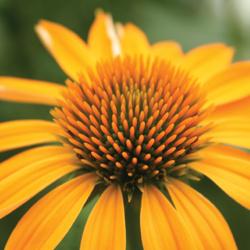
Beautiful and dependable, Echinacea purpurea, or purple coneflower, is the crowning glory of the summer perennial garden. A member of the Aster family, all Echinacea species are native to North America. The genus Echinacea is derived from the Greek ‘echino’ meaning hedgehog, a reference to the spiny center disc flowers.

Coneflowers are practical as well as gorgeous. They have long been used as an herbal remedy to stimulate the body’s natural immune system. Both plant roots and tops are used in the production of herbal medicines. Echinacea purpurea has traditionally been used for this purpose, but research is being conducted on the nine other species to determine their usefulness for homeopathic treatments.

Cultivating Coneflowers

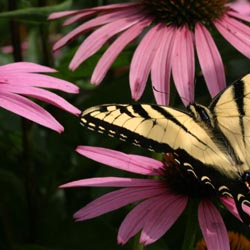
Coneflowers will thrive in a sunny location, planted in well-drained soil. They are tolerant of nutrient-poor soil, heat and humidity. Echinacea purpurea grows on thick sturdy stems from 3-5 feet tall and generally does not require staking. Coneflowers are long-blooming, the flowers are fragrant and they make a long-lasting cut flower. This is one of the top ten perennials for attracting butterflies to the garden. You may deadhead plants after the blooms have faded to improve their appearance and to encourage a second, but smaller, bloom. You may also leave seed heads in place. In the summer and fall, they attract and provide food for goldfinches and other seed-loving birds. In the winter, the black spent flower heads add ornamental interest as they contrast dramatically with pure white snow.

This perennial is not invasive, but will self-seed if flower heads are left to mature. Cut plants down to the basal foliage, the low growing rosette of leaves, in the spring. Plants should be lifted and divided about every four years or as crowns become crowded.

Where to Place Coneflowers

Purple coneflower is a great addition to the back of any sunny perennial border. Its rose-purple flowers, with their coppery-orange centers, look great with ornamental grasses, Black-Eyed Susan (Rudbeckia) and Sedum ‘Autumn Joy.’ Appropriate usage ideas include: cottage, meadow, prairie, wildflower, native and herb gardens, as well as butterfly gardens and any containers that serve similar purposes.

Favorite Coneflowers

America is having a love affair with Echinacea and several new cultivars are released each year, while popular favorites continue to be top choices.

Popular Echinacea Varieties

  • ‘Baby White Swan’ – Dwarf ‘White Swan’
  • ‘Bright Star’– Petals are pale purple-pink on the edge and darker toward disc
  • ‘Coconut Lime’ – New for 2007, first double white coneflower
  • ‘Doubledecker’ – Unusual two-tiered coneflower with ray petals in disc
  • ‘Fancy Frills’ – Petals are frilled on the edge
  • ‘Fatal Attraction’ – Vivid purple-pink flowers with 2 rows of petals
  • ‘Fragrant Angle’ – Large, fragrant, snow white flowers
  • ‘Green Envy’ – Unusual rounded green petals with magenta veining near the cone
  • ‘Green Eyes’ – Magenta flower with a green center disc
  • ‘Hope’ – Pale pink flower named in honor of a cure for breast cancer
  • ‘Kim’s Knee High’ – Dwarf with recurved ray petals and large orange cone
  • ‘Kim’s Mophead’ – Compact plant with white flowers
  • ‘Magnus’ – 1998 Perennial Plant of the Year, purple-pink flowers, 3’ tall
  • ‘Mars’ – Large orange cones surrounded by brilliant rose-purple petals
  • ‘Merlot’ – Large rose-pink flowers on wine colored, sturdy stems
  • ‘Pink Double Delight’ – Similar to ‘Razzmatazz’ with a more compact habit
  • ‘Razzmatazz’ – Double, bright pink flower on very sturdy stems
  • ‘Ruby Giant’ – Large, rich ruby-pink flowers that are highly fragrant
  • ‘Ruby Star’ – Reddish-purple flowers held horizontally
  • ‘Sparkler’ – Rose-pink flowers, white-splashed variegated foliage
  • ‘Tiki Torch’ – Large, bright orange flowers
  • ‘White Swan’ – White coneflower with downward reflexed petals

Echinacea Big Sky Series

  • ‘After Midnight’ – Dwarf plant with brilliant magenta, highly fragrant blooms
  • ‘Harvest Moon’ – Gold flower with golden-orange cone
  • ‘Summer Sky’ – Bicolor flower, soft peach and rose petals
  • ‘Sundown’ – Russet-orange with a prominent brown central cone
  • ‘Sunrise’ – Lemon-yellow flowers
  • ‘Sunset’ – Orange flowers with prominent brown central cone
  • ‘Twilight’ – Vibrant rose-red with a deep red cone

Echinacea Meadowbrite Series

  • ‘Mango Meadowbrite’ – Mango color, paler than orange meadowbright
  • ‘Orange Meadowbrite’ – Large single blooms of rich sunset orange
  • ‘Pixie Meadowbrite’ – A true dwarf, only 18” high, bright pink flowers

The list that we have provided is not all-inclusive, nor an accurate representation of every coneflower variety we carry. Please stop by often as we continue to provide standard, new and unusual perennials, including many new types of coneflowers.


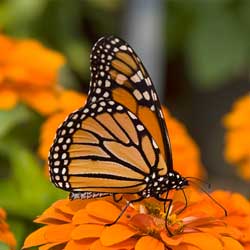
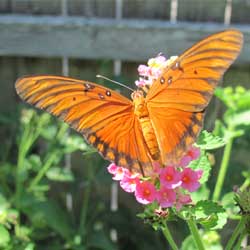
Bringing Butterflies to the Backyard

In spring, female butterflies will be mostly concerned with finding their species’ specific host plants on which to lay fertilized eggs. Instinctively, they know they must find plants to ensure that their caterpillars will have appropriate food for survival after hatching. Both male and female butterflies will be looking for flowers with nectar for their own survival. And, they will be searching for shelter from rainy or windy weather, a sunny place for basking, and a source of water. Because many natural butterfly habitats in North America are disappearing at an alarming rate, it is becoming increasingly difficult for butterflies to find these necessities of life.

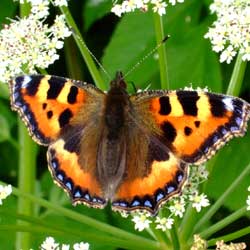
Starting a butterfly garden can be simple and rewarding if you follow these pointers. The most important thing you can do as a gardener is to plant both nectar and host plants in your garden. Providing host plants for caterpillars to feed on, will allow you to watch the metamorphosis from caterpillar to chrysalis to butterfly. So, do not discourage caterpillars. They may make your garden plants look bad but it’s usually only temporary. Most important – do not use pesticides! You may be killing off the very insects you made the garden for. And, you don’t have to have a large area to get a response. Just a few select plants will spur some action. Choose the sunniest spot possible for your butterfly garden. It could be any size or shape; even a short border will work. A combination of woody shrubs, perennials and annual flowers works best, but using just a couple of plants can still yield results. Planting a section of wildflowers is an easy way to cover a problem area and lure some butterflies to your yard. If you don’t have the room for a garden, fuchsia, petunia or impatiens hanging baskets will attract butterflies as well as hummingbirds.

The following is a list of plants that attract butterflies:

Woody shrubs:

  • Glossy Abelia
  • Butterfly Bush
  • Weigela
  • Spiraea
  • Lilac
  • Deutzia

Perennials:

  • Achillea (Yarrow)
  • Butterfly Weed
  • Aster
  • Shasta Daisy
  • Carnation
  • Coneflower
  • Joe-Pye weed

Annuals and Tender

Perennials:

  • Heliotrope
  • Lantana
  • Rosemary
  • Marigolds
  • Petunias
  • Geraniums
  • Snapdragons
  • Portulaca
  • Zinnias
  • Allysum
  • Fucshia
  • Vinca
  • Dahlia
  • Impatiens
  • Salvia
  • Verbena


Versatile Hydrangeas

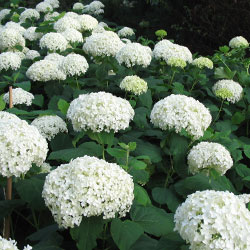
Tall or short, red, pink, purple, blue, white and shades in between, few shrubs provide the versatility of hydrangeas. Generations of gardeners have loved and designed their gardens using these showy shrubs as summer privacy screens, landscape focal points and beautiful cut flowers. Now, thanks to new hydrangea introductions, there are even more ways to use them.

Discover the Newest Hydrangeas

New types of hydrangeas are being introduced every year, and these showstoppers are fast favorites among both experienced hydrangea aficionados as well as newcomers to the hydrangea craze.

  • ‘Endless Summer’
    Termed “the best new flowering shrub of the decade” by some gardeners, this cultivar has gained a reputation as the first “reblooming” hydrangea. Blooming from early summer to first frost on both new and old wood, it is unfazed by high heat or extreme cold. Now gardeners in colder microclimates can grow beautiful low maintenance 3-5’ tall and wide hydrangeas. The 8″ diameter mophead balls of light blue or pink flowers bloom the entire summer.
  • ‘Bloomstruck’
    A dwarf ‘Endless Summer’ this hydrangea grows to only 2-4’ tall and wide with pink or blue 4-5″ diameter mopheads on upright red-purple stems. Perfect for containers, in smaller gardens or in the front of cutting beds, it also graces balconies and decks. In fall, red-purple colored leaves extend the beauty.

Color Tip: Change the flower colors of ‘Endless Summer’ and ‘Bloomstruck.’ The soil pH affects the flower color of many hydrangeas. To intensify the pink color, decrease the acidity by adding hydrated lime. To intensify the blue color, increase the acidity by adding sulfur. Our staff can suggest products to help you determine your soil pH and the amount of lime or sulfur to use.

  • ‘Quickfire’
    Also known as Hydrangea paniculata, this variety blooms earlier than most other hydrangeas and has flowers along an elongated stalk. The flowers, blooming on new wood, open as white, gradually turning to pink in the summer and darker rose in the fall. The soil pH does not affect the flower color. As one of the hardiest hydrangeas, this beauty grows to 6′ tall in most soils, full sun or dappled shade and tolerates drought conditions.
  • ‘Little Quickfire’
    A dwarf form of ‘Quickfire,’ this tiny powerhouse has all the beauty and benefits of its bigger relative but in a small package. Growing only to 3-4′ tall with a slightly larger spread, this hydrangea makes a big statement in a little space when covered with blooms and can be an ideal choice to start out with hydrangeas.
  • ‘Bobo’
    Another paniculata hydrangea, this variety creates huge drama for such a little plant. Growing only to 3′ tall and wide, it’s a thriller in containers, and easily won the Gold Florall medal for best novelty plant. ‘Bobo’s early season white flowers also bloom on new wood and cover the plant on strong overhead stems. Unaffected by soil type or pH, this hardy hydrangea steals the show wherever it is planted.

No matter how you use these newcomers in your landscape – larger varieties in the back of beds or as borders, smaller options in the front or in containers – their long-lasting flowers will make you think summer truly is endless.


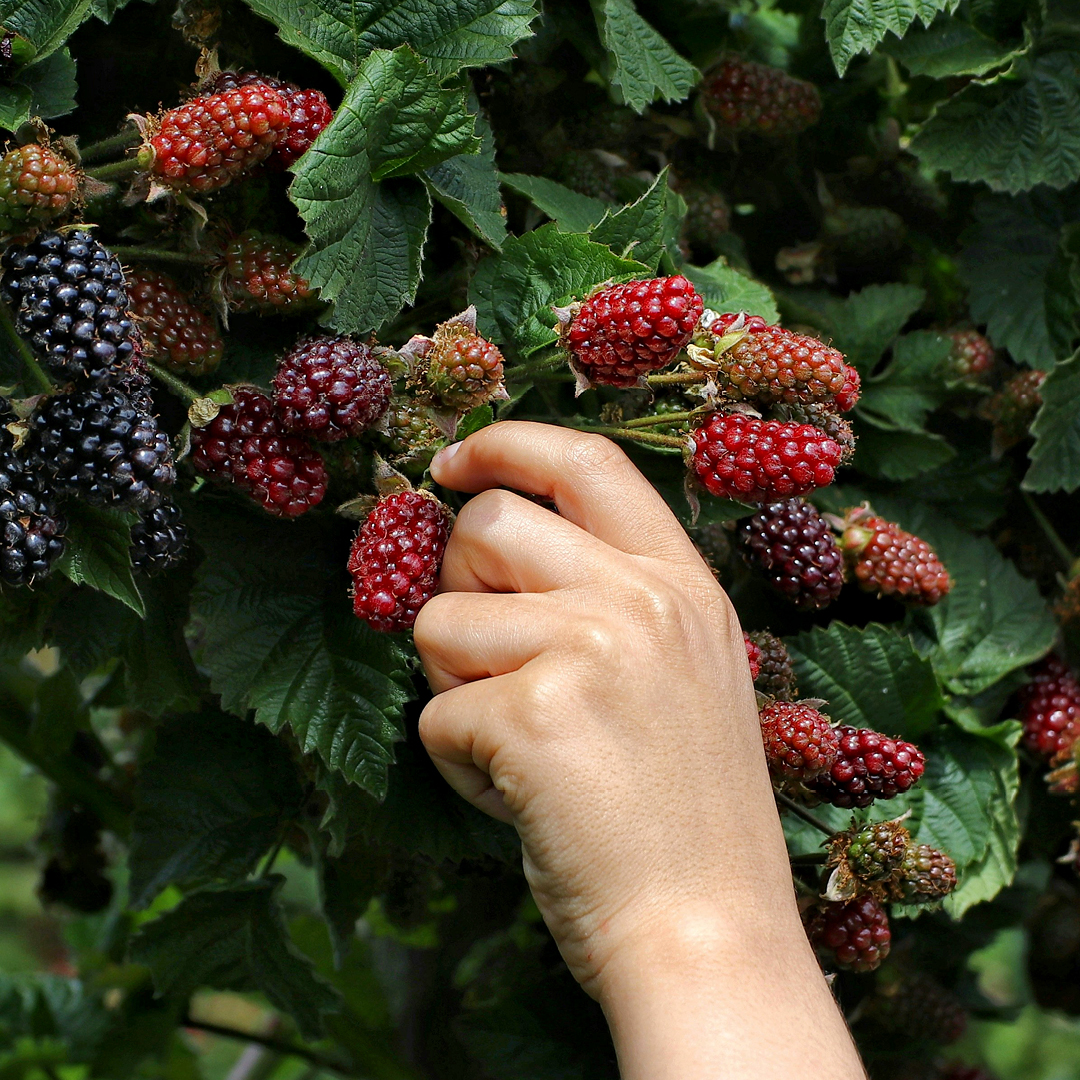
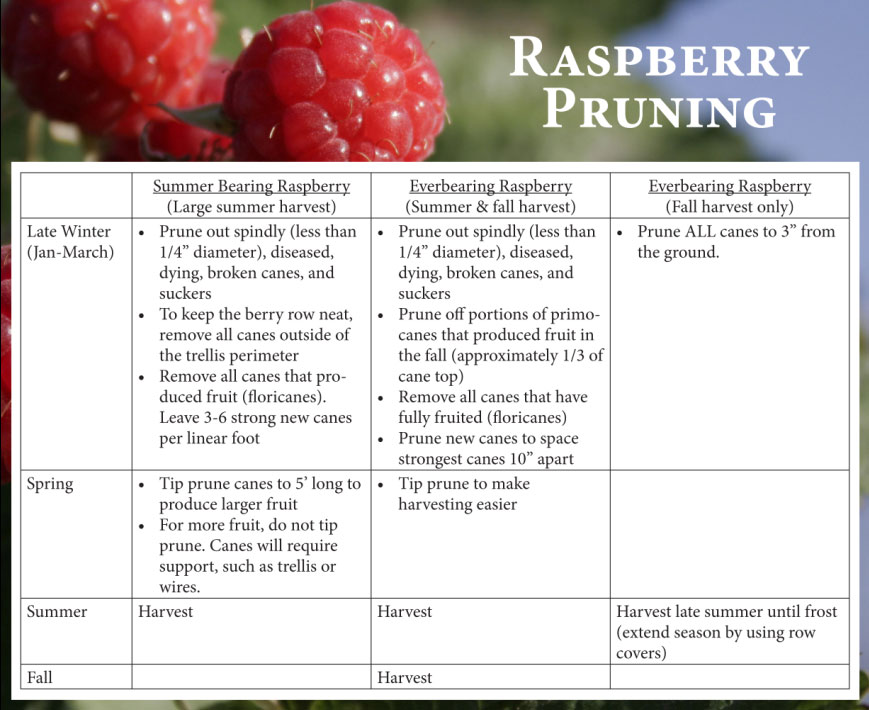
Pruning Red Raspberries

There’s an unfounded rumor that raspberries are difficult to prune. This isn’t true if you understand the type of raspberry in your garden. Summer-bearing raspberries produce only one harvest per year while everbearing, or fall-bearing, raspberries can produce two harvests.

Raspberry Types

Summer-bearing raspberries plants bear fruit on one type of cane, a floricane. These large, thick canes grow fruiting lateral branches. Most of the purple and black raspberry varieties and some red varieties are summer-bearing plants.

Everbearing raspberries grow two types of fruiting canes, floricanes and primocanes. The floricanes are similar those of the summer-bearing raspberry. However, the primocane has no lateral branches. Instead, the fruit buds are located on the thick cane. Most red and yellow raspberry varieties are everbearing.

No matter what type of raspberry you grow, proper pruning improves production and the taste of the fruit, the appearance of your garden and makes it easier to harvest the delicious fruit.

Raspberry Pruning Tips

If you are growing summer-bearing raspberries, you will follow a cycle of pruning out the older floricanes, which already bore fruit. If you are growing ever-bearing raspberries, you will prune out floricanes and the top one-third of the primocanes where fruit developed in the fall. However, you can choose a second option for pruning everbearing raspberries. Simply cut the entire plant to the ground in early spring to produce berries from fall until the first frost. This sacrifices the summer harvest, but puts all plant energy into fruit production for fall harvest, creating a larger, more robust crop. It also protects the canes from any extreme winter conditions and reduces insect damage. Using row covers or greenhouses to maintain a warmer temperature easily extends the harvest season later into the fall.

To simplify the pruning process…

When you grow your own berries, you know exactly how they were grown, you save money, and best of all, they taste great, even with dirt under your fingernails!

Gussy Up the Veggie Garden

A vegetable garden is the ultimate in practical landscaping, and a thriving veggie patch can not only be a bountiful supplement to a grocery budget, but also an enjoyable hobby and great exercise as you sow seeds, nurture plants and take up your delicious harvest. One thing a vegetable garden does not need to be, however, is drab, and there are many fun ways to gussy up the veggie garden to show off your personal flair and gardening charisma.

Why Beautify a Vegetable Patch?

As more gardeners expand their cultivated plots into side yards and even front yards, keeping a vegetable garden attractive is essential. Not only can a lovely vegetable garden be attractive to the neighborhood, but it increases curb appeal for your home, raises awareness about the beauty of vegetables and allows you to take just as much pride in your garden’s appearance as you do in your harvest. Adding more personality to your vegetable garden is also a fun way to discover more gardening techniques and show off your more colorful side.

Fun Ways to Gussy Up the Veggie Garden

There are many different ways you can give your garden a more colorful personality, and we have everything you need to do so. While you may not want to use every technique in your garden depending on the veggies you grow and the space you have available, trying just one or two fun tactics can give your garden a great makeover.

  • Liven Up the Lines
    Instead of planting vegetables in straight rows, embrace the twists, turns and curves of your landscape with a curvy garden. You can create a pattern of colors and shapes, or use different edging options to delineate the sections of your garden in more visible ways.
  • Pretty Up Your Paths
    You don’t have to use plain dirt paths in your garden when there are colorful mulches, unique stepping stones and other options to create more interesting pathways. Try river rocks, multi-colored gravel, crushed shells, bricks or other options to define paths more beautifully.
  • Build a Beautiful Border
    Define your garden’s edge with a beautiful border. Decorative fences can be quaint, or you can plant flowers all around the garden for extra color. Use deer- and rabbit-resistant flowers such as poppies, marigolds, zinnia and verbena to help protect your garden at the same time.
  • Create Bursts of Color
    Add more color to your garden with whimsical touches such as colorful tomato cages or painted support stakes. You can also add a brilliant gazing ball, a fun seasonal decorative flag or other colorful accents to add instant vibrancy to your veggie garden.
  • Add an Amazing Arbor
    An arbor or pergola can be an amazing architectural accent in your garden. This structure can be functional as well when it provides a bit of protection for shade-loving veggies or includes a bench with hidden storage for your favorite garden tools, hoses or other equipment.
  • Verticalize Your Veggies
    Go up, up, up with your veggie garden space when you embrace vertical gardening. You can hang baskets from an arbor, trellis or poles, or create a green wall or other vertical gardening space that climbing plants will love, and you’ll see your harvest multiply.
  • Secret Spaces to Make You Smile
    Your vegetable garden doesn’t need to be nothing but growing space, and you can add a whimsical garden gnome, fairy garden setup or other secret space to the garden. You might even include a small bench or meditation fountain for extra enjoyment.
  • Welcome Beneficial Wildlife
    Bring helpful visitors to your veggie garden when you add a bee house, butterfly feeder, hummingbird feeder or bird bath to the garden. These helpful pollinators will appreciate the assistance and will repay your generosity as they increase the yield of all your veggies.
  • Select Stunning Seedlings
    The seedlings you add to your veggie patch can go a long way toward beautification when you choose plants with colorful foliage or unique produce. This also gives you a chance to experiment with new plants, and you might discover a new favorite vegetable along the way.
  • Fill In With Flowers
    Quickly add color and texture to your vegetable garden when you fill in short rows and corners with extra flowers. This is a great way to expand your garden and avoid thin or bare patches that detract from your garden’s beauty.
  • Make Magnificent Markers
    Marking plant rows and types keeps your garden organized, and you can do it with flair when you choose colorful or whimsical plant markers. Painted rocks, fun signs, cheerful flags and other options can denote your plants while adding beauty to your garden.
  • Class It Up With Containers
    A bright pot or planter box can be an attractive addition to your veggie patch, and will add extra color as well. This is a great way to add herbs, mints, berries or other fun plants to your garden. Elevate smaller pots with plant stands or pot feet to give more dimension to the garden.

With so many fun options to gussy up your veggie garden, your gardening patch can be just as beautiful as any carefully cultivated flowerbed or meticulously groomed lawn – and more delicious!


Battling the Bugs of Summer

In the summer months, insects can take their toll on your plants if you are not on the alert for problems. If the right product is used at the right time and under the right conditions, however, pesticides can be reduced to a minimum and your plants will be well-protected.

Organic Products
Apply organic products early in the morning when bugs are eating. To stop insect damage, the spray must be applied to the insect itself or sometimes to where the bug is eating. The entire plant must often be sprayed to keep the pests from moving on to untreated areas. Organic controls include insecticidal soap, Bonide All Season Spray (horticultural oil), tobacco dust, bacillus thuringiensis (Bt), rotenone and pyrethrin sprays.

Contact Products
Inorganic in composition, these insecticides must be applied either to the insect or the leaf where the pest is feeding. Apply in the morning for best results, and as with the organic controls, soak the entire plant so the insects do not find a safer spot to nibble. Contact pesticides include Malathion and Sevin.

Systemic Products
Systemic insecticides circulate to all parts of the plant. Therefore, if you are only able to spray part of a shrub, the product will move to all leaves within 24 hours to control feeding insects for about two weeks. Systemics are best applied in the evenings when there is no chance of rain and sprinklers will not be used. The product will be absorbed only as long as the leaf stays wet. When the leaf dries by mid-morning, the product is then moved through the entire plant when the insects resume feeding. Systemic insecticides available to the homeowner include Bonide Systemic Insect Spray, Ortho Systemic Insecticide and Bayer Season-Long Tree & Shrub.

Not sure how to deal with your pests and unwanted insects? This handy chart can help!

Environmentally Friendly Controls for Common Garden Pests

Pest Type

Control Methods

Ants & Cockroaches Diatomaceous Earth, Bonide Eight,
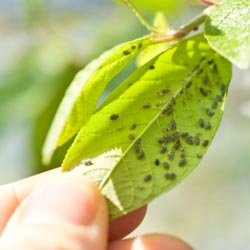
Aphids Insecticidal Soap, Pyrethrin, Bonide All-Season Spray, Bonide Eight, Hot Pepper Wax, Neem Oil
Predator: Ladybugs, Praying Mantis
Caterpillars (Tomato Hornworm, Cabbage Looper, etc.) Captain Jack’s Dead Bug Brew, Bt (Bacillus Thuringinensis), Dipel Dust, Bonide Eight, Neem Oil
Predator: Trichogramma, Praying Mantids
Fleas Diatomaceous Earth,  Bonide Eight
Predator: Beneficial Nematodes
Japanese Beetles Beetle Traps, Neem Oil,  Pyrethrin, Bonide Eight
Predator: Praying Mantids, Beneficial Nematodes for grub stage control
Lacebugs Hot Pepper Wax, Insecticidal Soap
Mealy Bugs Insecticidal Soap, Pyrethrin, Bonide All-Season Spray, Pyrethrin, Bonide Eight
Predators: Crytpolnemus or green lacewing
Mites Captain Jack’s Dead Bug Brew, Insecticidal Soap, Bonide All-Season Spray, Pyrethrin, Hot Pepper Wax,  Neem Oil
Mosquitoes Pyrethrin, Mosquito Bits, Mosquito Dunks (pond control)
Scale Hot Pepper Wax, Bonide All-Season Spray, Insecticidal Soap, Bonide Eight
Predator: Green lacewing
Thrips Captain Jack’s Dead Bug Brew, Insecticidal Soap, Bonide All-Season Spray, Pyrethrin, Hot Pepper Wax, Neem Oil
Whiteflies Insecticidal Soap, Pyrethrin, Repel M Sticky Tape, Safers or Tanglefoot Sticky Whitefly Trap, Bonide Eight
Predators: lady bugs, encarsia formosa or lace wings


Battling Bugs of Summer

Rose Care Basics

Beginners often become confused with the many recommendations and suggestions for growing roses. However, it is important to start with the basic guidelines for successful rose growing. Roses can thrive under many conditions, but they are sure to grow better, with more luxurious blooms and fewer problems, when you follow the basics.

Prepare the Soil

The proper soil is essential to nourish roses so they can grow to their full potential. To make the soil ideal for roses…

  1. Take a soil sample to test the pH, either with a home testing kit or through your local extension service. Roses like a pH of 6.0 to 6.8. You may need to add lime to raise the pH or sulfur to lower it to the optimum rose range.
  2. Incorporate composted cow manure or other healthy compost into the soil. This will provide superior drainage and excellent organic material for roses to absorb.

Planting Roses
If they aren’t planted properly, roses won’t thrive as well as they could. Improper planting could even damage roots and destroy a rose bush.

  1. Select a sunny spot with good soil drainage – roses require at least 6 hours of full sun daily. Early morning sun is preferred because it dries the leaves, which helps prevent disease.
  2. Dig a wide, shallow hole that is 2-3 times as wide but not quite as deep as the root ball (about 1 inch shallower). The plant should sit on solid ground so it doesn’t sink when the soil settles.
  3. Remove the plant from the pot and loosen any circling roots. If you can’t pull the roots apart, use a knife to make 4-5 vertical cuts in the root ball. This will allow new roots to grow out into the surrounding soil as the plant becomes established.
  4. Place the plant in the hole slightly elevated above ground level. Backfill with soil until the hole is half full.
  5. Soak the root ball with a mixture of a Root Stimulator & Transplanting Solution.
  6. Fill the rest of the hole with soil and water thoroughly. Apply mulch to a depth of 2 inches, being careful not to mound mulch against the trunk of the plant, which could encourage rotting or insect damage.

Pruning Roses

To look their best, roses must be properly pruned. This can be intimidating for rose-growing novices, but once the basics are mastered, the techniques for pruning roses are not difficult.

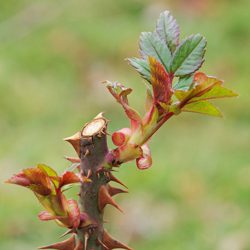
  1. In spring, remove winter mulch when new grow appears. Prune out all dead wood and twiggy growth and cut back to sound wood with a clean slanting cut, just above a good bud eye.
  2. During the growing season, remove fading roses promptly, cutting just above a five-leaflet leaf. This will help encourage reblooming on many cultivars, and will help prevent rot or disease infestation.
  3. To winterize, remove all fallen leaves and debris from the base of the plant, cut back to 10-12 inches after the ground freezes, then apply a mound of mulch over the canes to protect them from temperature shock. 

Food and Water

Roses need the proper nutrition – water and fertilizer – to bloom well and develop stunning colors and fragrances.

  1. Roses thrive best when given 1 inch of water weekly. A thorough soaking from rain or hose will keep roses blooming all season. Try not to overhead water unless it is early in the day, as the damp leaves can promote disease.
  2. Fertilize monthly with Espoma Rose-Tone or Fertilome Rose & Flower Food similar products specially formulated for the nutritional needs of roses.

Treat for Disease and Pests

There are times when roses will succumb to diseases and pests. Quickly recognizing these problems and treating them properly will help minimize outbreaks that can damage several rose plants at once.

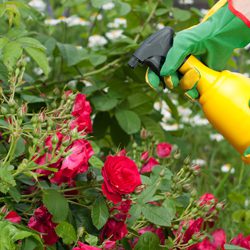
  1. Fungus diseases cannot be cured, so a regular spraying schedule is very important. Keep an eye on plants that were infected last year and spray with a fungicide to prevent outbreaks this year.
  2. You may also need to use an insecticide for severe insect problems. Minor problems can be handled with less harsh methods, but diligence will be necessary to keep pests from taking over the rose bushes.
  3. Many rose lovers find it convenient to use an all-purpose insect and disease spray once a week or a systemic control every 6 weeks.

It may seem like a lot of work to cultivate roses, but when you wander through your rose garden or see your favorite rose bush in full bloom, that effort will be well rewarded.

Check out our Rose List and stop by to take yours home!


General Soil Amendments

We’ve all heard of the importance of amending the soil properly for gardening and landscaping, but the number of soil amendments sold in garden centers often confuses gardeners. Which is which, and which will work best for your soil conditioning needs?

Types of Soil Amendments

Soil amendments fall into two basic categories, inorganic and organic. Inorganic amendments come from non-living materials such as sand, perlite, vermiculite and crushed stone. With the exception of limestone and gypsum, which are used to increase soil calcium, these are not commonly used in the garden.

However, organic amendments are the opposite. They come from previously living materials such as peat, manures and composts. When leaves, bark, peat, animals and animal wastes are mixed together to decompose, compost or “humus” is the final product. Very commonly used, these materials enrich the soil by increasing the air spaces, adding extra nutrients to the soil, improving the absorption of those nutrients and increasing overall soil fertility.

Why You Need Soil Amendments

Excellent soil is not common around most homes. Even if it was initially, house construction and roadwork often removes the good soil and construction equipment compacts the remaining soil. Furthermore, heavy use of the remaining turf – children and pets playing, for example – continues to compact the soil. Chemical treatments, runoff from gutters and downspouts, removal of existing plants, changes in local wildlife – all of these factors can wreak havoc on soil.

Adding organics loosens compacted soil and results in better gardens. Incorporate organics into the beds throughout the year by working evergreen needles, leaves and lawn clippings into the soil. Amendments such as peat or lime can improve a pH problem, if one exists. Calcium and magnesium deficiencies can be corrected using organic materials such as bone meal or wood ashes, or inorganic materials such as limestone, gypsum or soft rock phosphate.

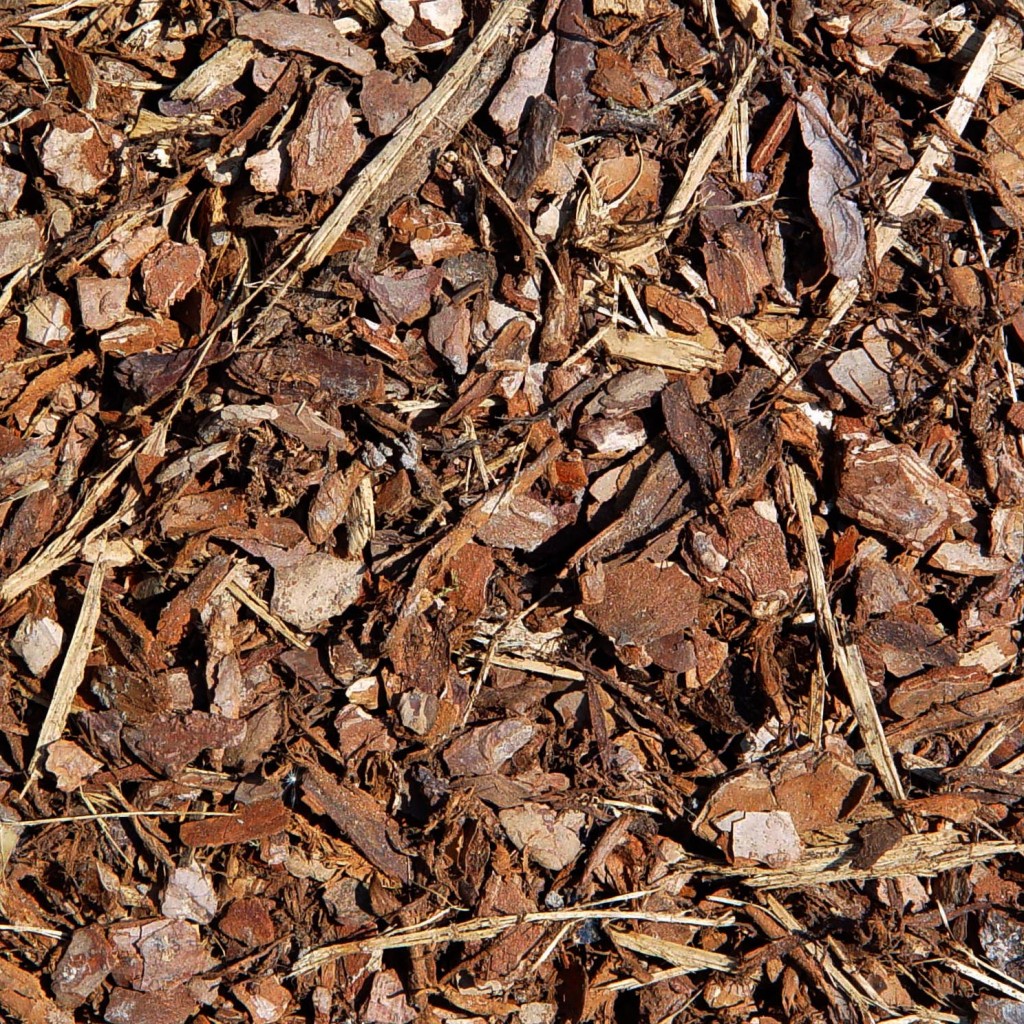
Mulching is another simple way to add biodegradable materials to the soil. Simply place mulch around the plant, leaving several inches bare closest to the stem to discourage insect invasions and rot. In addition to slowly providing nutrients as it decomposes, mulching is attractive, reduces weeds and erosion, maintains soil temperature and prevents “crusting” that occurs when soil becomes too dry.

Another advantage of adding organics is the attraction of worms. They further assist in the decomposition, increase aeration and leave worm castings, a valuable organic material, behind. A healthy garden is home to many worms, and it all starts with adding organic soil amendments.

Whether you opt for organic or inorganic soil amendments, if you use them properly, you soil will improve and your landscaping, flowerbeds and garden will look better than ever.

Growing Mint in Your Herb Garden

Many of us love mint. With many different flavors of mint available at garden centers, it is easy to want to plant one of each. Planning ahead makes this possible to do, but lack of planning may have you tearing them all out.

How Mint Grows

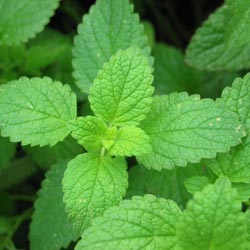
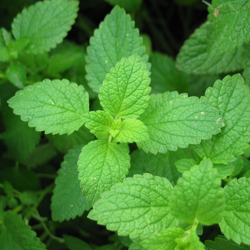
Mint grows as a groundcover. The underground runners spread quickly and are difficult to remove if containment is desired. In other words, mint is often considered invasive and can quickly take over flowerbeds, vegetable plots and even areas of turf near where it is originally planted. Planting in pots placed into the ground prevents its escape, or intensive labor may be needed to help get mint back to its original proportions after it has wandered.

Planting Mint

To help keep mint under control and more accessible for use, many gardeners opt to plant it indoors. Attractive in barrels or pots by the kitchen, mint leaves and flowers can be easily available for cooking or beverages.

To prevent plants from looking rangy, frequently cut or pinch back new growth. Pinching off the flower buds produces more lush leaves and fuller plants.

Mints grow well in sun or part shade, preferring well-drained but moist soil. Although not particular about soil type, enriching clay soil with compost will improve the overall plant appearance and taste. Different soil pH values and organic compositions may also have some minor influence on the taste of different mints.

Most mints grow 18-30 inches tall. Plant at least 2 inches apart to prevent cross-pollination of different varieties and preserve the best flavors. As a perennial, the plant may disappear in the winter, but will return in spring, hardier and more vigorous than ever.

Using Mint

It’s no surprise that mint is an edible favorite. Not only is it popular for refreshing drinks such as mint juleps or mint-infused lemonade, but it is also ideal for…

  • Sauces
  • Salads, especially fruit salad
  • Flavoring for cookies, cakes and puddings
  • Jellies and preserves
  • Smoothies
  • Soups and stews
  • Ice cream, gelato and frozen yogurt
  • Garnishes on meats
  • Freezing in ice cubes for a drink garnish

Mint can be used fresh for a strong, vibrant taste, or it can easily be dried and used all year long. Both fresh and dried mint sprigs can also be fragrant additions to cut flower arrangements, wreaths or other greenery decorations as well. With so many wonderful options for mint, you’ll want to add some to freshen up your herb garden today!

Why Is Deadheading Your Flowers Important?

Deadheading should be a regular garden task to maintain beautiful blooms, but why? What is the purpose of deadheading, how does it affect flowering plants, and how can you do it more effectively to make the most of every bloom?

About Deadheading

Deadheading is simply the process of removing faded, wilted, browning, or dead flowers from annuals or perennials before seeds are produced. Depending on the size of the flower and its type of stem, deadheading can be done by gently pinching back stems, snapping off the blooms, plucking off spent flowers, or cutting the stems with sharp snippers or pruners.

Why You Need to Deadhead Your Flowers

When you remove wilted blooms, you immediately improve the appearance of your shrubs and flowering plants by leaving only the best, most colorful, richest flowers to enjoy, and fallen petals will not spread rot or fungus to the plant’s lower leaves. Deadheading can also help your plants keep a tidy shape and will encourage fuller foliage. Removing dead flowers also lengthens the bloom time by forcing the plant to produce more flowers, and because dead blossoms are removed before they go to seed, you avoid unwanted seedlings taking over the lawn or flowerbed.

Deadheading also helps wildlife, as many butterflies and hummingbirds thrive on the nectar from boldly blooming flowers, so a longer bloom time and extra flowers will attract more of these colorful visitors to your yard. Extra blooming can also bring more color to your landscape later in summer and even into autumn for even more interest in your yard and landscape.

Some of the more familiar and widespread flowers that benefit from deadheading include…

  • Bee balm
  • Begonia
  • Columbine
  • Geranium
  • Lavender
  • Petunia
  • Rose
  • Salvia
  • Yarrow

Ask your garden center experts about the need to deadhead other types of flowers, including which deadheading techniques that can best benefit each plant.

How Deadheading Affects Plants

The visual affects of deadheading are immediate, but just how does deadheading impact each plant? As blooms begin to fade, plants focus their energy and growth on seed production rather than new blooms. When the blooms that are past their prime are removed through deadheading, however, the plant is effectively tricked into creating more blooms, thus increasing the overall bloom season. This is particularly important for annuals, as they only live for one growing season, so it is best to extend that bloom time for as long as possible. Furthermore, annual seeds are often unnecessary, as the plants will generally be replaced in the landscape the next spring. With perennials, deadheading has the same effect, and the process will help keep the plant’s shape and produce more prolific blooms for colorful accents.

Tips for Deadheading Your Flowers

Deadheading is an easy garden task, but it can quickly become overwhelming, particularly if you have many flowering plants to tend. Instead of letting the chore build up, consider spending a few minutes each day deadheading. That time can be a peaceful and soothing way to connect with nature without a lengthy commitment and will help keep the landscape lovely. Staggering the deadheading will also mean fewer flowers to cut away from each individual plant, minimizing the stress to the plant so it can continue to flourish. As you work, examine the plants carefully for any other signs of trouble, such as pests or diseases, so they can be taken care of right away.

When cutting away spent blooms, use the appropriate pruners or snippers to make clean, neat cuts for the least trauma to the plant. Small, clean pruners with sharp tips are a great choice, as they will more easily reach into the plant’s foliage for thorough deadheading. Keeping a small bucket or basket nearby to collect the cut blooms will make cleanup easy, and the trimmed flowers can be added to a compost pile or otherwise properly disposed of.

When cutting stems to remove wilted flowers, cut below the spent flower but above the first set of full, healthy leaves or approximately one-quarter inch above a new emerging bud. This will encourage new growth to keep the plant’s overall shape and fullness. Larger stems, such as mature rose bushes, should be cut at a 45-degree angle to minimize the risk of disease and damage to the plant.

Clean deadheading shears and pruners with rubbing alcohol, often, to minimize the risk of spreading disease, fungus, or pests between plants. Wearing gloves can protect your hands from thorns or sharp foliage, and a good garden hat is essential to protect yourself from the sun as you twist and turn to reach each wilted bloom.

After deadheading, water your plants carefully and use appropriate fertilizer regularly to nourish new growth as the plants produce even more blooms.

Deadheading is an easy garden chore, one that can be a tranquil time to tend your landscape or a great opportunity to involve children in essential tasks. By understanding how deadheading improves your plants and adds even more color to your landscape, you will happily take care of this task and enjoy the benefits it brings to every blooming plant.

Late Spring Gardener’s Calendar

Turn over your vegetable garden and add humus, mushroom compost or manure to enrich the soil.  Apply Bonide Fruit Tree Spray as buds swell and again at petal drop to all fruit trees.

Fertilize perennials with Dr. Earth Rose & Flower Fertilizer.

Continue spring cleanup.  Completely remove winter mulch.  Cultivate to remove winter weeds and debris from the planting beds, then edge.  Prepare your annual beds, and mulch landscape beds with shredded mulch, bark chips or gravel.   Apply Preen or Corn Gluten and scratch it in to prevent future weeds, or try the new Preen Mulch Plus which combines mulch and Preen and prevents weeds for up to 6 months.

Plant and transplant trees and shrubs, including roses, ground covers, and perennials (including hardy lilies and lily-of-the-valley).

Seed or sod new lawns.  Reseed bare spots in established lawns.  Keep the area moist until seedlings appear, then mow when the new grass is 3” high.

Put down a second application of Team or Tupersan (newly seeded lawns) for pre-emergent goosegrass control and control of crabgrass the rest of the year.

Transplant cool-season seedlings into the garden.  When the soil temperature reaches 60 degrees, sow warm- and cool-season vegetable and herb seeds.

Dig and divide crowded spring bulbs after they have finished blooming. Enrich the soil with compost, manure or Espoma Bulb-Tone.

Prune forsythia and other spring-flowering trees and shrubs after the flowers fall.

Place gro-thru sets and link stakes over or around peonies, grasses or any other perennials in need of support.

Check arborvitae, cedar, juniper spruce and pine for bagworms.  Hand-pick bags from the host and spray with Ortho Systemic Insecticide.

Begin summer rose care program of deadheading, spraying and watering.

Fertilize roses with Bayer All In One Rose and Flower Care or Dr Earth Rose and Flower Fertilizer, azaleas with Espoma Holly-Tone or Dr Earth Azalea/Camelia Fertilizer, and fruit trees with Dr Earth Tomato and Vegetable Fertilizer.

Deadhead bulbs, but leave foliage to mature and yellow before removing.  This will help nourish the bulb for next year’s flowering. Fertilize with Dr Earth Bulb Fertilizer.

Prune new growth on needled evergreens.

Dig and divide early blooming perennials after flowering.

Apply Encap Fast Acting Iron Plus or Bonide Liquid Iron Plus to azaleas, hollies, junipers, laurel, pines, rhododendron and spruce to provide iron for chlorophyll production by foliage.

Fertilize container plants and window boxes weekly with a Master Nursery Bud and Bloom Plant Food, or use Dynamite All Purpose Plant Food for season-long feeding, to promote healthy, vigorous plants all summer.

Pay close attention to the watering needs of these plants as well as hanging baskets, because they tend to dry out quickly on hot summer days.

Check plants for spider mite damage and treat with Bayer 3 in 1 Insect, Disease and Mite Control then alternate every 7-10 days with Bonide All-Season Oil Spray.

Rock Gardens

Rock gardens can be amazing options for challenging spaces in your landscape, whether your yard has poor soil, narrow sections, steep terraces, deep shade or other concerns. You can even design a rock garden anywhere just to enjoy their elegant lines, varied texture and easy care. But how do you put in a rock garden?

What Is a Rock Garden?

A rock garden is much more than just a pile of rocks, but of course rocks are the key component of this type of landscaping. Using different colors, shapes and textures from gravel and river rocks to flagstones, pavers and boulders will add dimension and variety to any rock garden. These unique gardens also often include rock-loving plants, a water feature or a design to mimic dry water, unexpected blooms and interesting accessories. Sizes can also vary, from simple containers or corner accents to a full landscaping bed or even an entire yard. While rocks may be a key feature of a rock garden, this type of garden can truly be anything you like!

Designing a Rock Garden

Rock gardens can be very flexible and you can create any type of rock garden you envision, but following some basic steps will give your garden a cohesive, amazing design you will love for years.

  1. Choose the Location
    In many cases, your yard will choose the location for your rock garden based on where you may have difficulty growing other plants or flowers, or where sunlight levels aren’t ideal for vigorous plants. Don’t be afraid to choose any location you’d like to see interesting rocks, however, including planning a rock garden around a pergola, gazebo or meditation space such as a favorite bench or simple pond.
  2. Lay Out the Garden Shape
    When planning a rock garden, use a hose, planter stakes or flexible edging to outline the garden space. This will help you visualize where to put the primary rocks and plants, and you can easily adjust your outline to find the perfect shape for your rock garden. You can consider natural curves and flowing lines, or you might prefer a more geometric shape for a visual pop in your landscape.
  3. Clear the Garden Space
    If the area for your new rock garden isn’t already bare, you will need to clear out existing plants and grass to make way for your new design. Opt for sharp tools designed for cutting sod and digging up root systems to be sure you are able to clear plants effectively. Putting down a layer of weed barrier fabric is a good idea to keep growth from recurring so your rock garden remains crisp and clean, reducing the need to weed.
  4. Install Rocks
    Take your time installing different rocks in your garden, starting with the largest boulders or heavier rocks and carefully positioning them just where you want to see them, checking from different angles to be sure they offer the most pleasing view. You can even create patterns with rocks, such as using different rock shapes or colors to create a spiral or labyrinth, initials or fun features such as flowers, waves or complete scenes. Think vertically as well, stacking rocks to create a cairn or arch, or opt for fun mimicry such as using different rock sizes and colors to create a dry “creek” bed in your rock garden.
  5. Add Plants
    Plants will be part of your rock garden, add them after you’ve designed the rocky spaces, and filling around these rocks with soil. Most plants can be part of a rock garden, however, drought tolerant plant that grow in well-drained, low-fertility soil are the best choices. Flowering bulbs, evergreens and ornamental grasses are popular choices, and you might include mounds of graceful groundcovers or even interesting mosses – depending on the amount of sun you receive. Keeping the chosen plants ultimate size in mind when planning is also essential to a well-designed rock garden. Make sure that the plants with stay in scale with the size garden you have created. Always when selecting plants, consider the light level of your garden as well as the soil quality and moisture levels to be sure the plants will thrive alongside your rocks.
  6. Fill Bare Spaces
    Because rocks don’t grow, they won’t gradually get larger to fill in bare spaces in a rock garden. Instead, you can fill in those spaces yourself with additional gravel or pretty pebbles, mulch or smaller ground covers. Leave enough room for any plants in the garden to grow to their mature size, but feel free to fill in the extra spaces with additional color and texture.
  7. Accessorize Your Garden
    Adding accessories, accents and decorations to your rock garden is a lot of fun, and helps add more color and character to the design. Consider a colorful gazing ball, bird bath, meditation bench, statue, fountain or other interesting element. Containers of flowers can be beautiful additions, or you might want to position solar stakes or other landscape lighting that will show off the drama of your rock garden after the sun goes down.

A rock garden is a fun chance to be creative in your landscape, and it can be a great way to show off your personality in unique and interesting ways. Rock on!

Milkweed and Monarchs

In nature, few relationships are as intricate and essential as that between the Monarch butterfly and the milkweed plant. Famous for being the most recognized insect in the US, these vibrant winged beauties rely on milkweed not only for sustenance but for their very survival. Sharing this fascinating relationship between Monarchs and milkweed with you, we’ll explore how this plant supports every stage of the butterfly’s life cycle.

Birthplace and Sanctuary:
Milkweed, genus Asclepias, serves as the cradle of life for Monarch butterflies. Female Monarchs lay their eggs exclusively on milkweed plants, offering them a safe haven as they undergo their transformation from egg to caterpillar to chrysalis to butterfly.

Caterpillar Cuisine:
Once the Monarch eggs hatch, the tiny caterpillars feast voraciously on milkweed leaves. These particular leaves provide the essential nutrients needed for the caterpillars to grow rapidly. As they munch on the leaves, they accumulate toxins from the milkweed sap, making them distasteful and even poisonous to potential predators. This unique adaptation is crucial for the survival of Monarch caterpillars in the wild.

Metamorphosis Station:
As the caterpillars mature, they undergo a miraculous transformation within their chrysalis, emerging as fully-formed adult butterflies. Milkweed habitats provide the ideal environment for this metamorphosis to occur. Not only is milkweed the favored source of food, but the structure of milkweed plants, with their sturdy stems and broad leaves, offers ample space for Monarch chrysalises to hang securely until the butterflies emerge.

Fueling the Journey:
During their remarkable migration journeys, Monarch butterflies rely on milkweed for sustenance. Nectar from milkweed flowers serves as a vital energy source, fueling their long flights across continents. As they journey thousands of miles from their breeding grounds to overwintering sites and back again, Monarchs depend on the abundance of milkweed along their migratory routes.

Conservation Connection:
The decline of milkweed habitats poses a significant threat to Monarch populations. Factors such as habitat loss, pesticide use, and climate change have led to a decline in milkweed availability across North America. Efforts to conserve and restore milkweed habitats are essential for ensuring the survival of Monarch butterflies. By planting milkweed in home gardens, individuals can contribute to the preservation of this vital butterfly species. Selecting the appropriate milkweed species is crucial for attracting Monarchs. While there are over 100 species of milkweed native to North America, some varieties are particularly favored by Monarchs, and many are region-specific.

Milkweed Species for Northeast and Midwest

In the Mid-Atlantic States, there are several native milkweed species that are crucial for Monarch Butterflies. Here are some of them, along with their details:

Common Milkweed (A. syriaca)
Common milkweed is perhaps the most well-known milkweed species.

It typically grows in tall clusters and produces pink to purplish flowers. It is most often found in a variety of habitats, including fields, meadows, and roadsides.

Swamp Milkweed (A. incarnata)
As the name suggests, swamp milkweed is often found in wetter habitats like marshes, wet meadows, and along stream banks. It has clusters of pink to mauve flowers. Swamp milkweed is an excellent choice for wetter areas where other milkweed species might not thrive.

Butterfly Weed (A. tuberosa)
Butterfly weed is known for its vibrant orange flowers and is a favorite among gardeners. It prefers well-drained soil and is often found in dry fields, along roadsides, and in open woods. While it’s not as commonly used by Monarch larvae as some other milkweed species, it’s still an important nectar source for adult butterflies.

Poke Milkweed (A. exaltata)
This milkweed species has tall, slender stems and delicate, pale pink flowers. It’s typically found in shaded woodlands and along forest edges. While it’s not as widespread as some other milkweed species, it’s still an important host plant for Monarch caterpillars where it occurs.

Whorled Milkweed (A. verticillata)
Whorled milkweed is characterized by its narrow leaves and small clusters of white flowers. It’s found in a variety of habitats, including dry fields, open woods, and roadsides. While it may not be as common as some other milkweed species, it’s still valuable for Monarch butterflies, particularly in areas where other milkweeds may not grow as well.

These native milkweed species will not only provide an essential habitat for Monarch Butterflies but also support other native pollinators in your area. Make sure to choose species that are appropriate for your specific region and growing conditions.

Cultivating Milkweed for Butterfly Abundance
Are you ready to invite the mesmerizing beauty of Monarch butterflies into your garden? Cultivating milkweed isn’t just about growing a plant; it’s about fostering an ecosystem, supporting biodiversity, and witnessing the awe-inspiring journey of one of nature’s most iconic creatures – the Monarch butterfly.

Now that you’ve chosen your milkweed varieties, it’s time to roll up your sleeves and get gardening! Here’s a general step-by-step guide to growing milkweed in the garden to create a haven for Monarchs.

  1. Site Selection
    Choose a sunny spot in your garden with well-drained soil. Although some exceptions exist, most milkweed plants prefer full sun but can tolerate partial shade.
  2. Soil Preparation
    Milkweed isn’t overly picky about soil type but does prefer soil that’s not too compacted. Loosen the soil to a depth of about 6 inches and amend with compost if necessary.
  3. Planting
    Sow milkweed seeds directly in the ground in early spring after the danger of frost has passed. If you prefer to start with seedlings, transplant them into your garden with plenty of space between plants to accommodate their mature size.
  4. Watering
    Keep the soil consistently moist but not waterlogged, especially during the plant’s early growth stages. Once established, milkweed is relatively drought-tolerant.
  5. Maintenance
    Milkweed is generally low-maintenance, but removing weeds around young plants can help them thrive. Deadheading spent flowers can encourage continuous blooming and prevent self-seeding if desired.
  6. Ongoing Support
    Embrace the biodiversity that milkweed attracts by avoiding the use of pesticides and herbicides in your garden. Encourage beneficial insects and pollinators to make themselves at home alongside your Monarchs.

As your milkweed garden flourishes, so too will the population of Monarch butterflies that grace your outdoor oasis. By cultivating milkweed, you’re not just growing a plant – you’re fostering a connection to nature, supporting wildlife conservation efforts, and creating a sanctuary for Monarchs to thrive. So, roll out the floral welcome mat and prepare to be enchanted by the majestic beauty of Monarch butterflies in your own backyard.

Rose – Queen of the Garden

We all love roses. It may be the luxurious fragrances, rich colors or the elegant flower forms that attract us. It may be the memories that roses evoke. Whatever the reason, roses are one of the world’s most popular flowers. With so many different types of roses available, ranging from the diminutive miniatures to the towering climbers, there is no excuse to exclude this “Queen of Flowers” from your garden.

Rose Types

There are many types of roses to cultivate, and it can be difficult to choose. If you’re just getting started with roses, consider some of these popular favorites…

  • Hybrid Tea Roses: These blooms are a favorite of rose gardeners who enjoy long-stemmed, large flowers. Hybrid tea flowers have many petals and plants grow upright and tall, about 3-7 feet. These roses are appropriate in either a formal garden or informal planting.
  • Floribunda Roses: These roses have smaller flowers than hybrid teas with the flowers arranged in clusters. This rose bush is useful as a hedge for a border or privacy screen, and is equally stunning in mass plantings.
  • Grandiflora Roses: These beauties were developed by crossing hybrid teas with floribundas. This rose grows to around 10 feet tall so it should be used in the back of the border where its beauty won’t shroud other plants. The flowers of the Grandiflora are hybrid tea form and can be single stemmed or borne in clusters depending on the cultivar.
  • Climbing Roses: These roses make an outstanding vertical display when trained on arbors, walls, fences, trellises and pergolas and can grow from 8-15 feet tall. Flowers may be borne large and single or small and arranged in clusters.
  • Miniature Roses: These delicate nymphs are dwarf in every way – flowers, leaves and height. This rose may be mass planted as a ground cover, used as border or grown in containers on decks, patios and porches.
  • Shrub Roses: These flowers are renowned for their bushy habit and superior disease resistance making them an excellent choice for mass planting. The shrub rose flower may be either single or double. Some types have very showy rose hips.
  • Old Roses: These luscious heirlooms are making a come-back! Although bloom times and color choices are limited, old roses are much more fragrant, vigorous and disease resistant than modern roses. To obtain all the qualities of an old rose combined with a long bloom time of a modern rose, look for the David Austin varieties.

Not sure which rose is just right for your landscape or garden? Our rose experts will be glad to help you choose the perfect rose no matter what thoughts or emotions you want your garden to evoke. Stop in today to see the latest types of roses and the most popular cultivars for this year’s gardening.

roses_3

roses_8

roses_1

Planting Basics – Trees & Shrubs

Are you ready to add trees and shrubs to your landscape? Of course, we can do the planting for you. But if you’d like to do it yourself, here’s what you need to know:

Soil Preparation

How quickly and how well trees become established once they are planted is affected by the amount of stress they are exposed to before and during planting. Minimizing planting stress is the goal of proper planting. Trees and shrubs should also be thoroughly watered prior to planting to minimize water stress.

Ideally, soil preparation should be carried out well ahead of planting. Preparation could include incorporating organic matter into the soil to improve aeration, assist drainage of compacted soils and improve soil nutrient-holding capacity. Specific preparation may be needed if the soil has an inappropriate pH or is lacking in certain elements. Trees and shrubs with a limited soil tolerance range may require very specific soil preparation to meet their requirements.

You can also use a tree and shrub soil like Lambert Trees & Shrubs Planting Mix, which is a pH adjusted-compost that loosens the soil and contains peat that maintains ventilation for root growth.

Dig the planting hole 2-3 times wide than the root ball, but only as deep as the root ball. Prepare soil by mixing a one-to-one ratio of your backfill soil with the tree and shrub mix.

Planting Container-Grown Trees & Shrubs

When you buy a plant from a garden center or nursery, it may come in a small pot that holds the roots. Remove the plant from that container gently, but without pulling on delicate stems or foliage. Squeezing the container all around can help loosen the root ball so it slides out more easily, or the container may be thin enough to cut away.

Because the plant was grown in a container, its roots have been restricted by the shape of the container. Loosen the roots all the way around, even on the bottom. If the root system is too tight to loosen with your fingers, cut through roots slightly with a knife or pruning sheers. Make three or four one-inch deep cuts, then gently pull the roots apart.

Center the plant in the prepared hole, keeping it 1-3 inches above grade. Keep roots spread out.

Planting Field-Grown Trees & Shrubs

If you are transplanting a tree or shrub that has been field grown, it may have bare roots or be lightly bagged or burlapped. Center the plant in the prepared hole 1-3 inches above the grade. Cut and remove all cords or twine from the root ball and trunk. Burlap should be left on, but loosened and pulled away from the trunk and below the soil surface. Remember to move trees carefully. Roll the root ball on its side and “steer” it into the hole with the trunk. Straighten the tree upright in the hole, checking it from different angles to be sure it is fully upright.

Completing the Planting

For both container-grown and balled and burlapped plant material, backfill the planting hole with soil your mix and pack firmly. Make a rim of soil around the plant to act as a “saucer” for holding water.

Water thoroughly with a slow soaking, and use a root stimulator fertilizer like Fertilome Root Stimulator & Plant Starter Solution to provide good initial stimulus for the roots to spread out.

Apply a 2-inch layer of mulch around your new planting, keeping an open space of 3 inches around the trunk or base of the plant to allow for air circulation.

Staking Container & Field Grown Trees and Shrubs

When larger trees or shrubs are planted, they are not yet firmly established in their new locations and may tip or lean as the soil settles. For larger trees, use three wires secured to anchor stakes in firm ground (never into the root ball). Where the wires touch the tree, they should be covered with rubber hose to prevent damage. Remove stakes as soon as roots become established. This can be as soon as a few months, so check your tree frequently. Stakes should not be left in place any longer than one growing season.

New Plant Care

All newly planted trees and shrubs need gentle care as they settle in to their new locations. To keep them healthy and encourage good initial growth…

  • Water Properly
    Plants should be slowly soaked to a depth of 4 inches, which is the equivalent of about an inch of water per week. This is necessary during the first year or two. Let the hose run slowly at the base of the plant until the water has penetrated to the root depth. Too much water can also be a problem. Feel the soil. If it is soggy or squishy, do not add water. Frequent light watering is not as good as a thorough soaking once per week, which will encourage strong root growth.
  • Fertilize Appropriately
    Your new plants should be given a root stimulator type fertilizer right after planting, like Fertilome Root Stimulator. You should not use a fertilizer meant for mature plants on new material, as it could cause damage to your plant. It is essential for new plants to develop a healthy root system – top growth will follow. After the first season, regular fertilizers can be used.
  • Prune Safely
    Pruning at planting time may be necessary for larger trees to reduce leaf surface to match cut roots. Remove one-third of smaller twigs. Do not cut back the main trunk or larger branches. If shaping is necessary, trim side branches enough to get uniformity.
  • Be Alert for Insects and Diseases
    Keep an eye out for holes or brown leaves or needles. This could be a sign of insect or disease problems. Ask our staff for help identifying the insect or disease and to prescribe appropriate treatments.
  • Special Care Plants
    Some plants need extra special care. For example, azaleas, hollies, rhododendrons and dogwoods all need well-drained, acidic soils, high in organic matter and a shady location. Research the trees and shrubs you are planting to be sure you are meeting their needs right from the beginning.

It can seem intimidating to plant your own trees and shrubs, since they are an investment in your landscape that you hope to enjoy for many years. By understanding planting basics, however, you can easily give every plant a great start in its new home.

Time to Plant

Time to Plant

Time to Plant

Time to Plant

Try Delosperma

“Ice plants” refer to several types of plants, usually succulents with fleshy thick leaves in cool green-blue colors. However, after an introduction to Delosperma, you’ll know it as the real deal. As a group of tough groundcovers, these blooming succulents flourish in full sun in well draining soils with little water, once they are established. Plus, they’re amazingly colorful!

About Delosperma
Native to Africa, with fleshy, clustered green leaves, Delosperma species and varieties solve many common groundcover, erosion and container garden needs. From only ½” tall and a few inches wide to 4 inches tall and spreading to 2 feet wide, Delospermas begin blooming with daisy-like flowers in early spring and often continue blooming through the summer. Depending on the variety, these perennial succulents punch up the garden with bright fuchsia, red, bronze, yellow, white, lavender or orange flowers, and several variegated or two-toned blooms are available as well.

A more adventurous gardener can turn up the heat with Delosperma ‘Fire Spinner.’ It quickly grows to an attractive weed-thwarting 2 inches high and 15 inches wide mat in two seasons. The variety name perfectly describes the flowers. It’s a kaleidoscope of hot colors on unbelievable 1½” wide fiery flowers. Radiating from a clear white center, petals with deep magenta color in the middle transition to hot orange, finishing with bronze on the outer tips. These arresting flowers sit atop shiny, apple-green needle-like succulent leaves making an astonishing garden statement from late spring through fall. What an unexpected showstopper!

What Delosperma Demands
Most gardeners are all too used to the finicky habits of their favorite plants, from precise soil pH levels to a specified amount of sunlight to a unique cocktail of soil fertilization and amendments for the best growth. Not so with Delosperma – all these plants ask (it’s more of a demand, really) is good drainage. With that, they’re fairly self sufficient – easy to care for and requiring very little maintenance.

Birds, bees and butterflies love Delosperma just as much as gardeners, but deer don’t, making these plants ideal for areas where deer are a bit too friendly in the garden. They work well as borders or to soften the edges of buildings, walkways and driveways, and they’re right at home in well-drained terraces, rock gardens and xeriscaping.

Whether you live in a naturally drought-prone area or just want to conserve water without sacrificing color and beauty, give Delosperma a try and you won’t be disappointed!
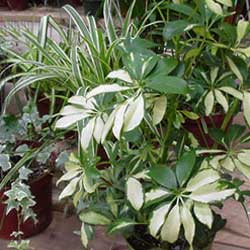
delosperma-1

Viburnums

Viburnums are one of the most outstanding groups of shrubs for use in landscape planting. Varying in height from 2-30 feet, viburnums can be found to suit most any planting location. Their varied growth habits, excellent foliage, striking and fragrant flowers, showy fruit and interesting winter appearance make them an excellent choice for most gardeners.

Which Viburnum to Choose
Effective in many situations, the smaller shrub forms, such as Viburnum carlesi ‘Compacta’ and V. opulus ‘Compactum’, are excellent for planting close to houses or in tighter spaces, such as narrow flowerbeds or in side yards. The larger forms, such as V. lantana and V. prunifolium, make good specimen and screen plantings to be a centerpiece in the garden or provide privacy. Which one will work best in your landscape will also depend on the available space you have, your soil type and the sunlight needs of individual plants.

Flowers and Foliage
Viburnum flowers, primarily white in color, are borne in clusters, ranging from a rounded snowball shape to a flat form. Large, white snowball clusters of florets are found on V. carlcephalum and V. macrocephalum. Half-round flower forms are borne on such types as V. carlesi and V. burkwoodi. Most of the others have a flat cluster of florets such as V. plicatum ‘Tomentosum,’ V. dilatatum and others.

Viburnum foliage can be extraordinary with types that include a velvety smooth leaf surface, bold rough-veined textures and glossy leathery character, all of which add more textural interest to the landscape. In addition, some forms have attractive fall leaf color such as the purplish red of V. dentatum and V. dilatatum, as well as the brilliant red of V. opulus.

Brilliant Berries
In the fall and winter there is also ornamental value with berries. Many viburnums produce lovely fruits in shades of red, pink, yellow and blue-black which not only add to fall and winter interest, but can also be attractive to birds and other backyard wildlife.

Viburnum Care
With so many many pleasing aesthetic features of these plants, how easy are they to care for? Easier than you may think! Viburnums are very hardy, resistant to serious pests, thrive in a variety of soil and environmental conditions and require little pruning. They will grow in either sun or shade; however, flowering and fruiting will be more profuse in a sunny location.

With so much to choose from and so many advantages to these shrubs, there’s sure to be one to suit all your landscaping needs. Stop in to consult with our landscaping experts today, and we can help you choose the perfect viburnum to complement your landscape.

viburnum_2

viburnum_1

Determinate Versus Indeterminate Tomatoes

It’s tomato-planting time again! If you’ve grown tomatoes in the past, you most likely have your favorites. If not, just ask! You’ll find some pretty strong opinions regarding tomato choices, and every gardener has their own top choices, must haves and great picks for tomatoes.

Choosing Tomatoes

Along with soil type, climate, moisture and other typical gardening considerations, one of the features you will need to take into account when choosing what type of tomato to grow is plant habit. The two main habit classifications are “determinate” and “indeterminate” and are based on fruit use, available growing space and length of growing season. Both habit classifications include fruit selections in a wide variety of colors, sizes, shapes and tastes.

Determinate Tomatoes

Tomatoes from a determinate plant are produced earlier in the growing season, on terminal ends of a compact bush. This type of tomato generally reaches 3-4 feet in height and is easily supported with a tomato cage or may even be self-supporting. Due to its compact habit, it may even be grown in containers, ideal for gardeners with less available space. Because all the fruit ripens at the same time, determinate tomatoes are an excellent choice if you plan to can your fruit or make sauce, as you won’t need to worry about collecting enough fruit to work with. Determinate classification includes popular tomato varieties such as:

  • “Celebrity” – an eating tomato
  • “Roma” – a paste tomato
  • “Patio” – a dwarf selectio

Indeterminate Tomatoes

Indeterminate tomato plants will fruit along the entire length of the stem over a longer period of time, in fact continually, until frost. Smaller amounts of fruit ripening regularly throughout the growing season makes an indeterminate tomato plant an excellent choice if you cannot cook or consume a large quantity of this perishable fruit all at one time. Indeterminate tomato plants are vines, requiring proper pruning and support, to reach their ultimate height of 8 feet or more. Indeterminate classification includes popular varieties like:

  • “Amish Paste” – heirloom, paste tomato
  • “Beefmaster” – extra large sandwich tomato
  • “Better Boy” – juicy but firm, compact vine with shorter internodes
  • “Black Krim” – deep color, rich flavor
  • “Chocolate Cherry” – cherry, chocolate red in color

By understanding the differences between these basic tomato classifications, it will be easy for you to choose the tastiest tomato to suit your gardening needs and harvest preferences. Many gardeners choose more than one of each type of tomato, ensuring there is always a bountiful supply to use, to share and to enjoy!

Tomatoes

Choosing the Right Flowering Tree

Purchasing a tree for your landscape is an investment that can raise the property value of your home and bring you pleasure, beauty and shade for many years to come. Selecting the proper flowering tree for your enjoyment is easy, just follow these simple guidelines and remember, we are here to help you with any of your gardening questions.

  1. Care
    Study your chosen planting environment carefully. Familiarize yourself with the sun patterns. Will your tree be in full sun, part sun or shade? What about soil type? Is it heavy clay or well-drained loam? Some trees will survive in poor soil, some will not. Is there a water source nearby? Having a clear understanding of your tree’s cultural requirements and characteristics of the site you have chosen will help you make a good match so the tree will thrive.
  2. Size & Form
    Consider the space where you will be planting the tree of your choice. Know the ultimate height and width of the plant that you choose to make certain that it will not outgrow the room you have allotted for it. At the same time, note the growth habits and sizes of nearby trees and shrubs to be sure they don’t crowd one another out in the years to come.
  3. Flowers
    Make note of when you would like your tree to flower. For instance, you don’t want flowers in August if that is when you are traditionally away on vacation. Many flowering trees are available in more than one flower color, depending on the cultivar. Choose the one that works best for you and your taste and looks good with whatever else you will have flowering at the same time.
  4. Other Ornamental Characteristics
    A higher value and more enjoyment is gained by choosing a tree with multiple seasons of interest. Look for a flowering tree that may also have interesting winter bark, persistent fruit or unique leaf coloration so you can enjoy its beauty in every season.
  5. Availability
    Frequently, folks will read about a unique new plant introduction and are disappointed when it is not yet available on the market or does not grow well in their area. To avoid disappointment, choose from our large selection of flowering trees in inventory. We pride ourselves on carrying plants that thrive in our area and can suggest an appropriate substitute for your desired tree.

With just a bit of careful consideration, you can easily choose a flowering tree that you will enjoy for many years to come.

FloweringTree_3

FloweringTree_4

FloweringTree_5

Strawberries: Home Grown in Hanging Baskets

Do you grow strawberries? Ripe, sweet, juicy strawberries are the number one favorite fruit in the US and are definitely worth the garden space. However, if you have a small or limited growing space, raising strawberries in hanging baskets offers a creative and space-saving solution while adding a decorative touch to outdoor areas.

Benefits of Growing in Hanging Baskets

  • Space Efficiency: Hanging baskets utilize vertical space, making them ideal for small gardens, balconies, and such.
  • Ability to Relocate: If an unforeseen deep frost or a scorching day arrives, hanging baskets may easily be temporarily relocated to a frost-free or cooler location.
  • Pest Management: Elevating strawberries can help deter pests like slugs and snails, reducing the risk of plant damage.
  • Improved Air Circulation: Hanging baskets allow for better airflow around the plants, which can help prevent diseases such as mildew.
  • Increased Water Drainage: Water drains quickly and easily from most hanging baskets, helping to prevent root rot.
  • Easy Access: Harvesting strawberries from hanging baskets is convenient and doesn’t require bending or stooping, making it suitable for gardeners of all ages and abilities.
  • Aesthetic Appeal: Hanging baskets add visual interest to your garden or outdoor space, providing a beautiful display of cascading foliage and ripe berries.

Selecting the Right Varieties:

Choose strawberry varieties that are well-suited for container gardening, such as Alpine, Day-neutral, and Everbearing. Alpine types do not produce runners, while Day-neutral and Everbearing types produce few runners, thus putting their energy into increased fruit production. It is best to avoid June-bearing types when planting in hanging baskets, as they produce excessive runners at the expense of fruit production. Also, consider factors like flavor, size, and yield when selecting varieties.

Alpine

Alpine strawberries are delightful little fruits that pack a punch of flavor despite their small size. What sets Alpine strawberries apart is their intense sweetness and aromatic fragrance. They typically have a more concentrated flavor compared to their larger counterparts, making them a favorite among gardeners and fruit lovers.

These plants are also known for their ability to produce fruit continuously throughout the growing season, ensuring a steady supply of delicious berries for eager growers.

Here are three popular varieties of alpine strawberries that thrive in hanging baskets:

  • Alexandria
    This variety is prized for its sweet, aromatic berries and vigorous growth habit. ‘Alexandria’ produces an abundant yield of small, deep red fruits that pack a punch of flavor. They have a lovely trailing nature, which creates an attractive cascade of foliage and fruit. With proper care, ‘Alexandria’ plants can produce fruit continuously throughout the growing season, providing a steady supply of delicious strawberries for snacking or culinary use.
  • Mignonette
    Renowned for its intense strawberry flavor, ‘Mignonette’ Alpine strawberries are a favorite among gardeners. These petite, ruby-red berries boast a rich, complex taste reminiscent of wild strawberries, making them a delightful addition to desserts or salads or enjoyed fresh off the vine.
  • Ruegen
    With its vigorous growth and prolific fruit production, ‘Ruegen’ Alpine strawberries are a popular choice for hanging baskets. This variety produces medium-sized, bright red berries with a sweet, tangy flavor that is simply irresistible. ‘Ruegen’ plants feature cascading stems adorned with delicate foliage and clusters of berries, creating a picturesque display in hanging baskets.

Everbearing & Day-neutral

Everbearing strawberries typically produce two to three harvests of fruit each year: one in late spring to early summer, another in midsummer, and sometimes a third in early fall. They initiate flower buds in response to day length, meaning they typically produce their main crop in the spring and a smaller crop later in the season. After the initial flush of fruit, everbearing varieties may produce sporadic berries throughout the summer and into the fall. However, their fruiting is influenced by day length, so they may slow down or stop producing during the hottest months of summer.

On the other hand, Day-neutral strawberries are less dependent than Everbearing strawberries on day length for flowering and fruiting. Instead, they produce fruit consistently throughout the growing season, regardless of day length. Day-neutral varieties initiate flower buds based on temperature rather than day length, allowing them to flower and fruit continuously as long as temperatures remain within their preferred range. This makes them ideal for regions with mild climates where temperatures stay relatively consistent throughout the year. Day-neutral strawberries typically produce smaller harvests of fruit compared to everbearing varieties but over a longer period of time.

Here are our favorite everbearing and day-neutral strawberry varieties popular for growing in hanging baskets:

  • Seascape
    ‘Seascape’ strawberries are prized for their exceptional flavor, firm texture, high yields, and compact size, making them a top choice for hanging basket growth. These berries boast a perfect balance of sweetness and acidity, making them excellent for fresh eating, preserves, or adding to desserts.
  • Tristar
    Loved for its robust flavor and reliable performance, ‘Tristar’ strawberries are known for their intense sweetness and juicy texture, making them a delightful addition to salads and desserts or enjoyed fresh off the vine. ‘Tristar’ plants are compact and produce abundant fruit throughout the growing season, making them well-suited for small-space gardening and hanging baskets.
  • Evie-2
    ‘Evie-2’ strawberries are esteemed for their large, flavorful berries and vigorous growth habit. These berries are known for their sweet, juicy flavor and firm texture, making them perfect for eating fresh, baking, or preserving. ‘Evie-2’ plants are compact and produce fruit prolifically throughout the season.
  • Albion
    ‘Albion’ strawberries are known for their large, firm berries and high yields. They have a deliciously sweet flavor and are resistant to several common strawberry diseases. Their compact, runnerless growth makes them an excellent choice for hanging baskets where space is limited.
  • Quinalt
    ‘Quinalt’ strawberries are another everbearing variety that produces medium-sized berries with a sweet, juicy flavor. ‘Quinalt’ strawberries are also known for their high tolerance to heat, making them a great choice for growing in containers during the summer months.

Each of these strawberry varieties offers something unique, whether it’s compact growth, continuous fruiting, disease resistance, or ornamental appeal, making them excellent choices for growing in hanging baskets.

Hanging Basket

Damman’s Garden Center offers a fantastic assortment of hanging baskets. When making your selections:

  • Opt for hanging baskets with sufficient drainage to prevent waterlogging.
  • Select a hanging basket large enough to hold your strawberry plant(s).
  • Ensure the basket is sturdy enough to support the weight of the soil and plants once they’re fully grown.
  • Choose a hanging basket color and style that goes well with your house.

Soil Mix

  • Use a well-draining potting mix rich in organic matter.
  • If needed, incorporate perlite or vermiculite to improve aeration and drainage.
  • Consider adding slow-release fertilizer or compost for long-term nutrient availability.

Planting

  • Fill the hanging basket with the prepared soil mix, leaving enough space for the strawberry plants.
  • Gently remove the strawberry plants from their pots and carefully separate any tangled roots.
  • Plant the strawberries in the basket, ensuring the crown (where the roots meet the stem) sits just above the soil level.
  • Space the plants evenly to allow for proper growth and airflow.

Watering and Care

  • Provide adequate sunlight exposure, aiming for at least 6-8 hours of direct sunlight per day.
  • Water the strawberries regularly, keeping the soil consistently moist but not sopping wet.
  • Mulch the surface of the soil to help retain moisture.

Maintenance and Harvesting

  • Remove any runners (long stems that produce new plants) to encourage the development of larger berries.
  • Fertilize the plants every 4-6 weeks with a balanced liquid fertilizer, following the manufacturer’s instructions.
  • Harvest ripe strawberries as they become ready, typically when they reach a deep, vibrant color and are firm to the touch.

Growing strawberries in hanging baskets makes cultivation and harvesting a cinch. Gardeners can enjoy fresh, flavorful berries while maximizing limited space. Why not give it a try this spring?

Growing Vegetables in Pots

You don’t need expansive acreage to grow a thriving vegetable garden. In fact, growing vegetables in pots can be very productive and can bring a delicious, healthy harvest to your home no matter what type of garden space you may – or may not – have to work with.

Why Grow Vegetables in Pots?

Whether you have a balcony, fire escape, small patio, narrow stoop, or windowsill for your gardening efforts, there is always room for a pot or two of vegetables. Yet vegetable container gardening is about more than just saving space, and there are many benefits to using pots for your garden plot.

When using pots, for example, your garden space is much less likely to be overtaken by weeds, saving you time and effort. Pots are also easier to move around your space in order to take advantage of the best positioning for sun, rainfall, and weather protection. Pots and containers can also be more comfortable for you to tend without needing to bend down or kneel as much to reach your plants and harvest your vegetables.

Easiest Vegetables for the Urban Garden

There are many options for container garden vegetables. Ideally, choose cultivars that are dwarf, miniature, or compact whenever possible, as they will be better adapted to lush growth in pots and small spaces. Popular choices include:

  • Beans
  • Broccoli
  • Carrots
  • Chard
  • Chilies
  • Cucumbers
  • Eggplant
  • Kale
  • Leeks
  • Lettuce
  • Okra
  • Onions
  • Peas
  • Potatoes
  • Radishes
  • Spinach
  • Peppers
  • Tomatoes

Because you may have less growing space than a traditional garden, choose vegetables you love and that you will use to make the most of your gardening space. Also be aware of how much sunlight your pots will receive, how deep the pots are for roots or root vegetables, and whether the plants will need vertical space for climbing before you plant them. The more familiar you are with each vegetable’s growing needs, the better choices you can make for vegetables that will flourish in your urban garden.

Tips for Growing Vegetables in Pots

No matter which vegetables you choose to grow in pots, they will need proper care to reach their full potential for a bountiful harvest. To help your container vegetables thrive…

  • Choose the Proper Pot – Consider the root system of your favorite vegetables and choose a pot deep enough to allow the roots to flourish. If you are planting root vegetables, you will need a deeper pot that allows more space for veggie growth. Bear in mind that ceramic or clay pots can be very heavy, so plastic pots may be a more convenient and easier option.
  • Position the Pot for Good Sunlight – Many leafy vegetables do well in part-shade conditions, while other vegetables need greater amounts of sunlight for the best harvest. Putting pots on a plant caddy or stands with casters can make it easy to move each container for maximum sunlight throughout the growing season.
  • Provide Necessary Support – Vining and tall vegetables may need stakes, cages, netting, or trellises to support the plant and help it stay healthy. Using proper supports will also maximize your vertical growing space. It is best to have that support in place when the plant is young, so you do not accidentally damage roots when adding a support later.
  • Use the Best Soil – Because container vegetables don’t have as much soil to draw nutrition from, it is critical to use a high-quality potting mix when growing veggies in pots. Choose a mix that will maximize water retention to help with watering and mix in compost or appropriate fertilizer with the soil before you add your vegetable plants.
  • Water Adequately – All vegetables need adequate water for lush growth and veggie production. Depending on the pot size, plant type, and climate conditions, you may need to water vegetable pots daily or even twice per day to ensure they have good moisture. Consider self-watering containers to make this garden task even easier.
  • Feed Plants Properly – The right fertilization and feeding schedule can improve your plants’ health and increase the yield of even small vegetable pots. Choose a liquid fertilizer that will meet your plants’ needs and apply it according to the label directions for the best results that maximize the productivity of your vegetable plants.
  • Consider Combination Planting – It’s easy to plant different vegetables in the same pot, but take care to group plants with similar water, fertilization, and sunlight needs so each pot can get the proper care. Themed pots can be a fun way to add flair to your vegetable garden as well – try a salad pot, a pizza pot, or even a pot for pickles, each one with related herbs and veggies.
  • Stay Alert to Pests – Unwanted pests can invade even container gardens. Inspect your pots weekly for pests such as slugs, aphids, and leaf hoppers. It is best to use the safest solution available to control insect infestations. Also, in urban gardens, animals such as stray cats, dogs, or even rats can also be a problem and you should use cages or other techniques to protect your plants if necessary.

Growing vegetables in pots can bring you a delicious, nutritious harvest no matter what the size or location of your gardening space. By choosing vegetables adapted to containers and giving your pots the best of care, you’ll soon have an amazing crop to enjoy.

Early Spring Gardener’s Calendar

* Plan your summer vegetable and herb garden. We offer a wide selection of seeds that include all of your favorite annuals, perennials, vegetables and other novelties as well as many hard-to-find selections. Inventory your pots and flats and discard unusable ones. Make a list of the supplies you will need. Test your garden soil  for nutrient content. We offer a variety of do-it-yourself soil test kits.

* Prune woody plants while dormant, including fruit trees, summer- and fall-blooming shrubs and vines. Limit pruning of spring-blooming trees and shrubs to the removal of sucker growth and rubbing or broken branches. Spray trees and shrubs with year-round Bonide All Seasons Horticultural Oil to reduce insect population.

* Sharpen, clean and oil tools and lawn mowers. Begin heavy annual pruning of shrub roses as new leaves appear.

* Plant pansies and primrose as soon as the earth is workable. Plant strawberry plants. Sow cool-season vegetables and herbs in the garden. 

* Start spring cleanup and begin major lawn work. Remove debris, dethatch your lawn or aerate compacted areas to improve water penetration.

* Spray needles and limbs of Arborvitae, Cryptomeria, false cypress, fir, hemlock, Juniper, pine, yew and spruce (except blue spruce) for spider mites with Fertilome Dormant Oil.

* Apply fertilizer to perennials and roses with. Feed berry bushes, grapevines, rhubarb and asparagus a balanced 12-12-12 fertilizer before new growth begins. Fertilize trees and shrubs with Espoma Tree and Shrub fertilizer.

*Apply Bonide Weed Beater Complete to  control crabgrass. Do not use on newly seeded lawns.

* Continue spring cleanup. Cultivate to remove winter weeds and debris from the planting beds. Apply corn gluten or Preen specified for gardens and scratch it in to prevent future weeds. Do not use in gardens where you will be direct seeding.

* Reseed bare spots in established lawns with Dammann’s Special Grass Mix. Keep the area moist until seedlings appear, then mow when the new grass is 3″ high.

* Prune forsythia and other spring-flowering trees & shrubs after the flowers fall.

* Dig and divide crowded early spring bulbs after they finish blooming. Enrich the soil with Fertilome Bone Meal.

* Plant and transplant trees and shrubs, including roses, ground covers, and perennials.  Be sure to use Fertilome Root Stimulator to root your plants in properly.

* Transplant cool-season seedlings after hardening off into the garden mid to late March. When the soil temperature reaches 60 degrees in early May, sow warm-season vegetable and herb seeds.

* Place our gro-thru sets over peonies, grasses or any other perennials in need of support.

Protecting Our Pollinators

Every garden requires pollinators, and bees are among the finest. Without them there would be limited flowers and far fewer fruits and vegetables. Did you know that about 30 percent of the food we eat depends on the pollination of bees, including onions, cashews, coffee, carrots, chocolate and vanilla? If we don’t protect these prolific pollinators, our landscapes, gardens and diets will be irrevocably changed.

About Bees
Although there are many bees that are great pollinators, like carpenter, mining, sweat and cellophane bees, some of the most well known and easily identified bees are the honeybee and bumblebee. Both of these bees live in social colonies and are cavity nesters. Because these bees are active all summer long, they require a constant supply of floral nectar close to their hive and they thrive in flower gardens, orchards and other areas with abundant blooms.

Unfortunately, both these types of bees – along with many others – are disappearing rapidly, and two key threats are to blame.

  • Habitat Loss: As more natural habitat is lost to development, there are fewer nesting locations and inadequate food supplies for bees. While meadows developed into resorts and parks disappearing for strip malls are obvious examples of development, other less visible developments that can hurt bees include widespread use of flower cultivars that do not produce adequate nectar, eliminating critical bee food sources.
  • Pesticide Drift: Widespread, abundant spraying of pesticides to protect crops, lawns and parks can inadvertently hurt bees. Stronger pesticides can kill bees directly, while less potent toxins can contaminate nectar and will gradually build up to fatal levels in bees’ systems. Even if pesticides are not sprayed in areas where bees are abundant, high level spraying can easily be spread by wind patterns into critical bee habitats.

Inviting Bees to Your Garden
Fortunately, it is easy to bring more bees to your garden and encourage healthy bee populations. To support local bees…

  • Planting a variety of flowers that will bloom throughout the entire summer to provide ongoing food supplies.
  • Opt for native flower varieties that will be more easily recognized and used by bees, instead of introduced flowers that are less familiar.
  • Eliminate chemical use in your yard, as much as possible, including on your lawn, garden and trees, especially while plants are in flower.
  • Provide bees a safe place for shelter and to lay their eggs. A wood pile is suitable, or you can invest in a specialized bee house.
  • Make sure that there is an available water source for your bees. A bird bath or any simple water basin works just fine.

Want to bring bees to your yard and help them feel at home? Start with this list of native plants bees love, and ask our experts for more tips about keeping your lawn and garden bee-friendly!

Native Plants That Attract Bees

  • Apple (Malus)
  • Aster (Aster)
  • Blackberry & Raspberry (Rubis)
  • Black-Eyed Susan (Rudbeckia)
  • Blueberries (Vaccinium)
  • Currant (Ribes)
  • Elder (Sambucus)
  • Goldenrod (Solidago)
  • Highbush Cranberry (Viburnum)
  • Joe-Pye Weed (Eupatorium)
  • Penstemon (Penstemon)
  • Purple Coneflower (Echinacea)
  • Redbud (Cercis)
  • Rhododendron (Rhododendron)
  • Sage (Salvia)
  • Stonecrop (Sedum)
  • Sunflower (Helianthus)
  • Willow (Salix)

bee_2
bee_3
bee_1

Spring Lawn Renovation

Spring is the ideal time to spruce up your lawn. After a long winter, you can easily see where any bald, bare or thin patches exist, as well as where weeds or fungus may be taking over the lawn. Fortunately, there are easy ways to set your lawn to rights!

Seeding

If you are planning to seed a new lawn or overseed an existing lawn, it is best to seed as early as possible. It is important to get seed germinated and growing before trees begin to leaf out, when the trees will be usurping more of the soil’s moisture and nutrition and new leaves will block sunlight from the grass seed. This is especially true in more heavily shaded areas. Keep the area moist at all times until the roots of grass seed become established, then you can gradually decrease the frequency of watering. The new grass can be mowed when it reaches a height of about three inches.

Rejuvenating a Weak Lawn

Your lawn cannot live without air, water and nutrients, but decaying material matted down between grass blades can smother even the healthiest-looking lawn. This decaying material is called thatch, and when a thick layer of thatch builds up, water and fertilizer may run off instead of penetrating the soil. Aerating and dethatching can help rejuvenate a lawn by restoring passageways to the soil. Late spring is an excellent time to dethatch cool-season grasses. Thatching rakes can be used, or you can use a metal rake to remove thatch by hand.

Adjusting pH

The pH of your soil has a direct impact on the health of your lawn. Test your soil to determine the pH (simple kits are available to do this). We recommend a small handful of soil taken from a depth of 3 inches to get the most accurate reading. At a pH of 6.4-7.0 nutrients are most readily available to turf grasses, and beneficial microorganisms are more active to decompose thatch and keep the soil structure healthy. If your pH is too low or too high, consider amending the soil as needed to help bring it to a more desirable level.

Crabgrass Control

On established lawns that you are not overseeding, apply a fertilizer with crabgrass control in early to mid-April like Fertilome Crabgrass Preventer Plus Lawn Food. Reapply in fall for the second germination of crabgrass. Remember, crabgrass seeds start to germinate when the soil temperature reaches 50-58 degrees.

Newly Seeded Lawns

On newly seeded lawns and those seeded in late fall or during the winter months, use a starter fertilizer like Fertilome New Lawn Starter Fertilizer to promote a strong root system.

Maintaining your lawn at a higher level, 4 inches, throughout the growing season will allow you to control crabgrass and broadleaf weeds without the use of chemicals. Taller grass will shade out the weed seed preventing germinating.

Insect Controls

An early season application of St. Gabriel Organics Milky Spore Granular Grub Control or Bayer Grub Control will provide effective white grub control for the growing season. This preventative method tends to give better results than applying insecticides when you notice damage as it then may be too late. If you have routinely had problems with other insects, opt for products specifically targeted for those pests to ensure effective control.

A lot goes into having a lush, healthy lawn, but if you take the appropriate steps to rejuvenate your lawn in spring, you’ll be rewarded with thick, healthy, resilient turf to enjoy from early spring until snow flies again.

spring_lawn_3

spring_lawn_1

Grass sprinkler

More Than Just Mulch

Not only does mulch add a decorative finish to your flower beds, it also keeps the soil cool and moist and thus reduces the need for watering. By using a pre-emergent herbicide with mulch, weed seeds are discouraged from germinating and growing. But which mulch should you use?

Types of Mulch

There are several types of mulch to choose from, and each type can give your landscaping a different finishing touch.

  • Pine Bark and Nuggets
    These types of mulches release acid when they break down. Pine mulches should be used around plants that need a more acidic soil. Use around azaleas, rhododendron, pieris japonica and holly.
  • Shredded Hardwood
    This is by far the most popular mulch. It has a dark color and knits together well so that it does not wash away. This mulch is often available in different colors, including black, red and brown.
  • Cypress
    This long-lasting mulch has a pleasant fragrance. Cypress mulch also knits together well, and it is thought to repel insects.
  • Yard Waste
    Many gardeners use yard waste such as shredded leaves, grass clippings or pine needles as mulch. While these can be effective mulches to conserve moisture and repel weeds, and they are certainly more economical, they do not have the refined look of wood mulches. Yard waste mulches will also decay and discolor much more quickly than wood mulches.

Using Mulch

No matter which mulch you choose, it is important to use it properly. It is recommended that mulch be applied 2-3 inches deep around plants, in flowerbeds and in garden areas – less depth will not be as effective to shield and protect the soil, while deeper mulch may actually protect too much and could restrict water from entering the soil. Take care not to pile mulch directly next to stems and trunks, which could invite insects and rot to invade the plant.

Over time, mulches will decay and compact, at which time they can be removed and added to a compost pile, or simply turned and worked into the soil around the plants they’ve been protecting. To preserve mulch a bit longer, raking and turning it over will refresh its color and reduce compaction.

Not sure which mulch will be best for your plants? Our experts will be happy to help you choose!

mulch_1mulch_2

A Feast for the Eyes

Traditionally, when planning a vegetable garden, the focus has been primarily on function with aesthetics as an afterthought – a productive harvest has usually been more important than any visual appeal. This year, why not try a new approach? Thoughtfully combine beauty and performance to create an edible garden that will explode with a variety of color and an abundance of produce. It can truly be a feast for the eyes as well as the table!

Planning a Beautiful Vegetable Garden

Color, texture and form are characteristics we keep in mind when combining plants in the flower garden. We plan flowerbeds so that plants enhance each other, repeating colors and shapes for continuity and flow. We add a variety of texture and form for diversity and interest. Vegetables, herbs and fruits can be just as vibrant, exciting, diverse and easy to combine as annual and perennial flowering plants are.

To begin, provide structure. Placing a picket fence around your garden offers instant structure and visually sets it apart from the rest of the landscape. If you plan on planting along the outside of the perimeter, you will create the allure of a garden within a garden, with a hint of secret places. Place a straight pathway through the center, starting at the entrance. Divide the larger garden into smaller square planting beds using pathways to separate the beds. This will enhance the structure of, and provide easy access to, the garden beds as well as lead your eye through the garden. If desired, you can also used raised beds for this formal structure.

Next, focus on plant selection. Begin with a plant plan or layout. Initially, base your selections on what is pleasing to your individual tastes. Consider unusual varieties of vegetables and herbs that come in unique colors. Repeat colors, both horizontally and vertically, to add depth and dimension to the garden. Don’t forget to add brightly flowering annuals such as zinnias and marigolds to mingle amongst the edibles. Another consideration is edible flowers like nasturtium and calendula. Contrast colors for a striking, eye-catching effect. Keep in mind, also, texture and form. Bold textures add drama and are often combined with fine-foliaged plants for a softening contrast. Short, stout plants anchor the garden bed while tall, willowy plants raise the eye and lead you farther down the garden path. Take all these characteristics into account when planning and place plants in geometric patterns to create a quilt-like garden tapestry.

Finally, your spring edible garden will emerge invoking a feeling of calm, displaying a variety of cool greens, purples and blues found in peas, lettuce, cabbage and broccoli. Shortly after, the summer edible garden will be completely transformed at harvest time with an explosion of vibrant shades of red, purple, orange and yellow. With so many stunning options to combine, you can truly create a feast for the eyes that will be beautiful in every season!

EdiblePlants-1024x457

Feast-2

Feast-3

Feast-1

Putting on Airs: Tillandsias

Looking for something easy to grow? Tillandsias should be on the top of your list. Tillandsia is the largest genus in the Bromeliad family with over 650 species that vary in color, size, texture and shape. In their native habitat, Tillandsias attach themselves to trees and rocks using their roots. They derive the nutrients and water they need from the air, hence the common name “air plant.” And like their name implies, no soil is necessary for a beautiful, thriving specimen! This versatile houseplant is not fussy, and when given minimal care, will adapt to most home and office environments.

About Tillandsias

Tillandsias are evergreen flowering perennials, and their native range spreads from the southeastern United States to Central and South America. While they are often associated with tropical regions, these diverse plants can also be found in deserts, high mountain ranges and rocky habitats.

It is a common misconception that these are rootless plants – in fact, their roots are critical to serve as anchors and keep the plants stable, though the roots do not absorb moisture or nutrition like other plants. Instead, these plants absorb all they need through their foliage.

Caring for Tillandsias

These delicate plants are easy to care for, but there are some tricks necessary to keep them healthy and looking their very best.

  • Light
    Place your Tillandsias where they will receive plenty of light but not direct sunlight. Direct sun will dry out the leaves very quickly and can cause dehydration and wilting. Home or office fluorescent lighting works just fine.
  • Temperature
    Typical indoor temperatures are perfectly suitable for Tillandsias, and a range of 50-90 degrees Fahrenheit is ideal.
  • Water
    Once a month, soak your air plant in water for about 20 minutes. If the plant is flowering, a delicate rinse would be more appropriate so that the bloom is not damaged. When through soaking, shake off the excess water from the plant and place in an area with good air circulation so it can dry easily. In between soaks, spritz your Tillandsias 1-2 times per week with clean water from a spray bottle. Indoor heat and air conditioning rob moisture from the air. If your air plant leaves start to wrinkle or roll, this is a sign of dehydration. Give them a good soak and spritz more frequently.
  • Pruning
    It is not unusual for the outer leaves of an air plant to dry out and turn brown, and these spent leaves can simply be removed. If leaf tips dry a bit and turn brown, cut off the tip and continue with regular care. The plant will grow and look just fine.

One final note, Tillandsias have beautiful brilliant blooms but only bloom once in their lifetime. Depending on the species, the bloom may last several days to several months. Why not try several different Tillandsia varieties so you can experience these amazing blooms?

tillandsias_2tillandsias_1

Tremendous Turf

The benefits of turf grass as a ground cover are numerous and often undeclared or overlooked. In recent years, turf has gotten a bad reputation due to the belief that a beautiful lawn requires a lot of hard work and overuse of dangerous chemicals. This is a misconception and the benefits of turf can far outweigh the concerns, particularly when you care for your turf properly and responsibly.

The following is a list of the many advantages that our lawns provide. This list was provided by and may be found, along with other helpful turf information, at www.TheLawnInstitute.org.

Environmental Benefits

  • Cools the Air
  • Produces Oxygen
  • Filters Air & Reduces Pollution
  • Captures & Suppresses Dust
  • Recharges & Filters Groundwater Supply
  • Reduces Storm Water Runoff
  • Controls Soil Erosion
  • Retains and Sequesters Carbon
  • Assists Decomposition of Pollutants
  • Restores Soil Quality

Community & Human Health Benefits

  • Enhances Community Pride & Social Harmony
  • Offers a Natural Playing Surface for Recreation
  • Provides a Safe Surface & Reduces Injuries
  • Promotes Outdoor Activity & Exercise
  • Improves Physical & Mental Health
  • Relieves Stress
  • Lowers Allergy-Related Problems
  • Dissipates Heat & Cools the Environment
  • Reduces Glare
  • Diminishes Noise Pollution
  • Minimizes Nuisance Pests
  • Compliments Overall Landscaping
  • Preserves Natural Wildlife Habitat

Economic Benefits

  • Increases Property Values
  • Reduces Home Cooling Costs
  • Provides a Low-Cost Ground Cover
  • Serves as a Fire Barrier
  • Improves Visibility & Deters Crime
  • Boosts Human Productivity

With so many benefits to healthy, luxurious turf, won’t you give your lawn another chance? We can help – from suggestions for revitalizing a weak lawn to proper mowing tips to fighting weeds and pests, plus all the tools, seed, fertilizers and amendments you need to improve your lawn – our experts can help you make the most of every square inch of your turf!

Creating a Meditation Space in Your Garden

Gardening can be a relaxing, therapeutic hobby as you nurture seedlings, encourage growth and bring your harvest to fruition. But if you just want to take a moment to breathe, reflect and center yourself, it isn’t necessary to get out the garden clogs, sharpen your hand tools or get dirt under your fingernails. Creating a peaceful meditation space in your garden is easy, and can turn any garden into your own private sanctuary.

The Need for Peace

As our lives get ever busier with hectic schedules and cramped appointments, it may seem impossible to have any time for thoughtful reflection or meditation. Furthermore, smaller living spaces and more crowded urban areas can make it seem equally impossible to have any space for solitary peace. Without the ability to relax, we’re faced with skyrocketing stress in our lives, along with a host of different health problems such as tension headaches, high blood pressure, depression, obesity and more. More and more studies, however, are demonstrating that time spent in nature is beneficial for reducing stress and tension, and there’s no better place to easily enjoy nature than in your own garden.

Your Peaceful Purpose

Before creating your meditation space, you need to plan what you want to use it for in order to ensure you have enough room and all the right touches for your peaceful retreat. Meditation can mean something different to everyone – you might prefer a place for quiet, contemplative prayer, or you could be interested in an outdoor space for yoga practice. For some people, a restful space for coloring or painting is their ideal meditation spot, while others may want a natural niche for reading or journaling. Creating or listening to music may be part of your meditation practice, or even a cozy spot for an outdoor nap. Whatever means peace and relaxation to you, it can be incorporated into your garden.

Eliminating Distractions

Once you know how you will use a meditation space in your garden, it is essential to eliminate other distractions and interruptions from that space. Unwanted noises, glaring streetlights, unsavory sights and even unpleasant smells can interrupt meditation and disrupt your relaxation, but it is easy to plan your gardening to eliminate those difficulties. For example, a green wall or trellis can be used to block an unsightly view, and the plants on it will help muffle noises. You could also consider a small fountain for the soothing tinkle of running water to block traffic or neighborhood noises. Climbing, clinging vines can be used to cover structures with greenery to increase the natural feel of the space. Opt for arbors or pergolas that can help create comfortable shade and define the space without completely blocking sunlight, and consider fragrant flowers nearby if unwanted aromas are invading your garden.

Adding Joy to Your Garden Space

Once your meditation area is structured and distractions are minimized, it is time to add your own personal joy into the space. What brings joy to the space will vary from garden to garden and even from season to season, but it should be a personal choice and something that helps draw you into the space. Consider…

  • Seating
    In order to enjoy your meditation space, you will need a place to sit and relax within it. This may be a comfortable bench, a cozy chaise lounge, a soothing hammock or any other type of seating. A chair-sized boulder can be a natural alternative, or you may opt for a more whimsical swing to add a dash of fun to your personal space.
  • Sights
    You’ve taken steps to block sights you don’t want to see in your garden, but a good meditation space will also include sights you want to look at. A bird feeder or bird bath can invite beautiful feathered friends to share your space, or you might prefer a lovely piece of garden art, a gazing ball, plants in your favorite colors or even unique mulch or paving stones in a therapeutic pattern.
  • Sounds
    Pleasant sounds can help add a focal point to your meditation space, allowing you to focus on unique tones to help center yourself. A wind chime, waterfall fountain or even a way to bring your favorite music outdoors can be a wonderful addition to a peaceful meditation space.
  • Water
    Water can serve several purposes in a meditation space. Flowing or splashing water provides natural white noise, and the sparkles of the water are ideal for meditative gazing or creating soothing reflections. Consider different aquatic options, such as a small stream or brook, a weeping rock, a fountain or even a reflecting pool. You can even opt for a small pond for goldfish or koi if you desire.

Above all, remember that there are no strict rules for creating your personal meditation space. Whatever brings you peace and joy can be part of your design, and it can change as your tastes and preferences change. Garden meditation spaces can vary as much as any other part of the garden, but each one helps nurture our green spirits.

What Is the Difference Between an Annual, a Perennial, and a Biennial?

All living creatures, including plants and flowers, have expected lifespans. Recognizing the differences between annuals, perennials, and biennials can help you determine the life expectancies of different garden center plants so you can choose the varieties that will work best in your garden, landscape, and containers.

Annuals
Annual plants are fairly straightforward. These plants complete their entire lifespan in just one year or growing season, from first sprouting from seeds and growing foliage, stems, and blooms to creating seeds to continue the next generation. After the plants die, they will not regrow from their initial roots, but must restart from seeds again as completely new plants. Annuals are generally faster growing and have longer bloom seasons, making them colorful showstoppers in the garden and landscape.

Common and popular annuals include…

  • Begonias
  • Cosmos
  • Impatiens
  • Marigolds
  • Petunias
  • Zinnias

In addition to many popular flowers, most garden vegetables are also grown as annuals, though some of them would botanically be classified as perennials if they were allowed to remain in place for multiple years.

Perennials
Perennial plants are those with a lifespan that lasts at least three years, though they can live significantly longer as well. Perennial foliage may die back during the winter months but will regrow from dormant roots the next season. These plants often take longer to mature and may have shorter blossom times than annuals, but they can provide many years of beauty in the landscape.

Familiar perennials include…

  • Coneflowers
  • Coral bells
  • Daylilies
  • Peonies
  • Phlox
  • Sedum

In addition to these elegant and popular flowers, hedges and trees are also perennials. These plants are staples in the yard and provide a foundation for any landscape.

Biennials
Biennials fall between annuals and perennials with a two-year life cycle. During their first year, these plants establish leaves, roots, and stems. Though they may die back slightly over the winter, they will rejuvenate in the spring and grow flowers in their second year, maturing to seeds before the plants die completely.

Familiar biennial flowers include…

  • Canterbury bells
  • Columbine
  • Dame’s rocket
  • Forget-me-nots
  • Foxglove
  • Hollyhocks

Because these plants do not bloom in their first year, patience is essential to enjoy their beauty in their second year. Planting biennials in two successive years can ensure the plants enhance the landscape in multiple years.

Choosing Annuals, Perennials, and Biennials for Your Yard
Once you understand plant lifespans, you can more easily choose the plants that will give you a landscape you love. When choosing plants, larger perennials can create a stunning foundation or border for your yard, including showstopping specimen plants and shade trees. Smaller perennials can fill in larger spaces in flowerbeds and edging, while annuals add brilliant color to pathways, edges, and very visible spaces, including porch pots and containers.

Biennials can be spectacular transition plants, particularly if you may plan on expanding your landscaping beds in the future, or want to fill in a space temporarily before adding a new deck, porch, or otherwise expanding your home or outdoor living space. Biennials are also great choices if you want to enjoy a changing landscape without as much work each year, because you can enjoy the plants for two years before they need replacing. Many biennials are self-seeding making them great additions to the cottage garden.

Ultimately, a landscape that includes a thoughtful mix of annuals, perennials, and biennials will showcase different colors, textures, and growth patterns for stunning visual interest. New cultivars are developed every year, and greenhouses often have the latest plants and newest showstoppers on display. If you plan a mixed landscape, you will have the freedom to enjoy new plants as they are introduced and you will always have new plants to be excited about.

Caring for Annuals, Perennials, and Biennials
While the differences between annuals, perennials, and biennials may seem clear, different plants can have different lifespans based on the exact cultivar, gardening zone, climate variations, and even microclimates within an individual landscape. Furthermore, the care plants receive can ensure they reach their maximum potential for the longest, most productive life. Dammann’s Garden Center & Greenhouse experts can provide recommendations and guidance for the best plants based on your preferences and needs and assist you in choosing plants that will thrive in the conditions of your yard, including soil type, sunlight levels, fertilization, moisture levels, and other needs. To provide each type of plant the best care, consider…

  • Annuals – Provide nourishing fertilizer formulated for the type of plant, and weed around them carefully so these fast-growing plants don’t need to compete for moisture and nutrition. Soaker or dripper hoses can also provide great watering as these plants flourish.
  • Perennials – Be sure these plants have adequate space in the landscape to reach their full size. Good quality mulch can help protect the roots each winter so the plants remain healthy for the next spring.
  • Biennials – Take care to provide appropriate fertilizer for these plants in their different life stages, and mulch around those with basal leaves to provide good winter protection during their dormancy.

Adding annuals, perennials, and biennials to your landscape will not only help you learn about plant lifespans, but you will enjoy a more varied and richly diverse landscape, with plants that provide beauty through the years.

Baptisia Briefing: Growing A North American Native

Baptisia australis, commonly known as false indigo or wild indigo, is a stunning perennial plant beloved by gardeners in USDA Hardiness Zones 3 through 9. It offers numerous benefits, from environmental to aesthetic, while also being relatively easy to care for. Here are some reasons why adding Baptisia to your garden can be a great choice:

Baptisia Benefits

Native Plant:
Baptisia australis is native to North America, making it well-suited to local environmental conditions. By planting native species like Baptisia, you can support local ecosystems and provide habitat and food for native wildlife, including pollinators like bees, butterflies, and hummingbirds.

Soil Health:
Baptisia is a nitrogen-fixing plant, meaning it has a symbiotic relationship with certain soil bacteria that allows it to convert atmospheric nitrogen into a form that can be used by plants. This helps improve soil fertility and overall soil health, reducing the need for synthetic fertilizers.

Beautiful Flowers:
Baptisia australis produces stunning spikes of deep blue to purple lupine-like flowers in late spring to early summer, adding a vibrant splash of color to the garden and bouquets.

Attractive Foliage:
The foliage is equally appealing as the flowers. With blue-green eucalyptus-like leaves, Baptisia adds texture and interest to the garden even when the plant is not in bloom. The leaves are a long-lasting cut foliage for summer bouquets.

Architectural Form:
The upright, bushy growth habit of Baptisia australis adds structure and architectural interest to garden beds and borders. Even when not in bloom, its foliage provides a handsome backdrop for other plants in the garden.

Seed Pods:
After the flowers fade, Baptisia develops interesting seed pods that persist into fall and winter, adding visual interest and texture to the garden landscape.

Low Maintenance:
Once established, Baptisia australis is a low-maintenance plant that requires minimal care. It is drought-tolerant and thrives in a wide range of soil types, including poor, sandy, or clay soils. It is also relatively pest and disease-resistant, further reducing the need for human intervention.

Longevity:
Baptisia australis is a long-lived perennial, providing decades of beauty and enjoyment in the garden without the need for division or replacement.

Planting and Growing Baptisia

When growing Baptisia, selecting the right location is crucial for its success. Baptisia thrives in full sun to partial shade, preferring at least six hours of sunlight daily. Ensure that the soil is well-draining, as Baptisia does not tolerate waterlogged conditions. While it can adapt to various soil types, it prefers slightly acidic to neutral soil with a pH of 6.0 to 7.0. This large perennial can grow up to 4 feet wide and tall, giving you a generous bang for your buck. Make sure that you provide it with the room it needs to grow to full maturity as it resents being moved or divided.

Spring or fall is the best time to plant Baptisia. Begin preparing the planting area by loosening the soil and incorporating organic matter such as compost. Dig a hole slightly larger than the plant’s root ball and place the Baptisia at the same depth it was previously growing. Backfill the hole with soil, gently firming it around the plant, and water thoroughly. Adding a layer of mulch to the surrounding soil will help prevent the newly planted perennial’s roots from drying too quickly.

Once established, Baptisia is relatively low-maintenance. Water newly planted Baptisia regularly during the first growing season to help it establish a robust root system. Afterward, Baptisia is drought-tolerant and typically only requires supplemental watering during prolonged dry spells.

In early spring, before new growth emerges, prune Baptisia by cutting back the previous year’s growth to the ground. This encourages healthy new growth and helps maintain the plant’s shape. At this time, apply a layer of mulch around the base of the plant to conserve moisture, suppress weeds, and insulate the roots.

Baptisia Garden and Landscape Design

Baptisia can be used in a variety of ways to create stunning effects. It works well as a border plant, edging pathways, or defining garden beds. Planted en masse, it can create a bold statement in the landscape. Planted alone, it will provide a striking focal point. Baptisia also pairs beautifully with other perennials and shrubs, adding depth and dimension to mixed borders and perennial gardens.

For a naturalistic look, Baptisia can be incorporated into prairie or meadow-style plantings, where it can mingle with grasses and wildflowers to create a relaxed atmosphere. It can also be used in other informal designs, such as densely planted cottage gardens, where it will capture attention in the early part of the growing season. Give it a try in formal borders, where its upright habit and structured foliage provide a sense of order and balance. Overall, Baptisia is a plant that finds its way to work well in just about any garden situation.

Beautiful Baptisia should grace every garden! Not only does this perennial provide unique and vibrant flowers, foliage, and seed pods on a plant with a lovely architectural form, but it also offers environmental benefits, such as supporting native wildlife and improving soil health. Its ease of care makes it an excellent choice for both beginner and experienced gardeners looking to create a sustainable and visually appealing landscape. Plant a few today!

Rain Gardens: Created for Beauty and Functionality

Rain gardens are more than just picturesque additions to a landscape; they are powerful tools for sustainability and environmental stewardship. In a time when climate change is a pressing concern, rain gardens offer a practical solution to mitigate stormwater runoff, promote biodiversity, and enhance the beauty of outdoor spaces. Let’s explore what rain gardens are, their benefits, how to design and build one, and why they are essential for both urban and suburban environments.

What are Rain Gardens?

Rain gardens are shallow, landscaped depressions designed to capture, absorb, and filter rainwater runoff from roofs, walkways, driveways, and other impervious surfaces. By mimicking a natural water filtering process, they help reduce the volume and velocity of stormwater runoff, thus preventing erosion, flooding, and pollution of water bodies.

Benefits of Rain Gardens

  • Stormwater Management: Rain gardens act as natural sponges, absorbing excess rainwater and allowing it to infiltrate the soil. This helps restore groundwater supplies and reduces the burden on stormwater infrastructure.
  • Water Quality Improvement: As rainwater percolates through the soil in a rain garden, it undergoes filtration, removing pollutants and contaminants before reaching groundwater or nearby water bodies.
  • Habitat Creation: Rain gardens provide valuable habitat for native plant species, pollinators, and other wildlife, promoting biodiversity and ecological resilience.
  • Aesthetic Appeal: With their diverse array of plants, textures, and colors, rain gardens enhance the visual appeal of outdoor spaces, creating vibrant landscapes that change with the seasons.
  • Climate Resilience: By reducing runoff and increasing infiltration, rain gardens help ease the impacts of extreme weather events, such as heavy rainfalls and flash floods, associated with climate change.

Designing and Building a Rain Garden

  • Site Selection: Choose a location for your rain garden that receives runoff from impervious surfaces, such as roofs or driveways, and has well-draining soil. Rain gardens should be situated at least ten feet from the foundation of a house or building.
  • Size and Shape: Determine the size and shape of your rain garden based on the amount of runoff it will receive and the available space. Typically, rain gardens are shallow depressions with gently sloping sides.
  • Soil Preparation: Amend the soil in the rain garden area with compost or organic matter to improve drainage and fertility.
  • Plant Selection: Select native plants adapted to local soil and climate conditions, with a mix of species that can tolerate both wet and dry periods.
  • Mulching: Apply a layer of mulch, such as shredded bark or wood chips, to the surface of the rain garden to suppress weeds, retain moisture, and enhance soil health.
  • Maintenance: Regular maintenance, including weeding, watering during dry spells, and occasional pruning, is essential to keep your rain garden healthy and thriving.

Plants for the Mid-Atlantic Rain Garden

Rain gardens are fantastic for managing stormwater runoff and supporting local biodiversity. Here are some great plant options for rain gardens in the Mid-Atlantic region that will thrive in moist conditions:

Perennials:

Beardtongue (Penstemon)
Blue-Star Flower (Amsonia hubrectii)
Coneflower (Echinacea spp.)
False Blue Indigo (Baptisia australis)

Ferns:

Christmas Fern (Polystichum acrostichoides)
Cinnamon Fern (Osmunda cinnamomea)
Royal Fern (Osmunda regalis)
Sensitive Fern (Onoclea sensibilis)

Grasses:

Big Bluestem (Andropogon gerardii)
Little Bluestem (Schizachyrium scoparium)
River Oats (Chasmanthium latifolium)
Switchgrass (Panicum spp.)

Shrubs:

Northern Bayberry (Myrica pensylvanica)
Spicebush (Lindera benzoin)
Sweetshrub (Calycanthus floridus)
Winterberry Holly (Ilex verticillate)

Trees:

American Holly (Ilex opeca)
Eastern Redbud (Cercis canadensis)
River Birch (Betula nigra)
Serviceberry (Amelanchier canadensis)

Remember to consider the specific conditions of your rain garden, such as sunlight exposure and soil type, when selecting plants. Additionally, incorporating a variety of species, such as native trees, shrubs, perennials, grasses, and ferns, can help provide habitat for diverse wildlife and promote ecosystem resilience.

In addition to their beauty and beneficial plant diversity, rain gardens play a crucial role in promoting community resilience and fostering a deeper connection to the natural world. By creating and maintaining rain gardens, individuals, neighborhoods, and municipalities can contribute to broader efforts to combat climate change, protect water resources, and create more sustainable, livable communities.


Edible Flowers

Flowers aren’t just for beautiful dining table centerpieces anymore! For all you “foodies” out there, who also love flowers, are you aware that there are numerous blooms that are not only edible but also delicious? Flowers make a striking, colorful, textural and flavorful addition to soups, salads, baked goods and more.

Safety First

There are just a couple of things to keep in mind when experimenting with unfamiliar flowers. Not all flowers are edible and some can be poisonous, even in small tastes. Be certain to clearly identify your flowers and accept no imposters, as some blooms can look very similar. Also, it is best to use flowers that have not been sprayed with chemicals – either fertilizers or pesticides. The best way to avoid both of these issues is to grow your own edible flowers from seed, keeping them conveniently in a kitchen container garden or safely on a deck or patio where there’s no risk of contamination or misidentification.

Favorite Edible Flowers

There are surprising blooms that can be tasty accents to your favorite dishes. For the best flavor and freshness, harvest blooms at their peak early in the day. Younger and older blooms or blooms of different sizes often have subtly different flavors, so be sure to experiment to find your favorites.

  • Bee Balm (Monarda didyma) – Tea-like flavor, flowers in white, pink, red and lavender
  • Borage (Borago officinalis) – Cucumber-like taste, flowers in lavender, purple and blue
  • Calendula (Calendula officianalis) – Peppery taste, flowers in yellow, orange and gold
  • Chive (Allium schoenoprasum) – Onion flavor, flowers in white, pink and lavender
  • Nasturtium (Tropaloum majus) – Peppery flavor, flowers in white, yellow, orange and red
  • Pineapple Sage (Salvia eleagans) – Sage flavor with pineapple undertones, flowers in scarlet
  • Pinks (Dianthus spp.) – Clove-like flavor, flowers in white, pink and red
  • Red Clover (Trifolium pretense) – Sweet tasting, flowers in pink and red
  • Signet Marigold (Tagetes tenufolia) – Citrus taste, flowers in white, yellow, gold and red
  • Viola or Pansy (Viola spp.) – Sweet flavor, flowers in a multitude of colors

Not sure which recipes to try? Flowers make surprising accents to salads or garnishes for cakes, cookies and ice creams. Add flower petals to a favorite drink, or freeze blooms in ice cubes for colorful cooling. There are even recipes available for sauces, salsas, marinades and more, all with more taste and color thanks to edible flowers. Bon appétit!

The Best Birdseed for Winter Finches

Gardening and landscaping may be at a standstill during the coldest, deepest days of winter, but that doesn’t mean there is nothing to enjoy in your yard. In fact, there are many beautiful birds that visit our yards only in winter, including whole flocks of fantastic winter finches. With the right bird feeders and the very best birdseed, plus a few other key winter garden accessories, you can easily enjoy a flock of feathered fun all winter long.

Winter Finches to Watch For
There are many different birds that thrive in northern regions. When winter conditions are exceptionally harsh or food supplies are exceptionally low, these birds may move much further south than expected during the coldest months. While weather patterns, food sources and population changes all impact how many of these birds visit feeders, some of the most eagerly anticipated winter finches include…

  • Common redpolls
  • Evening grosbeaks
  • Pine siskins
  • Purple finches
  • Red crossbills

Several other northern species, including snow buntings, bohemian waxwings and boreal chickadees may also be seen at feeders more frequently in winter, but it is the finches that are often the most welcome and reliable winter guests – if you have the right birdseed and feeders to attract them.

Not in a northern area? No need to miss out even if the typical winter finches won’t make it to your yard! Many other finches, including house finches, Cassin’s finches, American goldfinches and lesser goldfinches visit more southerly regions in the winter or even stay in the same range year-round, and these tips work just as well for those species.
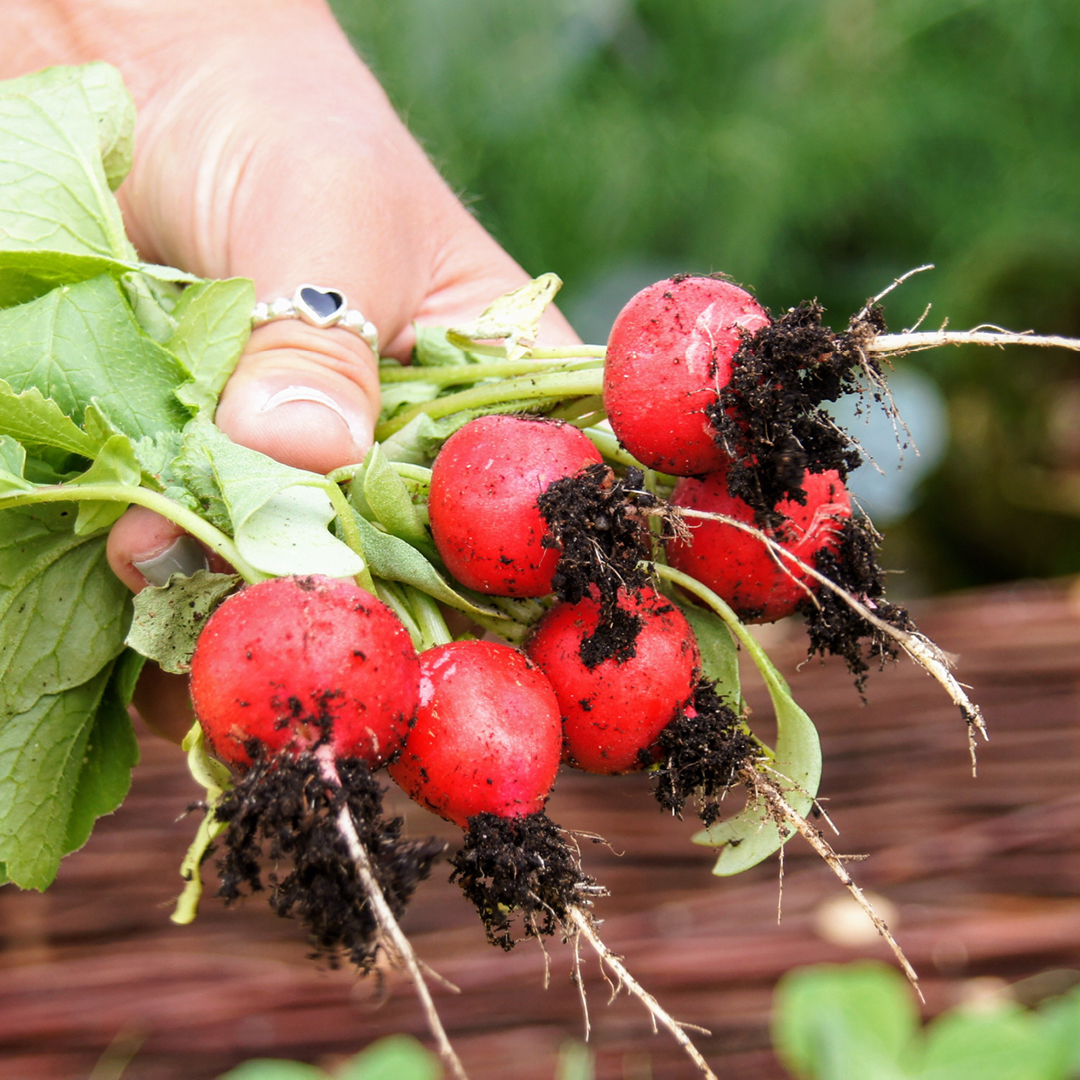
Feeding Winter Finches
Winter finches eat mostly seeds and grain, and they require great quantities of nutritious food to keep up their body heat and energy in the bitter cold. Black oil sunflower seed is ideal for most winter finches, even in southern areas. While their sturdy bills can break open these seeds, hulled sunflower seed is often preferred because there will be no discarded shells to build up under the feeder until the ground can be cleaned in the spring. Offering this seed in open platform feeders will accommodate large, hungry flocks, but hopper or tube feeders with covers will protect the seed better from snow, ice and winter rains that can cause mold.

The smaller finches, siskins, redpolls and goldfinches, are especially fond of Nyjer (finch) seed, and it is best to offer these tiny, lightweight seeds in small tube feeders or mesh feeders.

Making Your Yard More Finch-Friendly
The right food and feeders will feed hungry winter finches, but there are several additional accessories you can add to your yard to make it even more finch-friendly.

  • Fresh Water
    Despite all the snow and ice around in winter, birds need liquid water even more than they need food. Providing a heated bird bath when temperatures drop will give birds a fresh, liquid water source to visit so they don’t need to waste precious calories melting their own water.
  • Safe Shelter
    These birds are used to cold, but extra shelter can make a critical difference in bitter cold snaps, especially further south where dropping temperatures aren’t as common. Bird roost boxes and bird houses can be left up year-round for fast, easy shelter, and dense evergreen plantings also provide a good windbreak and comfortable spot for birds to rest.
  • Clean Facilities
    Bacteria is easily spread through dirty water and bird feces, and clean baths and feeders are essential to keep finches and other backyard birds safe. Use a weak bleach solution to sterilize feeders and baths regularly, and use scrub brushes, old toothbrushes or bottle brushes to get into every nook and cranny. Some bird diseases can also affect humans, so be sure to wear gloves when cleaning.
  • Open Feeding Areas
    Even the best food and greatest feeders won’t be useful if the feeding areas are buried under ice and snow. A broad, umbrella-style baffle can keep snow off feeders, or you can use a brush or old broom to gently remove snow when needed. Keep a small ground feeding area shoveled or tamped down to make foraging easier for birds under the feeder as well.

Winter finches are amazing backyard visitors that aren’t deterred by the cold days, chilly winds and frozen ground that keep gardeners inside for months. By providing good quality food, suitable feeders and other finch-friendly accessories, you can enjoy the energy, color and excitement of these birds in your yard all winter long.


Winter Gardener’s Calendar

Winter is a perfect time to plan! Curl up with your gardening books and the gardening magazines and catalogs you’ve received in the mail. Get out the gardening journal and start dreaming.
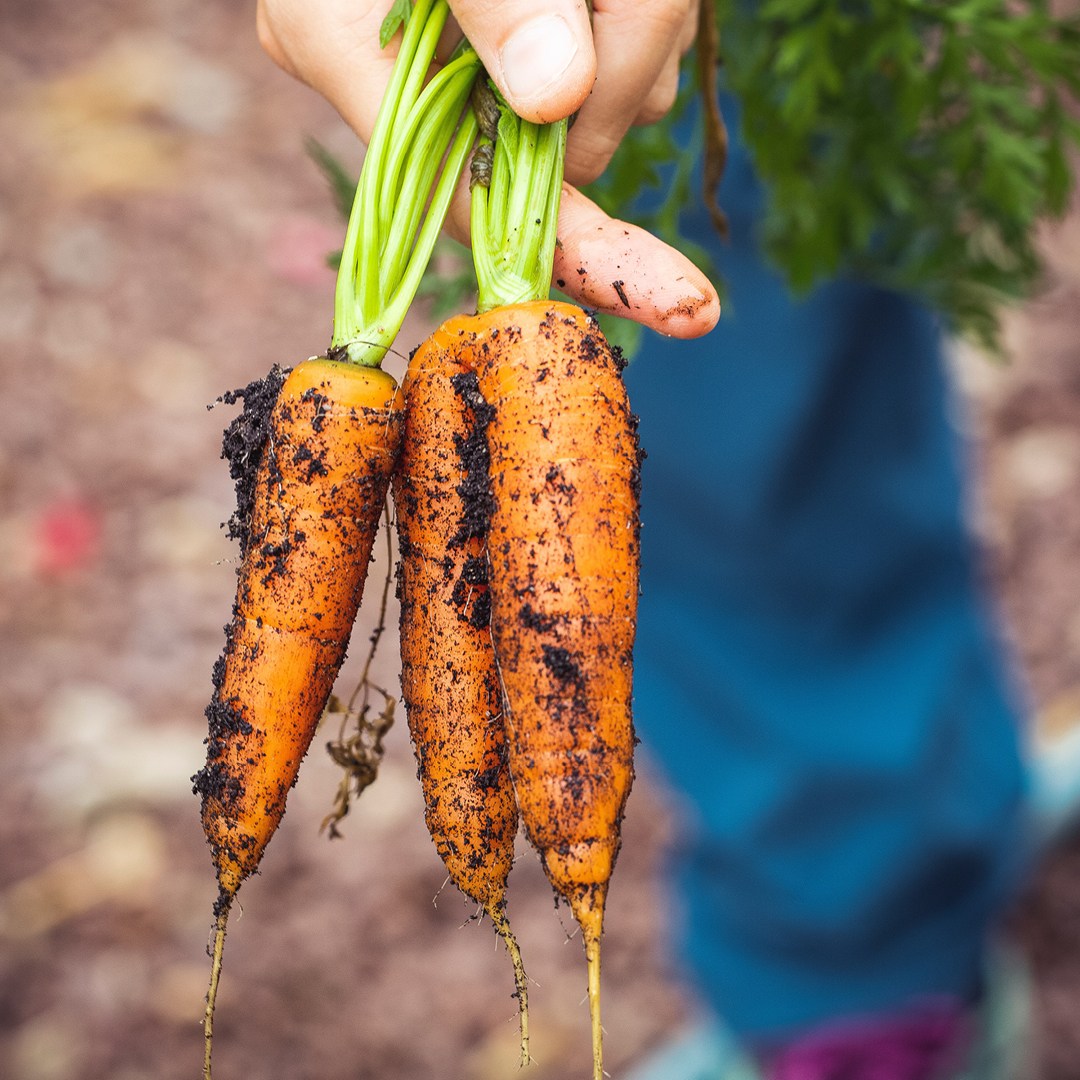
General Landscape

  • Clean up when you get a break in the weather. Remove fallen branches and downed evergreen clumps. Rake leaves to prevent stains on concrete and dead patches on lawn. If freezing weather is still in the forecast, leave the mulch in place.
  • If your Christmas tree is still around, set it where the dropping needles will provide mulch, use the branches as additional insulation for perennials, or get together with neighbors to rent a chipper and create wood chips for larger mulch.

Houseplants

  • Perk up tired houseplants by removing dead and dying leaves. Wash under a soft shower in the sink or tub.
  • Spider mites love living in warm dry winter homes. Check for mites by looking for tiny speckles on leaves. If so, pick up some Neem Oil or Horticultural Oil or Insecticidal Soap from Bonide.
  • Transplant if roots are growing through the drainage holes or over the pot edge. Pick up some new larger trend-setting colored pots to perk up your décor. Or, if you don’t want to move into a larger pot, untangle the roots and cut back by 1/3, scour the pots and replant with new soil.
  • Remember to turn your plants each week as they begin to grow towards the weaker window light.
  • Plant a terrarium or miniature garden. If you can’t play in the dirt outside, bring the fun indoors!
  • Pick up a potted plant for your valentine. Come in and choose from our thriving greenhouse full of succulents, tropicals and houseplants that are the perfect “I love you!”

Vegetables

  • February: Start vegetable and herb seeds indoors. Pick up some seed trays, heating pads, peat pellets and seed starting mix.
  • Sign up for our February 17th class “Seed Starting and Companion Gardening” and learn and companion gardening and different methods for seed starting.
  • These veggies need an early start indoors:
Broccoli
Cabbage
Celery
Chard
Eggplant
Kale
Leeks
Lettuce
Scallion
Onions, bulb
Peppers
Tomatoes

If you just need a breath of aromatic fresh garden air, stop by and smell ours! The humidity is perfect and will instantly transport you to spring. We’d love to see you!


Insect Control Begins Now

It’s hard to think of insects in winter, but don’t forget the havoc these tiny creatures can bring to your garden – defoliating leaves, contaminating produce, even destroying complete plants. Before these pests begin to be a problem is the perfect time to take steps to control them.

Why Winter Control?

Late winter is the right time to control insects for two reasons. First, the insects and their eggs are just coming out of dormancy. The shells and protective coverings are softer and more porous in late winter, and so are more vulnerable to the effects of oils and sprays. Second, the oil-water mixture should not freeze on the tree or plants, which could damage the plant and make the spray far less effective. When you spray, the temperature should be above 40 degrees. Delay spraying if freezing night temperatures are predicted. Choose a calm day for spraying to be sure stray breezes and cross winds do not spread the spray to plants you don’t want covered.

Insects to Control

In late winter, before any leaf buds begin to open, spray Bonide All-Season Oil or Dormant Oil Spray on fruit trees or other ornamental trees or shrubs to suffocate over-wintering aphids, thrips, mealybugs, whitefly, pear psylla, scale and spider mites that cling to the bark. The treatment will also destroy the eggs of codling moths, Oriental fruit moths and assorted leaf rollers and cankerworms. Don’t wait until the buds have burst in early spring, as the coating of oil will also smother the emerging plant tissue.

Tree Spraying Tips

While small shrubs can be easy to treat, larger trees are more challenging to be sure you don’t leave any area untreated where insects can thrive. Spray the whole tree at one time, concentrating on the trunk, large branches and crotches, rather than spraying down a whole row of trees at one pass. If you’ve experienced extremely bad infestations of insects, you might treat your trees a second time. But be sure to spray before the buds are near the bursting point. Dormant oil can also be used after the leaves have dropped in the fall. Never spray when any foliage or fruit is on the trees or you risk unwanted pesticide contamination.

After you spray, be sure to store any remaining oil properly and out of reach of children and pets. Containers should be labeled clearly and kept in cool, dark spaces to preserve their usefulness. Avoid reusing any sprayers to minimize the risk of cross contamination or inadvertent use.

Spraying for insects in winter may not be the most glamorous job, but you’ll appreciate the improvement in your trees through the spring and summer when you’ve nipped your insect problems in the bud.

Valentine Gifts From the Garden Center

Valentine’s Day is all about love, and if you love gardening, there’s no better place to find the perfect Valentine’s Day gifts than the garden center. Whether the gifts are for that someone special in your life or just to show some love to yourself or your garden, you can find a wide array of amazing choices for Valentine’s Day or any gift-giving occasion.

Gifts for Your Very Special Valentine

The garden center has much more than just tools or plants, and you can find a variety of nature-inspired gifts for everyone you love this Valentine’s Day. Whether you are shopping for a friend, neighbor, family member or anyone else on your friendship and love gift list, the garden center can offer the right touch of Valentine’s Day sentiment, including…

  • Wind chimes, welcome signs, decorative path stones, and colorful wall decor for the person who loves their porch
  • Bird baths, feeders, houses, nesting material and birdseed for the bird lover
  • Gnomes, fairy gardens, fun statuary and other whimsical accessories for the fantasy lover
  • Houseplants, succulents and easy plants for the plant lover who doesn’t have a full garden
  • Moisture meters, thermometers, pH test kits and rain gauges for the environment manager
  • Fountains, statues, gazing balls and other relaxing accents for those who love to meditate

Gifts for Yourself

While it’s fun to shop for Valentine’s Day gifts for all your friends and everyone you love, don’t forget to show yourself some self-love on this holiday. The garden center has great gift options for a little treat you can enjoy, including…

  • New tools engineered for better ergonomics and comfortable use
  • Plants and seeds to add to the variety in your garden and flowerbeds
  • Decorative solar lights and other colorful accents to spice up your garden space
  • Pots, planters and containers to expand your growing area
  • Seed starting materials setups so you can put that caring spirit to use, even in the winter

Valentine Gifts to Give Your Garden

While you’re shopping for everyone on your Valentine’s Day list, don’t forget your garden. It gives you joy and pleasure all year long, from the first sprouts and blooms of spring to your autumn harvest, and even through the winter with preserved herbs and canned fruits and vegetables as well as outdoor visual interest. As you start planning your spring gardening chores around Valentine’s Day, mid-February is a great time to pick up gifts to “give” your garden, including…

  • Proper fertilizer for the needs of different herbs, vegetables, fruits and flowers
  • Pesticides to keep unwanted garden visitors away and protect your plants
  • A ladybug house to attract beneficial insects to help your garden grow
  • Different types of mulch to control weeds and preserve moisture in your garden
  • New hoses, drip systems and other irrigation tools to keep your garden well-watered
  • Row covers and other shelter to protect your garden against frosts, birds and deer

No matter what your garden needs, you can show it how much you love every plant, path and corner with Valentine gifts from the garden center. Even with every gift you give others on Valentine’s Day, you can share your love of gardening and encourage everyone to enjoy more time in the garden, courtesy of a well-stocked garden center.


5 Most Common Houseplant Pests

It’s not unusual or a sign of failure if houseplants become infested with some common potted plant pests. This problem is more pervasive when introducing newly purchased plants to the home, moving tender houseplants from the outdoors back inside with the changing seasons, and finally, when houseplants are under stress. These buggers can wreak havoc, leaving plants unhappy, unhealthy, and downright unattractive. However, even the most tenacious pests can be controlled with conscientious care. By acting quickly when these unwanted guests are first noticed, you can completely remove an infestation and keep your houseplants healthy, happy, and thriving.

Top 5 Common Houseplant Pests and Controlling Them

There are quite a number of houseplant pests that can make both you and your plants miserable. We’ve covered the five most common ones in this article.

Fungus Gnats

These tiny, flying pests, resembling fruit flies, don’t harm houseplants in their mature, adult form, but fungus gnat larvae live in houseplant soil and feed on organic material. This not only robs the plant of nutrition, but the larvae may also nibble on the plant’s roots. While they don’t cause much overall damage to an otherwise healthy plant, fungus gnats can be very irritating when they form cloud-like flocks hovering around a plant’s foliage.

Overwatering encourages fungus gnats, and they can be notoriously difficult to eradicate. Begin control by repotting the plant in fresh potting soil. Before repotting, rinse the roots to wash away any larvae. If reusing the same container, be sure to sterilize it before repotting. Use a high-quality, well-draining potting mix. Once repotted, reduce the amount of water and frequency, allowing the top inch of the soil to dry between waterings. Bottom watering will also make the environment less attractive to fungus gnats. In addition, mixing diatomaceous earth into the potting soil, adding a layer of chicken grit to the soil surface, or applying Bt var. israelensis (Bti-H14) will all help to control fungus gnat larvae organically.

Mealybugs

The tell-tale sign of these tiny, sap-sucking insects is a white, waxy, cottony substance frequently found on the underside of plant leaves and in plant stem crotches. As they suck the plant’s sap, the leaves wither and wilt. Yellowing leaves can also indicate an infestation, mainly if leaves are seen throughout the plant rather than just older bottom foliage.

When a houseplant is heavily infested with mealybugs, the fastest way to control the pests is to prune away infected foliage and prudently discard it. If the infestation is light, the bugs can be deterred first with a strong stream of water followed by an application of Neem oil. Rubbing alcohol is also an effective control measure. Apply the alcohol directly to the pests with a cotton swab or ball soaked in alcohol. Regardless of the control method used, immature mealybugs can be easily missed. Keep an eye out and retreat the plant as necessary.

Spider Mites

These pests are very destructive to all houseplants and can be challenging to get rid of. The mites themselves are so tiny that they may not be noticeable even with a heavy infestation, but their webs on the undersides of foliage or stretching between stems are easier to see. Leaves that show yellow stippling may also indicate an infestation.

Spider mites thrive in dry conditions, so keeping houseplants’ humidity high is an excellent way to deter them. Running a humidifier, frequent misting, grouping pots, and sitting pots on a water-filled pebble tray are all helpful solutions. When the bugs are present, neem oil spray should be used weekly to remove them and keep them from returning. Alternatively, light cleaning with insecticidal soap is also an effective way to control spider mites.

Aphids

While better known for their outdoor infestations, aphids can also be a problem for indoor houseplants. They are tiny insects, no more than one-eighth of an inch in size, and range from green or black to reddish or white. They are plump insects and get that way as they suck sap from the plant, usually on the foliage or stems. The plant will gradually wilt as it is unable to stay firmly upright while the aphids drain its sap.

Aphids are easily dislodged with a blast of water, so a cleansing shower is an excellent way to remove them without any unnecessary chemicals. If the infestation is extreme, washing the plant gently with an insecticidal soap may be necessary. Neem oil spray can also be effective for controlling aphids on houseplants.

Scale

These insects have a hard, oval-shaped shell that gives them a tough, scale-like exterior as they line up on a plant’s stems in tight clusters, similar to barnacles on a boat’s hull. These pests suck sap from the plant and then produce a sticky, honeydew residue that can coat the plant and lead to mildew or may attract additional pests.

Your first line of defense is gently scraping scale bugs off with your fingernail, taking care not to scratch or damage the already stressed plant. Dabbing the insects with a cotton swab or ball soaked in rubbing alcohol or spraying with neem oil can also be effective.

Minimizing Houseplant Pests

No matter which pests present a problem, it’s always best to avoid infestations altogether rather than try to control them after the insects have already appeared. To minimize the risk of bugs taking over your houseplants…

  • Purchase new plants only from a reputable retailer like Dammann’s Garden Center & Greenhouse. We offer pest-free houseplants, effective plant care products, and the support you may need to identify and combat pest problems.
  • Scrutinize new plants before purchasing and avoid plants with signs of pests.
  • Quarantine any new plant for at least a week to ensure it has no unwanted guests, including outdoor summer plants that will overwinter as houseplants.
  • Use high-quality, well-drained potting soil for all houseplants rather than garden soil that isn’t sterilized and can harbor pests.
  • Provide houseplants with optimum care so they are not stressed, as this can make them more susceptible to pest infestations.
  • Sterilize all houseplant equipment regularly, including pots that will be reused, pruners and shears, and watering cans, to be sure no pests are carried between plants.
  • Stay alert at all times for signs of possible insect infestations. The faster you act, the easier it will be to control these houseplant pests.

Finding pests on your houseplants can be frustrating or downright frightening, but don’t worry; with careful monitoring, appropriate control measures, and Dammann’s Garden Center & Greenhouse in your corner, your plants will soon be pest-free.

Holiday Staycation

No matter the reason, staying at home during the holidays doesn’t have to be a disappointment. Instead, a holiday staycation can be a true celebration of home and family, creating new traditions and making memories to enjoy all year round.

Benefits of Staying Home for the Holidays

It is normal to be disappointed if you’re accustomed to holiday travel but decide to stay at home instead. A positive attitude, however, can make all the difference for an enjoyable and festive holiday season. There are many benefits to staying home, including saving money, no travel stress, no need to pack, no crowds at airports, more time to relax, and ease of changing your plans for whatever strikes your festive fancy. When you stay home, you can sleep in or stay up late without worrying about missing a tour or activity, and you can be more flexible with all your seasonal fun. This is especially important, as you will soon discover there is so much to do, your holiday staycation – “holistay” – will be just as entertaining and enriching as any far-flung destination.

Ideas for Your Holiday Staycation

There are many fun and festive options to enjoy at home for a happy holistay, using your landscape, lawn, and garden to add to the excitement. Whether you choose just one activity as a focal point of your holiday or plan different options every day, you can make great memories and enjoy time with all your loved ones.

  • Decorate a Tree for Birds and Wildlife
    Invite your local wildlife to the holiday festivities with a deliciously decorated tree. Use softened suet or peanut butter to coat pinecones and roll them in seed for feeder ornaments or use fishing line or sturdy thread to create cranberry and popcorn strings as edible garlands. Use floral wire or ribbons to hold twigs into star or tree shapes for extra beauty on the tree, and fasten small ribbons or burlap bows to the tips of branches to catch birds’ eyes and attract them to the bounty.
  • Create Elaborate Snow Sculptures
    Go beyond snowmen when you use your whole yard as a canvas for an epic snow sculpture. You might create a giant figure or an intricate scene and using a variety of handheld garden tools can help you sculpt details with ease. A wheelbarrow or buckets will be necessary to haul extra snow from other parts of the yard to enhance your sculpture, and sturdy wire or garden stakes can help provide internal support for taller features.
  • Enjoy a Gourmet S’mores Night
    Clean off your firepit and get ready for holiday decadence with a gourmet s’mores night. Choose different graham crackers or other cookies for a base and opt for different chocolate bars – dark chocolate raspberry, white chocolate peppermint, sea salt, caramel, etc. – to experiment with rich and delicious flavors.
  • Host a Neighborhood Bonfire
    Create a larger festive gathering with a neighborhood bonfire in a portable fire pit in your driveway or front yard (safely, of course!). Consider a potluck-style gathering with everyone bringing their favorite holiday treats or provide hot drinks for everyone to enjoy. Outdoor games such as cornhole can easily be added to the fun for a bit of friendly competition.
  • Create Garden Gifts
    Give your crafty side a workout and make garden-inspired gifts for family members, friends, and neighbors. Dip pinecones in scented wax for festive fire starters or use clear glass or plastic ornaments to showcase a pine sprig, miniature pinecones, or dried flowers. Pine prunings can make beautiful homemade wreaths and swags, or river rocks can be painted into festive row markers or decorative accents.
  • Blend Homemade Potpourri
    Bring natural air fresheners into your holiday home with garden potpourri. A variety of plants can be dried for amazing scents, including lavender, lemon balm, rose buds, mint, pine, lemon verbena, rosemary, yarrow, geraniums, zinnias, and sage. Add dried apple or orange slices for a sweet accent, and a few drops of essential oil to enhance aromas. Give your homemade dried or simmering potpourris as gifts when wrapped in burlap and tied with ribbon or fill a clay pot or tin pail for a rustic diffuser.
  • Decorate a North Pole Fairy Garden
    Create Santa’s Workshop in a fairy garden with accessories from the garden center. A broken clay pot can easily be the base, and you can paint it white, red, green, or a combination of festive shades. Use sand and potting soil as the base to keep the garden from tipping and add miniature holiday décor to create a wonderland to enjoy.
  • Build a Natural Gingerbread House
    Instead of cookies that go stale and candy that falls off, use pieces of cardboard and natural decorations to create a faux gingerbread house with rustic accents such as pinecones, pine needles, acorns, twigs, dried flowers, and other garden-inspired beauty. Get the kids involved with creative decorations and create an entire village or nativity scene of natural beauty to decorate a large dining room table or mantle.
  • Make Soaps and Candles
    Add garden accents to luxurious gifts when you make homemade soaps or candles with garden-fresh herbs, dried flowers, pine needle and berry sprigs, or other great decorations. You can pour your own soaps and candles using holiday-themed cookie cutters or candy molds, or you can simply soften premade soaps and candles to press your garden accents into the surface for instant customization. Wrap the gift with jute twine or rustic ribbon and your gift is ready!
  • Plan a Holiday Scavenger Hunt
    Create a themed list of items to find and offer prizes for the winners in an at-home holiday scavenger hunt. You could include items from the landscape and garden, holiday decorations from around the neighborhood, or more widespread objects around your town. If you want to keep the hunt in your garden, colorful plastic pots or tin buckets are great for collecting all the items on the list – a sprig of berries, a funny-shaped rock, a piece of pine, etc.
  • Get Started With Indoor Gardening
    Even if the weather outside is frightful, you can have a delightful time with indoor holiday gardening. Pot amaryllis bulbs, paperwhites, or Christmas cacti to use as seasonal decorations or gifts or consider starting a savory herb garden to flavor soups, stews, gravies, roasts, and other meals all winter long. You can even add a tropical touch to your indoor landscaping with a potted lemon tree, palm, or other greenhouse favorites.
  • Take a Class
    Investigate winter classes hosted by your local arboretum, botanical garden, or our garden center. Classes may be online or in person. Many popular winter options may be available, such as garden-inspired crafts, wreath making, winterizing your landscape, how to start an indoor herb garden, terrarium-making classes, painting clay pots, or overviews on succulents, bulbs, seed starting, and other fun and informative topics. Some may be geared to children, some for adults, and some may be fun for the entire family.
  • Get Inspired
    Another day out can be just visiting a local garden center, botanical garden, or even walking around the neighborhood or a local park to get inspired for your own garden and landscape. Look for plants that offer winter interest or different arrangements, accents, and accessories that can be great to feature in your own yard. If you can’t identify the plants, take pictures so you can seek identification help from our garden center experts.
  • Plan for Spring
    Let your imagination sprout when you plan your spring garden during a holiday staycation. Gather books and magazines, visit a range of websites, and draw out the landscape plan of your dreams. Work in different colors adding plants to showcase during different seasons. Include wildlife-friendly features and practical details such as how to creatively store your garden tools, hoses, and other necessities to make your garden great. You can even start buying seeds, new tools, and accessories to be ready to go as soon as spring begins.
  • Create Epic Holiday Decorations
    Since you will be home during the holidays, make the most of your outdoor holiday decorating with an epic lighting scheme or themed display. Get creative by using plant stakes and tomato cages to create faux trees and supports for more elaborate light displays and add a welcoming accent with a holiday-themed porch pot or living wreath to greet any holiday guests.

There is a great deal you can do to make the most of a holistay, no matter why you may be staying home for the holidays or what your garden and landscape offer. By embracing what your home offers and getting creative with your holiday activities, you can make many amazing holiday staycation memories.


Perennial Power

Perennials may not be the best showstoppers in a garden full of annuals, but they make great foundation plantings to serve as a reliable backdrop or trusty fillers among other plants. There’s no reason you can’t select perennials that are just as beautiful as your favorite annuals, however, it’s just a matter of choosing the flowers that pack the most punch and using them appropriately.

Best Perennials to Choose

When choosing a perennial to fill an empty space in your garden, make sure to get the most bang from your buck by selecting one, or several, long-blooming perennials. These flowers will be worthwhile additions to your landscape for their ongoing staying power, giving you a reliable backdrop and structure to build from.

  • Achillea (Yarrow)
  • Alcea (Hollyhock)
  • Anemone (Wind Flower)
  • Asclepias tuberosa (Butterfly Weed)
  • Campanula (clips series)
  • Clematis ‘Jackmani’
  • Coreopsis (Tickseed)
  • Corydalis lutea (Yellow Bleeding Heart)
  • Delosperma (Ice Plant)
  • Dicentra exima (Bleeding Heart)
  • Echinacea (Coneflower)
  • Gallardia (Blanket Flower)
  • Gaura (Wand Flower)
  • Geranium ‘Johnson Blue’
  • Heliopsis (Sunflower)
  • Hemerocallis ‘Stella D’Oro’ (Daylily)
  • Hemerocallis ‘Happy Returns’ (Daylily)
  • Kniphofia (Red Hot Poker)
  • Lavender
  • Liatris spicata (Gayfeather)
  • Ligularia (Ragwort)
  • Lobelia cardinalis (Cardinal Flower)
  • Lythrum (Loosestrife)
  • Malva (Mallow)
  • Monarda (Bee Balm)
  • Nepeta (Catnip or Catmint)
  • Oneothra ‘Siskiyou’ (Evening Primrose)
  • Perovskia (Russian Sage)
  • Rudbeckia (Coneflower)
  • Salvia (most verticillata)
  • Scabiosa (Pincushion Flower)
  • Shasta Daisy ‘Becky’ or ‘Snow Queen’
  • Stokesia (Stoke’s Aster)
  • Veronica (Speedwell)

Using Your Blooming Perennials

To make your perennials truly pop, it’s important to position them in your landscape where they will show to their best advantage. Popular options include…

  • Filling in between showstopping annuals with perennials that will grow and bloom to cover fading blooms after the annuals are finished.
  • Adding blooming perennials in front of a hedge, fence or privacy screen for extra coverage with a dash of color.
  • Using perennial flowers as a backdrop for lower annual plantings along a house foundation or in other flowerbeds.
  • Creating a naturalized lawn or meadow-like area full of different perennials for a low-maintenance option that still stuns.
  • Planting perennials in hard-to-tend areas, such as alongside a water feature, in tight corners or on terraces so they can be gorgeous with less maintenance.

With so many options for lovely perennials that can be used in many different ways in the landscape, there’s no excuse not to enjoy these easy-care flowers for many years!


Protecting Our Pollinators

Every garden requires pollinators, and bees are among the finest. Without them there would be limited flowers and far fewer fruits and vegetables. Did you know that about 30 percent of the food we eat depends on the pollination of bees, including onions, cashews, coffee, carrots, chocolate and vanilla? If we don’t protect these prolific pollinators, our landscapes, gardens and diets will be irrevocably changed.

About Bees

Although there are many bees that are great pollinators, like carpenter, mining, sweat and cellophane bees, some of the most well known and easily identified bees are the honeybee and bumblebee. Both of these bees live in social colonies and are cavity nesters. Because these bees are active all summer long, they require a constant supply of floral nectar close to their hive and they thrive in flower gardens, orchards and other areas with abundant blooms.

Unfortunately, both these types of bees – along with many others – are disappearing rapidly, and two key threats are to blame.

  • Habitat Loss: As more natural habitat is lost to development, there are fewer nesting locations and inadequate food supplies for bees. While meadows developed into resorts and parks disappearing for strip malls are obvious examples of development, other less visible developments that can hurt bees include widespread use of flower cultivars that do not produce adequate nectar, eliminating critical bee food sources.
  • Pesticide Drift: Widespread, abundant spraying of pesticides to protect crops, lawns and parks can inadvertently hurt bees. Stronger pesticides can kill bees directly, while less potent toxins can contaminate nectar and will gradually build up to fatal levels in bees’ systems. Even if pesticides are not sprayed in areas where bees are abundant, high level spraying can easily be spread by wind patterns into critical bee habitats.

Inviting Bees to Your Garden

Fortunately, it is easy to bring more bees to your garden and encourage healthy bee populations. To support local bees…

  • Planting a variety of flowers that will bloom throughout the entire summer to provide ongoing food supplies.
  • Opt for native flower varieties that will be more easily recognized and used by bees, instead of introduced flowers that are less familiar.
  • Eliminate chemical use in your yard, as much as possible, including on your lawn, garden and trees, especially while plants are in flower.
  • Provide bees a safe place for shelter and to lay their eggs. A wood pile is suitable, or you can invest in a specialized bee house.
  • Make sure that there is an available water source for your bees. A bird bath or any simple water basin works just fine.

Want to bring bees to your yard and help them feel at home? Start with this list of native plants bees love, and ask our experts for more tips about keeping your lawn and garden bee-friendly!

Native Plants That Attract Bees

  • Apple (Malus)
  • Aster (Aster)
  • Blackberry & Raspberry (Rubis)
  • Black-Eyed Susan (Rudbeckia)
  • Blueberries (Vaccinium)
  • Currant (Ribes)
  • Elder (Sambucus)
  • Goldenrod (Solidago)
  • Highbush Cranberry (Viburnum)
  • Joe-Pye Weed (Eupatorium)
  • Penstemon (Penstemon)
  • Purple Coneflower (Echinacea)
  • Redbud (Cercis)
  • Rhododendron (Rhododendron)
  • Sage (Salvia)
  • Stonecrop (Sedum)
  • Sunflower (Helianthus)
  • Willow (Salix)


Clematis

Beautiful, showy clematis are not as difficult to grow as you might think. Learning when to prune your clematis and giving a little attention to their few requirements will reward you with a magnificent show of colorful blooms.

Planting Clematis

A beautiful clematis starts with proper planting. Clematis prefer to have their roots in the shade and their tops in the sun. Keep the roots cool with a well-drained rich soil with added compost, peat moss or composted manure and a good layer of mulch. Planting ground cover or other low growing perennials around the base of your clematis will also help to keep the soil cool and minimize weed growth. Organic amendments will help to retain moisture when added to the soil. Feed monthly with a liquid fertilizer or use a slow release fertilizer which can last for up to six months.

A Note About Bloom Rates

For the first few years, clematis may be slow to grow. Just keep in mind that it is establishing its root system, which is essential to a healthy, vibrant plant. In its first year, your clematis may produce very few flowers or even none at all. By the second year there will be more growth and a few flowers. By the third year you should see substantial growth and many lovely blooms.

Planting Clematis

For the best chance of success if you are new to gardening with clematis, buy plants in larger containers. While smaller starts will be less expensive to buy, they will take a little more work to establish and can be more delicate and prone to failure. If you purchase a pot of any size and are not planting it in the ground immediately, be sure not to allow the soil in the container to dry out or the plant may be overly stressed and vulnerable.

Keep the climbing habit of clematis in mind when selecting your planting site. Allow your plants to grow up into large shrubs and trees, or on a trellis against a sunny wall. Select varieties with growth that will not exceed your shrub or trellis; a 20-foot vine may overwhelm a smaller shrub or a weak trellis and will look overgrown and out of place.

Proper Pruning

Clematis are divided into three distinctive groups. Knowing what group your clematis falls under will guide you on when and how to prune.

These pruning suggestions are for established vines that have been in the ground for at least three years. Young vines should all be pruned to 12 inches the second spring and to 18 inches the third spring. This helps to develop more shoots, a fuller vine and a better root system.

  • Group 1
    This group includes certain species clematis and their cultivars which bloom early in the year. Some of the more familiar representatives of this group include the Montanas, varieties of C. alpina and C. macropetala. All of the Group 1 clematis bloom on growth made the previous year. They can be pruned to keep them within their allotted space or to remove dead and unsightly foliage. If they are pruned late in the season or before they flower, however, the cuts may remove potential flower buds and reduce that year’s flowering. To prevent this, prune Group 1 clematis right after flowering.
  • Group 2
    These are the large flowered hybrids. They are often divided again into two subgroups – 2a and 2b. All of the clematis in Group 2 bloom on ‘old wood’ (actually on short shoots from old wood) and should not be pruned except for deadwood pruning in early spring after the leaf buds open slightly.
  • Group 3
    These are the summer-blooming varieties such as the viticellas and Jackmanii types that bloom on new wood and the late bloomers such as Sweet Autumn Clematis (C. terniflora) and orientalis types. Clematis in Group 3 mainly flower on new wood produced in the current year and should be pruned back severely every year in late winter, when they are completely dormant, to about 12-14 inches. Leave at least two pairs of buds on each stem of the plant. Most clematis in this group are very fast growing and will reach their full height before blooming every summer.

Once you know how to properly care for clematis, you will find it to be a welcome addition to your landscape. If you aren’t sure just what your clematis needs to thrive, our expert staff will be glad to help be sure you and your plants have a great relationship!


Naturescaping With Regional Perennial Wildflowers

There’s no need to sacrifice beauty when designing or redesigning your yard or garden to be more nature-friendly. Naturescaping is an approach to garden and landscape design that will help save time, money and energy while providing an attractive and healthy habitat for wildlife and people. Readily available native wildflowers can add remarkable beauty to your environment, and since they are adapted to our climate and soils, they require little, if any, supplemental watering, fertilizing or care and are less susceptible to pests and disease. Native plants also attract a variety of native birds, butterflies, moths and bees essential for pollination. As an added bonus, native wildflowers are often less expensive to purchase, and you may even be able to get some varieties free by sharing with neighbors, botanical gardens, wildlife centers or extension services that are encouraging more native planting.

Choosing Native Flowers

There are many beautiful native flowers to choose from, but they won’t all thrive in every yard. When selecting, be certain to match the plant’s moisture requirements and exposure preferences to your site, taking into consideration growth patterns, available space and mature sizes. Also consider choosing flowers with different bloom times so your yard puts on a native show all season long, and tier different plant heights to create layers of natural color and beauty. Then plant, sit back, relax and enjoy!

Our perennial inventory changes daily, so please call or stop by for the most accurate offerings.


Protecting Trees From Drought Stress

Summer can be the most stressful time of year for landscape plants with heat and drought being the main offenders. When not receiving sufficient moisture, plants are much more susceptible to insect and disease damage. Trees are the most valuable landscape plants and can be the most difficult to replace, so it is sensible that they should be given priority during periods of drought.

Identify Drought Trouble

Lack of water is not a clear indication of a drought when it comes to trees. Many trees have deep, active roots that can easily survive short periods without rain or moisture, but it is important to notice when they are starting to become drought-stressed. Wilting and curling leaves will appear on drought-stressed deciduous trees. Leaf edges will eventually turn brown and crispy and may drop prematurely. Evergreen needles will begin to turn brown at the tips. As the drought continues, the entire needle will turn brown.

Prioritize Which Trees to Help

Generally, the trees most at risk are those that are newly planted or transplanted, as well as any younger trees. The root system of these plants is underdeveloped or has been damaged by the planting. Trees that are growing in a restricted area should also be of greater concern. This includes trees planted in containers, the narrow grass strip between the street and sidewalk and trees grown adjacent to your house or driveway where they suffer more from reflected heat and have less underground space to spread their roots to collect sufficient moisture. Drought-sensitive plants like birches, beeches, dogwoods, Japanese maples and magnolias should also be given priority during drought conditions.

Watering During a Drought

It is best to begin good watering practices before the tree succumbs to drought stress. Trees need approximately one inch of water per week. If Mother Nature is not supplying it then you should.

It is best for the tree if the required water is applied all at one time to the soil, slowly and deeply. This can be accomplished by using irrigation bags on newly planted or small trees. Trees in a restricted area are best watered with a slow dripping hose placed at the base of the tree and moved frequently for even distribution. For larger trees, a soaker hose laid in a spiral pattern, radiating from the tree trunk out to the drip line, works well.

Take care that if your community has watering restrictions during drought conditions, you follow approved practices to maintain your trees without risking fines or fees from illegal watering.

Tips for Helping Drought-Stressed Trees

  • Always water the soil and not the leaves or needles of the tree.
  • 2-4 inches of mulch placed over the soil, under the tree, from the trunk to just beyond the drip line, will help conserve soil moisture. Do not mound mulch against the tree trunk, which can encourage insects.
  • Water on overcast days, early in the morning or in the evening. Evaporation is slower during these times and more water will soak down to the roots.
  • Fertilizer can injure tree roots during times of limited soil moisture. Avoid using fertilizer during drought conditions. If amendments are necessary, choose compost or other gentle options instead of harsher fertilizers.

You can help your trees resist drought conditions with a little thoughtful care, and they will continue to thrive to help provide shade and beauty in your landscape.


Butterfly Bush

What could be more enjoyable than relaxing in your favorite lawn chair or hammock, your sunglasses on and a cool beverage in hand, staring at an enchanting array of colorful butterflies milling around their favorite plant? What could possibly be an easier way to accomplish this vision than by planting a simple butterfly bush?

About Butterfly Bush

Buddleia davidii, the butterfly bush, is a flowering maniac. It pushes its proliferation of perfumed blooms straight through summer and well into fall, providing nourishment to butterflies all season long. Available in a multitude of colors ranging from white to pink to red to purple, there are colorful butterfly bushes to match any garden or landscape color scheme. The fragrant, long, spiked panicles are borne in profusion on long, gracefully arching branches that add drama and elegance to the yard. And it really is a butterfly magnet!

Growing Butterfly Bush

This quick growing, deciduous, woody shrub is winter hardy in zones 5-10. In the northernmost areas of its hardiness range, Buddleia behaves like a herbaceous perennial, dying back to the ground in very cold winters. In the southernmost areas, Buddleia is grown as large shrub and can flourish all year. In either location, however, you should treat this plant as a cut back shrub. Because butterfly bush blooms on new wood, it benefits the plant to be cut back to the ground each spring. This judicious pruning will stimulate lavish new growth and an abundance of flowers. It will also keep some of the larger varieties at a manageable size, particularly in smaller yards, corners or other confined spaces.

Plant your butterfly bush in full sun in just about any type of soil and it will thrive. Don’t worry about fertilizing as over-fertilization can encourage too much leaf growth over flower formation. Deadheading will encourage additional growth and new flower buds to extend the blooming season. Buddleia has a good tolerance for drought once established, but should be carefully watered when young. A good, thick layer of mulch will help maintain soil moisture and keep weeds down to keep the shrub healthy. Just be sure not to use insecticides or pesticides on your butterfly bush or you may be harming the very fluttering fliers you hope to attract.


Fall Chrysanthemums

No flower is more iconic of autumn than the chrysanthemum, and these beautiful mounding perennials are ideal for fall flowerbeds, pots, window boxes, borders, and many other uses. How will
you get creative with chrysanthemums this fall?

Why We Love Chrysanthemums

Just when many other flowers are fading at the end of summer, chrysanthemums, or mums, are coming into their glory with a range of stunning autumn colors. Depending on the cultivar, these plants sport yellow, white, red, orange, bronze, pink, peach, wine, purple, and bicolored blooms. The flowers range from small, button-like blossoms to larger blooms reminiscent of daisies. Mum blooms are long-lasting when cut and they’re just as lovely in floral arrangements and bouquets as they are planted in containers, flowerbeds, and the landscape. This makes mums extremely useful for all manner of autumn décor.

Chrysanthemums are native to east Asia and northern Europe and were first domestically cultivated in China nearly 600 years ago. Today, there are more than 20,000 chrysanthemum cultivars worldwide. They are deer- and rabbit-resistant, making them a hardy option for landscaping beds, and with a bit of thoughtful care, these tender perennials can be a wonderful addition to any flower garden or fall containers.

Caring for Chrysanthemums

The hardiness of chrysanthemums depends on the cultivar as well as the local climate and even the microclimate in your landscape. These flowers prefer well-drained, rich soil with a neutral pH, so it is best to use a good quality potting soil in containers. When planting chrysanthemums in the garden or landscape, mixing compost or peat moss in the planting hole will help increase drainage and nourish the soil to promote the best blooms. A good rule of thumb is that if soil is good for vegetables, it will also be good for mums – making them a wonderful choice to refresh a garden after the summer harvest has finished.

Chrysanthemums grow best in full sun requiring a minimum of six hours per day. If mums are planted in containers, consider using a mobile plant cart or a stand with casters so  that the pots may be moved to brighter areas, if needed, as the season progresses.

Chrysanthemums prefer evenly moist, but not soggy, soil. Because of their thick, mounding habit, it is best to water mums from below suing a soaker hose or irrigation drip system in garden beds. In pots, mums should again be watered from below the plant but above the soil line. A watering wand will make this job direct and easy. Be sure to drain excess water from saucers after watering so the roots do not remain continually wet.

Fertilizing chrysanthemums every month through the spring and early summer, with a balanced fertilizer, will help them grow and bloom well, but if mums are planted in the Fall, they should not need extra feeding as long as they were planted in rich, nutritious soil. Deadheading spent blooms by pinching them back can encourage more flowering and help mums maintain their compact, mounding habit.

Decorating with Fall Mums

Chrysanthemums are a beautiful choice not only in the garden, but are equally lovely in welcoming porch pots, deck or patio containers, or even small indoor pots and arrangements. Add an extra touch of fall with rustic containers, such as wine barrels, baskets, or terra cotta pots, or glam up your mums in hammered copper or bronze pots that will accentuate their color. A burlap ribbon or bow can be a charming accent, and you can give more seasonal flair to mum arrangements or flowerbeds by adding pumpkins and gourds as fun decorations. Indoors, use small pails or pots for petit mum arrangements, or add them to larger arrangements with grain sprigs, dried pods, colorful leaves, or twists of grapevine for additional texture.

Fall chrysanthemums can be a pleasant burst of autumn color, whether they are part of the landscape or are used in containers, pots, or arrangements and we carry a wide selection to make your fall home suit the season!


Fantastic Fall Shrubs

Shrubs can be real showstoppers in fall as they provide layers of color and texture to your autumn landscape. Adding these top  5 fantastic fall shrubs to your yard can bring the beauty of the season to all your beds and borders.

Top  5 Fall Shrubs

There are many stunning shrubs and hedges that offer colorful foliage, long-lasting berries, and other fantastic features to enjoy through fall and into winter. While the best shrubs for your yard will depend on the soil type, sunlight levels, and general climate available, these ten choices are amazing options for most landscapes.

  1. Arrowwood Viburnum (Viburnum dentatum)
    Many viburnum species are great fall shrubs, but arrowwood viburnum is truly outstanding with its yellow, orange, and red autumn colors on toothed leaves. This comes after bright white flowers appear in spring and early summer followed by beautiful blue berries.

Plant arrowwood viburnum as a dramatic background for landscaping beds or back borders in the yard. This shrub can tolerate many soil types, even clay soils, and is hardy through winter for easy maintenance.

  1. Chokeberry (Aronia sp.)
    There are several species of chokeberries that can be beautiful additions to the autumn landscape. While their foliage will vary, it is the bold crop of berries in shades ranging from red to purple to nearly black that add interest to the yard, and will attract birds and wildlife.These shrubs perform best and produce the heartiest berry crops when planted in well-drained soil in full sun to part shade. The more sun the plant receives, the more luxurious its foliage and berry crop will be for a superb autumn performance.
  2. Itea (Itea viriginica)
    Often known as Virginia sweetspire, this shrub has stunning firework-like sprigs of white flowers in early summer, and it is a favorite of butterflies. In autumn, however, this deer-resistant shrub bursts into rich hues of yellow, orange, red, and mahogany.Itea can thrive in full shade to full sun and is a great option not only for the landscape, but for autumn-themed containers and porch pots as well. The berries this shrub produces in late summer will also attract birds and wildlife.
  3. Oakleaf Hydrangea (Hydrangea quercifoli)
    The oak-like leaves of this colorful hydrangea are reminiscent of the most popular deciduous trees, and turn bold hues of purple, bronze, red, and orange as fall advances. This is well after the plant’s big summer flowers, that range from white to purple to pink, have faded.This plant prefers rich, well-drained, slightly acidic soil amended with compost to add rich nutrition for abundant flowering. While these plants thrive in part shade to full sun conditions, the autumn color will be more brilliant if the shrub is in full sun.
  4. Red Twig Dogwood (Cornus sericea)
    While the foliage of red twig dogwood will briefly turn rose or golden before fading to brown, it is the unexpected brightness of its stems in sharp crimson hues that make it outstanding in the fall and winter landscape, long after the leaves have fallen.This shrub will do best in slightly acidic, moist soils, and it will be happiest if it receives at least four hours of sun per day. Lightly shaded placements, particularly from afternoon sun, are suitable for red twig dogwood.

Caring for Fall Shrubs

No matter which shrubs you choose to add autumn drama to your yard, they will need proper care to perform their best. Be sure to site them with the appropriate sunlight levels and amend soil as necessary to provide a supportive pH for healthy growth and brilliant color. Mulch autumn shrubs to protect their root systems as seasonal temperatures drop. Choose these fantastic fall shrubs for a glorious autumn palette in your yard for years to come.


Holiday Gifts from The Garden

Your garden is filled with bounty, and not just during the growing season. With a bit of creativity and some help from your local garden center, you can find many lovely gifts and holiday accents in your garden and landscape, letting you share your love of gardening with friends, family members, neighbors, teachers, and everyone you care about.

15 Fun Holiday Gifts From Your Garden

  1. Dried Flower Crafts
    The beautiful flowers you enjoyed in spring and summer can easily be dried to become lovely holiday gifts. Pansies, yarrow, astilbe, lavender, salvia, and rose buds all dry especially well, and can be part of pressed bookmarks or magnets, scented potpourri sachets, or sprigs and sprays to embellish gift packages.
  2. Dried Herbs
    Fragrant and delicious, dried herbs can be a lovely and practical gift. Layer herbs in small clear glass jars, test tubes, or ornamental tins, and attach rustic recipe cards or a garden-fresh cookbook for an even more thoughtful gift. Thyme, dill, lemon balm, oregano, and rosemary are all superb choices that work well in savory winter recipes.
  3. Ornament Sprigs
    Create natural, beautiful ornament sprigs when you bind pine, arborvitae, holly, or evergreen twigs and colorful berries with jute twine or a festive ribbon to create a decorative bunch. Use sharp pruners to create clean edges with each cut, and use floral wire to shape the branches and twigs into elegant shapes.
  4. Garden Tool Bouquet
    The perfect gift for a gardener, you can create a tool bouquet using a clay pot as a vase and lining it with a pair of garden gloves. Arrange several hand tools for the “flowers” in the bouquet, and add packets of seeds, plant stakes, twine, or other small items as fillers in the arrangement for a useful and thoughtful gift.
  5. Fire Starter Pine Cones
    If you have large pine cones in your yard, they can become beautiful fire starters. Bake cones briefly in a warm oven to dry them out and ensure they are fully open, and allow them to cool. Wrap wicking around the cone, leaving a loop at the top for easy handling, then dip the cone in colorful wax 3-4 times for an even coat. Add a clever tag and you’ve made a perfect winter gift.
  6. Fire Starter Jars
    If you don’t have large pine cones, you can still create kindling jars as fire starter gifts. Use a small mason jar and fill it with mini pine cones, shredded dry leaves, and cedar shavings. Add a drop or two of candle fragrance and decorate the jar with ribbon or twine and tie on a long-lasting match to complete the gift.
  7. Pine Cone Bird Feeder
    Another pine cone gift is an easy bird feeder. Use large or medium-sized cones and spread softened suet or peanut butter over the cone. Roll the cone in birdseed and consider using sunflower seeds or even dried cranberries to create a fun pattern. Tie twine or ribbon around the top as a hanger, and you have a healthy feeder for winter birds.
  8. Hose Door Mat
    A garden hose can become a practical, easy-care mat for the deck, patio, or garage. Wind the hose into an oval or circle for a full-size mat, gluing it together to keep the appropriate shape. For a smaller mat, cut the full-size shape in half. The mats are easy to clean and safe for all weathers, making them ideal for outdoor use all year, and are even great for storing boots and galoshes inside to protect interior flooring.
  9. Jar Lid Garden Stakes
    Turn canning jar lids into whimsical garden stakes. Use markers, paint, or pens or create labels for each lid with the names of different flowers, herbs, and veggies, and attach each lid to a twig or stake for a rustic but useful gift.
  10. Fairy Garden
    A broken clay pot makes an excellent base for a charming fairy garden gift. Fill the pot with sand and dirt, and decorate it with moss, small plants, and all types of fairy accessories, such as mini toadstools, a whimsical door or miniature house, a fairy mailbox, and other fun accents. You can even present the garden as a kit and let the recipient arrange the items however they wish.
  11. River Rock Markers
    Buy large, smooth river rocks to turn into garden markers. You can paint each rock just with the name of a flower, herb, or vegetable, or embellish the rocks with swirls, dots, stripes, and other colorful accents. If you have a more artistic bent, consider painting the rocks to look like the foods and flowers they will be labeling!
  12. Catnip Mice
    Grow a stash of catnip in your garden and you can make homemade catnip mice for all your cat-loving friends. Use a burlap bag or flour sack and cut out mouse-like shapes to sew roughly together. Stuff them with safe fiberfill and a few dried catnip leaves and consider adding a bit of crinkly plastic inside to make the toy even more engaging. Adorn it with a button or yarn eye and tail and you’ve got a fun gift for every feline.
  13. Herb Finishing Salt
    Add dried herbs to coarse sea salt for a delicious finish for savory dishes. Try different blends of herbs for different flavorings, or consider bright, fresh options such as lemon or lime zest in the salt for a punch of flavor. You can use a jar, tin, or even homemade envelopes for the gift container, and include a tiny scoop for a handy way to spread the salt.
  14. Mini Zen Garden
    Create a miniature Zen garden to give a peaceful and thoughtful gift. Use a plant saucer as the base and fill it with fine sand or crushed perlite. Add a painted rock, miniature succulents, or a single fairy garden accent as a focal point, and include a miniature rake or wooden staff for making soothing patterns in the garden.
  15. Wood Slice Coasters
    If you’ve pruned a large branch or cut down a tree, you have the perfect material to make wood slice coasters for a rustic gift. Cut the coasters quite thin and dry them thoroughly for several weeks. Use different sandpaper grits to polish both sides to a smooth finish, leaving the bark intact, then varnish them well to seal the wood and give it a wet gloss. You could paint or use wood burning tools to add accents to the coasters before varnishing if desired.

Your garden can be a source of many beautiful gifts, with a little help from your local garden center to bring your gift inspiration to thoughtful reality. Whether you want to give gifts to like-minded gardeners or just share your love of gardening with everyone on your gift list, you can always find the perfect gift right in your garden or landscape.


Summer Gardener’s Calendar

Continue planting trees, shrubs, perennials, annuals, vegetables and herbs. Consider adding some exotic color to your deck or patio with tropical blooming plants. We have a great selection of color this summer.

It’s time for your houseplant’s summer vacation! Take outside to a shady place. Repot if necessary, fertilize and check for pests and diseases. They’ll thrive in their outdoor location all summer. Be sure to bring them back inside in early fall.

Water plants and lawns deeply during periods of dry weather. Annuals, perennials, vegetables, trees and shrubs should be watered with a slow trickling or soaker hose. Pay extra attention to plants in containers and hanging baskets – check them regularly. Remember that clay pots dry out faster than plastic.

Apply a 2-3″ layer of mulch on your garden beds in preparation for summer. Mulch conserves valuable moisture in the soil, helps keep weeds down, maintains even soil temperatures, and gives an attractive finishing touch to your beds and borders.

Spray azaleas, Pieris japonica, laurel and Rhododendron with Bonide All-Season Oil to control lacebug. Spray early in the morning or evening when temperatures are moderate and there is no rain in the forecast.

Warm, humid weather encourages the development of fungal diseases such as Black Spot and Powdery Mildew on roses. Water roses in the early morning and avoid overhead watering if possible. Clean up any fallen leaves and follow a regular fungicide spray program. We recommend the Bayer Rose and Flower All in One for good control of fungus diseases.

Prune evergreens such as pines, cypress, hollies, euonymus and boxwood, to shape as needed. Remove faded flowers of annuals regularly, to encourage more flowers. Annuals will also benefit from regular applications of a water-soluble fertilizer right through summer.

Attract hummingbirds and butterflies to your landscape by planting Butterfly Bush, Bee Balm (Mondarda), Hardy Hibiscus, Lobelia, Scabiosa and Coreopsis.


All About Amaryllis

A bold, flowering bulb, amaryllis is popular for its winter blooming habit and makes a colorful indoor plant as well as a great gift for anyone with a green thumb. But how much do you really know about these familiar flowers?

What Is Amaryllis?

These plants are part of the flowering bulb genus Hippeastrum, which is native to South America, Central America, Mexico and the Caribbean in tropical and subtropical regions. It must be noted that the familiar amaryllis can easily be confused with the genus Amaryllis, which is actually native to southern Africa and is most successful only when grown outdoors. Hippeastrum flowers, on the other hand, thrive indoors and are widely sold as gifts and houseplants in the winter months.

Hippeastrum bulbs range from 2-5 inches in diameter and are relatively fleshy. Each bulb will produce several spear-like, stiff leaves that can reach 12-20 inches long. Along with the foliage, each bulb can produce 1-2 long stems that will yield 2-12 trumpet-shaped flowers with large, triangular petals. The bloom colors range from white, red, orange, salmon, pink and peach to deeper hues of burgundy and purple. Variegated and striped blooms are also popular.

Blooms may last for several weeks, and the foliage can persist long after the blooms die.

Potting and Caring for Amaryllis

Unpotted, dormant bulbs should be stored in a cool (55 degrees Fahrenheit), dark, dry location. Before planting, the bulbs should be brought to room temperature, and the roots can be lightly rehydrated in lukewarm water for an hour or two before planting, but the base of the bulb itself should be kept dry to minimize the risk of rot. While these bulbs will bloom in water – they’re often sold in clear, decorative vases with the roots reaching into water and pebbles used as a planting medium – they will do better when properly planted, which will also encourage reblooming.

The best pot for a single amaryllis bulb will be just an inch wider than the bulb’s diameter, or several bulbs can be planted together in a larger pot for a more dramatic display. Because these flowers grow so tall, however, the pot should be heavy enough to support their size. If necessary, adding several rocks or a layer of gravel to the bottom of the pot before planting will help balance the weight to keep the arrangement stable, and a deeper pot will also provide adequate room for root growth. It may also be necessary to add a stake to support the tall flower stems, but be sure not to damage the bulb when adding a stake to the pot.

Rich potting soil is essential for the best amaryllis blooms, as these bulbs grow vigorously and require adequate nutrition to reach their full potential. When planting a bulb, it should be submerged in the soil up to its neck, but leaving the top quarter of the bulb uncovered. The soil should be tamped firmly to support the bulb. Place the pot in a warm, sunny spot when foliage emerges, and rotate the pot daily as the plant grows taller to ensure straight, upright growth that will better support heavy flowers.

Gently water the bulb until the first stems appear, but take care not to overwater the pot or the bulb and roots may rot. As the plant grows taller and the blooms emerge, more watering will be needed to keep it adequately moisturized.

It may take 7-12 weeks for an amaryllis to bloom, depending on the type and size of bulb, its growing conditions and the care it receives. Larger bulbs that produce more flowers will generally take longer to bloom, while smaller bulbs will have shorter flowers but will bloom more quickly.

After the Bloom

Because these plants are popular every holiday season, many people discard amaryllis bulbs after they have stopped blooming. It is possible, however, to encourage reblooming with the proper care.

After the flowers have faded, deadhead the blooms but leave the foliage intact. Sharp flower-pruning shears are best to avoid tearing the stem or causing it to bend or break. Your Amaryllis should be placed in the sunniest spot available, continue to water as necessary and monthly feeding should ensue. This will encourage leaf production which with photosynthesize adding nourishment to the bulb enabling it to produce flowers again next winter. Move the plant outside once all danger of frost has passed to a sunny location. Continue to water and begin fertilizing every other week.

If you want to control when your amaryllis blooms again, you will need to encourage the bulb to go dormant. This is done by stopping fertilization, allowing the soil to gradually dry out, and reducing sunlight and temperature so leaf production slows and eventually stops. The dormant period will generally last 8-10 weeks, so, if you would like your Amaryllis to bloom for Christmas, mid-August is the time to begin this process. When leaves brown naturally, cut them back, remove the bulb from the dry soil, wrap it in newspaper and store it at around 55 degrees Fahrenheit for 8 to 10 weeks. After this dormant period, repot the bulb in fresh soil and begin watering again. The bulb will start to produce leaves and flowers won’t be far behind. With the proper conditions and care, you can keep your amaryllis blooming for years to come.

Amaryllis flowers are attractive and bold, perfect for brightening any indoor landscape during a cold and dreary winter. By understanding these flowers and their needs, you can provide them with proper care to ensure they always look their best.


Holiday Gardener’s Calendar

Winter is upon us. Depending upon the temperatures, there may still be time to finish remaining chores. If you have any questions about the following procedures or products, please come in and see us. We can help you select the correct dormant oil, fertilizer, selective herbicide and frost protection method. We’re always here to help.

General Landscape

  • Mulch with bark, compost or other local materials to enrich soil, protect plant roots and prevent erosion.
  • Protect plants from frost and wind.

Houseplants

  • Perk up tired houseplants by removing dead and dying leaves. Wash under a soft shower in the sink or tub.
  • Spider mites proliferate in warm dry winter homes. Check for mites by looking for tiny speckles on leaves.
  • Transplant if roots are growing through the drainage holes or over the pot edge. If you don’t want to move into a larger pot, untangle the roots and cut back by 1/3, scour the pots and replant with new soil.
  • Remember to turn your plants each week as they begin to grow towards the weaker window light.
  • For indoor bloom, plant amaryllis, paper white narcissus, hyacinth, crocus and indoor cyclamen.
  • Popular holiday plants such as poinsettias, chrysanthemums and orchids fill the stores. Check them thoroughly for “hitchhikers” before bringing into the home or spray with household plant insecticide or soap.
  • Be creative in your arrangements and combine them with metallic painted twigs, pinecones or seashells.
  • If using a live tree for a “living Christmas tree”, prolong its time indoors by using Wilt-Pruf to reduce the loss of moisture from the needles.

Lawn:

  • Remove leaves, toys, hoses, etc, from lawns to prevent dead spots.
  • Apply winter fertilizer, if not already done. The middle number, phosphorus, aids root growth during the winter.
  • If you have weeds in your lawn, consider using a winter fertilizer with weed control.
  • Mow one time after lawn goes dormant and before freezing. This last mowing should be 2 ½” tall.
  • When temps are freezing, stay off the lawn as much as possible to reduce blade breakage.

Vegetables:

  • Protect cool season vegetables with row covers, leaf or mulch cover.
  • Mulch beds to enrich and protect from rain/snow erosion.
  • Review gardening notes and plan next year’s garden.
  • Test germination rate of leftover seeds, if wanting to use again.
  • If gardening under lights or in heated greenhouse, start seeds of early spring crops: lettuce, kale, mustard, spinach, and other greens.
  • Harvest carrots, lettuce, greens and over-wintering crops.

Trees and Shrubs

  • Stake young trees and vines if needed. In case of a heavy freeze, use Wilt-Pruf or similar product to reduce transpiration of moisture.
  • Prevent southeast trunk injury, a form of winter freeze damage. Use light-colored tree guards to protect the trunks of young trees for at least two years after planting. After two years, paint the trunks with white latex paint. These two methods prevent the tree trunk from splitting when sunlight warms the bark on side of the trunk.
  • Fertilize shrubs and trees, if not done already, and the ground is not frozen. This allows roots to absorb when temperatures are above 40° and when spring returns. Granules and spikes provide nutrients effectively and easily.
  • Prune out dead and diseased tree branches to prevent from falling on roof or pedestrians.


Fall Gardener’s Calendar

Fall Gardener’s Calendar

Spray Bonide All-Season Concentrate on hemlocks to control woolly adelgid.

Spruce up the landscape by planting Flowering Cabbage & Kale, Garden Mums, Fall-Blooming Perennials as well as Trees and Shrubs.

Pick up your Spring Flowering Bulbs now!  To make planting easier, use a Bulb-Digger or an Auger.

Apply Hi-Yield Superphosphate now to coax stubborn plants into bloom next year.

Aerate, re-seed and apply Fall Lawn Food to the lawn. Keep grass seed damp; water every day if necessary.  You will also want to check for grubs.  Increased activities of skunks, raccoons and moles as well as brown patches that peel back easily are an indication of grub activity.  Apply granular Sevin or Milky Spore to control the grubs as well as chinch bugs and sod webworm.

Treat houseplants with Bonide Systemic Granules and Bonide Insect Killing Soap now to get rid of any insects before bringing them into the house prior to the first frost.

Clean out garden ponds and pools. Cover with Netting before the leaves start falling.

Plant bulbs. Fertilize with Espoma Bulb-Tone and water in well.

Divide daylilies and spring-blooming perennials, including iris and peonies. Don’t be tempted to prune your spring flowering shrubs like forsythia, azaleas, camellia, holly, lilac, rhododendron, spirea or viburnum or you will destroy next year’s buds.

Dig up summer-flowering bulbs, such as dahlias, cannas, tuberous begonias, caladiums and gladiolus after the frost kills the top growth.  Treat them with Bulb Dust, pack them in Peat Moss, and store them in a ventilated area for winter.

Fertilize your trees with Espoma Tree & Shrub Fertilizer after the leaves fall. Fertilize azaleas, rhododendron, and evergreens with Holly-Tone and other shrubs with Plant-Tone. Spray hemlock again with Bonide All-Season Concentrate.

Set up bird feeders. Clean out birdbaths, refill and purchase heaters for the winter.

Clean up and destroy diseased rose leaves and debris surrounding shrubs and perennials. Use a Rose Collar to mound 6-10 inches of dirt around roses to protect from winter damage. Use Rose Cones for complete coverage.

Remove annuals, roots and all, and add to your compost pile, but do not add any diseased material to it.

Cut back perennials unless they feature ornamental seed heads and fertilize with Espoma Tree-Tone. Prune long raspberry and rose canes back to a height of three feet.  Clean up your beds and gardens to avoid harboring insects and diseases over the winter.

Pot hardy spring bulbs (anemone, crocus, daffodil, hyacinth, ranunculus and tulip) and place in a cold frame or cool garage (40 degrees) or sink into the ground and mulch.  Keep evenly moist.

Update garden records, noting successes and failures, gaps in planting, future planting and landscape changes.

Water all landscape plants well and mulch before the winter cold sets in.

Spray evergreens, azaleas, rhododendron, boxwood and rose canes with Wilt Stop for protection against wind and cold weather.


Pre-Emergent Control of Crabgrass

Did you have a crabgrass problem last year? Well, chances are, it’s gonna be even worse this year! Crabgrass is an annual lawn weed that dies once a hard frost hits. The main problem with this pest is the tenacious seed that it leaves behind after it blooms.

Early spring is the season to control crabgrass with a pre-emergent herbicide like Fertilome Crabgrass Preventer Plus Lawn Food or Bonide Weed Beater Complete.

This chemical works by killing the crabgrass seedlings as they germinate. Here’s what you need to do:

  • Apply the pre-emergent as the forsythia is going out of bloom.
  • For newly seeded lawns, wait until you have mowed your lawn three times before applying the herbicide. This will help to avoid killing the new grass.
  • Use a spreader to apply the herbicide uniformly across your lawn.
  • Apply your pre-emergent before a light rain. This will knock the chemical off the grass blades and down to the soil surface where the crabgrass seed is germinating.
  • Do not de-thatch or aerate the lawn after applying the herbicide, as this disruption will break the chemical barrier.
  • Wait two to four months to re-seed the lawn after applying.
  • Repeat this same procedure year after year.
  • Keep you and your lawn safe. Always follow the manufacturers’ instructions.
crabgrass

Dividing Hybrid Hellebores

Hybrid hellebores bring us all sorts of happiness. These are one of the first plants to bloom in the late winter and early spring and are available in flower colors of chartreuse, cream, white, pink, red and deep purple. Hybrid hellebores are also those rare and treasured perennials that provide year-round interest, giving you the most bang for your buck and brightening your landscape in every season. As evergreens, they never lose their luster, and their flower shapes and textures are quite varied for even more interest, with a cultivar to suit any gardener’s taste. What’s not to be happy about?

A Love Divided

To keep these plants healthy and thriving, and to increase your quantity, division is a necessity. It is important to divide these plants carefully, however, or else you risk sadness with fewer blooms, lopsided plants or even losing these gems. Fortunately, it’s possible for even a novice hellebore lover to divide their plants with confidence.

  1. Divide hybrid hellebores in the spring when it is in bloom. This will also let you see how the blooms are positioned on the plant so you can divide shapes appropriately.
  2. Choose a plant that has at least 5 flower stems. Each one represents a division and will give you great new plants to bloom.
  3. Dig your hellebores up with a garden spade by inserting it deeply into the soil around the perimeter of the plant about 6 inches away from the outer stems of the clump. This will keep the root system largely intact and uninjured.
  4. Lift the clump and shake off loose soil or any trapped rocks or ensnared mulch. You can gently loosen clumps with your fingers, but take care not to damage the roots.
  5. With a garden hose, wash away any additional soil from the clump so the plant roots are exposed. This will help them get established in their new location more quickly.
  6. Divide the clump by cutting through the roots with a heavy-duty serrated knife. Make your root cuts where you see obvious natural divisions between the flower stalks.
  7. Replant your divisions at their original depth, in a shady location. Include plenty of compost in the planting hole for good nourishment. Water well and continue to keep soil from drying out until your new plants are well established.

Before you know it, you’ll have many more hybrid hellebores to enjoy! If you have a few too many, be sure to share the happiness by giving them to family members, friends, neighbors and anyone else who can fall in love with these beauties.

Helleborus orientalis

Dealing With Winter Damage

It’s early spring – time to survey the damage that winter has produced. In some areas, shrubs may still be hiding under piles of frozen snow, and could be crushed or compacted. Severed tree limbs may lie scattered across the landscape, and bark may be torn and stripped from trunks. It’s difficult to know what to tackle first, but fortunately, much of the damage is easily correctible.

Repairing Winter-Damaged Trees

When surveying and repairing winter damage, start with your trees – they are generally the most valuable additions to your property. As you survey the damage – broken limbs, torn bark, a tilting trunk – ask yourself “Is this tree salvageable or should it be removed?” If the damage is extensive, or you are unsure about how the damage may affect the tree’s overall health or future growth, hire a professional for a consultation. Replacing a severely damaged tree with a younger one, perhaps a type you like even better, may be the best solution.

If a limb is broken somewhere along its length, or damaged beyond repair, employ good pruning practices and saw off the remaining piece at the branch collar, being careful not to cut into the trunk or leave a stub. Sometimes a fallen limb may strip bark off the tree trunk. To repair this damage, cut the ragged edges of the loose bark away from the stripped area to firmly affixed healthy bark. Nature will take care of the rest. Even if the trunk of the tree is split, the tree may still be saved. For large trees, repairing this type of damage usually requires cabling and bracing done by a professional. If the tree is still young, the crotch may be pulled tightly together and tied or taped until the wound eventually heals.

Repairing Winter-Damaged Shrubs

Shrubs can suffer the same damage as trees, including broken limbs and stripped bark. Heavy snowfall can crush smaller shrubs, and larger varieties may have their trunks or centers split from heavy snow or ice accumulation. Most shrubs are resilient, however, and slowly regain their shape as the weather warms. If branches are bent but not broken, you may tie them together to help them along and prevent further damage from late-season storms. Do not tie tightly and remove twine after about a year. Completely broken branches may be pruned away, but take care to maintain the shrub’s form and balance, keeping in mind its growth pattern so it will not look lopsided or ungainly. Again, if the damage is severe, you may need to replace the plant.

The harder the winter is, the more of a beating trees and shrubs will take. With prompt attention in early spring, however, you can easily undo much of the damage and help your landscape recover with ease.

damage_1damage_2

Pruning Forsythia

Forsythia is a true spring favorite and never disappoints with its shocking yellow blooms atop a mass of unruly branches. This early-flowering shrub can thrive for decades on neglect but there will come a time, whether out of want or necessity, that your forsythia will require pruning. But how can you do so without dampening the ferocious spring flame these spring shrubs produce?

Why Prune Forsythia?

When this shrub does so well without detailed care, why is it necessary to prune it at all? In many landscapes, if the shrub is properly sited, it may not need pruning. Unfortunately, many people underestimate the vigorous growth of these beauties, and in just a few years it may seem crowded and overgrown in a corner, narrow bed or border. A large, unruly forsythia may also seem overwhelming in a smaller space or when paired with less vigorous plants. Damage or illness may also create a misshapen or unbalanced plant that is no longer so pleasing to the eye. In these cases, judicious pruning can rejuvenate and refresh the shrub and give new life to its part of the landscape.

Pruning and Rejuvenating Forsythia

Pruning out of shape and poorly flowering forsythia is simple. After the shrub has finished flowering in late spring, cut all the branches back to within one foot of the ground. When branches put on new growth, reaching two feet from the ground, prune all branch tips to the first set of side shoots. This will help develop a fuller, thicker shrub for a more lush look. Be aware, however, that it will take until the second bloom season for a severely pruned forsythia to return to its former splendor.

A newer forsythia that is just a few years old can be kept in tip-top shape a bit more easily. Each spring, after it flowers, cut up to one-third of the branches back to the ground. Choose dead branches, branches thicker than your thumb and all crossed or inward facing branches. This will help create a good form with healthy air circulation and pleasing growth for years of beauty and enjoyment.

It’s easy to keep forsythia looking stunning for many years. Whether you want to make the most of the forsythia already in your yard or want to add this beauty to your landscape, stop by – our landscaping experts can help you choose the best species for your yard and needs so you can enjoy its beauty for many springs to come.

forsythia-1

Herbs As Companion Plants

Practiced by organic gardeners for years, companion planting has become very popular for all gardeners. The concept is to plant together species that will benefit each other, to help prevent disease and insect infestation without the use of chemicals. In general, herbs and other aromatic plants like tomatoes, marigolds and onions are helpful in warding off insects. Certain colors, like the orange of nasturtium flowers, are thought to repel flying insects. While these practices have not been scientifically proven, many gardeners have been using them for years with positive results. Try it – and see if it works for you!

Best Companion Herbs

The exact herbs you choose to pair with other plants will depend on what you want to grow and what problems you want to eradicate. The most common herbs and their purported benefits include…

  • Basil – Enhances the growth of tomatoes and peppers. Dislikes rue. Repels flies and mosquitoes.
  • Borage – Companion to tomatoes, squash and strawberries. Deters tomato worm.
  • Chamomile – Companion to cabbages and onions. Improves the growth of all garden plants.
  • Chives – Companion to carrots. Deters Japanese beetles, blackspot on roses, scab on apples and mildew on cucurbits.
  • Dill – Improves the growth of lettuce, cabbage and onions. Dislikes carrots.
  • Fennel – Most plants dislike it – avoid using it as a companion herb and instead plant it away from the garden.
  • Garlic – Plant near roses and raspberries. Deters Japanese beetles.
  • Horseradish – Plant at the corners of your potato patch; deters potato bug.
  • Hyssop – Companion to cabbage and grapes. Deters flea beetles and cabbage moths. Dislikes radishes.
  • Marigolds – Plant throughout the garden as they discourage nematodes and other insects.
  • Mints (esp. Spearmint and Peppermint) – Companion to cabbages and tomatoes. Deters aphids, flea beetles and many types of cabbage pests.
  • Nasturtium – Companion to radishes, cabbage and cucurbits. Plant under fruit trees. Deters aphids and squash bugs.
  • Onion – Repels cabbage loopers, potato beetles, carrot flies and imported cabbage moths.
  • Oregano – Improves the growth of beans.
  • Parsley – Enhances the growth of roses. Repels asparagus beetles.
  • Pot Marigold – Companion to tomatoes, but plant elsewhere, too. Deters tomato worm, asparagus beetles and other pests.
  • Rosemary – Companion to cabbage, bean, carrots and sage. Deters cabbage moth, bean beetles and carrot fly.
  • Rue – Companion to roses and raspberries, dislikes sweet basil. Deters Japanese beetles.
  • Sage – Plant with rosemary, tomatoes, strawberries, cabbage and carrots. Dislikes cucumbers. Deters cabbage moth and carrot fly.
  • Summer Savory – Companion to beans and onions. Deters bean beetles.
  • Tarragon (French) – Enhances the growth of all vegetables.
  • Thyme – Improves the growth of tomatoes, potatoes and eggplant. Repels whiteflies and cabbageworms.
  • Wormwood – Use as a border, keeps animals from the garden.
  • Yarrow – Plant along borders, paths and near aromatic herbs. Enhances production of essential oils. Attracts beneficial insects including ladybugs and predatory wasps.

Exactly how much benefit companion plants give to one another will vary; be sure to choose varieties to group that have similar soil, light, water and fertilization needs. Even if their companion benefits may not pan out, you’re sure to enjoy a more diverse and vibrant garden filled with delicious vegetables and herbs!

herbs_companion_3

herbs_companion_1

herbs_companion_2

Healthy Soil: Winter Cover Crops

It’s fall and our annual and vegetable gardens are winding down for the season. Now is the time to invest a little extra time and effort to prepare your soil for next year. Whether your garden is large or small, all annual planting beds will benefit from the addition of a winter cover crop.

Benefits of Cover Crops

A cover crop is a fast-growing, low-maintenance crop that can be used to protect your garden and landscaping beds in fall and winter. Depending on the crop you choose, it can provide many benefits to your garden, including…

  • Stabilizing soil and preventing erosion
  • Adding organic matter back into the soil to nurture later crops
  • Adding nutrients to the soil that have been used by previous crops
  • Suppressing disease that can wither new crops even before they start
  • Repressing weeds that will take over a garden
  • Improving soil structure with aeration and better drainage
  • Encouraging beneficial insects that will help later crops

Recommended Cover Crops

Different cover crops work best in different areas, and the climate, soil type and growing season will help determine which cover crops will work best for your gardening needs. The most popular recommended cover crops for our area are oats, rye and wheat.

  • Oats
    Sow 6-8 weeks before the first hard frost. Planted early, oats will provide a quick covering with the added benefit of providing an early planting time for next spring’s crops. Oats are not winter hardy, but they will grow in the fall and die in the winter, leaving behind nutritious mulch that will easily decompose when incorporated into the soil in the spring. This is a great cover crop choice for low- or no-till gardens. Sow at 2 lbs. per 1,000 sq. ft. for the best coverage.
  • Winter Rye
    Sow 2-4 weeks before the first hard frost. This is a good choice for gardeners who have late season crops and don’t want to cut off that last harvest. If hardened off before frost arrives, winter rye will continue to grow over the winter. Rye is a vigorous grower and can be difficult to turn in the spring, so bear that in mind depending on what crops you will be planting in spring. Sow at 3-4 lbs. per 1000 sq. ft. for appropriate coverage.
  • Winter Wheat
    Sow 2-4 weeks before the first hard frost. Wheat will cover quickly but is not as aggressive as winter rye. Winter wheat is also leafier, making it easier than winter rye to turn into the soil in the spring. Sow at 3 lbs. per 1000 sq. ft. to provide good coverage.

Cornell University provides a tool to assist you in choosing the correct cover crop for your situation. (http://covercrops.cals.cornell.edu/decision-tool.php)

Planting Cover Crops

Before planting a cover crop, clean out garden beds, removing all roots and plant material. Compost all plant matter that is not diseased. Broadcast seed evenly and cover with soil. Water thoroughly when planting and when necessary during dry periods. In the spring, till or fork oats into the planting bed and you are ready to plant. For winter rye and wheat, mow or chop tops 4 weeks before planting leaving cut cover crop on top to dry. Till or fork dried wheat and rye into the bed before planting.

With the appropriate cover crop, you can protect your garden’s most valuable asset – the soil – and be sure it is ready for spring planting.


Over-Wintering Container Plants Outdoors

All containerized plants that are considered hardy in your zone can spend the winter outdoors, but you do need to take a little special care to keep them safe and comfortable as temperatures drop. Despite their hardiness, winter is still a challenging season, but it is possible to keep your container plants healthy until the days grow longer and warmer again.

Options to Overwinter Your Container Plants

  • In the late summer or fall, removed the plant from its container and plant it in the ground while the soil is still warm. Another method is to bury the pot, with the plant in it, in the garden and remove the pot following spring. Both of these methods will help insulate the root system, preventing it from freezing solid and killing the root system.
  • Place containerized plants in an unheated garage but along a heated wall. This is an excellent method for very large pots or porous pots that tend to break apart from the constant cycle of freezing and thawing, and so would not be very hardy if buried. For extra root protection and insulation, wrap the pots in plastic bubble wrap or wrap an old comforter or quilt around the pots.
  • Group pots together along the sunny side of your house or shed. If this area is windy, create a windscreen with stakes and burlap. Place bales of straw or hay around the perimeter of the grouping up against the pots to further protect plants from cold winds. Fill in areas between pots with mulch, shredded leaves, grass clippings or hay for insulation. Lay evergreen branches or place a layer of mulch on top of the pots for additional protection.
  • Use a cold frame covered with plastic or Reemay fabric to help control temperatures and reduce light as well, helping plants stay dormant in winter. It will still be necessary to use mulch, shredded leaves or hay around and in-between pots for insulation. Rodent control, such as Havahart traps, may be necessary when using this method.

Watering Container Plants in Winter

Make sure that plants go into the winter with moist soil so that there is water available to plant roots. Check soil moisture occasionally, never allowing it to dry completely. It is also a very good idea to spray needled and broadleaf evergreens with an anti-desiccant. This acts as a protective coating for plant foliage and stems as it helps them retain moisture.

With just a little care and forethought, you can easily prepare containers for winter without risking the plants and arrangements you have so carefully cultivated.


Tulips: Spring Starts Now!

Tips for Planting Tulips

Tulips are an easy care addition to any landscape, and they are easier to plant than many gardeners realize.

  1. Choose only top-sized bulbs without any bruises or obvious damage. Bigger bulbs generally indicate better quality and bigger flowers.
  2. Plant bulbs as soon as purchased or store in a cool, dry location.
  3. Choose a sunny (or part sun) location with well-drained, rich soil.
  4. Plant 2″ deeper than recommended to promote re-blooming each year.
  5. Apply bone meal 3 times a year – in fall when you plant, in spring as bulbs emerge from the ground and after flowering has finished. This will provide food for the foliage and bulb growth for next year’s flowers.
  6. Mulch and water the bed thoroughly after planting.
  7. Plant before the ground freezes.
  8. Deadhead flowers after they have faded, but leave the foliage to die back naturally. Do not cut off the leaves until they have turned brown, or else they will not develop large enough bulbs for a good show the next year.


Applying Horticultural Oil or Neem Oil

Autumn is an excellent time to apply All Seasons Horticultural Oil or Neem Oil. The oil smothers many soft-bodied insects and hard-shelled scales that are impenetrable to many insecticides, and can therefore help control some of the most stubborn insect populations. But is it right for your plants?

About Horticultural and Neem Oils

Horticultural oil, or hort oil, is typically derived from petroleum, and is a type of ecologically-friendly mineral oil. Some cottonseed and soybean oils can also be effective horticultural oils. Emulsifying agents are typically added to these oils so they can be mixed with water and used as a spray, which helps distribute them evenly over plant foliage to be most effective.

Neem oil can control pests that are trying to overwinter in your potted plants. You can apply it on upper and lower leaves. Use neem oil as a preventative for established infestations and horticultural oil to eliminate eggs.

Pests That Don’t Like Horticultural Oils

Different types of horticultural oils can be effective against many unwanted garden pests, including…

  • Spider mites
  • Aphids
  • Whiteflies
  • Mealy bugs
  • Psyllids
  • Lace bugs
  • Caterpillars

In addition to smothering the larvae or insects directly, the heavy oil also makes it difficult for many insects to crawl therefore starving them to death and preventing them from spreading diseases from plant to plant. Additionally, the oil repels many insects looking for winter homes. The oils also act as fungicide against powdery mildew, rust and leaf spot on some plants.

Applying Horticultural Oils

Application of horticultural oils is easy, requiring only a simple hose-attached sprayer. Because oil and water do not mix, frequent agitation by shaking is required even if the oils are mixed with other agents to be more sprayable. These products are most effective if applied when plants are dormant, since oil-based products can burn and harm actively growing foliage, buds, flowers and fruit. Some lighter weight, summer-formulated oils are available, but they should be used only sparingly and only if absolutely necessary. Autumn and winter are the best seasons to apply horticultural oils when insects are a problem, though autumn applications can occasionally cause problems with plants dying back and other winter damage. Because the oils can evaporate and dissipate quickly, they should only be used when insects are present, otherwise they will be ineffective. In freezing weather the oil coverage will be inconsistent, so cool but not bitterly cold temperatures are best.

Of course, always follow the instructions for proper application rates, plant sensitivity and ideal weather conditions to ensure the most effective treatment. Because these oils are still pesticides, protective gear such as gloves and goggles should also be worn to avoid accidental irritation or more severe contamination.

Using  oils can be a great way to control insects on your plants, but only if the oils are used appropriately. Come in for a consultation to see if these products can help end your insect problems.

Repotting Houseplants

Fall is an excellent time to repot many houseplants. Potted plants that have been growing outdoors during the summer have probably grown quite vigorously due to the high light levels and greater humidity. If the top growth of the plant has increased in size by 20 percent or more, it probably should be transplanted into a larger container so the roots can stretch and settle comfortably.

Before You Repot

Before repotting, check the plant and the soil carefully for insects.  Add systemic granules to the soil and spray the leaves with an insecticidal soap to remove any unwanted pests. If an insect infestation is particularly bad, it may be necessary to remove most of the plant’s soil and replace it with fresh potting soil. Avoid using soil from the garden, however, which will harbor insect larvae and eggs as well as weed seeds and other material you do not want in your houseplants.

Acclimating Plants

Bring your plants indoors well before any danger of frost for proper acclimation to the indoor environment. The change in light levels and humidity could shock more delicate plants, and they may wilt temporarily or drop leaves before they adjust to the new conditions. If possible, bring them in just a few minutes at a time for several days, gradually increasing their indoor time to several hours before keeping them indoors all the time. Flowering tropicals will also benefit from cutting back some of their foliage to avoid shock before being brought indoors.

To help houseplants overcome the transition from outdoors to indoors, position them in a bright, sunny area and consider adjusting indoor temperature and humidity controls to more closely mimic outdoor conditions. Make adjustments slowly and gradually, and the plants will adjust.

Time to Repot

Once your houseplants are adjusted to their indoor fall and winter environment, they can be safely repotted without adding to their stress. Repot the plants early in the day, and move them to a slightly larger pot. Avoid jumping several pot sizes, which could lead to excessive root growth while the foliage is neglected. Be sure to fertilize and water the plants appropriately to provide them proper nourishment as they settle into new pots. Do not expect luxuriant foliage growth right away, however, as it will take some time for the plants to begin growing again, especially in fall and winter when most houseplants are entering a dormant, slow growth period.

By repotting your houseplants in fall, you can help healthy, vigorously growing plants adjust to a new environment and continue their growth with ease in a new, larger, more comfortable pot.

King of the Cold: Ornamental Cabbage & Kale

Looking to add interest to the fall and winter landscape? This year, plant ornamental cabbage and kale for bold textures and vibrant colors.

About Ornamental Cabbage & Kale

Unlike most other annuals and perennials, these two hardy plants improve in appearance after a frost or two, which bring out more intense and brilliant colors in their foliage – perfect as an autumn accent or centerpiece plant. Identified by a number of names including floral kale, decorative kale, ornamental-leaved kale, flowering kale and flowering cabbage, ornamental cabbage and kale are classified as Brassica oleracca (Acephala group). Offering unlimited use in the landscape, these plants have large rosettes of gray-green foliage richly variegated with cream, white, pink, rose, red and purple. Kale leaves are frilly edged and sometimes deeply lobed.

While typical ornamental kale and cabbage varieties are easy to find, you can also try more unusual options, including dwarf varieties as well as upright, taller hybrids that can even be used in cut arrangements.

Using These Attractive Plants

Popular in borders, grouped in planting drifts, or planted in containers for the deck or patio, ornamental cabbage and kale typically grows to 12-18” high and wide, depending on the cultivar. Plant these specimens at least 12” apart in an area with full sun that has moist, well-drained soil. Organically rich soil with proper compost or fertilization is best to provide adequate nutrition for these lush plants. Although they are able to withstand light frosts and snowfalls, ornamental cabbage and kale will typically not survive hard freezes and are best treated as showy annuals.

The best foliage color will occur if ornamental cabbage and kale is planted in early fall as temperatures are cooling, or you can sow seeds 6-10 weeks before the first anticipated frost date – just be sure the seeds have sun exposure in order to germinate properly. These plants are usually attractive in the garden until Thanksgiving or slightly later, or in mild climates they may even last until spring temperatures begin to rise. Hint – when the plants smell like cooked cabbage, it is time to pull them out!

While these plants are superficially similar to the familiar cabbage and kale vegetables popular in salads and other edible uses, it is important to note that ornamental varieties are cultivated for color and shape rather than taste. Keep them out of the kitchen and in the garden instead, and you won’t be sorry!

Choosing a Japanese Maple

We’re certain you’ve heard it numerous times: fall is the best time to buy your Japanese maple. Have you come into the garden center to pick one? Did the varieties overwhelm you? Let us make it easier for you by explaining Japanese maple differences. Then, when you come in, you’ll know exactly what you want.

The species Japanese maple, Acer palmatum, moderately grows to a 20′ by 20′ multi-trunked tree. The leaves have 5-9 finely cut lobes giving them a more delicate look than other maples. Red spring leaves turn to green in the summer and blaze with yellow, orange and red in the fall. All do best with protection from drying winds and hot overhead afternoon sun. During their centuries of use in gardens around the world, gardeners have discovered and propagated those selections with unusual growth habits and bark patterns, as well as leaf color and shape. With hundreds of Japanese maple varieties available at garden centers, we feel a little simplification is in order.

  • Leaf Shape
    The variation Dissectum or Laceleaf Japanese Maple has leaves are deeply cut and finely lobed giving a lace cutout look. These varieties generally grow best in shady locations as the leaves easily burn or scorch. The leaves of non-Dissectum varieties are much less lacy. They resemble the leaves of native maples but are smaller and more deeply cut.
  • Leaf Color
    The leaf color of different Japanese maples also varies. Many have red spring growth changing to green in the summer. However, some retain the red through the growing season. Some varieties have variegated leaves with white, cream, gold or pink. Variegated leaves burn easily in the sun but can revert to all green in too much shade. Green leaves tolerate more sun than red. Autumn is when Japanese maples really put on a show with a riot of blazing colors.
  • Tree Form
    Non-Dissectum varieties grow more quickly into upright forms. Some varieties remain less than 10′ tall but others can grow to 25′ tall by 20′ wide. Laceleaf maples slowly develop a weeping form approximately 8-10′ tall and 8-12′ wide. However, ‘Seiryu’ is an exception, growing into an upright form.

Laceleaf (Dissectum)

Non-Dissectum

Location

More shade

Less shade

Size

Smaller

10-25′ tall depending upon variety

Tree Form

Weeping

Upright

Leaf Shape

Lacy, fine cut

Lobed

Leaf Color

Red, green

Red, green, variegated

Now that you have identified a suitable planting location and the type of Japanese maple you prefer, come see us and let our friendly staff show you the varieties that meet your requirements. Autumn colors are blazing now so this is a great time to make your selection.


Holiday “Cactus” (Schlumbergera varieties)

Have you noticed the odd-looking plants with neon bright flowers blooming since Halloween? You may know them as Thanksgiving cactus, Christmas cactus or Crab Cactus. Whatever you call them, they’re certainly bright and cheerful, and bring a bold bloom of color indoors during the winter months.

These plants don’t resemble their cactus cousins. Native to forests and jungles rather than desert regions, these plants are generally epiphytic, growing on trees or rocks. Distinctly flattened claw-like joints approximately 1″ long form the arched and hanging stems. The 2.5 – 3″ tubular blossoms emerge from the stem tips.

In case you’re wondering, the Easter cactus is a close relative but a different genus. However, in addition to blooming in the spring, another difference is the blossoms also form at the stem joints. Hybrids now bloom at different times of the year and new introductions create a wider variety of colors including pink, reddish, white, orange, purple and even multicolored blooms on the same plant. You can actually create a blooming rainbow effect over the entire year, with proper care and diligent upkeep.

The Christmas cactus usually begins flowering when night temperatures are around 55° Fahrenheit. After the buds are set, night temperatures of 60-70° Fahrenheit and slightly higher during the day are ideal. Many people summer their plants outdoors in a shady location and bring them indoors after bud set to enjoy during the holidays.
Caring for Holiday Cacti

Holiday cacti are as easy to grow as most houseplants. These easy instructions can help your Christmas cactus become part of your holiday traditions for years to come.

  1. Use general all-purpose container potting soil and a pot with sufficient drainage to protect the roots.
  2. Keep the soil moist while the cactus is blooming and allow it to become mostly dry while resting before watering again.
  3. Fertilize “weakly, weekly” while flowering. Otherwise, water every other month without fertilization.
  4. Place the cactus where it will receive bright indirect light for 6-8 hours a day. Avoid direct sunlight that can burn the plant.
  5. Transplant the cactus to a larger container when roots are very tight and blooming is less vigorous.

A holiday cactus can be a fine addition to any winter decorations, or by itself it will brighten any room for weeks with its bold, colorful blooms. With proper care, you’ll enjoy your cactus for many holiday seasons.


Rotating Your Vegetable Crops

Whether you just plant a few tomatoes, herbs and some lettuce or an elaborate garden complete with exotic selections of lesser known veggies, you’ll want to rotate your crops each year. All types of vegetable crops – brassicas, onions, legumes and root crops – require a slightly different blend of nutrients and trace elements, even if their light and water requirements are similar. If you always grow your tomatoes in the same place, eventually the soil will become exhausted of the nutrients that tomatoes require the most, and the crop will become weaker and less productive. Meanwhile, another vegetable could easily thrive in that location and its growth would help replenish the nutrients that tomatoes may need in future years. If you rotate crops in and out, you’ll enrich the soil and enjoy larger, more productive, more flavorful harvests.

The easiest way to rotate your vegetables is to use a 3-year plan. First, you’ll need to decide which vegetables you plan to grow, then divide them into these three main groups:

Group 1:
Peas
Beans
Celery
Onions
Lettuce
Spinach
Sweet Corn
Tomatoes
Zucchini

Group 2:
Cabbage
Cauliflower
Broccoli
Kohlrabi
Rutabaga
Turnip
Radishes

Group 3:
Beets
Carrots
Parsnips
Potatoes

It’s all right if you don’t plant to grow vegetables from each group. Simply adjust your rotation plan to compensate, or even consider trying out a new vegetable to complete the rotation and expand the variety of your garden.

Next, draw a plan of your garden and mark where each group of plants will go, keeping in mind the light and watering requirements of different varieties. It may help to sketch out the boundaries of each group, noting which plants are part of which rows, boxes, containers or beds. Keep those notes and sketches in your garden journal, and also take notes throughout the growing season about which plants perform best and which may be struggling. Next year, move the plants accordingly to shift where different crops are located. If you choose to add new vegetables to your garden, start them in the location with their appropriate group and bring them right into the rotation scheme.

As you rotate crops each year, you will notice consistently lush, healthy plants, bountiful harvests and delicious produce. After a few growing seasons, rotating your vegetable crops will be second nature and will be an important part of your gardening plan to ensure only the best comes from your garden.


Size Up Your Site: A First Step in Planning Your Landscape

Whether you plan your garden from start to finish or use a professional designer, a few simple steps can help you assess your property’s potential to develop the landscape of your dreams. By getting involved in the landscape design process, you can address practical problems, structure your outdoor living space and develop a plan that will reflect your taste and lifestyle.

Surveying Your Site

Every yard, garden and landscape site will have differing light conditions, grade changes, varying soil conditions and existing plants and structures to consider when planning changes and expansions. Using a loose-leaf binder, take notes on each of the following:

Overall:

  1. What are your favorite spots in your yard and why? What your least favorite and why?
  2. In landscapes, do you generally prefer open on enclosed spaces?
  3. What existing plants do you want to preserve, and which do you want to remove?
  4. What is the architectural style of your home? What is your decorating style?
  5. Are you planning any additions to your home that may take away yard space?
  6. Do you want special areas for children, entertaining, pets, recreation, vegetable gardening, water features or composting?
  7. What is your time frame? Do you want a short-term or long-range plan?
  8. Which building materials do you like – brick, wood, stone, pavers, etc.?
  9. Is your outdoor lighting adequate for your use?
  10. Do you need to screen an area for wind, noise or an unwanted view?
  11. What is you landscaping budget (both short- and long-term)?
  12. How will your landscape use change over time, such as when children grow up?

Specific Areas:

  1. What is the light condition of the area? How does it change seasonally?
  2. How is the soil – well-drained, poor, heavy clay, poorly drained, etc?
  3. What are the dimensions of a confined area that could affect plant size?
  4. What are your favorite plants or types of plants?
  5. Would you like a garden accent or other feature in this area (trellis, arbor, sculpture, bench, pond, etc)?
  6. What is the pH and general condition of the soil?

Once you have taken adequate notes, you’ll have a much better understanding about the overall layout of your landscaping site. This can help you plan the best options without making costly or time-consuming mistakes, such as planting the wrong tree that will outgrow a corner in a few years, or choosing building materials that won’t stand up to your climate.

More Tips for Landscape Surveying

You can never have too much information at your fingertips when you are surveying your site for landscaping changes. More techniques that can give you all the information you need include…

  • Photographing your property. Snapshots can reveal what the eye may overlook, and can be useful to show others to get their unique perspectives. Take views from your house and various areas of your property. Include photos from different times of day.
  • Measure everything and mark it on a map. You can use graph paper to create a simple sketch that will show dimensions so you can properly size your landscaping plans.
  • Make a sketch that shows what is existing (plants & structures) and where it is located. This will help you figure out what features you want to preserve, what you may want to expand and what you would rather remove and how the space will change.

Sign up for our Landscape Design Classes on our event page. Bring your information in – we can help you choose the best plants, accents and accessories suitable to your needs, style and budget for the landscape of your dreams!

Forcing Bulbs for the Holidays and Beyond

Blooming baskets and pots of brightly colored forced bulbs make a fabulous holiday or winter gift for others and ourselves. What better way to dress up the holiday home or cheer up a long, cold winter, reminding us of impending spring?

The forcing process should begin in September or early October if you want the bulbs to be blooming when given in late November or December. If you are starting late, no worries, just print these easy instructions to give with your potted bulbs and let the recipient do the rest.

Forcing Bulbs in 10 Easy Steps

  1. Count backwards from the desired bloom date the number of weeks required for bloom plus the number of weeks required for cooling. This is the planting date. To use your forced bulbs as a blooming Christmas gift, you will have to plant in September.
  2. Select a container that has drainage holes and is at least twice as tall as the unplanted bulb. There is an exception for paperwhites that you plan to grow in stone. These should be placed in a container without drainage holes.
  3. Mix a good bulb fertilizer into your potting soil according to directions on the package.
  4. Fill enough of your container with potting soil so that when the bulb is placed on top of the soil the tip of the bulb sits slightly above the lip.
  5. Place your bulbs on top of the soil. Keep them close without touching each other or the container.
  6. Continue to fill the area between the bulbs with soil. Fill until slightly below the lip.
  7. Water the soil gently, allowing excess to drain.
  8. Refrigerate potted bulbs for the appropriate amount of time. Check frequently and water as necessary to keep the soil moist.
  9. Gradually acclimate planted bulbs to a warm, bright location when their required cooling time has been completed. Move back out of direct sun and into a cooler location when the bulbs finally flower to prolong the blooms.
  10.  Rotate container frequently to produce straight stems.

Post Bloom

After flowering, cut back flower stems and place your containers back in full sun. Continue to water until the foliage dies back naturally. When the foliage is completely spent, place containers in a cool, dry place until early next fall when the bulbs may be safely planted into the garden. Forced bulbs cannot be forced a second time. Paperwhites will never bloom again and should be discarded after forcing. Previously forced bulbs, after planting in the ground, may skip a year’s bloom but will eventually return to their former beauty and regular schedule.


Anti-Desiccants: Why, What, and When

Use Bonide Wilt-Stop to protect live evergreens, fresh cut evergreens, newly transplanted shrubs and tender bulbs from drying out during harsh winter weather.

You’ve removed late-autumn weeds, layered on the mulch, pruned appropriately, possibly even covered or wrapped your plants – so why do some still die in the winter, despite all your well-meaning efforts?

Many plants die during winter because they dry out, or desiccate. As temperatures drop, the ground freezes and plant roots cannot take water from the soil, no matter how much snow may fall. This causes the plant to use stored water from the leaves and stems as part of the transpiration process, during which water exits the plant through the leaves. If the sun is shining or the wind is blowing, transpiration increases and more water exits the leaves. If no water is available and transpiration continues, the plant will soon die. Because evergreen plants do not drop their leaves, they are especially susceptible to this death.

Preventing Desiccation

How can you help your plants stay well-hydrated through the frozen drought of winter? The first step is to remember healthy plants in the summer survive the hardships of winter far better than sickly or stressed plants. Through the spring, summer and fall, you should always be on the lookout for signs of pests, diseases and damage, and take all necessary steps to keep your plants thriving.

Second, be sure to water well even when temperatures begin dropping below freezing. Later, if the ground thaws, water before the ground refreezes. Water slowly to provide a deep drink without waterlogging the roots, however, so they are not damaged by ice.

The third step is to use an anti-desiccant, also called an anti-transpirant like Bonide Wilt-Stop, to reduce the moisture loss from the leaves and needles. Because broadleaf evergreens such as boxwood, aucuba, holly, rhododendron, many laurels, Japanese skimmia and leucothoe do not drop their leaves, they are especially vulnerable to winter death. Using a product such as Wilt-Stop to reduce transpiration by protecting the pores will save many broadleaf evergreens.

When using any horticultural product, be sure to check the label and follow all instructions properly. Some conifers such as cedar, cypress, juniper and pine may benefit from these products. However, be sure to read the instructions to prevent burning specific conifers. Also, do not use on “waxy” blue conifers, such as blue spruce, which already have an oily protective film on the nettles.

Here are a few reminders to get the best protection from an anti-desiccant:

  • Plan to apply when day temperatures begin dropping below 50⁰ Fahrenheit. Apply when temperatures are above freezing on a dry day with no rain or snow anticipated within 24 hours. This allows the product to thoroughly dry. Spraying in freezing temperatures will cause plant damage.
  • Do not spray conifers until thoroughly dormant, generally in late winter. This prevents trapping moisture in the needles which could burst when frozen.
  • Generously apply to dry leaves and needles. Don’t forget the undersides. Spray from several angles to ensure complete coverage.
  • Because the anti-desiccant will break down in light and warmth, reapply in late winter on a dry day when temperatures are above freezing for at least 24 hours.

Beyond Winter Drought

Other than protecting your landscape evergreens from winter drought, there are other uses for anti-desiccants. Many gardeners use it to protect newly transplanted shrubs from drying winds and sunshine as they settle in. It also provides protection to tender bulbs going into storage. A quick spray in early winter protects rose canes and hydrangea stems. Spraying onto live or cut Christmas trees and carved pumpkins slows the drying process, making them last longer for greater holiday enjoyment.

To answer your questions, or to choose the best product for your landscape plants, come in to discuss anti-desiccants with one of our friendly and knowledgeable staff members. Together, we can reduce the number of plants you lose to the dryness of winter and keep your garden beautiful and healthy.


Dormant Pruning With the Proper Tools

Late winter pruning is often recommended for many trees and shrubs. Pruning the plants while they are dormant is less stressful for the plant and it’s also easier to view the structure of deciduous trees and shrubs without leaves to ensure the pruning helps create the desired shape. It’s also a time of the year when late winter sunshine makes us all long to be in our gardens and pruning is an excellent job to get us out there.

Pruning Tools

To get out and get pruning, you will need the proper tools. There are several types of pruners that should be in every serious gardener’s tool shed.

  • Hand Pruners
    The simplest tool, but the hardest to choose, is the hand pruner. There are two distinct styles of hand pruners: the anvil type and the bypass. The anvil pruner is good for pruning deadwood or undesirable growth. For more valuable specimens anvil pruners tend to smash the wood during cutting, leaving the wound open to insects and disease. Bypass pruners are like a pair of scissors and give you an easier, cleaner healthier cut. Different hand pruners are available in different sizes and grip styles, including options for both right-handed and left-handed gardeners. To get the best results, it is important to choose a hand pruner that feels comfortable but still provides adequate strength for the job.
  • Lopping Shears
    Another tool that comes in handy is the lopping shear. They are used for making larger cuts up to 1-1/2″ in diameter, and have longer handles to provide more power without stress or strain. The longer handles also provide a better reach than hand pruners. They are also excellent for clearing away undesirable growth in your yard, including trimming hedges.
  • Pole Pruners
    The last tool you’ll need is a pole pruner. It is a combination lopping shear and pruning saw. The pole pruner extends out to twelve feet and can be used for making small cosmetic cuts or larger limb removals without needing to set up a ladder. Pole pruners are also useful in dense canopies when using a ladder would not be practical or suitable.

To learn more about pruning specific trees or shrubs and to choose the appropriate tools for the job, please stop in or give us a call. We’ll be happy to help you be sure you are equipped to make clean, appropriate cuts that will help your trees and shrubs look their very best.


Flirting with Spring

In January and February, winter flirts with spring. Despite snow on the ground, there will be occasional warm days, balmy breezes and stunning blue skies that remind us of the rich colors of spring. On these flirtatious days, quince, forsythia and pussy willow begin to emerge from dormancy. With this slight swelling of buds, it is time to cut a few branches to bring spring indoors, so even when winter reappears with the next freeze or storm, we’re reminded of the warmer times to come.

Forcing Branches

Just like forcing bulbs, forcing branches will bring their buds into full beauty even if the outside weather isn’t quite right yet. To force branches, select plants that have set their buds in the fall or early winter. Look for branches with plump flower buds, and cut branches that you would have normally pruned in order to preserve the shape and health of the plant.

Next, scrape about 2 inches of the bark from the pruned end of the branch and make a 3-5 inch cut up the branch (lengthwise from the pruned end) to allow water to be absorbed. You can also split the end by carefully hammering it, but avoid crushing the tissues. Fill a tall container or vase with room-temperature water and floral preserver, then place the cut branches in it. Place the arrangement in a dimly lit room for 2-3 days, then move into a brighter area (but no direct sunlight). Change the water and cut 1 inch off the bottom of the stem each week. Mist the branches daily. Although they may take up to 3 weeks to bloom, the delightful bursts of color will be a celebrated reward for your time and efforts.

Flowering Branches for Forcing

Depending on when you want your buds to bloom, there are a variety of great branches you can work to force into brilliance even when spring is weeks away.

Early bloomers…

  • Witch Hazel
  • Cornelian Cherry
  • Forsythia
  • Pussy Willow
  • Azalea
  • Flowering Quince

For Later Blooms…

  • Magnolia
  • Apple
  • Crab Apple
  • Flowering Dogwood
  • Hawthorn
  • Red Bud
  • Mockorange

 Decorating With Forced Branches

There are many different ways you can add a little spring glory to your interior décor with forced branches. Consider…

  • Using blooming branches in lieu of any flowers in vases.
  • Putting shorter branches in bud vases on a windowsill.
  • Adding branches to candle centerpieces or other arrangements.
  • Twining thinner branches around a wreath form.
  • Using the tallest branches in a tall, thin floor vase.

Spring will be here before you know it, and you can speed it along when you force branches to enjoy their blooms a few weeks early!


Birdscaping

As wildlife habitats are threatened by development, the creation of a bird-friendly environment that provides food, water and shelter is crucial to the existence of our wild bird population. Caring for our feathered-friends is an educational and enjoyable activity for the entire family that brings beauty and song to our lives.

Benefits of Wild Birds

Birds are great guests to have in your yard, garden or landscape, and they provide more benefits than many homeowners and gardeners realize. Wild birds can…

  • Control insects by feasting on both flying and crawling insects, as well as spiders, slugs, snails and other creepy-crawlies.
  • Pollinate plants by flitting from flower to flower as they seek out insects or eat seeds, taking pollen along between blooms.
  • Manage weeds as they consume copious amounts of weed seeds before the seeds ever have a chance to sprout.
  • Control rodents when raptors visit the yard in search of mice, rats, gophers, voles or other unwanted pests.

Attracting Backyard Birds

Fortunately, it is easy to attract a wide variety of backyard birds when you offer them what they need most – food, water and shelter.

Food for Birds

Wild birds rely on both natural and supplemental food supplies so it is important to consider both when birdscaping. Feeding the birds is most important in the winter when natural food is scarcer, but they will visit feeders at any time of year. Migratory birds require additional food in the spring and fall as they pass through the region and nesting birds will utilize feeders in the summer.

Tips:

  • Provide a variety of natural foods for birds by planting berry bushes, seed-bearing flowers, nectar-rich flowers and sunflowers. Leave windfall fruit on the ground for birds to nibble. Minimize pesticide use so birds can feast on insects as well.
  • Add supplemental feeders to your yard, such as birdseed feeders, suet feeders and nectar feeders. Clean feeders weekly to avoid mold that can be dangerous to birds, and be sure feeders are full when birds need them most.

Water

Improve your backyard bird habitat by adding water. Birds require a constant supply of clean water for drinking and bathing. This is especially important in late summer, when water is scarce, and in the winter, when it is frequently frozen.

Tips:

  • Place bird baths in a protected location safe from predators, and keep the baths filled at all times so a fresh supply of water is constantly available.
  • Scrub off algae as soon as it is appears and thoroughly was the bird bath each week to minimize feces contamination or other messes in the water.
  • Provide motion for greater attraction by using a bubbler, wiggler, dripper or fountain. Birds will see the sparkles of the moving water and will hear the splashes from great distances, so more birds will visit.
  • Use Mosquito Dunks to safely prevent mosquito larvae in warm weather. A clean bird bath with moving water will also harbor fewer insects.
  • Add an outdoor-safe submersible heater to the bath in winter to keep the water liquid instead of frozen, or consider using a fully heated bird bath during the coldest months.

Shelter

It is important to offer safe and comfortable shelter for your wild birds to nurture their young, protect them from predators and shield them from the elements. Planting evergreen trees and shrubs and providing bird houses, along with roosting boxes and pockets, are all beneficial additions to your birdscape.

Tips:

  • Choose both deciduous and evergreen landscaping trees and shrubs to offer birds different types of shelter in all seasons.
  • Minimize pruning to give birds denser, more secure shelter to take advantage of when they feel threatened.
  • Plant in layers and create thicket-like pockets or corridors in your landscape so birds can move around freely without feeling exposed.
  • Supplement the shelter in your yard with good quality bird houses, winter roost boxes or nesting pockets to give birds even more options to stay safe and secure.

When you meet birds’ needs for food, water and shelter, your birdscape will soon be home to a fun and friendly flock of backyard birds.

Spruce Up for the Holidays

From the Fir Family come some of our most beloved Christmas trees, the Colorado, Norway and White Spruce varieties. Both the Colorado and Colorado Blue Spruce have a nice pyramidal shapes with strong limbs that can hold heavy ornaments or light strands. The Colorado Blue is set apart by its stunning steel-blue foliage. The Norway Spruce has short, soft, deep green needles and the White Spruce possesses a robust full form. Both the Norway and White Spruce should be purchased planted in containers or balled and burlapped as they tend to lose their needles quickly when cut.

Beyond the holidays, spruces make a lovely addition to any landscape. When viewed in the northern forests, these majestic, needled evergreens are glorious with their graceful, symmetrical, conical forms. Smaller landscapes may also enjoy the merits of this genus with the many slow-growing and dwarf cultivars that are commonly offered, many of which are also ideal when selected as living holiday trees. Larger spruces work wonderfully planted in a row as a windbreak but shine equally as well when chosen as a specimen plant. Added benefits include deer resistance and salt tolerance.

Caring for Your Living Christmas Tree

If you do opt for a bagged, balled or potted spruce, there are certain steps you need to take so they can survive the rigors of the holiday and be ready for planting. 

  1. Only leave a live spruce tree inside the house for a maximum of 5-7 days.
  2. If possible, place the tree in a garage, carport or sheltered area to help acclimate it to a warmer location before putting it into the house. Keep the root ball moist.
  3. Before bringing indoors, spray the tree with Wilt-Pruf to help keep it from drying out.
  4. Place the tree in a tub of 2 inches of water and cover with newspaper or mulch to retain moisture.
  5. Place the tree away from heating vents, wood stoves and baseboard heaters.
  6. Check water level daily and refill as needed.
  7. Prepare your planting hole outside by digging it early and covering with plywood until needed. Store soil in the garage so it does not freeze.
  8. If possible, acclimate the tree once more by putting it in a garage or sheltered area for a few days before planting outside. Continue to keep the root ball moist.
  9. Plant the tree as you normally would, mulch and water well.

Growing Tips 

  • Plants require full sun, good air circulation and moist, well-drained, acidic soil.
  • Spruces are shallow-rooted and should always be planted high rather than low.
  • Mulch the root zone with a thick layer to keep plant roots cool and moist.
  • Consider available space and ultimate size of the chosen variety before planting.

 Since we are interfering with the natural growth cycle of these trees, their survival through the season cannot be guaranteed. However, customers who have purchased living trees from us and followed the guidelines have reported 80-85 percent success rate with the trees thriving in the spring. It is fun to look out into your yard at trees from Christmases past!


Daylilies… Easy to Grow, Fun to Collect!

Few perennials can match the daylily (Hemerocallis) for versatility and durability. One of the most popular perennials, daylilies have become a collector plant for novice and experienced gardeners alike. Thousands of named cultivars are trouble-free to grow and adaptable to many conditions, which makes daylily collecting fun and easy. Although each lily-like flower lasts only one day, there are always more buds to open which provide summer color and a subtly changing garden for many weeks.

Using Daylilies

Just as there are many different daylilies to try, there are many different ways to try them. Plant them individually for a pop of color, or create a mixed border with other plants or multiple daylily types. Daylilies can be a fun surprise when naturalized in a grassy area or grouped in a mass as a groundcover over larger areas. Taller varieties can even become simple screens or create gentle privacy surrounds. The creative gardener may even use multiple daylilies to create fun patterns or pictures in a themed flowerbed.

Daylily Care

Daylilies tolerate dry, poor soil, but perform best and reach their full potential in rich well-drained beds. Different cultivars have different needs for sunlight, moisture and fertilizing, and while these flowers do well even if somewhat neglected, it is best to try to meet their needs so each bloom can flourish. Some will tolerate drought and frost better than others, while certain cultivars need more attention. All are quite low-maintenance, however, and will thrive for years even in marginal conditions.

Daylily Fun Fact:

The American Hemerocallis Society has classified daylilies by flower size. A miniature has flowers less than 3” in diameter, small-flowered cultivars have flowers from 3-4.5” and large-flowered cultivars have flowers 4.5” or larger.

Daylilies
Daylilies
Daylilies

Seed Starting

Starting seeds indoors is a rewarding gardening experience and can help extend your growing season to include more plant varieties than your outdoor season may permit. Furthermore, a larger selection of seed varieties doesn’t limit your opportunities to growing only those transplants that are available at planting time. The key to success in growing seedlings is in creating the proper environment.

What Seeds Need

Seeds are generally hardy, but to start them properly they do need gentle nurturing so they can produce healthy, vibrant plants. In general, seeds should be started 4-6 weeks before the recommended planting time so the seedlings will be large and strong enough to withstand the stresses of transplanting. Use a sterile growing mix which is light enough to encourage rich root growth. Sow the seeds thinly and cover lightly with sphagnum peat moss. Water using a fine spray but do not soak the seeds – they also need oxygen to germinate, and if they are overwatered they will drown. Cover the container with clear plastic to hold the moisture and increase humidity. Place the containers in a warm (70-80 degrees) spot and watch daily for germination. The top of the refrigerator is often an ideal location. When the first seeds germinate, place the seedlings in bright light or under artificial lights (tube lights should be 2-3″ from seedling tops) for several hours each day, since late winter sunlight will not usually be sufficient to prevent weak, leggy seedlings. Daytime temperatures should range from 70-75 degrees. Night time temperatures should range from 60-65 degrees.

As Seeds Grow

When the seedlings develop their first true sets of leaves, add half-strength water soluble fertilizer to their water – organic fish emulsion or seaweed fertilizers are great to use. Repeat every second week to provide good nourishment. Thin the seedlings or transplant them to larger containers as they grow. Before planting outdoors, harden-off the plants at least one week before the planting date. Take the transplants outdoors in the daytime and bring them in at night if frost is likely. Gradually expose them to lower temperatures and more sunlight. The use of hotcaps and frost blankets to cover early plantings will also aid in the hardening off process so the seedlings can adjust well to their new outdoor environment.

Transplanting Seeds

Transplant seedlings into the garden after the safe planting date on a calm, overcast day. Pack the soil around the transplant with as little root disturbance as possible. Sprinkle the plants with water, keeping the soil moist until the plants become established.

Popular Indoor Seed Start Dates

The exact dates you want to start seeds will vary depending on your local growing season, the varieties of plants you choose and what their needs are. In general, dates for the most popular produce include…

Vegetable Seed Starting Dates

  • February – Asparagus, celery, onion
  • March 1 – Broccoli, Brussels sprouts, cabbage, cauliflower, collards, kale, lettuce
  • March 15 – Eggplant, peppers, tomatoes
  • April 1 – Summer squash
  • April 15 – Cantaloupes, cucumbers, winter squash

Flower Seed Starting Dates

  • January/February – Begonia, carnation, geranium, impatiens, nicotiana, pansy, rudbeckia, salvia, snapdragon, verbena, vinca
  • March 1 – Ageratum, dahlia, dianthus, petunia
  • April 15 – Aster, calendula, celosia, marigold, zinnia

Use seed starting dates as a general guide to ensure your seeds have plenty of time to reach their full harvest potential before the weather turns in autumn. At the same time, consider staggering seed starting every few days to lengthen your harvest and keep your favorite vegetables and flowers coming even longer during the growing season. As you gain more experience with starting seeds, you’ll be able to carefully plan your seed calendar to ensure a lush, rich, long harvest season.


Family Gardening: Attracting Wildlife to the Garden

Attracting wildlife to the home garden is an enjoyable and creative way to teach children about nature, evoke their respect for the environment and provide meaningful family together time. Many things that are good for wildlife are equally good for a wholesome, thoughtful garden – win-win!

 Covering the Basics

 All wildlife – butterflies, birds, squirrels, snakes, deer, etc. – requires three things for survival: food, water and cover. When you meet these basic needs in the garden, you can expect a variety of visitors.

  • Food
    Native trees, shrubs, vines and wildflowers provide the foliage, nectar, pollen, berries, seeds and nuts that wildlife requires to survive and thrive. As an added advantage, natives are well adapted to their particular geographic area and therefore are more disease and pest-resistant and generally require little extra fertilization, supplemental watering or other maintenance.There will be times when natural food sources are not readily available, especially in late winter when many stores of food are exhausted or early spring before natural supplies are replenished. This is when it is most important to provide supplemental sources of food using bird, squirrel and butterfly feeders to add to the native food sources for resident and migrating wildlife.
  • Water
    All wildlife requires a source of clean water for drinking and bathing. Many of us do not have a natural water source on our properties but this situation is easily remedied by adding a garden bird bath or water dish. With larger landscapes, adding a pond, fountain or pondless waterfall is an ambitious and rewarding project that will greatly enhance your efforts to increase the wildlife population. If space and your budget permits, you might even consider a tiered stream or other extensive feature.
  • Cover
    Wildlife requires a place to hide from predators, shelter in inclement weather and a secluded place to birth their young. Trees, both dead and alive, are perfect for hiding, nesting and perching. Leafy and thorny shrubs also provide wildlife protection and a suitable hiding place. Tiers of plants are most desirable, and thicker, denser plantings such as thickets or groves will be very attractive. Even if you have plenty of vegetation already, the addition of bird and bat houses will increase areas of wildlife safety in your landscape.

Native Plants to Benefit Wildlife

All types of plants, from trees to vines to shrubs to flowers, can provide food, water and cover to wildlife, but some plants are more useful than others. These handy lists can help you choose the best options for your landscape and the type of help you want to give backyard birds, butterflies, squirrels, deer and other visitors.

Note: “Seed” denotes abundant seeds that are attractive and nourishing for wildlife; “Nectar” denotes blooms butterflies and hummingbirds will sip from; “Fruit” denotes berries or other small fruits to feed wildlife; “Host” denotes a nourishing host plant for butterfly larvae.

Still not sure about the best plants for your backyard wildlife? Come on in and we’ll help you select just the plants you need for the wildlife you want to welcome to your yard!

Our product availability varies each day, so if you’re looking for something specific, feel free to give us a call ahead of your visit.