Author Archives: Dammann's Garden Center

Strawberries: Home Grown in Hanging Baskets

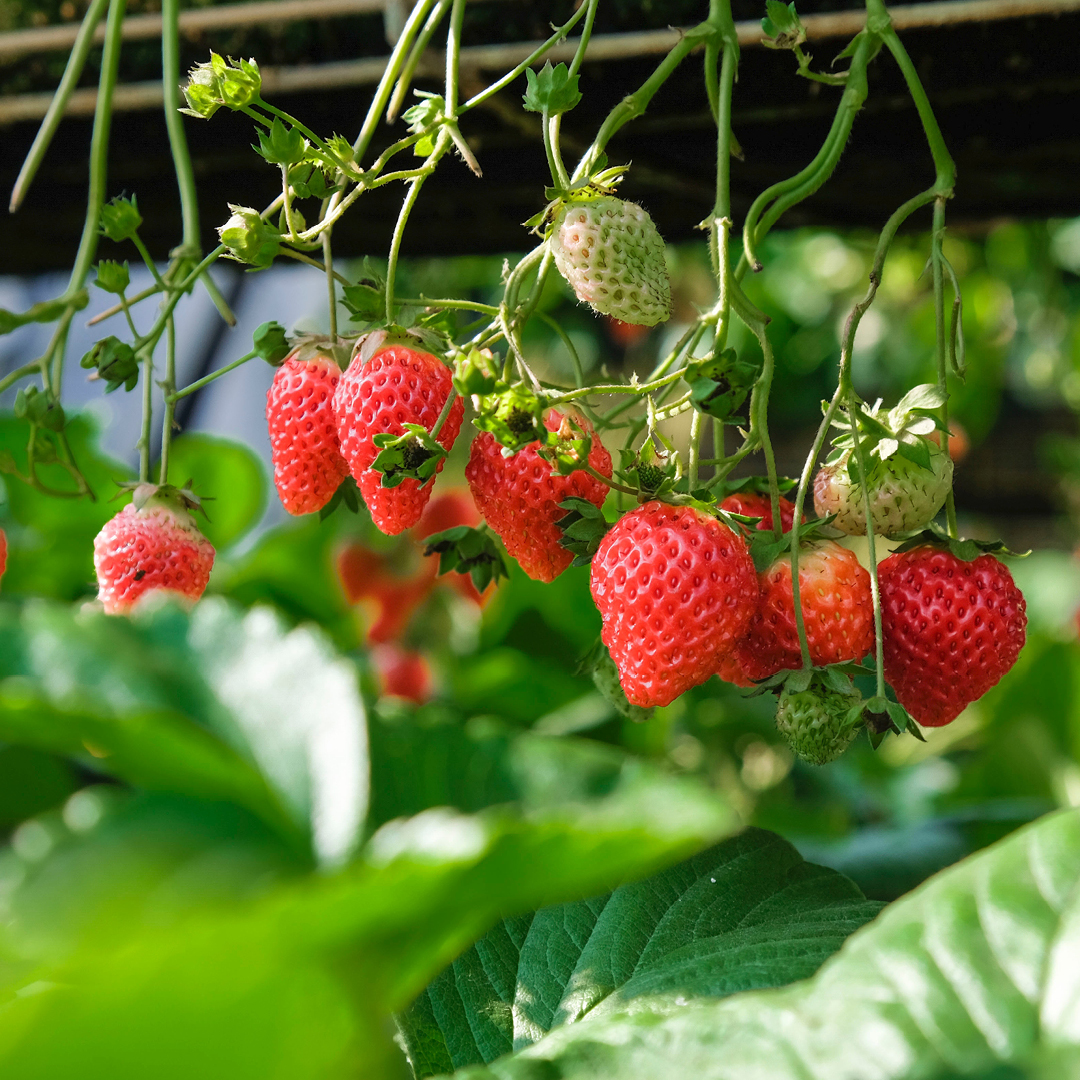
Do you grow strawberries? Ripe, sweet, juicy strawberries are the number one favorite fruit in the US and are definitely worth the garden space. However, if you have a small or limited growing space, raising strawberries in hanging baskets offers a creative and space-saving solution while adding a decorative touch to outdoor areas.

Benefits of Growing in Hanging Baskets

  • Space Efficiency: Hanging baskets utilize vertical space, making them ideal for small gardens, balconies, and such.
  • Ability to Relocate: If an unforeseen deep frost or a scorching day arrives, hanging baskets may easily be temporarily relocated to a frost-free or cooler location.
  • Pest Management: Elevating strawberries can help deter pests like slugs and snails, reducing the risk of plant damage.
  • Improved Air Circulation: Hanging baskets allow for better airflow around the plants, which can help prevent diseases such as mildew.
  • Increased Water Drainage: Water drains quickly and easily from most hanging baskets, helping to prevent root rot.
  • Easy Access: Harvesting strawberries from hanging baskets is convenient and doesn’t require bending or stooping, making it suitable for gardeners of all ages and abilities.
  • Aesthetic Appeal: Hanging baskets add visual interest to your garden or outdoor space, providing a beautiful display of cascading foliage and ripe berries.

Selecting the Right Varieties:

Choose strawberry varieties that are well-suited for container gardening, such as Alpine, Day-neutral, and Everbearing. Alpine types do not produce runners, while Day-neutral and Everbearing types produce few runners, thus putting their energy into increased fruit production. It is best to avoid June-bearing types when planting in hanging baskets, as they produce excessive runners at the expense of fruit production. Also, consider factors like flavor, size, and yield when selecting varieties.
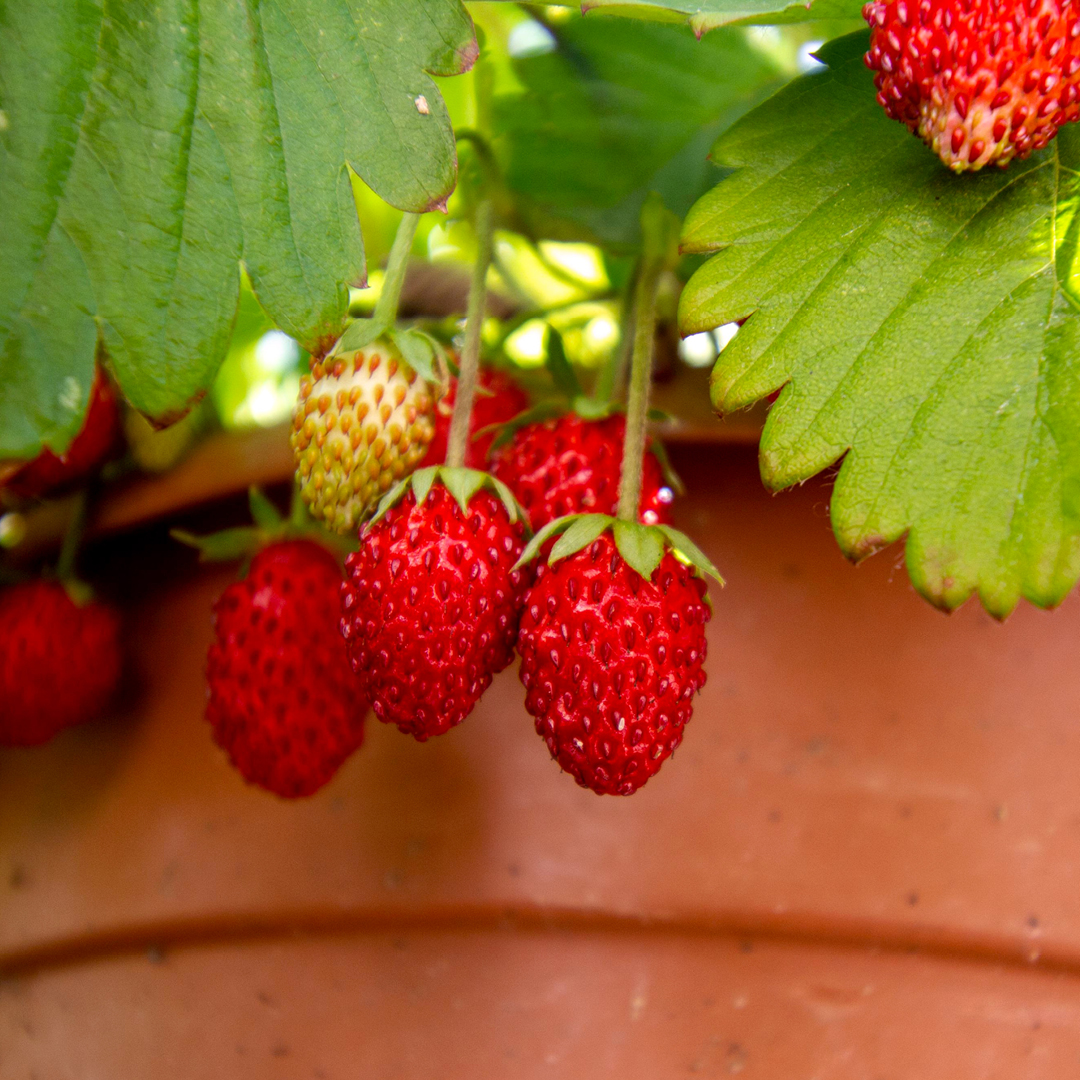
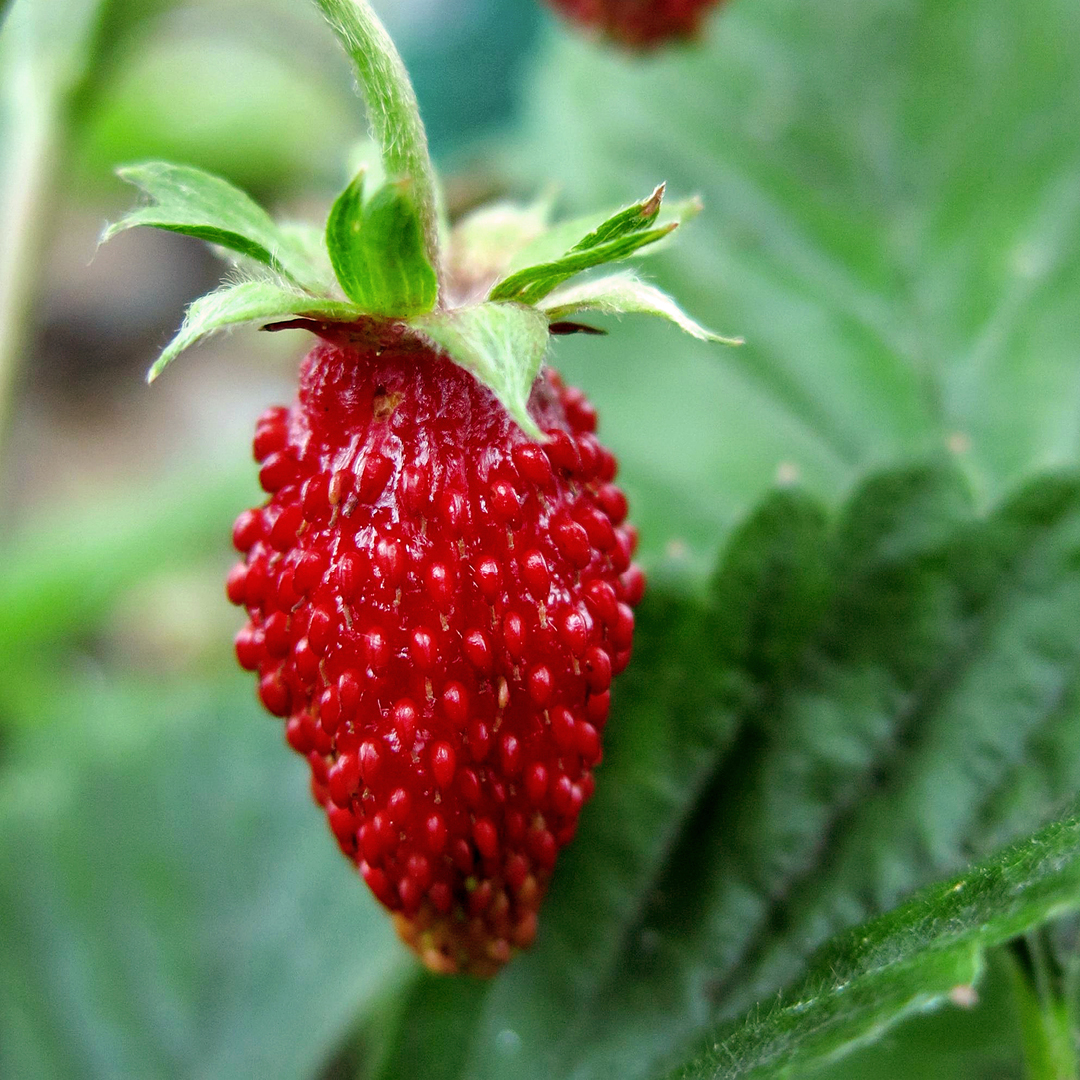
Alpine

Alpine strawberries are delightful little fruits that pack a punch of flavor despite their small size. What sets Alpine strawberries apart is their intense sweetness and aromatic fragrance. They typically have a more concentrated flavor compared to their larger counterparts, making them a favorite among gardeners and fruit lovers.

These plants are also known for their ability to produce fruit continuously throughout the growing season, ensuring a steady supply of delicious berries for eager growers.

Here are three popular varieties of alpine strawberries that thrive in hanging baskets:

  • Alexandria
    This variety is prized for its sweet, aromatic berries and vigorous growth habit. ‘Alexandria’ produces an abundant yield of small, deep red fruits that pack a punch of flavor. They have a lovely trailing nature, which creates an attractive cascade of foliage and fruit. With proper care, ‘Alexandria’ plants can produce fruit continuously throughout the growing season, providing a steady supply of delicious strawberries for snacking or culinary use.
  • Mignonette
    Renowned for its intense strawberry flavor, ‘Mignonette’ Alpine strawberries are a favorite among gardeners. These petite, ruby-red berries boast a rich, complex taste reminiscent of wild strawberries, making them a delightful addition to desserts or salads or enjoyed fresh off the vine.
  • Ruegen
    With its vigorous growth and prolific fruit production, ‘Ruegen’ Alpine strawberries are a popular choice for hanging baskets. This variety produces medium-sized, bright red berries with a sweet, tangy flavor that is simply irresistible. ‘Ruegen’ plants feature cascading stems adorned with delicate foliage and clusters of berries, creating a picturesque display in hanging baskets.

Everbearing & Day-neutral

Everbearing strawberries typically produce two to three harvests of fruit each year: one in late spring to early summer, another in midsummer, and sometimes a third in early fall. They initiate flower buds in response to day length, meaning they typically produce their main crop in the spring and a smaller crop later in the season. After the initial flush of fruit, everbearing varieties may produce sporadic berries throughout the summer and into the fall. However, their fruiting is influenced by day length, so they may slow down or stop producing during the hottest months of summer.

On the other hand, Day-neutral strawberries are less dependent than Everbearing strawberries on day length for flowering and fruiting. Instead, they produce fruit consistently throughout the growing season, regardless of day length. Day-neutral varieties initiate flower buds based on temperature rather than day length, allowing them to flower and fruit continuously as long as temperatures remain within their preferred range. This makes them ideal for regions with mild climates where temperatures stay relatively consistent throughout the year. Day-neutral strawberries typically produce smaller harvests of fruit compared to everbearing varieties but over a longer period of time.

Here are our favorite everbearing and day-neutral strawberry varieties popular for growing in hanging baskets:

  • Seascape
    ‘Seascape’ strawberries are prized for their exceptional flavor, firm texture, high yields, and compact size, making them a top choice for hanging basket growth. These berries boast a perfect balance of sweetness and acidity, making them excellent for fresh eating, preserves, or adding to desserts.
  • Tristar
    Loved for its robust flavor and reliable performance, ‘Tristar’ strawberries are known for their intense sweetness and juicy texture, making them a delightful addition to salads and desserts or enjoyed fresh off the vine. ‘Tristar’ plants are compact and produce abundant fruit throughout the growing season, making them well-suited for small-space gardening and hanging baskets.
  • Evie-2
    ‘Evie-2’ strawberries are esteemed for their large, flavorful berries and vigorous growth habit. These berries are known for their sweet, juicy flavor and firm texture, making them perfect for eating fresh, baking, or preserving. ‘Evie-2’ plants are compact and produce fruit prolifically throughout the season.
  • Albion
    ‘Albion’ strawberries are known for their large, firm berries and high yields. They have a deliciously sweet flavor and are resistant to several common strawberry diseases. Their compact, runnerless growth makes them an excellent choice for hanging baskets where space is limited.
  • Quinalt
    ‘Quinalt’ strawberries are another everbearing variety that produces medium-sized berries with a sweet, juicy flavor. ‘Quinalt’ strawberries are also known for their high tolerance to heat, making them a great choice for growing in containers during the summer months.

Each of these strawberry varieties offers something unique, whether it’s compact growth, continuous fruiting, disease resistance, or ornamental appeal, making them excellent choices for growing in hanging baskets.

Hanging Basket

Damman’s Garden Center offers a fantastic assortment of hanging baskets. When making your selections:

  • Opt for hanging baskets with sufficient drainage to prevent waterlogging.
  • Select a hanging basket large enough to hold your strawberry plant(s).
  • Ensure the basket is sturdy enough to support the weight of the soil and plants once they’re fully grown.
  • Choose a hanging basket color and style that goes well with your house.

Soil Mix

  • Use a well-draining potting mix rich in organic matter.
  • If needed, incorporate perlite or vermiculite to improve aeration and drainage.
  • Consider adding slow-release fertilizer or compost for long-term nutrient availability.

Planting

  • Fill the hanging basket with the prepared soil mix, leaving enough space for the strawberry plants.
  • Gently remove the strawberry plants from their pots and carefully separate any tangled roots.
  • Plant the strawberries in the basket, ensuring the crown (where the roots meet the stem) sits just above the soil level.
  • Space the plants evenly to allow for proper growth and airflow.

Watering and Care

  • Provide adequate sunlight exposure, aiming for at least 6-8 hours of direct sunlight per day.
  • Water the strawberries regularly, keeping the soil consistently moist but not sopping wet.
  • Mulch the surface of the soil to help retain moisture.

Maintenance and Harvesting

  • Remove any runners (long stems that produce new plants) to encourage the development of larger berries.
  • Fertilize the plants every 4-6 weeks with a balanced liquid fertilizer, following the manufacturer’s instructions.
  • Harvest ripe strawberries as they become ready, typically when they reach a deep, vibrant color and are firm to the touch.

Growing strawberries in hanging baskets makes cultivation and harvesting a cinch. Gardeners can enjoy fresh, flavorful berries while maximizing limited space. Why not give it a try this spring?

Growing Vegetables in Pots

You don’t need expansive acreage to grow a thriving vegetable garden. In fact, growing vegetables in pots can be very productive and can bring a delicious, healthy harvest to your home no matter what type of garden space you may – or may not – have to work with.

Why Grow Vegetables in Pots?

Whether you have a balcony, fire escape, small patio, narrow stoop, or windowsill for your gardening efforts, there is always room for a pot or two of vegetables. Yet vegetable container gardening is about more than just saving space, and there are many benefits to using pots for your garden plot.

When using pots, for example, your garden space is much less likely to be overtaken by weeds, saving you time and effort. Pots are also easier to move around your space in order to take advantage of the best positioning for sun, rainfall, and weather protection. Pots and containers can also be more comfortable for you to tend without needing to bend down or kneel as much to reach your plants and harvest your vegetables.

Easiest Vegetables for the Urban Garden

There are many options for container garden vegetables. Ideally, choose cultivars that are dwarf, miniature, or compact whenever possible, as they will be better adapted to lush growth in pots and small spaces. Popular choices include:

  • Beans
  • Broccoli
  • Carrots
  • Chard
  • Chilies
  • Cucumbers
  • Eggplant
  • Kale
  • Leeks
  • Lettuce
  • Okra
  • Onions
  • Peas
  • Potatoes
  • Radishes
  • Spinach
  • Peppers
  • Tomatoes

Because you may have less growing space than a traditional garden, choose vegetables you love and that you will use to make the most of your gardening space. Also be aware of how much sunlight your pots will receive, how deep the pots are for roots or root vegetables, and whether the plants will need vertical space for climbing before you plant them. The more familiar you are with each vegetable’s growing needs, the better choices you can make for vegetables that will flourish in your urban garden.

Tips for Growing Vegetables in Pots

No matter which vegetables you choose to grow in pots, they will need proper care to reach their full potential for a bountiful harvest. To help your container vegetables thrive…

  • Choose the Proper Pot – Consider the root system of your favorite vegetables and choose a pot deep enough to allow the roots to flourish. If you are planting root vegetables, you will need a deeper pot that allows more space for veggie growth. Bear in mind that ceramic or clay pots can be very heavy, so plastic pots may be a more convenient and easier option.
  • Position the Pot for Good Sunlight – Many leafy vegetables do well in part-shade conditions, while other vegetables need greater amounts of sunlight for the best harvest. Putting pots on a plant caddy or stands with casters can make it easy to move each container for maximum sunlight throughout the growing season.
  • Provide Necessary Support – Vining and tall vegetables may need stakes, cages, netting, or trellises to support the plant and help it stay healthy. Using proper supports will also maximize your vertical growing space. It is best to have that support in place when the plant is young, so you do not accidentally damage roots when adding a support later.
  • Use the Best Soil – Because container vegetables don’t have as much soil to draw nutrition from, it is critical to use a high-quality potting mix when growing veggies in pots. Choose a mix that will maximize water retention to help with watering and mix in compost or appropriate fertilizer with the soil before you add your vegetable plants.
  • Water Adequately – All vegetables need adequate water for lush growth and veggie production. Depending on the pot size, plant type, and climate conditions, you may need to water vegetable pots daily or even twice per day to ensure they have good moisture. Consider self-watering containers to make this garden task even easier.
  • Feed Plants Properly – The right fertilization and feeding schedule can improve your plants’ health and increase the yield of even small vegetable pots. Choose a liquid fertilizer that will meet your plants’ needs and apply it according to the label directions for the best results that maximize the productivity of your vegetable plants.
  • Consider Combination Planting – It’s easy to plant different vegetables in the same pot, but take care to group plants with similar water, fertilization, and sunlight needs so each pot can get the proper care. Themed pots can be a fun way to add flair to your vegetable garden as well – try a salad pot, a pizza pot, or even a pot for pickles, each one with related herbs and veggies.
  • Stay Alert to Pests – Unwanted pests can invade even container gardens. Inspect your pots weekly for pests such as slugs, aphids, and leaf hoppers. It is best to use the safest solution available to control insect infestations. Also, in urban gardens, animals such as stray cats, dogs, or even rats can also be a problem and you should use cages or other techniques to protect your plants if necessary.

Growing vegetables in pots can bring you a delicious, nutritious harvest no matter what the size or location of your gardening space. By choosing vegetables adapted to containers and giving your pots the best of care, you’ll soon have an amazing crop to enjoy.

Early Spring Gardener’s Calendar

* Plan your summer vegetable and herb garden. We offer a wide selection of seeds that include all of your favorite annuals, perennials, vegetables and other novelties as well as many hard-to-find selections. Inventory your pots and flats and discard unusable ones. Make a list of the supplies you will need. Test your garden soil  for nutrient content. We offer a variety of do-it-yourself soil test kits.

* Prune woody plants while dormant, including fruit trees, summer- and fall-blooming shrubs and vines. Limit pruning of spring-blooming trees and shrubs to the removal of sucker growth and rubbing or broken branches. Spray trees and shrubs with year-round Bonide All Seasons Horticultural Oil to reduce insect population.

* Sharpen, clean and oil tools and lawn mowers. Begin heavy annual pruning of shrub roses as new leaves appear.

* Plant pansies and primrose as soon as the earth is workable. Plant strawberry plants. Sow cool-season vegetables and herbs in the garden. 

* Start spring cleanup and begin major lawn work. Remove debris, dethatch your lawn or aerate compacted areas to improve water penetration.

* Spray needles and limbs of Arborvitae, Cryptomeria, false cypress, fir, hemlock, Juniper, pine, yew and spruce (except blue spruce) for spider mites with Fertilome Dormant Oil.

* Apply fertilizer to perennials and roses with. Feed berry bushes, grapevines, rhubarb and asparagus a balanced 12-12-12 fertilizer before new growth begins. Fertilize trees and shrubs with Espoma Tree and Shrub fertilizer.

*Apply Bonide Weed Beater Complete to  control crabgrass. Do not use on newly seeded lawns.

* Continue spring cleanup. Cultivate to remove winter weeds and debris from the planting beds. Apply corn gluten or Preen specified for gardens and scratch it in to prevent future weeds. Do not use in gardens where you will be direct seeding.

* Reseed bare spots in established lawns with Dammann’s Special Grass Mix. Keep the area moist until seedlings appear, then mow when the new grass is 3″ high.

* Prune forsythia and other spring-flowering trees & shrubs after the flowers fall.

* Dig and divide crowded early spring bulbs after they finish blooming. Enrich the soil with Fertilome Bone Meal.

* Plant and transplant trees and shrubs, including roses, ground covers, and perennials.  Be sure to use Fertilome Root Stimulator to root your plants in properly.

* Transplant cool-season seedlings after hardening off into the garden mid to late March. When the soil temperature reaches 60 degrees in early May, sow warm-season vegetable and herb seeds.

* Place our gro-thru sets over peonies, grasses or any other perennials in need of support.

Putting on Airs: Tillandsias

Looking for something easy to grow? Tillandsias should be on the top of your list. Tillandsia is the largest genus in the Bromeliad family with over 650 species that vary in color, size, texture and shape. In their native habitat, Tillandsias attach themselves to trees and rocks using their roots. They derive the nutrients and water they need from the air, hence the common name “air plant.” And like their name implies, no soil is necessary for a beautiful, thriving specimen! This versatile houseplant is not fussy, and when given minimal care, will adapt to most home and office environments.

About Tillandsias

Tillandsias are evergreen flowering perennials, and their native range spreads from the southeastern United States to Central and South America. While they are often associated with tropical regions, these diverse plants can also be found in deserts, high mountain ranges and rocky habitats.

It is a common misconception that these are rootless plants – in fact, their roots are critical to serve as anchors and keep the plants stable, though the roots do not absorb moisture or nutrition like other plants. Instead, these plants absorb all they need through their foliage.

Caring for Tillandsias

These delicate plants are easy to care for, but there are some tricks necessary to keep them healthy and looking their very best.

  • Light
    Place your Tillandsias where they will receive plenty of light but not direct sunlight. Direct sun will dry out the leaves very quickly and can cause dehydration and wilting. Home or office fluorescent lighting works just fine.
  • Temperature
    Typical indoor temperatures are perfectly suitable for Tillandsias, and a range of 50-90 degrees Fahrenheit is ideal.
  • Water
    Once a month, soak your air plant in water for about 20 minutes. If the plant is flowering, a delicate rinse would be more appropriate so that the bloom is not damaged. When through soaking, shake off the excess water from the plant and place in an area with good air circulation so it can dry easily. In between soaks, spritz your Tillandsias 1-2 times per week with clean water from a spray bottle. Indoor heat and air conditioning rob moisture from the air. If your air plant leaves start to wrinkle or roll, this is a sign of dehydration. Give them a good soak and spritz more frequently.
  • Pruning
    It is not unusual for the outer leaves of an air plant to dry out and turn brown, and these spent leaves can simply be removed. If leaf tips dry a bit and turn brown, cut off the tip and continue with regular care. The plant will grow and look just fine.

One final note, Tillandsias have beautiful brilliant blooms but only bloom once in their lifetime. Depending on the species, the bloom may last several days to several months. Why not try several different Tillandsia varieties so you can experience these amazing blooms?

tillandsias_2tillandsias_1

More Than Just Mulch

Not only does mulch add a decorative finish to your flower beds, it also keeps the soil cool and moist and thus reduces the need for watering. By using a pre-emergent herbicide with mulch, weed seeds are discouraged from germinating and growing. But which mulch should you use?

Types of Mulch

There are several types of mulch to choose from, and each type can give your landscaping a different finishing touch.

  • Pine Bark and Nuggets
    These types of mulches release acid when they break down. Pine mulches should be used around plants that need a more acidic soil. Use around azaleas, rhododendron, pieris japonica and holly.
  • Shredded Hardwood
    This is by far the most popular mulch. It has a dark color and knits together well so that it does not wash away. This mulch is often available in different colors, including black, red and brown.
  • Cypress
    This long-lasting mulch has a pleasant fragrance. Cypress mulch also knits together well, and it is thought to repel insects.
  • Yard Waste
    Many gardeners use yard waste such as shredded leaves, grass clippings or pine needles as mulch. While these can be effective mulches to conserve moisture and repel weeds, and they are certainly more economical, they do not have the refined look of wood mulches. Yard waste mulches will also decay and discolor much more quickly than wood mulches.

Using Mulch

No matter which mulch you choose, it is important to use it properly. It is recommended that mulch be applied 2-3 inches deep around plants, in flowerbeds and in garden areas – less depth will not be as effective to shield and protect the soil, while deeper mulch may actually protect too much and could restrict water from entering the soil. Take care not to pile mulch directly next to stems and trunks, which could invite insects and rot to invade the plant.

Over time, mulches will decay and compact, at which time they can be removed and added to a compost pile, or simply turned and worked into the soil around the plants they’ve been protecting. To preserve mulch a bit longer, raking and turning it over will refresh its color and reduce compaction.

Not sure which mulch will be best for your plants? Our experts will be happy to help you choose!

mulch_1mulch_2

Tremendous Turf

The benefits of turf grass as a ground cover are numerous and often undeclared or overlooked. In recent years, turf has gotten a bad reputation due to the belief that a beautiful lawn requires a lot of hard work and overuse of dangerous chemicals. This is a misconception and the benefits of turf can far outweigh the concerns, particularly when you care for your turf properly and responsibly.

The following is a list of the many advantages that our lawns provide. This list was provided by and may be found, along with other helpful turf information, at www.TheLawnInstitute.org.

Environmental Benefits

  • Cools the Air
  • Produces Oxygen
  • Filters Air & Reduces Pollution
  • Captures & Suppresses Dust
  • Recharges & Filters Groundwater Supply
  • Reduces Storm Water Runoff
  • Controls Soil Erosion
  • Retains and Sequesters Carbon
  • Assists Decomposition of Pollutants
  • Restores Soil Quality

Community & Human Health Benefits

  • Enhances Community Pride & Social Harmony
  • Offers a Natural Playing Surface for Recreation
  • Provides a Safe Surface & Reduces Injuries
  • Promotes Outdoor Activity & Exercise
  • Improves Physical & Mental Health
  • Relieves Stress
  • Lowers Allergy-Related Problems
  • Dissipates Heat & Cools the Environment
  • Reduces Glare
  • Diminishes Noise Pollution
  • Minimizes Nuisance Pests
  • Compliments Overall Landscaping
  • Preserves Natural Wildlife Habitat

Economic Benefits

  • Increases Property Values
  • Reduces Home Cooling Costs
  • Provides a Low-Cost Ground Cover
  • Serves as a Fire Barrier
  • Improves Visibility & Deters Crime
  • Boosts Human Productivity

With so many benefits to healthy, luxurious turf, won’t you give your lawn another chance? We can help – from suggestions for revitalizing a weak lawn to proper mowing tips to fighting weeds and pests, plus all the tools, seed, fertilizers and amendments you need to improve your lawn – our experts can help you make the most of every square inch of your turf!

A Feast for the Eyes

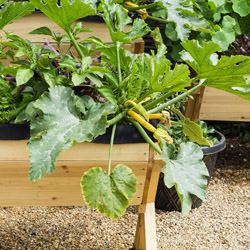
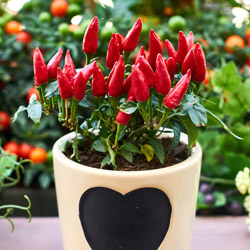
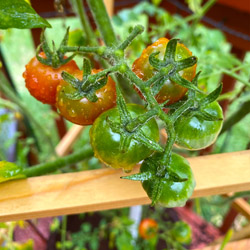
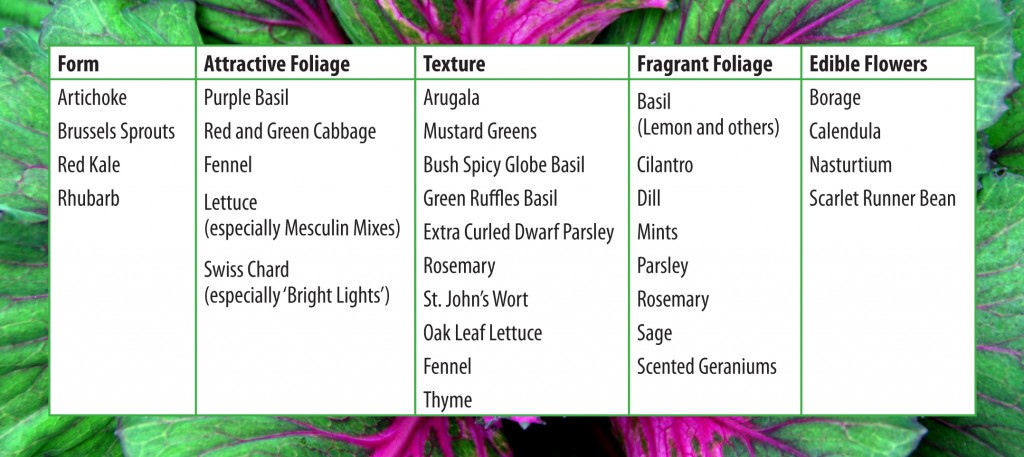
Traditionally, when planning a vegetable garden, the focus has been primarily on function with aesthetics as an afterthought – a productive harvest has usually been more important than any visual appeal. This year, why not try a new approach? Thoughtfully combine beauty and performance to create an edible garden that will explode with a variety of color and an abundance of produce. It can truly be a feast for the eyes as well as the table!

Planning a Beautiful Vegetable Garden

Color, texture and form are characteristics we keep in mind when combining plants in the flower garden. We plan flowerbeds so that plants enhance each other, repeating colors and shapes for continuity and flow. We add a variety of texture and form for diversity and interest. Vegetables, herbs and fruits can be just as vibrant, exciting, diverse and easy to combine as annual and perennial flowering plants are.

To begin, provide structure. Placing a picket fence around your garden offers instant structure and visually sets it apart from the rest of the landscape. If you plan on planting along the outside of the perimeter, you will create the allure of a garden within a garden, with a hint of secret places. Place a straight pathway through the center, starting at the entrance. Divide the larger garden into smaller square planting beds using pathways to separate the beds. This will enhance the structure of, and provide easy access to, the garden beds as well as lead your eye through the garden. If desired, you can also used raised beds for this formal structure.

Next, focus on plant selection. Begin with a plant plan or layout. Initially, base your selections on what is pleasing to your individual tastes. Consider unusual varieties of vegetables and herbs that come in unique colors. Repeat colors, both horizontally and vertically, to add depth and dimension to the garden. Don’t forget to add brightly flowering annuals such as zinnias and marigolds to mingle amongst the edibles. Another consideration is edible flowers like nasturtium and calendula. Contrast colors for a striking, eye-catching effect. Keep in mind, also, texture and form. Bold textures add drama and are often combined with fine-foliaged plants for a softening contrast. Short, stout plants anchor the garden bed while tall, willowy plants raise the eye and lead you farther down the garden path. Take all these characteristics into account when planning and place plants in geometric patterns to create a quilt-like garden tapestry.

Finally, your spring edible garden will emerge invoking a feeling of calm, displaying a variety of cool greens, purples and blues found in peas, lettuce, cabbage and broccoli. Shortly after, the summer edible garden will be completely transformed at harvest time with an explosion of vibrant shades of red, purple, orange and yellow. With so many stunning options to combine, you can truly create a feast for the eyes that will be beautiful in every season!

EdiblePlants-1024x457

Feast-2

Feast-3

Feast-1

Spring Lawn Renovation

Spring is the ideal time to spruce up your lawn. After a long winter, you can easily see where any bald, bare or thin patches exist, as well as where weeds or fungus may be taking over the lawn. Fortunately, there are easy ways to set your lawn to rights!

Seeding

If you are planning to seed a new lawn or overseed an existing lawn, it is best to seed as early as possible. It is important to get seed germinated and growing before trees begin to leaf out, when the trees will be usurping more of the soil’s moisture and nutrition and new leaves will block sunlight from the grass seed. This is especially true in more heavily shaded areas. Keep the area moist at all times until the roots of grass seed become established, then you can gradually decrease the frequency of watering. The new grass can be mowed when it reaches a height of about three inches.

Rejuvenating a Weak Lawn

Your lawn cannot live without air, water and nutrients, but decaying material matted down between grass blades can smother even the healthiest-looking lawn. This decaying material is called thatch, and when a thick layer of thatch builds up, water and fertilizer may run off instead of penetrating the soil. Aerating and dethatching can help rejuvenate a lawn by restoring passageways to the soil. Late spring is an excellent time to dethatch cool-season grasses. Thatching rakes can be used, or you can use a metal rake to remove thatch by hand.

Adjusting pH

The pH of your soil has a direct impact on the health of your lawn. Test your soil to determine the pH (simple kits are available to do this). We recommend a small handful of soil taken from a depth of 3 inches to get the most accurate reading. At a pH of 6.4-7.0 nutrients are most readily available to turf grasses, and beneficial microorganisms are more active to decompose thatch and keep the soil structure healthy. If your pH is too low or too high, consider amending the soil as needed to help bring it to a more desirable level.

Crabgrass Control

On established lawns that you are not overseeding, apply a fertilizer with crabgrass control in early to mid-April like Fertilome Crabgrass Preventer Plus Lawn Food. Reapply in fall for the second germination of crabgrass. Remember, crabgrass seeds start to germinate when the soil temperature reaches 50-58 degrees.

Newly Seeded Lawns

On newly seeded lawns and those seeded in late fall or during the winter months, use a starter fertilizer like Fertilome New Lawn Starter Fertilizer to promote a strong root system.

Maintaining your lawn at a higher level, 4 inches, throughout the growing season will allow you to control crabgrass and broadleaf weeds without the use of chemicals. Taller grass will shade out the weed seed preventing germinating.

Insect Controls

An early season application of St. Gabriel Organics Milky Spore Granular Grub Control or Bayer Grub Control will provide effective white grub control for the growing season. This preventative method tends to give better results than applying insecticides when you notice damage as it then may be too late. If you have routinely had problems with other insects, opt for products specifically targeted for those pests to ensure effective control.

A lot goes into having a lush, healthy lawn, but if you take the appropriate steps to rejuvenate your lawn in spring, you’ll be rewarded with thick, healthy, resilient turf to enjoy from early spring until snow flies again.

spring_lawn_3

spring_lawn_1

Grass sprinkler

Protecting Our Pollinators

Every garden requires pollinators, and bees are among the finest. Without them there would be limited flowers and far fewer fruits and vegetables. Did you know that about 30 percent of the food we eat depends on the pollination of bees, including onions, cashews, coffee, carrots, chocolate and vanilla? If we don’t protect these prolific pollinators, our landscapes, gardens and diets will be irrevocably changed.

About Bees
Although there are many bees that are great pollinators, like carpenter, mining, sweat and cellophane bees, some of the most well known and easily identified bees are the honeybee and bumblebee. Both of these bees live in social colonies and are cavity nesters. Because these bees are active all summer long, they require a constant supply of floral nectar close to their hive and they thrive in flower gardens, orchards and other areas with abundant blooms.

Unfortunately, both these types of bees – along with many others – are disappearing rapidly, and two key threats are to blame.

  • Habitat Loss: As more natural habitat is lost to development, there are fewer nesting locations and inadequate food supplies for bees. While meadows developed into resorts and parks disappearing for strip malls are obvious examples of development, other less visible developments that can hurt bees include widespread use of flower cultivars that do not produce adequate nectar, eliminating critical bee food sources.
  • Pesticide Drift: Widespread, abundant spraying of pesticides to protect crops, lawns and parks can inadvertently hurt bees. Stronger pesticides can kill bees directly, while less potent toxins can contaminate nectar and will gradually build up to fatal levels in bees’ systems. Even if pesticides are not sprayed in areas where bees are abundant, high level spraying can easily be spread by wind patterns into critical bee habitats.

Inviting Bees to Your Garden
Fortunately, it is easy to bring more bees to your garden and encourage healthy bee populations. To support local bees…

  • Planting a variety of flowers that will bloom throughout the entire summer to provide ongoing food supplies.
  • Opt for native flower varieties that will be more easily recognized and used by bees, instead of introduced flowers that are less familiar.
  • Eliminate chemical use in your yard, as much as possible, including on your lawn, garden and trees, especially while plants are in flower.
  • Provide bees a safe place for shelter and to lay their eggs. A wood pile is suitable, or you can invest in a specialized bee house.
  • Make sure that there is an available water source for your bees. A bird bath or any simple water basin works just fine.

Want to bring bees to your yard and help them feel at home? Start with this list of native plants bees love, and ask our experts for more tips about keeping your lawn and garden bee-friendly!

Native Plants That Attract Bees

  • Apple (Malus)
  • Aster (Aster)
  • Blackberry & Raspberry (Rubis)
  • Black-Eyed Susan (Rudbeckia)
  • Blueberries (Vaccinium)
  • Currant (Ribes)
  • Elder (Sambucus)
  • Goldenrod (Solidago)
  • Highbush Cranberry (Viburnum)
  • Joe-Pye Weed (Eupatorium)
  • Penstemon (Penstemon)
  • Purple Coneflower (Echinacea)
  • Redbud (Cercis)
  • Rhododendron (Rhododendron)
  • Sage (Salvia)
  • Stonecrop (Sedum)
  • Sunflower (Helianthus)
  • Willow (Salix)

bee_2
bee_3
bee_1

Creating a Meditation Space in Your Garden

Gardening can be a relaxing, therapeutic hobby as you nurture seedlings, encourage growth and bring your harvest to fruition. But if you just want to take a moment to breathe, reflect and center yourself, it isn’t necessary to get out the garden clogs, sharpen your hand tools or get dirt under your fingernails. Creating a peaceful meditation space in your garden is easy, and can turn any garden into your own private sanctuary.

The Need for Peace

As our lives get ever busier with hectic schedules and cramped appointments, it may seem impossible to have any time for thoughtful reflection or meditation. Furthermore, smaller living spaces and more crowded urban areas can make it seem equally impossible to have any space for solitary peace. Without the ability to relax, we’re faced with skyrocketing stress in our lives, along with a host of different health problems such as tension headaches, high blood pressure, depression, obesity and more. More and more studies, however, are demonstrating that time spent in nature is beneficial for reducing stress and tension, and there’s no better place to easily enjoy nature than in your own garden.

Your Peaceful Purpose

Before creating your meditation space, you need to plan what you want to use it for in order to ensure you have enough room and all the right touches for your peaceful retreat. Meditation can mean something different to everyone – you might prefer a place for quiet, contemplative prayer, or you could be interested in an outdoor space for yoga practice. For some people, a restful space for coloring or painting is their ideal meditation spot, while others may want a natural niche for reading or journaling. Creating or listening to music may be part of your meditation practice, or even a cozy spot for an outdoor nap. Whatever means peace and relaxation to you, it can be incorporated into your garden.

Eliminating Distractions

Once you know how you will use a meditation space in your garden, it is essential to eliminate other distractions and interruptions from that space. Unwanted noises, glaring streetlights, unsavory sights and even unpleasant smells can interrupt meditation and disrupt your relaxation, but it is easy to plan your gardening to eliminate those difficulties. For example, a green wall or trellis can be used to block an unsightly view, and the plants on it will help muffle noises. You could also consider a small fountain for the soothing tinkle of running water to block traffic or neighborhood noises. Climbing, clinging vines can be used to cover structures with greenery to increase the natural feel of the space. Opt for arbors or pergolas that can help create comfortable shade and define the space without completely blocking sunlight, and consider fragrant flowers nearby if unwanted aromas are invading your garden.

Adding Joy to Your Garden Space

Once your meditation area is structured and distractions are minimized, it is time to add your own personal joy into the space. What brings joy to the space will vary from garden to garden and even from season to season, but it should be a personal choice and something that helps draw you into the space. Consider…

  • Seating
    In order to enjoy your meditation space, you will need a place to sit and relax within it. This may be a comfortable bench, a cozy chaise lounge, a soothing hammock or any other type of seating. A chair-sized boulder can be a natural alternative, or you may opt for a more whimsical swing to add a dash of fun to your personal space.
  • Sights
    You’ve taken steps to block sights you don’t want to see in your garden, but a good meditation space will also include sights you want to look at. A bird feeder or bird bath can invite beautiful feathered friends to share your space, or you might prefer a lovely piece of garden art, a gazing ball, plants in your favorite colors or even unique mulch or paving stones in a therapeutic pattern.
  • Sounds
    Pleasant sounds can help add a focal point to your meditation space, allowing you to focus on unique tones to help center yourself. A wind chime, waterfall fountain or even a way to bring your favorite music outdoors can be a wonderful addition to a peaceful meditation space.
  • Water
    Water can serve several purposes in a meditation space. Flowing or splashing water provides natural white noise, and the sparkles of the water are ideal for meditative gazing or creating soothing reflections. Consider different aquatic options, such as a small stream or brook, a weeping rock, a fountain or even a reflecting pool. You can even opt for a small pond for goldfish or koi if you desire.

Above all, remember that there are no strict rules for creating your personal meditation space. Whatever brings you peace and joy can be part of your design, and it can change as your tastes and preferences change. Garden meditation spaces can vary as much as any other part of the garden, but each one helps nurture our green spirits.