Author Archives: Dammann's Garden Center

Holiday Gifts from The Garden

Your garden is filled with bounty, and not just during the growing season. With a bit of creativity and some help from your local garden center, you can find many lovely gifts and holiday accents in your garden and landscape, letting you share your love of gardening with friends, family members, neighbors, teachers, and everyone you care about.

15 Fun Holiday Gifts From Your Garden
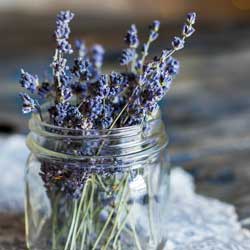
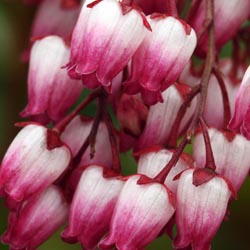
  1. Dried Flower Crafts
    The beautiful flowers you enjoyed in spring and summer can easily be dried to become lovely holiday gifts. Pansies, yarrow, astilbe, lavender, salvia, and rose buds all dry especially well, and can be part of pressed bookmarks or magnets, scented potpourri sachets, or sprigs and sprays to embellish gift packages.
  2. Dried Herbs
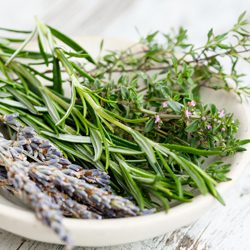
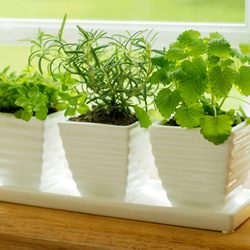
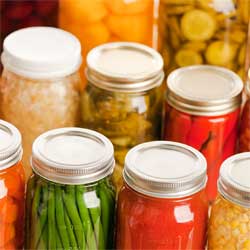
    Fragrant and delicious, dried herbs can be a lovely and practical gift. Layer herbs in small clear glass jars, test tubes, or ornamental tins, and attach rustic recipe cards or a garden-fresh cookbook for an even more thoughtful gift. Thyme, dill, lemon balm, oregano, and rosemary are all superb choices that work well in savory winter recipes.
  3. Ornament Sprigs
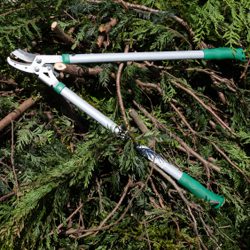
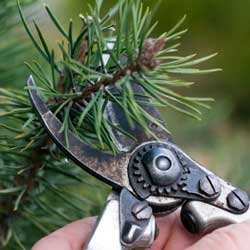
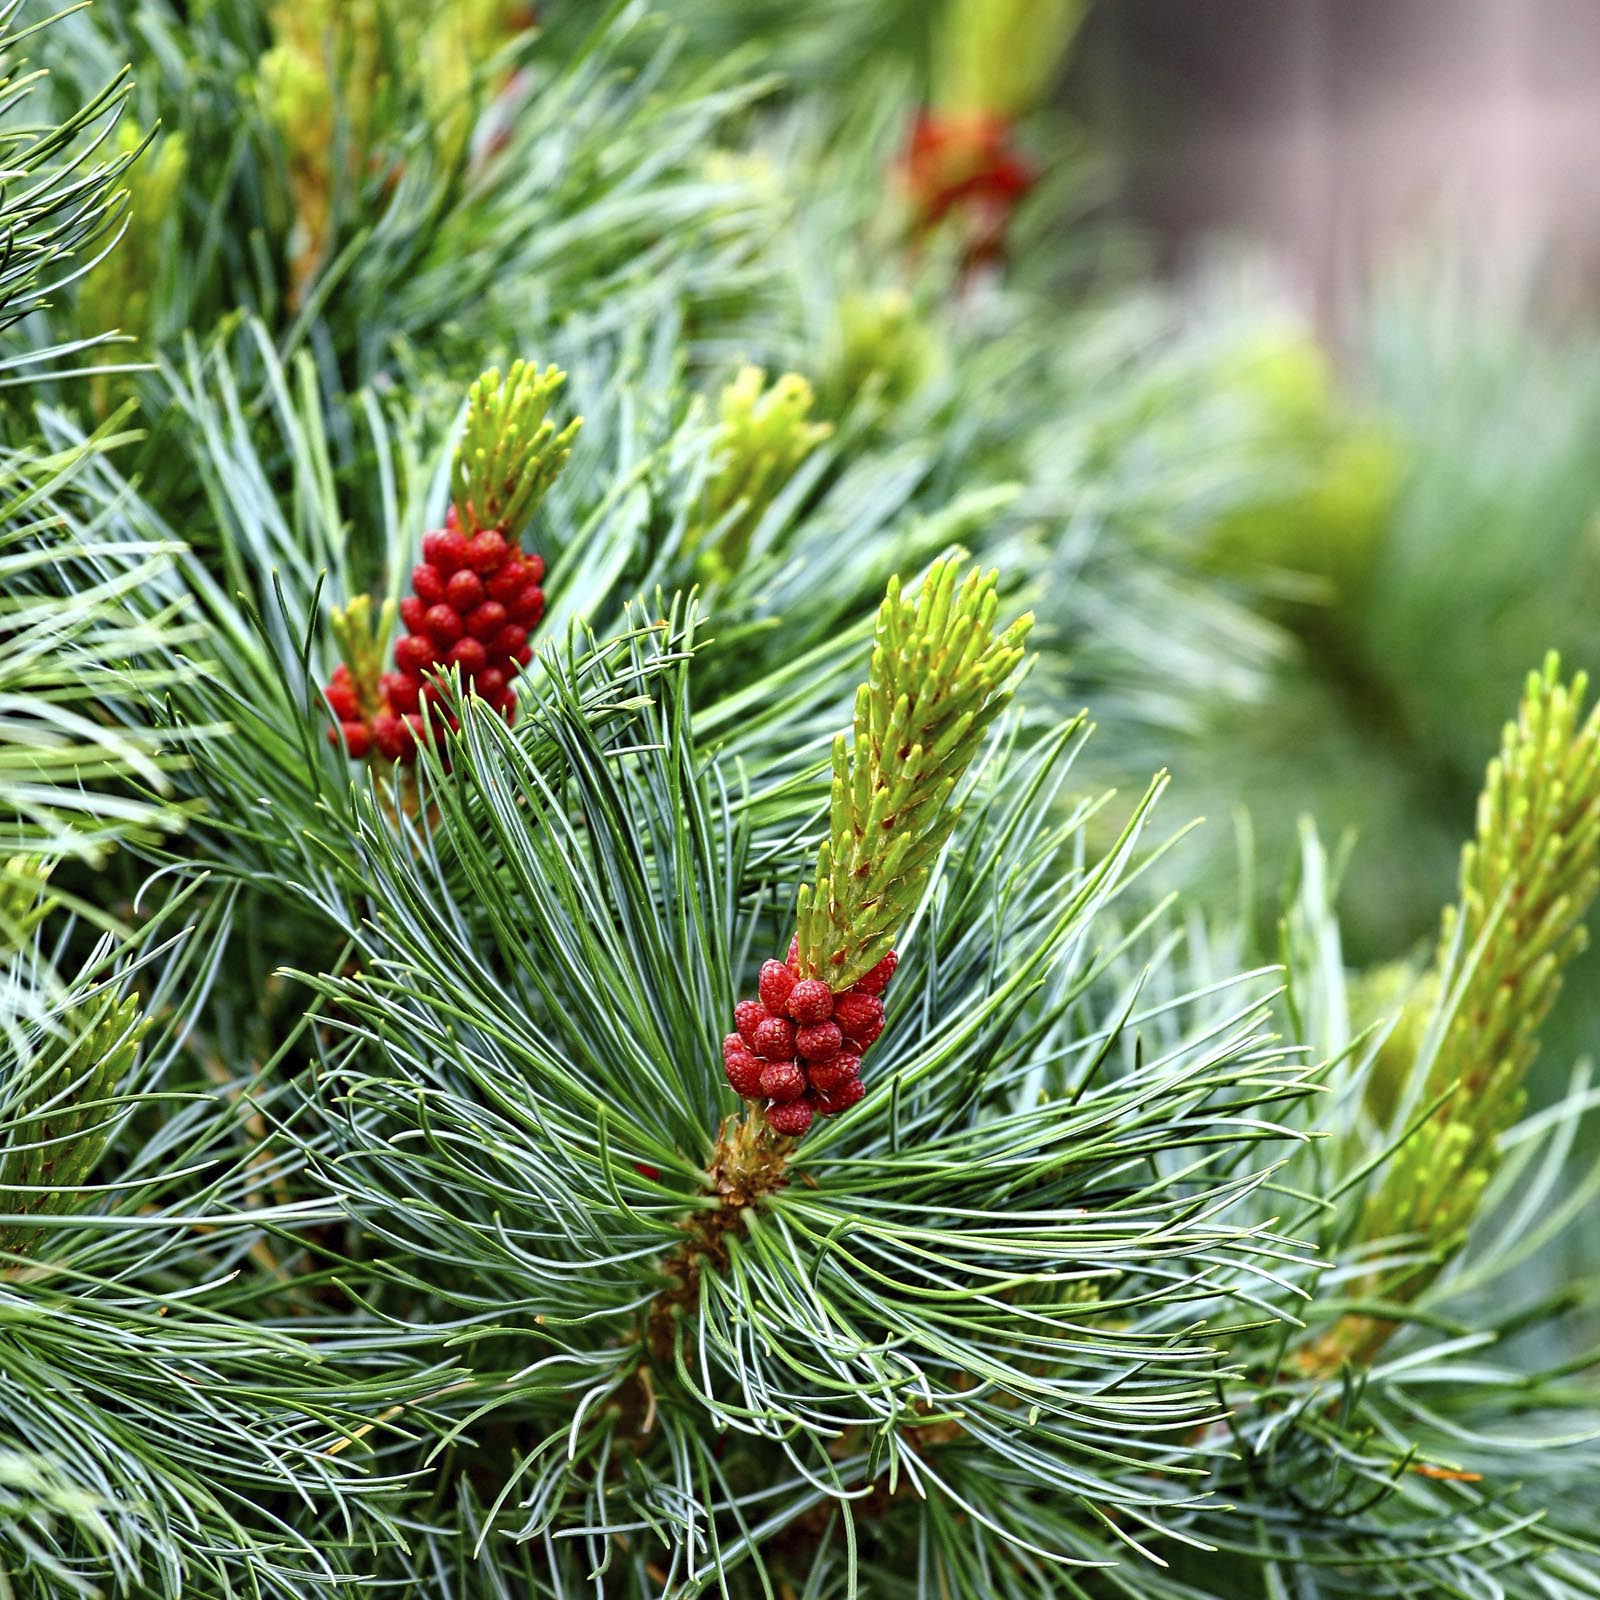
    Create natural, beautiful ornament sprigs when you bind pine, arborvitae, holly, or evergreen twigs and colorful berries with jute twine or a festive ribbon to create a decorative bunch. Use sharp pruners to create clean edges with each cut, and use floral wire to shape the branches and twigs into elegant shapes.
  4. Garden Tool Bouquet
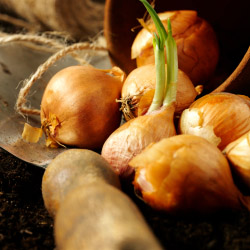
    The perfect gift for a gardener, you can create a tool bouquet using a clay pot as a vase and lining it with a pair of garden gloves. Arrange several hand tools for the “flowers” in the bouquet, and add packets of seeds, plant stakes, twine, or other small items as fillers in the arrangement for a useful and thoughtful gift.
  5. Fire Starter Pine Cones
    If you have large pine cones in your yard, they can become beautiful fire starters. Bake cones briefly in a warm oven to dry them out and ensure they are fully open, and allow them to cool. Wrap wicking around the cone, leaving a loop at the top for easy handling, then dip the cone in colorful wax 3-4 times for an even coat. Add a clever tag and you’ve made a perfect winter gift.
  6. Fire Starter Jars
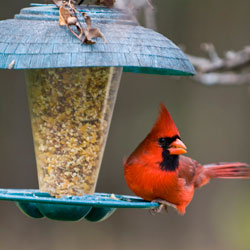
    If you don’t have large pine cones, you can still create kindling jars as fire starter gifts. Use a small mason jar and fill it with mini pine cones, shredded dry leaves, and cedar shavings. Add a drop or two of candle fragrance and decorate the jar with ribbon or twine and tie on a long-lasting match to complete the gift.
  7. Pine Cone Bird Feeder
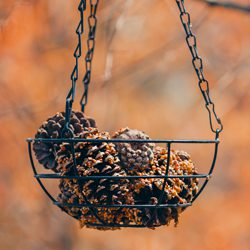
    Another pine cone gift is an easy bird feeder. Use large or medium-sized cones and spread softened suet or peanut butter over the cone. Roll the cone in birdseed and consider using sunflower seeds or even dried cranberries to create a fun pattern. Tie twine or ribbon around the top as a hanger, and you have a healthy feeder for winter birds.
  8. Hose Door Mat
    A garden hose can become a practical, easy-care mat for the deck, patio, or garage. Wind the hose into an oval or circle for a full-size mat, gluing it together to keep the appropriate shape. For a smaller mat, cut the full-size shape in half. The mats are easy to clean and safe for all weathers, making them ideal for outdoor use all year, and are even great for storing boots and galoshes inside to protect interior flooring.
  9. Jar Lid Garden Stakes
    Turn canning jar lids into whimsical garden stakes. Use markers, paint, or pens or create labels for each lid with the names of different flowers, herbs, and veggies, and attach each lid to a twig or stake for a rustic but useful gift.
  10. Fairy Garden
    A broken clay pot makes an excellent base for a charming fairy garden gift. Fill the pot with sand and dirt, and decorate it with moss, small plants, and all types of fairy accessories, such as mini toadstools, a whimsical door or miniature house, a fairy mailbox, and other fun accents. You can even present the garden as a kit and let the recipient arrange the items however they wish.
  11. River Rock Markers
    Buy large, smooth river rocks to turn into garden markers. You can paint each rock just with the name of a flower, herb, or vegetable, or embellish the rocks with swirls, dots, stripes, and other colorful accents. If you have a more artistic bent, consider painting the rocks to look like the foods and flowers they will be labeling!
  12. Catnip Mice
    Grow a stash of catnip in your garden and you can make homemade catnip mice for all your cat-loving friends. Use a burlap bag or flour sack and cut out mouse-like shapes to sew roughly together. Stuff them with safe fiberfill and a few dried catnip leaves and consider adding a bit of crinkly plastic inside to make the toy even more engaging. Adorn it with a button or yarn eye and tail and you’ve got a fun gift for every feline.
  13. Herb Finishing Salt
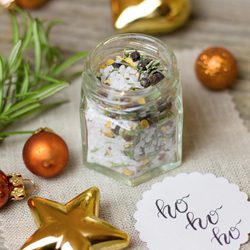
    Add dried herbs to coarse sea salt for a delicious finish for savory dishes. Try different blends of herbs for different flavorings, or consider bright, fresh options such as lemon or lime zest in the salt for a punch of flavor. You can use a jar, tin, or even homemade envelopes for the gift container, and include a tiny scoop for a handy way to spread the salt.
  14. Mini Zen Garden
    Create a miniature Zen garden to give a peaceful and thoughtful gift. Use a plant saucer as the base and fill it with fine sand or crushed perlite. Add a painted rock, miniature succulents, or a single fairy garden accent as a focal point, and include a miniature rake or wooden staff for making soothing patterns in the garden.
  15. Wood Slice Coasters
    If you’ve pruned a large branch or cut down a tree, you have the perfect material to make wood slice coasters for a rustic gift. Cut the coasters quite thin and dry them thoroughly for several weeks. Use different sandpaper grits to polish both sides to a smooth finish, leaving the bark intact, then varnish them well to seal the wood and give it a wet gloss. You could paint or use wood burning tools to add accents to the coasters before varnishing if desired.

Your garden can be a source of many beautiful gifts, with a little help from your local garden center to bring your gift inspiration to thoughtful reality. Whether you want to give gifts to like-minded gardeners or just share your love of gardening with everyone on your gift list, you can always find the perfect gift right in your garden or landscape.


Summer Gardener’s Calendar

Continue planting trees, shrubs, perennials, annuals, vegetables and herbs. Consider adding some exotic color to your deck or patio with tropical blooming plants. We have a great selection of color this summer.

It’s time for your houseplant’s summer vacation! Take outside to a shady place. Repot if necessary, fertilize and check for pests and diseases. They’ll thrive in their outdoor location all summer. Be sure to bring them back inside in early fall.

Water plants and lawns deeply during periods of dry weather. Annuals, perennials, vegetables, trees and shrubs should be watered with a slow trickling or soaker hose. Pay extra attention to plants in containers and hanging baskets – check them regularly. Remember that clay pots dry out faster than plastic.

Apply a 2-3″ layer of mulch on your garden beds in preparation for summer. Mulch conserves valuable moisture in the soil, helps keep weeds down, maintains even soil temperatures, and gives an attractive finishing touch to your beds and borders.

Spray azaleas, Pieris japonica, laurel and Rhododendron with Bonide All-Season Oil to control lacebug. Spray early in the morning or evening when temperatures are moderate and there is no rain in the forecast.

Warm, humid weather encourages the development of fungal diseases such as Black Spot and Powdery Mildew on roses. Water roses in the early morning and avoid overhead watering if possible. Clean up any fallen leaves and follow a regular fungicide spray program. We recommend the Bayer Rose and Flower All in One for good control of fungus diseases.

Prune evergreens such as pines, cypress, hollies, euonymus and boxwood, to shape as needed. Remove faded flowers of annuals regularly, to encourage more flowers. Annuals will also benefit from regular applications of a water-soluble fertilizer right through summer.

Attract hummingbirds and butterflies to your landscape by planting Butterfly Bush, Bee Balm (Mondarda), Hardy Hibiscus, Lobelia, Scabiosa and Coreopsis.


Fall Gardener’s Calendar

Fall Gardener’s Calendar

Spray Bonide All-Season Concentrate on hemlocks to control woolly adelgid.

Spruce up the landscape by planting Flowering Cabbage & Kale, Garden Mums, Fall-Blooming Perennials as well as Trees and Shrubs.

Pick up your Spring Flowering Bulbs now!  To make planting easier, use a Bulb-Digger or an Auger.

Apply Hi-Yield Superphosphate now to coax stubborn plants into bloom next year.

Aerate, re-seed and apply Fall Lawn Food to the lawn. Keep grass seed damp; water every day if necessary.  You will also want to check for grubs.  Increased activities of skunks, raccoons and moles as well as brown patches that peel back easily are an indication of grub activity.  Apply granular Sevin or Milky Spore to control the grubs as well as chinch bugs and sod webworm.

Treat houseplants with Bonide Systemic Granules and Bonide Insect Killing Soap now to get rid of any insects before bringing them into the house prior to the first frost.

Clean out garden ponds and pools. Cover with Netting before the leaves start falling.

Plant bulbs. Fertilize with Espoma Bulb-Tone and water in well.

Divide daylilies and spring-blooming perennials, including iris and peonies. Don’t be tempted to prune your spring flowering shrubs like forsythia, azaleas, camellia, holly, lilac, rhododendron, spirea or viburnum or you will destroy next year’s buds.

Dig up summer-flowering bulbs, such as dahlias, cannas, tuberous begonias, caladiums and gladiolus after the frost kills the top growth.  Treat them with Bulb Dust, pack them in Peat Moss, and store them in a ventilated area for winter.

Fertilize your trees with Espoma Tree & Shrub Fertilizer after the leaves fall. Fertilize azaleas, rhododendron, and evergreens with Holly-Tone and other shrubs with Plant-Tone. Spray hemlock again with Bonide All-Season Concentrate.

Set up bird feeders. Clean out birdbaths, refill and purchase heaters for the winter.

Clean up and destroy diseased rose leaves and debris surrounding shrubs and perennials. Use a Rose Collar to mound 6-10 inches of dirt around roses to protect from winter damage. Use Rose Cones for complete coverage.

Remove annuals, roots and all, and add to your compost pile, but do not add any diseased material to it.

Cut back perennials unless they feature ornamental seed heads and fertilize with Espoma Tree-Tone. Prune long raspberry and rose canes back to a height of three feet.  Clean up your beds and gardens to avoid harboring insects and diseases over the winter.

Pot hardy spring bulbs (anemone, crocus, daffodil, hyacinth, ranunculus and tulip) and place in a cold frame or cool garage (40 degrees) or sink into the ground and mulch.  Keep evenly moist.

Update garden records, noting successes and failures, gaps in planting, future planting and landscape changes.

Water all landscape plants well and mulch before the winter cold sets in.

Spray evergreens, azaleas, rhododendron, boxwood and rose canes with Wilt Stop for protection against wind and cold weather.


Holiday Gardener’s Calendar

Winter is upon us. Depending upon the temperatures, there may still be time to finish remaining chores. If you have any questions about the following procedures or products, please come in and see us. We can help you select the correct dormant oil, fertilizer, selective herbicide and frost protection method. We’re always here to help.

General Landscape

  • Mulch with bark, compost or other local materials to enrich soil, protect plant roots and prevent erosion.
  • Protect plants from frost and wind.

Houseplants

  • Perk up tired houseplants by removing dead and dying leaves. Wash under a soft shower in the sink or tub.
  • Spider mites proliferate in warm dry winter homes. Check for mites by looking for tiny speckles on leaves.
  • Transplant if roots are growing through the drainage holes or over the pot edge. If you don’t want to move into a larger pot, untangle the roots and cut back by 1/3, scour the pots and replant with new soil.
  • Remember to turn your plants each week as they begin to grow towards the weaker window light.
  • For indoor bloom, plant amaryllis, paper white narcissus, hyacinth, crocus and indoor cyclamen.
  • Popular holiday plants such as poinsettias, chrysanthemums and orchids fill the stores. Check them thoroughly for “hitchhikers” before bringing into the home or spray with household plant insecticide or soap.
  • Be creative in your arrangements and combine them with metallic painted twigs, pinecones or seashells.
  • If using a live tree for a “living Christmas tree”, prolong its time indoors by using Wilt-Pruf to reduce the loss of moisture from the needles.

Lawn:

  • Remove leaves, toys, hoses, etc, from lawns to prevent dead spots.
  • Apply winter fertilizer, if not already done. The middle number, phosphorus, aids root growth during the winter.
  • If you have weeds in your lawn, consider using a winter fertilizer with weed control.
  • Mow one time after lawn goes dormant and before freezing. This last mowing should be 2 ½” tall.
  • When temps are freezing, stay off the lawn as much as possible to reduce blade breakage.

Vegetables:

  • Protect cool season vegetables with row covers, leaf or mulch cover.
  • Mulch beds to enrich and protect from rain/snow erosion.
  • Review gardening notes and plan next year’s garden.
  • Test germination rate of leftover seeds, if wanting to use again.
  • If gardening under lights or in heated greenhouse, start seeds of early spring crops: lettuce, kale, mustard, spinach, and other greens.
  • Harvest carrots, lettuce, greens and over-wintering crops.

Trees and Shrubs

  • Stake young trees and vines if needed. In case of a heavy freeze, use Wilt-Pruf or similar product to reduce transpiration of moisture.
  • Prevent southeast trunk injury, a form of winter freeze damage. Use light-colored tree guards to protect the trunks of young trees for at least two years after planting. After two years, paint the trunks with white latex paint. These two methods prevent the tree trunk from splitting when sunlight warms the bark on side of the trunk.
  • Fertilize shrubs and trees, if not done already, and the ground is not frozen. This allows roots to absorb when temperatures are above 40° and when spring returns. Granules and spikes provide nutrients effectively and easily.
  • Prune out dead and diseased tree branches to prevent from falling on roof or pedestrians.


Dealing With Winter Damage

It’s early spring – time to survey the damage that winter has produced. In some areas, shrubs may still be hiding under piles of frozen snow, and could be crushed or compacted. Severed tree limbs may lie scattered across the landscape, and bark may be torn and stripped from trunks. It’s difficult to know what to tackle first, but fortunately, much of the damage is easily correctible.

Repairing Winter-Damaged Trees

When surveying and repairing winter damage, start with your trees – they are generally the most valuable additions to your property. As you survey the damage – broken limbs, torn bark, a tilting trunk – ask yourself “Is this tree salvageable or should it be removed?” If the damage is extensive, or you are unsure about how the damage may affect the tree’s overall health or future growth, hire a professional for a consultation. Replacing a severely damaged tree with a younger one, perhaps a type you like even better, may be the best solution.

If a limb is broken somewhere along its length, or damaged beyond repair, employ good pruning practices and saw off the remaining piece at the branch collar, being careful not to cut into the trunk or leave a stub. Sometimes a fallen limb may strip bark off the tree trunk. To repair this damage, cut the ragged edges of the loose bark away from the stripped area to firmly affixed healthy bark. Nature will take care of the rest. Even if the trunk of the tree is split, the tree may still be saved. For large trees, repairing this type of damage usually requires cabling and bracing done by a professional. If the tree is still young, the crotch may be pulled tightly together and tied or taped until the wound eventually heals.

Repairing Winter-Damaged Shrubs

Shrubs can suffer the same damage as trees, including broken limbs and stripped bark. Heavy snowfall can crush smaller shrubs, and larger varieties may have their trunks or centers split from heavy snow or ice accumulation. Most shrubs are resilient, however, and slowly regain their shape as the weather warms. If branches are bent but not broken, you may tie them together to help them along and prevent further damage from late-season storms. Do not tie tightly and remove twine after about a year. Completely broken branches may be pruned away, but take care to maintain the shrub’s form and balance, keeping in mind its growth pattern so it will not look lopsided or ungainly. Again, if the damage is severe, you may need to replace the plant.

The harder the winter is, the more of a beating trees and shrubs will take. With prompt attention in early spring, however, you can easily undo much of the damage and help your landscape recover with ease.

damage_1damage_2

Pruning Evergreens

When choosing an evergreen for your landscape project, it is always best to select a plant that will not outgrow its designated space, crowding out nearby plants or distorting its own shape without enough room to shine. Proper research can help you choose – you should know the ultimate height, width and growth rate of your selection before committing to what may be one of the more costly additions to your landscape. Always choose naturally slow-growing or dwarf conifers for small spaces, bearing in mind how nearby plants and structures may limit available space over time. Fortunately, just about every genus of evergreen is available in a dwarf variety.

That being said, what if the mistake has already been made? We’ve all made it! It is easy to fall in love with a sweet little plant in the garden center that, within a few years in the ground, looks like it could swallow your house. Fear not, there are ways to rectify the situation with proper pruning.

You will need the right tools to accomplish the job:

  • Loppers
  • Bypass pruners
  • Safety goggles
  • Leather gloves

Pruning should begin in the early spring before the plant’s soft new growth hardens off. Take a close look at your evergreen to determine its branching habit. Pine, spruce and fir trees all have layers of branches that are whorled around the trunk. Arborvitae, juniper, yew and false cypress have limbs that are produced randomly along the trunk.

Conifers with a random branching habit are able to grow new limbs from old, foliage-bearing wood. You may prune this type of evergreen back to this older wood to encourage a more compactly branched habit and keep size down, or to create the desired shape. Whorled branching evergreens are pruned differently, however. They have new growth called “candles” at the tip of their branches, and they really do look like candles with lighter coloration. To promote a more densely branched, compact habit, pinch the candles back by up to half their length before the needles harden off. Never cut into the older wood below the candle, as this type of evergreen does not have dormant buds on the stem that will become new growth. Pruning into old wood will leave a hole in your plant and distort its overall appearance.

As always, we are eager to assist you with selecting the proper plant for any landscape project you undertake and to advise you on proper pruning to keep it healthy and beautiful for many years.

Pruning
Pruning
Pruning

Choosing a Japanese Maple

We’re certain you’ve heard it numerous times: fall is the best time to buy your Japanese maple. Have you come into the garden center to pick one? Did the varieties overwhelm you? Let us make it easier for you by explaining Japanese maple differences. Then, when you come in, you’ll know exactly what you want.

The species Japanese maple, Acer palmatum, moderately grows to a 20′ by 20′ multi-trunked tree. The leaves have 5-9 finely cut lobes giving them a more delicate look than other maples. Red spring leaves turn to green in the summer and blaze with yellow, orange and red in the fall. All do best with protection from drying winds and hot overhead afternoon sun. During their centuries of use in gardens around the world, gardeners have discovered and propagated those selections with unusual growth habits and bark patterns, as well as leaf color and shape. With hundreds of Japanese maple varieties available at garden centers, we feel a little simplification is in order.

  • Leaf Shape
    The variation Dissectum or Laceleaf Japanese Maple has leaves are deeply cut and finely lobed giving a lace cutout look. These varieties generally grow best in shady locations as the leaves easily burn or scorch. The leaves of non-Dissectum varieties are much less lacy. They resemble the leaves of native maples but are smaller and more deeply cut.
  • Leaf Color
    The leaf color of different Japanese maples also varies. Many have red spring growth changing to green in the summer. However, some retain the red through the growing season. Some varieties have variegated leaves with white, cream, gold or pink. Variegated leaves burn easily in the sun but can revert to all green in too much shade. Green leaves tolerate more sun than red. Autumn is when Japanese maples really put on a show with a riot of blazing colors.
  • Tree Form
    Non-Dissectum varieties grow more quickly into upright forms. Some varieties remain less than 10′ tall but others can grow to 25′ tall by 20′ wide. Laceleaf maples slowly develop a weeping form approximately 8-10′ tall and 8-12′ wide. However, ‘Seiryu’ is an exception, growing into an upright form.

Laceleaf (Dissectum)

Non-Dissectum

Location

More shade

Less shade

Size

Smaller

10-25′ tall depending upon variety

Tree Form

Weeping

Upright

Leaf Shape

Lacy, fine cut

Lobed

Leaf Color

Red, green

Red, green, variegated

Now that you have identified a suitable planting location and the type of Japanese maple you prefer, come see us and let our friendly staff show you the varieties that meet your requirements. Autumn colors are blazing now so this is a great time to make your selection.


King of the Cold: Ornamental Cabbage & Kale

Looking to add interest to the fall and winter landscape? This year, plant ornamental cabbage and kale for bold textures and vibrant colors.

About Ornamental Cabbage & Kale

Unlike most other annuals and perennials, these two hardy plants improve in appearance after a frost or two, which bring out more intense and brilliant colors in their foliage – perfect as an autumn accent or centerpiece plant. Identified by a number of names including floral kale, decorative kale, ornamental-leaved kale, flowering kale and flowering cabbage, ornamental cabbage and kale are classified as Brassica oleracca (Acephala group). Offering unlimited use in the landscape, these plants have large rosettes of gray-green foliage richly variegated with cream, white, pink, rose, red and purple. Kale leaves are frilly edged and sometimes deeply lobed.

While typical ornamental kale and cabbage varieties are easy to find, you can also try more unusual options, including dwarf varieties as well as upright, taller hybrids that can even be used in cut arrangements.

Using These Attractive Plants

Popular in borders, grouped in planting drifts, or planted in containers for the deck or patio, ornamental cabbage and kale typically grows to 12-18” high and wide, depending on the cultivar. Plant these specimens at least 12” apart in an area with full sun that has moist, well-drained soil. Organically rich soil with proper compost or fertilization is best to provide adequate nutrition for these lush plants. Although they are able to withstand light frosts and snowfalls, ornamental cabbage and kale will typically not survive hard freezes and are best treated as showy annuals.

The best foliage color will occur if ornamental cabbage and kale is planted in early fall as temperatures are cooling, or you can sow seeds 6-10 weeks before the first anticipated frost date – just be sure the seeds have sun exposure in order to germinate properly. These plants are usually attractive in the garden until Thanksgiving or slightly later, or in mild climates they may even last until spring temperatures begin to rise. Hint – when the plants smell like cooked cabbage, it is time to pull them out!

While these plants are superficially similar to the familiar cabbage and kale vegetables popular in salads and other edible uses, it is important to note that ornamental varieties are cultivated for color and shape rather than taste. Keep them out of the kitchen and in the garden instead, and you won’t be sorry!

Healthy Soil: Winter Cover Crops

It’s fall and our annual and vegetable gardens are winding down for the season. Now is the time to invest a little extra time and effort to prepare your soil for next year. Whether your garden is large or small, all annual planting beds will benefit from the addition of a winter cover crop.

Benefits of Cover Crops

A cover crop is a fast-growing, low-maintenance crop that can be used to protect your garden and landscaping beds in fall and winter. Depending on the crop you choose, it can provide many benefits to your garden, including…

  • Stabilizing soil and preventing erosion
  • Adding organic matter back into the soil to nurture later crops
  • Adding nutrients to the soil that have been used by previous crops
  • Suppressing disease that can wither new crops even before they start
  • Repressing weeds that will take over a garden
  • Improving soil structure with aeration and better drainage
  • Encouraging beneficial insects that will help later crops

Recommended Cover Crops

Different cover crops work best in different areas, and the climate, soil type and growing season will help determine which cover crops will work best for your gardening needs. The most popular recommended cover crops for our area are oats, rye and wheat.

  • Oats
    Sow 6-8 weeks before the first hard frost. Planted early, oats will provide a quick covering with the added benefit of providing an early planting time for next spring’s crops. Oats are not winter hardy, but they will grow in the fall and die in the winter, leaving behind nutritious mulch that will easily decompose when incorporated into the soil in the spring. This is a great cover crop choice for low- or no-till gardens. Sow at 2 lbs. per 1,000 sq. ft. for the best coverage.
  • Winter Rye
    Sow 2-4 weeks before the first hard frost. This is a good choice for gardeners who have late season crops and don’t want to cut off that last harvest. If hardened off before frost arrives, winter rye will continue to grow over the winter. Rye is a vigorous grower and can be difficult to turn in the spring, so bear that in mind depending on what crops you will be planting in spring. Sow at 3-4 lbs. per 1000 sq. ft. for appropriate coverage.
  • Winter Wheat
    Sow 2-4 weeks before the first hard frost. Wheat will cover quickly but is not as aggressive as winter rye. Winter wheat is also leafier, making it easier than winter rye to turn into the soil in the spring. Sow at 3 lbs. per 1000 sq. ft. to provide good coverage.

Cornell University provides a tool to assist you in choosing the correct cover crop for your situation. (http://covercrops.cals.cornell.edu/decision-tool.php)

Planting Cover Crops

Before planting a cover crop, clean out garden beds, removing all roots and plant material. Compost all plant matter that is not diseased. Broadcast seed evenly and cover with soil. Water thoroughly when planting and when necessary during dry periods. In the spring, till or fork oats into the planting bed and you are ready to plant. For winter rye and wheat, mow or chop tops 4 weeks before planting leaving cut cover crop on top to dry. Till or fork dried wheat and rye into the bed before planting.

With the appropriate cover crop, you can protect your garden’s most valuable asset – the soil – and be sure it is ready for spring planting.


Rotating Your Vegetable Crops

Whether you just plant a few tomatoes, herbs and some lettuce or an elaborate garden complete with exotic selections of lesser known veggies, you’ll want to rotate your crops each year. All types of vegetable crops – brassicas, onions, legumes and root crops – require a slightly different blend of nutrients and trace elements, even if their light and water requirements are similar. If you always grow your tomatoes in the same place, eventually the soil will become exhausted of the nutrients that tomatoes require the most, and the crop will become weaker and less productive. Meanwhile, another vegetable could easily thrive in that location and its growth would help replenish the nutrients that tomatoes may need in future years. If you rotate crops in and out, you’ll enrich the soil and enjoy larger, more productive, more flavorful harvests.

The easiest way to rotate your vegetables is to use a 3-year plan. First, you’ll need to decide which vegetables you plan to grow, then divide them into these three main groups:

Group 1:
Peas
Beans
Celery
Onions
Lettuce
Spinach
Sweet Corn
Tomatoes
Zucchini

Group 2:
Cabbage
Cauliflower
Broccoli
Kohlrabi
Rutabaga
Turnip
Radishes

Group 3:
Beets
Carrots
Parsnips
Potatoes

It’s all right if you don’t plant to grow vegetables from each group. Simply adjust your rotation plan to compensate, or even consider trying out a new vegetable to complete the rotation and expand the variety of your garden.

Next, draw a plan of your garden and mark where each group of plants will go, keeping in mind the light and watering requirements of different varieties. It may help to sketch out the boundaries of each group, noting which plants are part of which rows, boxes, containers or beds. Keep those notes and sketches in your garden journal, and also take notes throughout the growing season about which plants perform best and which may be struggling. Next year, move the plants accordingly to shift where different crops are located. If you choose to add new vegetables to your garden, start them in the location with their appropriate group and bring them right into the rotation scheme.

As you rotate crops each year, you will notice consistently lush, healthy plants, bountiful harvests and delicious produce. After a few growing seasons, rotating your vegetable crops will be second nature and will be an important part of your gardening plan to ensure only the best comes from your garden.