Author Archives: Dammann's Garden Center

Bringing Your Tropical Plants Indoors for the Winter

As the summer comes to an end and autumn approaches, the days get shorter and cooler temperatures signal the time to ready your plants for winter. How can you protect your treasured tropicals from winter damage?

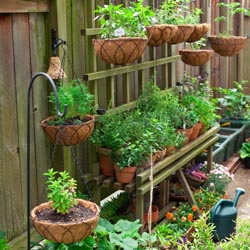
Overwintering Tropical Plants

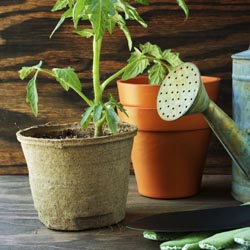
Don’t wait until frost warnings or freezes occur to bring tropical plants inside, especially since these plants are more susceptible to dropping temperatures. Try to have all of your plants acclimated to the new indoor environment by the end of October. Avoid the temptation to move your tropicals back outside if it suddenly gets warm, because they will have to re-acclimate when you bring them back inside again. With a little extra care even exotic hibiscus can be over-wintered inside the house.

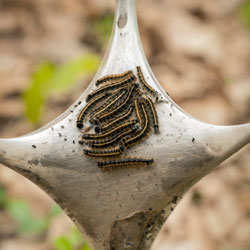
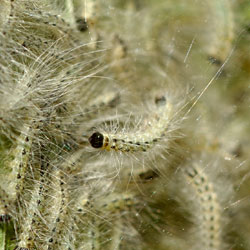
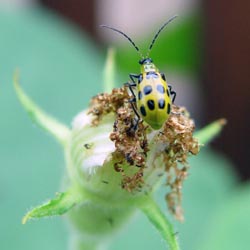
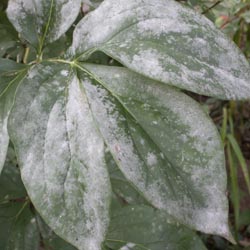
First, it’s a good idea to prune approximately one-eighth to one-fourth off the total height of the plant’s foliage. This helps reduce the shock that the plant receives with the change of conditions when bringing them indoors. Check the plants for signs of insects and treat them with insecticidal soap or pyrethrin spray as well as a systemic insecticide that will provide protection for up to six weeks.

Position indoor tropical plants in a very bright location that receives no less than 6 hours of light per day. If the winter is very cloudy, supplement your plants with an artificial light source. Be sure the room is warm, but avoid putting the plants too close to a heating vent, which can dry them out drastically.

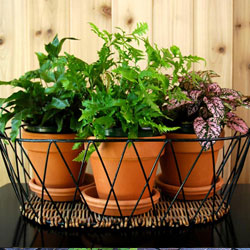
Because they are tropical plants, they will need good humidity which can be achieved by using a humidity tray. Use a saucer that is at least 3-4 inches larger than the pot and fill it with an inch of stones. Pour water over the stones until they are half covered, then place the pot on top of the stones. The humidity immediately around the plant will be increased, but avoid setting the pot directly in any water, which can lead to fungus and rotting. Grouping several plants close together can also help them preserve humidity for more luxuriant growth.

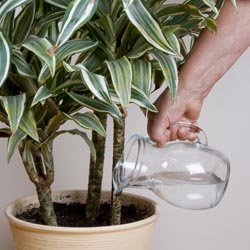
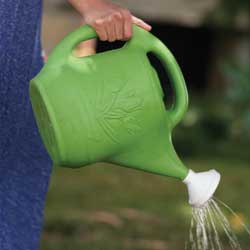
Fertilizing should be continued throughout the winter, but at a rate of once per week. You will find the plant will not utilize as much water in the winter because its growth has slowed. Generally, plants should be watered every 4-7 days depending on location, pot size, soil type and plant type.

If you have any questions about winter care of your plants, our staff will be glad to help you keep your tropicals in good condition all winter long.

Fall Has Arrived But Spring Is Already in Our Sight

It’s a sure sign that fall has arrived when dozen of boxes and crates, adorned with brilliant images of spring-blooming bulbs, appear on garden center shelves. Take a closer look through the pretty packaging, however, and what you see may seem totally unimpressive. It is hard to believe that in just a few short months these diminutive, subterranean dynamos will blossom into amazing forms of living art. What is even more incredible is how very simple and absolutely foolproof it is to achieve this beauty, no matter what shade of green, brown or black your garden thumb may be. These petite organic parcels encapsulate everything necessary to burst into astonishing flowers, and even the most inexperienced gardener can be a floral artist with spring bulbs.

Bulb Varieties

The only difficult thing about growing spring-flowering bulbs is choosing which blooms to showcase in your yard. The sheer variety of flower types, colors, sizes and bloom times is outstanding and virtually limitless, which can be overwhelming. Tulips alone are available in early, mid- and late-blooming varieties in just about every color under the sun, including multi-colored and variegated shades. The stems can be short or long, and the petal count may be single or double. The petals may be colorfully veined, like the ever popular parrot tulip, or fringed on the edges for a lacy look. Some tulips resemble peonies and some resemble crocuses. And that’s just tulips – other spring-blooming bulbs can have just as many varieties to choose from!

This fall, just about every garden center will be carrying at least a few varieties of ever-popular, widespread favorites, such as…

  • Allium
  • Crocus
  • Daffodil
  • Dutch Iris
  • German Bearded Iris
  • Grape Hyacinth
  • Hyacinth
  • Narcissus
  • Tulip

These are just a few examples of the amazing variety of bulbs available. Which new ones will be the showstoppers in your yard next spring?

Growing Bulbs

What’s most exciting is that if you’ve got soil and sunlight you can grow bulbs. It is absolutely that simple. Where you garden makes no difference at all, whether it is in the city, suburbs or countryside. Bulbs look fantastic blooming in a large landscape, small garden or simply in a pretty pot. They can be planted around trees and bushes, alongside driveways or sidewalks, or even in broad, flowing beds. Because they require very little care and maintenance, bulbs are ideal for busy gardeners or anyone who wants to stick their thumb in the soil but may not have much time to devote to an intensive flower garden or elaborate layout. There are just three steps to growing bulbs…

  1. Dig: Dig the hole of an appropriate depth for the bulb size – but they aren’t too picky!
  2. Drop: Drop the bulb in the hole, covering it firmly with soil and a layer of mulch if desired.
  3. Done! That’s it – the bulb will do the rest with the nutrients it has stored. Just be sure it has water at the appropriate time, and the blooms will amaze you.

So why not get out there and explore this big beautiful world of bulbs? Plan now for your spring floral explosion, and ask your local garden center staff for ideas for the best bulbs to suit your landscape, soil type and climate. Use the web resources, like Pinterest or Instagram, for information and inspiration. Get to your garden center early for the best bulb selection and get excited for unbelievable blooms!

Growing Zucchini

Zucchini is one of the most popular vegetables choices for growing in the home garden. Not only is zucchini easy to grow, it is also tasty and nutritious, as well as versatile in a number of recipes. All summer squash, including zucchini, are rich in beta-carotene, folic acid, vitamins C and E and numerous healthful minerals. Zucchini can be eaten fresh, baked into bread, roasted, grilled, added to salads and so much more. So, grow zucchini, eat up and get healthy – we’ll supply the tips you need for successful growing and a bountiful harvest.

Planting

Sow zucchini seeds or seedlings about 2 weeks after the last frost date in full sun and well-drained, nutritious garden soil. It is best to plant zucchini in hills, three plants in each, to ensure warm soil and good drainage. Hills should be about 8 inches high and 12 inches in diameter. Set hills at least three feet apart, as these plants are dense and require plenty of room for good air circulation.

Care

Zucchini plants will thrive in regular garden soil. If your soil is poor then you may wish to fertilize or amend the soil with compost. Keep zucchini plants evenly watered throughout the season. Mulch the garden bed with salt hay to keep it free of weeds and to retain soil moisture. If growing zucchini horizontally, mulch will keep the fruit clean by preventing it from coming into contact with the soil.

Staking

Zucchini is a vine and may be grown vertically, with assistance, on vegetable netting or a fence, trellis or lattice. Plants and fruit are heavy, so be certain to secure the vine carefully as it grows and watch for any signs of breakage that could damage maturing vegetables.

Harvesting

Zucchini is best and has the best flavor if it is harvested when young and tender, about 6 inches long. Use pruning shears or a garden knife to cut zucchini from the vine. Never pull the fruit off, which can damage the vine as well as the vegetable.

Pests

A number of pests will like zucchini just as much as you do, but there are steps you can take to keep your zucchini patch pest-free.

  • Cucumber Beetle: These insects will skeletonize the zucchini leaves, resulting in lower yields and smaller vegetables. Plant resistant varieties and hand pick the beetles.
  • Squash Bugs: Yellow spotting on zucchini leaves that turn brown identifies squash bug damage. Eventually the leaves then turn black and crispy. Control this pest when plants are young. Look for eggs on the underside of zucchini leaves and crush them.
  • Squash Vine Borer: This pest first presents itself with wilting leaves. Upon inspection you will see orange ‘sawdust’ at the base of the plant. Use floating row covers if planting early or hold off on planting zucchini until after July 4th when the insect egg laying is completed.
  • Blossom End Rot: This disease appears as a dark, leathery patch on the blossom end of the zucchini. It is caused by either uneven soil moisture or a soil calcium deficiency. Do not allow soil to dry out between watering, and add calcium to the soil with dolomitic lime or gypsum to ensure proper nutrition.

Recipes

Try these delicious treats to make the most of your zucchini harvest!

Grilled Zucchini

Ingredients

  • 1 large zucchini
  • 1/4 cup Italian-style salad dressing

Directions

  • Slice zucchini into 1/4 inch thick slices (peel first if desired). Toss in a bowl with Italian dressing.
  • Place on a hot grill about 4 to 5 minutes or until nice grill marks appear and the zucchini is slightly limp. Serve and enjoy.

Zucchini Bread

Ingredients

  • 3 cups all-purpose flour
  • 1 teaspoon salt
  • 1 teaspoon baking soda
  • 1 teaspoon baking powder
  • 3 teaspoons ground cinnamon
  • 3 eggs
  • 1 cup vegetable oil
  • 2 1/4 cups white sugar
  • 3 teaspoons vanilla extract
  • 2 cups peeled, grated zucchini
  • 1 cup chopped walnuts (optional)

Directions

  • Preheat oven to 325 degrees F.
  • Grease and flour two 8 x 4 inch bread pans.
  • Sift flour, salt, baking powder, soda and cinnamon together in a bowl.
  • Beat eggs, oil, vanilla and sugar together in a large bowl.
  • Add sifted ingredients to the creamed mixture and beat well.
  • Stir in zucchini and nuts (if desired) until well combined.
  • Pour batter into prepared pans.
  • Bake for 40-60 minutes or until tester inserted in the center comes out clean.
  • Cool in pan on rack for 20 minutes.

Remove bread from pan, and cool completely.

Growing Zucchini

Growing Zucchini

Summer Lavenders

Do you enjoy making herbal or floral bouquets and wands to scent the house? Maybe you’re into the lavender cooking trend or like to infuse playful summer drinks with a floral touch. Perhaps you recognize the aromatherapy or medicinal qualities of lavender.

In other words, do you love lavender and are frustrated because the bloom season is so short?

Whatever you do with your lavender, you may have planted one and it bloomed for a few weeks. Now you think you have to wait another year to enjoy the beauty and fragrance. That’s no fun! But here’s a secret to prolong your passion during lavender season…

About Lavenders

There are actually three groups of lavenders. Members of each group bloom around the same length of time, but each group blooms at different times. By planting at least one member of each group, you can enjoy lavender from early spring to mid-summer (and sometimes even longer with careful watering).

Members of the “Non-English Lavenders” bloom from early to late spring. “English Lavenders” follow and bloom from late spring to early summer. True summer lavenders, known as “Lavendins,” continue blooming into the hottest days of summer.

Also called “English Lavender hybrids,” the varieties in this summer group are crosses between the Portuguese and English Lavenders. They all have large gray leaves, grow into large plants, and grow best in the heat. They are all very fragrant, making them welcome additions to any lavender garden.

Abriali Lavender was one of the first hybrids. It produced cosmetic-grade oil until Grosso Lavender replaced it with superior oil production. Happily, gardeners can also enjoy Grosso in their gardens, as it’s frequently available at garden centers.

White Grosso Lavender, with the same beauty and fragrance, provides a nice background for a mixed flower border. Edelweiss Lavender, a smaller white lavender, mixes nicely in the garden, without a reduction of fragrance.

Hidcote Giant Lavender and Provence Lavender are garden center favorites. Approximately the same size, the Hidcote Giant has darker flowers than the Provence, which has a longer flower wand. Sachets usually contain Provance buds because they are exceptionally easy to remove from the stalk. Other popular varieties include Grappenhall, Dutch Mill, Seal and Fred Boutin lavenders.

Lavenders In the Garden

Growing lavenders could not be easier. All thrive in full sun in warm, well-drained, average quality soil. Dampness, either through poor drainage or humidity, will kill them. They grow well in pots with good drainage and fair soil. Prune after blooming to shape the plants and promote future blooming. While lavender is drought resistant, if the soil is dry, it is necessary to water well. Water again only when the soil is dry. Using compost as fertilizer will provide critical nutrients and improve soil drainage.

Using Lavender

Lavenders are very attractive to bees. They happily buzz from flower to flower while collecting pollen. Some honey producers site their hives in the middle of lavender fields to produce lavender-scented honey. The honey’s aroma is a great way to start the day!

Drying lavender for future use is easy. Cut bundles of wands from the plants without cutting into the older woody part of the plant. Use a rubber band to hold the bundles together and hang them upside down in a dark, dry room such as an attic or closet. The darkness helps retain the bloom color. The bundle should be dry in 7-10 days.

Although lavender’s taste isn’t the same as its fragrance, lavender dishes appear in many trendy restaurants. Lavender martinis and teas, ice cream, cookies and other desserts accompany lavender-sauced meats and vegetarian dishes. Lavender is an ingredient in the herbs de Provence mix and replaces strong tasting herbs such as rosemary, thyme or mint in many cookbooks for meats, breads and general seasonings.

Some folks even use lavender as an antibacterial antiseptic to treat wounds and insect stings.

Even if you just want to enjoy lavender for the sake of its beauty and ease of maintenance, remember… Planting one of each of the three groups lets you love your lavender for three times as long. Enjoy!

Summer Lavenders

Summer Lavenders

Summer Lavenders

Summer Lavenders

Summer Lavenders

Summer Watering Tips

As the days heat up, watering can become a dreaded garden chore and too many gardeners use wasteful techniques that use plenty of water but don’t give their plants the moisture they really need. Make watering plants easier and more efficient with the proper practices and tools…

    • Mulches not only make plantings look more attractive, but their most important functions are to help retain soil moisture and minimize weeds, which would also usurp moisture from your plants. Mulch around plants to a depth of 2-4 inches, refreshing mulch as needed to maintain that depth and attractiveness.
    • Watering cans and small containers work great for spot watering plants with different watering needs by hand. You don’t always need to get out a hose or sprinkler to get the watering done.
    • Check to make sure that you have the proper length hose(s) to reach every corner of your garden. Take into account any obstacles in the way, and be sure you aren’t dragging the hose over any delicate plantings to reach more distant dry spots.
  • Add a water wand to the hose to get the water where it’s most needed – the base of the plants – without needing to bend over repeatedly, which can cause back strain.
  • The best time to water is during the early morning hours of a sunny day. This will allow plants to absorb more water before it evaporates when temperatures rise, but won’t leave water to sit on plants overnight when mold can develop.
  • Always water plants and container gardens thoroughly and deeply to encourage deeper, more drought-tolerant root systems. It is better to water less frequently but more deeply rather than more often but with less water.
  • In the landscape, a good rule of thumb is to provide an inch of water per week minimum. Keep track of precipitation with a rain gauge to avoid wasting water by overwatering when Mother Nature does the job.
  • New individual plants that are set out, direct sown seed beds, sodding, etc. often require daily care, including watering, until established. Check moisture levels carefully during this period so the plants are well cared for.
  • Use soaker hoses to provide slow drip watering. This allows plants to absorb water easily without wasting water by evaporating from foliage or spraying into the air. Soaker hoses can even be layered beneath mulch to preserve as much moisture as possible.
  • Pay extra attention to plants in containers and hanging baskets as they tend to dry out faster and with greater frequency. These plantings will likely need to be watered daily or even multiple times a day during heat waves.
  • Place Tree Gators, a drip irrigation bag, on newly planted trees for slow, steady watering that will soak down to the root system without draining away along the surface of the soil.

If you’ll be away on an extended vacation, or even just for a few days, make arrangements with a trusted friend or neighbor to “plant sit” while you are gone. There’s nothing worse than worrying about your garden while you’re away – except coming home to crisp plants that haven’t been watered properly!

Summer Watering Tips

Gardening With Children

By gardening with your children or grandchildren, you can give them an awareness and appreciation of nature and the world around them that will stay with them for the rest of their lives. Even very young children enjoy helping with simple garden chores such as weeding, spreading mulch and harvesting. Older children love to have their own special garden to look after. This could be as small as several containers on the deck or as big as your whole yard, depending on their (and your) time, willingness and patience. To start out, you might give them a section of your garden to plant and look after.

First, be sure to teach your budding gardener the value of improving the soil with organic material before they begin planting. Explain how organic material improves the texture of the soil and adds some food for the plants as well.

Since improving the soil will make them more successful, they’ll be willing to garden again next spring. There are special kid-friendly tools available, just right for small hands to manipulate and since children love getting dirty, you’ll not be short of volunteers when the digging begins!

Next, help your child select a combination of plants that will make their garden interesting and exciting throughout the year. You can do this by considering all five senses:

  • Sight
    Many colorful blooming plants as well as plants with unusual flowers, oddly-shaped leaves or crazy seeds will appeal to a child’s imagination.
  • Touch
    Stroke the silky-soft, silver leaves of lamb’s ears (Stachys byzantina) – now you’ll know how it got its name. Or, feel the papery flowers of thrift (Armeria maritima) or strawflowers, the ferny foliage of yarrow or the succulent foliage of sedum. Even thorny plants such as raspberries or roses can engage a child’s sense of touch – carefully of course!
  • Taste
    Growing vegetables is always fun and rewarding for children. If you have the space, it’s always exciting to grow pumpkins for Halloween or weird and wonderful gourds. Other easy to grow vegetables include radishes, carrots, peas, lettuce and cherry tomatoes. And don’t forget fruits like strawberries, rhubarb and watermelon. At harvest time let your child host a ‘salad party’ to share their bounty with family and friends.
  • Smell
    There are many scented flowers to choose from, including perennial peonies and lilies, as well as annual sweet alyssum and heliotrope. Let kids select herbs with fragrant foliage too. Mint is always popular but be sure to allow room for it to spread. Choose varieties with interesting names like chocolate, apple or grapefruit to capture a young gardener’s imagination. Use the pineapple-flavored leaves of pineapple sage in iced tea and watch the hummingbirds gather around this herb’s bright red flowers!
  • Sound
    The whirring of hummingbird wings, the song of a bird, the rustling of foliage or flowers in a breeze – these are all sounds that you and your child can share in a garden. Take time out from your gardening chores every now and then to listen.

So, bring in your child and let us help you get started on that most special garden of all, a child’s garden.

Gardening with Children

Tent Caterpillars

“Ugly” “disgusting” “gross” and “creepy” are just a few things gardeners say when they see tent caterpillars. Not only are they visually unattractive, but the hundreds of caterpillars within a tent can defoliate a shrub or tree in a matter of days. Fortunately, the attack is seldom fatal.

About Tent Caterpillars

The Eastern tent caterpillar, Malacosoma americanum, one of the 26 species of tent caterpillars or tent worms, emerges from its egg in early spring as the leaves of the host plant, generally a member of the Rosaceae family, begin to open. Along with other emerging caterpillars, it climbs up the plant and begins building a silken nest in branch forks to provide group protection from predators, maintain warmth and act as a staging site prior to leaving the tent. The worms quickly consume any leaves within the nest, forcing them to forage outside of the nest during the day. At night, they return to the protective nest to rest and stay warm. In fall, the individual caterpillars spin cocoons and two weeks later emerge as snout moths. As adults, they mate, lay eggs and die. Thus, the cycle starts again.

Eliminating Tent Caterpillars

Methods to deal effectively with tent caterpillars…

  1. Bacillus thuringiensis (Bt) effectively kills this pest when young. Following directions, directly spray onto surrounding leaves and onto the tent. The unsightly nest will remain, but the caterpillars will die. In time, the nest will decay and disappear, or it can be removed manually if desired.
  2. Removing the tent removes the eyesore and the worms, if the tent isn’t too large. In the early morning or evening, when the worms have not yet left the tent or have already returned, thrust a stick into the middle of the web and twist until the tent is on the stake and off the tree, and then plunge it into soapy water to kill the worms. Or, remove it by pruning the branches and twigs going into and out of, the tent, but be sure to dispose of it properly so the caterpillars do not move on to another nearby location.
  3. In the fall, after deciduous leaves have fallen, remove any egg masses. Look for them on or near any trees previously infested. They’re usually 6-18″ from the tips of branches.

Tent Caterpillars

Tent Caterpillars

Vegetable Gardening Tidbits

Are you ready to make the most of your vegetable garden? Try these tips and tidbits for everything from easier weeding to stopping pests to enjoying a hearty harvest!

  • Reducing Weeds
    Minimize weeds in your garden by covering the soil between planting rows with mulch. Several sheets of moistened newspaper topped with hay or straw works very well, especially if you move your planting areas around a bit from year to year. You can even use carpet scraps placed upside-down. Landscape fabric topped with wood chips or gravel is a good choice if the walkways are permanent. Try to avoid the habit of tilling to remove weeds because this process brings up weed seeds from deeper in the soil and exposes them to the light they need to grow.
  • Increase Tomato and Pepper Production
    Fruiting of your tomatoes and peppers may be improved by applying Epsom salts, which contain sulfur and magnesium. Apply one tablespoon of granules around each transplant, or spray a solution of one tablespoon Epsom salts per gallon of water at transplanting, first flowering and fruit set. You can find Epsom salts at drug and grocery stores.
  • Supporting Tomato Plants
    Set your tomato supports in place before plants get too large. Smaller determinate (bushy) varieties can be supported with small cages, but larger indeterminate (vining) varieties need large cages or tall stakes. Secure cages with stakes so they don’t fall over as plants grow larger and heavier.
  • Growing Larger Tomatoes
    Indeterminate tomato plants, such as ‘Better Boy’, will produce many suckers. A sucker is a new shoot that starts where a branch connects with the main trunk. Removing suckers will decrease the number of fruits produced, but the remaining tomatoes will be larger and will ripen sooner.
  • Ending Blossom End Rot
    To minimize blossom end rot, keep soil evenly moist, apply a layer of mulch to conserve moisture, don’t over-fertilize (especially avoid high-nitrogen fertilizer) and avoid damaging plant roots while cultivating. Blossom end rot shows up as dark sunken spots on the blossom or non-stem end of tomatoes, peppers and squash. It’s caused by a calcium imbalance in the plant. The soil may have adequate calcium, but the plant isn’t able to take up enough to supply the rapidly developing fruit.
  • Stop Slugs and Snails
    Slugs and snails may be deterred with coffee grounds, diatomaceous earth and even sharp gravel. Spread any of these materials in a ring around individual plants. Wrap pots with copper tape to keep slugs from crawling up. Inspect foliage and pick off any insects that have already passed the barriers.
  • Keep Cucumber Beetles at Bay
    Young cucumber, melon and squash plants are easy prey for cucumber beetles. As the seedlings grow, these yellow-striped or spotted beetles emerge to feed on their foliage. The beetles also spread bacterial wilt disease. To control cucumber beetles use a portable vacuum cleaner to suck up them up in early evening, spray beneficial nematodes on the soil or try planting broccoli, calendula, catnip, nasturtium, radish, rue or tansy, which naturally repel these insects. If you want to try marigolds to repel them use the more pungent varieties like African, French or Mexican marigolds. The more common marigolds may actually attract these pests.
  • Plan for Late Summer Harvests
    It’s not too late to sow lettuce, beets, carrots, radishes and other short-season crops for a late summer harvest. Shade lettuce, if possible, during late afternoon to keep young plants cooler, or grow them next to larger plants that provide some shade. You’ll need to water more often on these hot days than you did in spring and early summer, but you can easily extend their growing season for later harvesting.
  • Grow More Tomatoes, Zucchini and Beans
    Harvest tomatoes, zucchini, beans and other fruiting crops frequently to encourage continued production. Don’t allow any fruits that you won’t be harvesting to remain on your plants, because when mature seeds are produced it’s a signal for the plant to slow down fruit production. Instead, consider sharing, selling, preserving or trading extra produce so you can continue to harvest and extend the growing season.
  • When to Harvest Herbs
    Herbs are best harvested just as they are beginning to flower. That’s when they have the highest concentration of essential oils and flavor in their leaves. Harvest entire branches back to within a few inches of the main stem to encourage new, bushy growth.
  • Harvesting and Storing Onions
    Begin harvesting onions when about half to three-quarters of the leaves have died back. Then gently dig or pull the onions and store them in a dry, shady place with good ventilation, such as an outdoor shed or barn, for 10-14 days. After the onions have cured, put them in slatted crates or mesh bags and store them indoors in an area with low humidity and temperatures between 33-45 degrees F.
  • Enjoying Green Tomatoes
    When daytime temperatures no longer rise above 65 degrees F in late summer and early fall, it’s time to pick the green tomatoes. Wrap them individually in newspaper and let them ripen indoors, or try some fried or in other recipes that call for under-ripe tomatoes.

Vegetable Garden Tidbits

Vegetable Garden Tidbits

Vegetable Garden Tidbits

Vegetable Garden Tidbits

Dealing with Powdery Mildew

One of the most common and easy to recognize plant diseases, powdery mildew, is caused by fungus spores that overwinter in garden debris and are spread by wind the following season. In late spring and early summer, the warmer days and high humidity provide perfect conditions for spore germination. The disease spreads over the surface of leaves of plants like Bee Balm, Lilac, Rose and Phlox. While the plant may look extremely unattractive, its overall health is not affected. Although we can’t change the conditions that favor powdery mildew, we can stop or slow its spread to keep your plants looking their best.

To control powdery mildew…

  • Place susceptible plants in locations where they receive early morning sun. This allows the dew to dry quickly from their leaves to inhibit the spread of mildew spores.
  • Increase the plants’ resistance by minimizing stress and providing adequate water, sun and soil requirements. This will help the plants naturally resist powdery mildew and other common diseases.
  • Give plants plenty of room for good air circulation. This helps leaves dry more quickly and lowers humidity so conditions are not as favorable for the mildew spores.
  • Water the soil not the leaves of susceptible plants. Use soaker hoses, drip systems or watering wands to get water just to the base of the plant and out to the drip line without watering the foliage.
  • Select mildew-resistant varieties of plants. These will vary in different areas and depend on your soil conditions and landscaping needs.
  • Prevent the disease from effecting susceptible plants by spraying with a fungicide like Bonide Fung-onyl, Bonide Infuse Systemic Disease Control or Safer Garden Fungicide every 7-14 days while conditions are favorable. Always read fungicide labels completely before applying and follow instructions carefully to prevent mishaps that could damage your plants.
  • Eliminate the breeding grounds for powdery mildew by cleaning up the garden and yard each fall, removing leaf litter, pruning branches and replacing old mulch. This will minimize the areas where spores can overwinter, reducing the chances of more mildew spreading in the spring.

Powdery mildew may not be pretty, but it can be pretty easy to control if the right steps are taken to protect your plants. Using multiple techniques will be the most effective way to reduce the spread of the mildew and keep it under control or completely eliminated so your plants always look their best.

Powdery Mildew

Growing and Storing Herbs

Growing herbs, whether inside or out, may be one of gardening’s most gratifying experiences. Because of their beauty and versatility, herbs may be grown amid vegetables, ornamentals or in a garden dedicated strictly to their kind. They may be nurtured in a sunny window box, strawberry pot, whiskey barrel or just about any container you choose. Situate your herbs for easy access: on the patio, deck, a sunny windowsill or in the kitchen garden. Herbs are relatively carefree and have a multitude of uses that include but are not limited to: culinary, aromatic, ornamental, medicinal and insect control.

Herb Growing Tips

Choose a full sun location, 4-6 hours per day is best. Herbs will grow in a shadier location, but plants will be weak and thin. Most herbs are not demanding of soil fertility. One thing that they will not tolerate, however, is wet or poorly drained soil, so be sure not to overwater your herbs.

Locate herbs in or near the kitchen for easy access when cooking. Be aware of the ultimate size, height and spread of the herbs that you plan to grow. If you take this into consideration you can assure room for the plants to reach their full potential. Position taller herbs to the back of the garden or container and shorter herbs to the front; this will allow for easier access and prevent shading.

Water pots before planting. Remove plants from their pots and loosen roots to stimulate new root growth. Place plants at the same soil depth that they were in the pot, or slightly higher to avoid rotting. Gently firm soil around each plant, water carefully and mulch if desired. Feed monthly with a mild, organic fertilizer such as Espoma Vegetable or Tomato Tone.

Some herbs, such as mints, have a tendency to be invasive and may take over an entire herb garden or even spread into the lawn or other parts of the landscaping. Sink aggressive potted herbs directly into the garden to minimize this overgrowth. Pull up pots each spring to replenish their soil, then sink the containers back into the garden for another season.

Growing herbs indoors is also quite simple. Choose herbs that will not get too large to handle inside. The same soil requirements apply for both indoor and outdoor planting. Select a south or west window to situate your plants so they receive adequate sunlight. It may be beneficial or necessary to supplement with artificial lighting during the winter months. Provide humidity by grouping plants together and misting daily. Another option is placing potted herbs on a humidity tray. Fertilize monthly to provide the best nutrition.

Harvesting

Fresh herb leaves are ready to be harvested as soon as there is enough foliage to maintain the plant. Try to harvest in the morning, after the dew has dried but before the sun becomes too hot, using a sharp knife or scissors to make each cut. It is a good idea to harvest only what you plan to use at time of cutting, as herbs do not store well in the refrigerator. With most herbs it is beneficial to harvest before the plants go to flower, as the taste is better at this stage of growth. Rinse with cold water and pat dry before using.

Drying

If you have excess herbs, you may want to dry them for future use. After gently rinsing the harvested herbs, drain them on absorbent towels, tie in bunches and dry thoroughly by hanging bunches up in the sun just until all water evaporates from the surface of the herbs. Remove plants from sun and hang in a clean, dark, dry location with good air circulation for 1-2 weeks until herbs are completely dry and brittle. If not dried completely the herbs will become moldy in storage. Remove leaves from the stem and store them in an airtight container in a cool, dry, low light environment. Check container in a few days for condensation. If there is any moisture in the container you must start the drying process again, after checking carefully for any mold or mildew.

You can also dry herbs in a conventional or microwave oven. With a conventional oven, position clean herbs in a single layer on a shallow pan. Place baking pan in a 180°F oven for 2 to 4 hours. When using a microwave, place clean herbs in a single layer on a paper towel or plate. Cook herbs on high for 1 to 3 minutes, rotating the plate every 30 seconds or moving the leaves around on the plate until thoroughly dry. Store these herbs just as you would air-dried herbs.

Freezing

Freezing herbs is also easy to accomplish. Wash herbs and blanch them in boiling water for one minute. Cool herbs very quickly in ice water then drain. Package herbs in airtight plastic bags and store in the freezer.

Herbs can be delightfully easy to grow and they are an even more delightful addition to salads, sauces, pastas, teas and many other treats you can enjoy year-round.

Storing Herbs

Storing Herbs

Storing Herbs