Author Archives: Dammann's Garden Center

Birdscaping

As wildlife habitats are threatened by development, the creation of a bird-friendly environment that provides food, water and shelter is crucial to the existence of our wild bird population. Caring for our feathered-friends is an educational and enjoyable activity for the entire family that brings beauty and song to our lives.

Benefits of Wild Birds

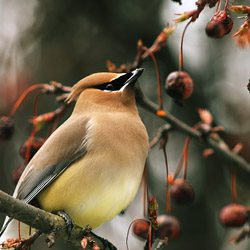
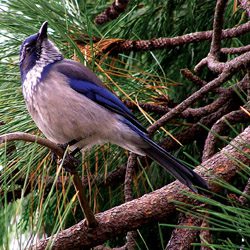
Birds are great guests to have in your yard, garden or landscape, and they provide more benefits than many homeowners and gardeners realize. Wild birds can…

  • Control insects by feasting on both flying and crawling insects, as well as spiders, slugs, snails and other creepy-crawlies.
  • Pollinate plants by flitting from flower to flower as they seek out insects or eat seeds, taking pollen along between blooms.
  • Manage weeds as they consume copious amounts of weed seeds before the seeds ever have a chance to sprout.
  • Control rodents when raptors visit the yard in search of mice, rats, gophers, voles or other unwanted pests.

Attracting Backyard Birds

Fortunately, it is easy to attract a wide variety of backyard birds when you offer them what they need most – food, water and shelter.

Food for Birds

Wild birds rely on both natural and supplemental food supplies so it is important to consider both when birdscaping. Feeding the birds is most important in the winter when natural food is scarcer, but they will visit feeders at any time of year. Migratory birds require additional food in the spring and fall as they pass through the region and nesting birds will utilize feeders in the summer.

Tips:

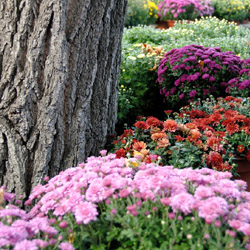
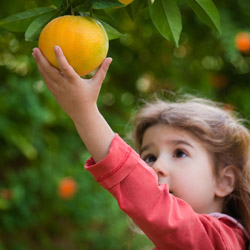
  • Provide a variety of natural foods for birds by planting berry bushes, seed-bearing flowers, nectar-rich flowers and sunflowers. Leave windfall fruit on the ground for birds to nibble. Minimize pesticide use so birds can feast on insects as well.
  • Add supplemental feeders to your yard, such as birdseed feeders, suet feeders and nectar feeders. Clean feeders weekly to avoid mold that can be dangerous to birds, and be sure feeders are full when birds need them most.

Water

Improve your backyard bird habitat by adding water. Birds require a constant supply of clean water for drinking and bathing. This is especially important in late summer, when water is scarce, and in the winter, when it is frequently frozen.

Tips:

  • Place bird baths in a protected location safe from predators, and keep the baths filled at all times so a fresh supply of water is constantly available.
  • Scrub off algae as soon as it is appears and thoroughly was the bird bath each week to minimize feces contamination or other messes in the water.
  • Provide motion for greater attraction by using a bubbler, wiggler, dripper or fountain. Birds will see the sparkles of the moving water and will hear the splashes from great distances, so more birds will visit.
  • Use Mosquito Dunks to safely prevent mosquito larvae in warm weather. A clean bird bath with moving water will also harbor fewer insects.
  • Add an outdoor-safe submersible heater to the bath in winter to keep the water liquid instead of frozen, or consider using a fully heated bird bath during the coldest months.

Shelter

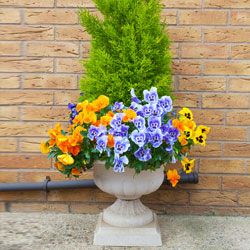
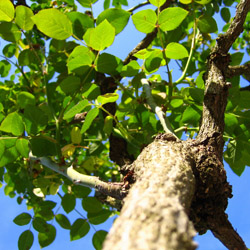
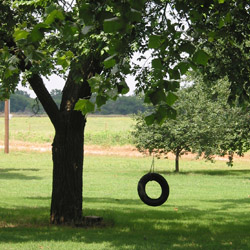
It is important to offer safe and comfortable shelter for your wild birds to nurture their young, protect them from predators and shield them from the elements. Planting evergreen trees and shrubs and providing bird houses, along with roosting boxes and pockets, are all beneficial additions to your birdscape.

Tips:

  • Choose both deciduous and evergreen landscaping trees and shrubs to offer birds different types of shelter in all seasons.
  • Minimize pruning to give birds denser, more secure shelter to take advantage of when they feel threatened.
  • Plant in layers and create thicket-like pockets or corridors in your landscape so birds can move around freely without feeling exposed.
  • Supplement the shelter in your yard with good quality bird houses, winter roost boxes or nesting pockets to give birds even more options to stay safe and secure.

When you meet birds’ needs for food, water and shelter, your birdscape will soon be home to a fun and friendly flock of backyard birds.

The Great Squirrel Battle for the Bulbs

Autumn is the catalog time of year, when gardeners devour and drool over the spring-blooming bulb catalogs, eagerly fantasizing about next year’s flowerbeds. We picture drifts of crocus and gaily swaying tulips, lush daffodils and glorious hyacinths. Snowdrops, irises, daylilies… Ah, the garden will be great this next spring.

Then we remember last spring – hours of labor and dozens of bulbs meticulously planted, but only one or two emerged to flaunt their blooms. What happened?

Squirrels and Bulbs

Squirrels like flower bulbs just as much as gardeners, but unfortunately not for their beauty. From the looks of the remains – chewed remnants, dug up holes, battered foliage – those bulbs became expensive squirrel food. Fortunately, if you want to plant daffodils, alliums, scilla, hyacinths, squills or fritillaria, your bulbs should be safe. Generally, squirrels don’t eat these. But how can you protect the bulbs that make the tastiest squirrel treats?

Keeping Squirrels Out of the Flowerbeds

Go ahead and order your bulbs. While you’re waiting for delivery, decide which of the three basic methods you will use to prevent the squirrel attacks. A small investment of time and materials will protect your bulbs.

  1. Mesh Barriers
    Wire mesh is the best protection to keep squirrels away from bulbs. Dig the hole for several bulbs, make a “cage” using mesh around the bulbs and fill in the soil. If the squirrels dig, the mesh will prevent them from eating the bulbs. You may also plant the bulbs as usual and place a layer of mesh on the soil. You’ll have to secure it to keep it in place then cover with mulch. Be sure the mesh layer is wide enough so squirrels cannot easily dig around the sides to reach the bulbs.
  1. Repellants
    Garden centers sell many different squirrel repellants, and deer repellants also repel squirrels. Some gardeners swear to the effective use of red pepper flakes mixed in the soil around, and over, the bulbs. Many squirrels don’t like spicy tastes, but pepper flakes may need to be replaced after heavy spring rains to be the most effective.
  1. Sharp Gravel
    Adding sharp gravel to the soil around and over the bulbs also deters squirrels from digging. Not only do they not like the feel of the gravel on their sensitive paws, but the gravel – which is heavier than dirt or mulch – is more difficult to move, so the bulbs stay safer.

There is another option to keep squirrels away from bulbs without completely discouraging their visits. If you can’t beat ’em, join ’em – because squirrels look for the easiest food sources, a squirrel feeding station stocked with corn and peanuts may be just the thing to keep the squirrels from looking for your buried treasures!

squirreldigging_250x250

bulbs_250x250

Fairy Garden Magic

Do you think your tiny balcony terrace means you can’t have a grand garden? Are you looking for a clever and imaginative way to introduce a child to the world of plants? Have you ever dreamed of your own “McGregor’s Garden?” One of the newest gardening trends can do all these and a whole lot more!

Start planning…and playing…in your fairy garden!

About Fairy Gardens

One of the newest gardening trends, fairy gardening is the new-and-improved miniature gardening of yesteryear with all sorts of new products, idea books and plants. Despite their small size, the themes, designs and creativity of these tiny garden spaces is boundless. Any container, nearly any type of plant and any type of design can add a bit of garden magic even to a tiny space. Go small and have fun.

Designing a Fairy Garden

You can create your fairy garden just about anywhere. For portability, consider a pot, basin or terrarium. Or, for a more rustic appeal, plant an old lunchbox, garden bucket or child’s wagon. Old shoes, a stack of broken pots, a rusty wheelbarrow or a concrete bird bath are other great planting options.

Fairy gardens can be positioned anywhere. A smaller design can be a fun centerpiece to patio furniture, or it can be part of an entryway display. To heighten the intrigue, find a secret place in your own garden to lure the garden fairies. Between tree roots, beside a water feature or in a grove under flowering shrubs… The possibilities are endless.

Design the overall look of your fairy garden just as you would a larger garden. What is its theme? Is it a fantasyland for unicorns? A gnome family farm? A replica of your own big house? It can be anything you imagine. Consider tiers, layers and depth as well to create a truly impactful scene in your miniature fairy world.

If you’re having trouble coming up with an idea, visit your garden center to check out all the products. If you need some inspiration, our Enchanted Garden products by Grassland Road will get you started. Whimsical and charming, they’ll help you create your own mini-fantasy scene. From arbors and benches to umbrellas and miniature tools, the possibilities are amazing. If you’re not sure your resident garden fairies will understand your invitation, you can always buy a mannequin fairy to entice them to share the fun.

This visit also sets the mind whirling with ideas for plant materials. Consider the mixture of colors, textures, shapes, and scents… in miniature. Tiny groundcovers such as moss or creeping thyme create beautiful “lawns.” Pebbles become paths. Sand creates shores. Twigs make houses, fences and other structures. What can you do with a small pinecone or acorn? How can you recreate a Disney-type pumpkin carriage?

Creativity knows no limits, and the fairies will love you for it!

Entrance Way Evergreens

Cool and classic or chic and contemporary, no matter what your style, you’ll always be proud of an entrance flanked with beautiful containers highlighting just-right evergreens. In this case, “evergreen” doesn’t necessarily mean a conifer, either – many other shrubs remain green in the winter and can be beautiful showpieces welcoming guests to your home.

Planting Your Container

Entrance way evergreens are generally planted in containers and frame a doorway, walkway or arch. If you truly want your evergreens to take center stage, opt for more understated, neutral containers, but select shapes that match the architecture of your home. You can opt for a boldly colored container, but take care that the container’s decorations won’t overwhelm your evergreens.

You will want to use high quality potting soil for the container to provide adequate nutrition for your evergreens to thrive. Also pay careful attention to the moisture levels, watering the plants appropriately – containers often need more frequent watering than plants in your landscape. You can rotate the containers regularly to help the plants get even sun exposure, and regular fertilizing will help keep them healthy.

If you’re not sure how to plant a container, try this simple formula: “Use a thriller, filler and spiller.” Thriller refers to the tallest or showiest plant, the one that immediately catches the eye. The fillers are the plants surrounding the thriller that add more structure and bulk to the arrangement, filling in empty spaces. The spillers are plants to grow over, and soften, the edge of the container, giving it a more natural, organic look.

Accents for Your Entrance Evergreens

In addition to welcoming your visitors with a beautiful entrance, it’s easy to entertain them and show your style when you accessorize your evergreens. Festively dress your plants to coordinate with seasons or holidays. Fun and creative options include…

  • Spring: Small bunnies, silk spring blooms such as daffodils, pastel Easter eggs
  • Summer: Patriotic flags or ribbons for Memorial Day and the Fourth of July
  • Fall: Scarecrows, pumpkins, Indian corn, Halloween decorations
  • Winter: Holly sprigs, tiny twinkling lights, beaded garlands, snowflake ornaments

You can also personalize your entrance evergreens for birthdays, anniversaries or to showcase your favorite teams, colleges, hobbies and more. All are easy to do, fun, and affordable, and make your entrance truly eye-catching.

Fall Mulching Pros

Mulch can add a protective layer to any fall garden, flowerbeds, or shrubs, but is it best for your landscape? Understanding the pros and cons of fall mulching can help you better prepare all your plants for the changing season.

Benefits of Fall Mulching

There’s no denying that when done properly, mulching in fall can provide enormous benefits to the landscape. The biggest pros of fall mulching include:

  • Insulating the soil.
    Fall mulching preserves heat that will keep microbes, earthworms, and other life active and thriving in the soil longer to improve the soil condition. The insulation mulch provides will also help moderate temperature swings that can damage tender roots, especially those of newly planted plant material.
  • Saving time with spring chores.
    Spring is a hectic season in the garden, but if mulching is already done in the fall, it doesn’t need to be redone in the spring and there will be more time to spend with other planting and gardening tasks when the weather warms.
  • Easier climate for working.
    The milder temperatures of autumn make it more enjoyable to spend time outdoors with the heavy labor of spreading mulch. This is especially true if you will be mulching multiple flowerbeds, tree rings, borders, and other spaces throughout the landscape.
  • Simpler to spread.
    If you mulch in spring, you may need to be delicately working around emerging sprouts and blooming bulbs. In fall, however, the work is less delicate after beds have already been cleaned out, and you can spread mulch much more quickly and efficiently.
  • Weed suppression.
    Weeds don’t stop growing when summer ends, and just like spring mulching, spreading mulch in fall will help minimize weeds. This will make it easier to keep weeds under control when spring arrives again, and growth is renewed.
  • Preventing soil erosion.
    Soils on sloped beds can quickly erode in autumn and winter weather as rain and snow batter the slopes. A good layer of mulch will protect the soil and keep it in place throughout the season, so it is ready to work again in the spring.
  • Nourishing the soil.
    Organic mulches that are spread in autumn will have several months to settle and begin decaying. This will introduce more nutrients into the top layer of soil, so it is richer and healthier for spring planting.
  • Tidy Appearance
    A fresh layer of mulch will always make the landscape and garden look well-tended.

Fall Mulching Tips

Every gardener must decide when to mulch, and if you do want to take advantage of the benefits of fall mulching, doing so carefully can help prevent many of the cons. First, adjust the mulch depth to match the requirements of your local climate and plant needs – a layer 2-4 inches deep is typically adequate. Apply fall mulch after the first hard freeze when perennials can be cut back easily but take care not to pile it against tree trunks or shrub bases where it may invite gnawing pests or induce bark rot.

Mulching can be a very productive fall chore for flowerbeds, garden spaces, borders, and other parts of the landscape. It has to potential to save you time and energy and help keep your property looking its very best not only in autumn, but through the winter and into spring once again.

Repotting Houseplants

Fall is an excellent time to repot many houseplants. Potted plants that have been growing outdoors during the summer have probably grown quite vigorously due to the high light levels and greater humidity. If the top growth of the plant has increased in size by 20 percent or more, it probably should be transplanted into a larger container so the roots can stretch and settle comfortably.

Before You Repot

Before repotting, check the plant and the soil carefully for insects.  Add systemic granules to the soil and spray the leaves with an insecticidal soap to remove any unwanted pests. If an insect infestation is particularly bad, it may be necessary to remove most of the plant’s soil and replace it with fresh potting soil. Avoid using soil from the garden, however, which will harbor insect larvae and eggs as well as weed seeds and other material you do not want in your houseplants.

Acclimating Plants

Bring your plants indoors well before any danger of frost for proper acclimation to the indoor environment. The change in light levels and humidity could shock more delicate plants, and they may wilt temporarily or drop leaves before they adjust to the new conditions. If possible, bring them in just a few minutes at a time for several days, gradually increasing their indoor time to several hours before keeping them indoors all the time. Flowering tropicals will also benefit from cutting back some of their foliage to avoid shock before being brought indoors.

To help houseplants overcome the transition from outdoors to indoors, position them in a bright, sunny area and consider adjusting indoor temperature and humidity controls to more closely mimic outdoor conditions. Make adjustments slowly and gradually, and the plants will adjust.

Time to Repot

Once your houseplants are adjusted to their indoor fall and winter environment, they can be safely repotted without adding to their stress. Repot the plants early in the day, and move them to a slightly larger pot. Avoid jumping several pot sizes, which could lead to excessive root growth while the foliage is neglected. Be sure to fertilize and water the plants appropriately to provide them proper nourishment as they settle into new pots. Do not expect luxuriant foliage growth right away, however, as it will take some time for the plants to begin growing again, especially in fall and winter when most houseplants are entering a dormant, slow growth period.

By repotting your houseplants in fall, you can help healthy, vigorously growing plants adjust to a new environment and continue their growth with ease in a new, larger, more comfortable pot.

Over-Wintering Container Plants Outdoors

All containerized plants that are considered hardy in your zone can spend the winter outdoors, but you do need to take a little special care to keep them safe and comfortable as temperatures drop. Despite their hardiness, winter is still a challenging season, but it is possible to keep your container plants healthy until the days grow longer and warmer again.

Options to Overwinter Your Container Plants

  • In the late summer or fall, removed the plant from its container and plant it in the ground while the soil is still warm. Another method is to bury the pot, with the plant in it, in the garden and remove the pot following spring. Both of these methods will help insulate the root system, preventing it from freezing solid and killing the root system.
  • Place containerized plants in an unheated garage but along a heated wall. This is an excellent method for very large pots or porous pots that tend to break apart from the constant cycle of freezing and thawing, and so would not be very hardy if buried. For extra root protection and insulation, wrap the pots in plastic bubble wrap or wrap an old comforter or quilt around the pots.
  • Group pots together along the sunny side of your house or shed. If this area is windy, create a windscreen with stakes and burlap. Place bales of straw or hay around the perimeter of the grouping up against the pots to further protect plants from cold winds. Fill in areas between pots with mulch, shredded leaves, grass clippings or hay for insulation. Lay evergreen branches or place a layer of mulch on top of the pots for additional protection.
  • Use a cold frame covered with plastic or Reemay fabric to help control temperatures and reduce light as well, helping plants stay dormant in winter. It will still be necessary to use mulch, shredded leaves or hay around and in-between pots for insulation. Rodent control, such as Havahart traps, may be necessary when using this method.

Watering Container Plants in Winter

Make sure that plants go into the winter with moist soil so that there is water available to plant roots. Check soil moisture occasionally, never allowing it to dry completely. It is also a very good idea to spray needled and broadleaf evergreens with an anti-desiccant. This acts as a protective coating for plant foliage and stems as it helps them retain moisture.

With just a little care and forethought, you can easily prepare containers for winter without risking the plants and arrangements you have so carefully cultivated.


Autumn: Why Plant Now?

Although many gardeners plant trees and shrubs in the spring, knowledgeable gardeners plant in the fall to take advantage of all this fabulous season has to offer. But why is fall planting better than spring planting?

  • Stress Reduction
    Transplanting causes stress as plants are removed from containers, balls or established locations and changed to new locations. Planting in the fall, when a plant is entering dormancy and is generally hardier and sturdier, reduces this stress so the plant can thrive.
  • Establishing Strong Roots
    Fall planting “establishes” trees and shrubs by encouraging root growth. Because the soil is still warm, the roots continue to develop until freezing, though the upper parts of the plant are already dormant. When transplanting in the spring, the developed roots are active and delicate tips or rootlets, as well as buds and new leaves, are more easily damaged.
  • Weather Resiliency
    Trees and shrubs planted in the fall are better able to withstand the rigors of the next summer’s heat and dry conditions because they have much longer to develop healthy roots systems and become thoroughly established. This is especially critical in dry climates or areas prone to drought or irregular rainfall.
  • Faster Maturity
    The “head-start” of fall planting results in a larger plant in less time, helping create a mature landscape without waiting for smaller plants to catch up. This can be especially critical when replacing dead or damaged plants in a mature landscape to avoid a gap or uneven look.
  • Water Conservation
    Planting in the fall saves watering time and promotes conservation by eliminating daily watering. Cooler temperatures with the addition of both morning and evening dew contribute greatly to soil moisture availability in fall without as much supplemental watering.
  • Color Confirmation
    Fall is the best time to see a plant’s autumnal color. Planting in the fall eliminates the surprise of the wrong color or unexpected shades that may not coordinate with nearby plants. By planting in autumn, you’ll know exactly what you’re purchasing and planting, and you will be able to match better with your existing landscape.

Autumn can be the ideal time to plant trees and shrubs, whether you are adding to your landscape, replacing plants or starting a whole new look. If you plant in autumn, you’ll be amazed at how lovely your landscape will look next spring.


Plant a Tree This Fall

There are so many reasons to add a new tree to your landscape this fall that it’s hard to find a reason not to.

Just think about it, trees will…

  • Beautify the Environment
    Trees add texture and color to the landscape. They soften the harsh lines of buildings and driveways, while their foliage and blooms add seasonal color changes and variety.
  • Stabilize Soil
    Tree roots prevent soil from blowing or washing away, minimizing erosion and providing protection for the surrounding landscape.
  • Provide Wildlife Habitat
    Trees provide shelter and food for birds and numerous small animals, including squirrels, raccoons, insects and more.
  • Make Food
    Many trees provide fruits, nuts, seeds, sap and berries for human consumption. Wildlife will also rely on the food provided by trees.
  • Create Oxygen
    Through photosynthesis, trees take in carbon dioxide, carbon monoxide, sulfur dioxide and other poisons from our air and release pure oxygen for us to breathe. One tree can produce enough oxygen for 10 humans for one year!
  • Filter the Air
    Trees act as giant filters trapping dust and pollution particles with their leaves and bark until the rain washes the particles away.
  • Cool the Air
    Air will remain several degrees cooler in the shade of a tree canopy. This is accomplished by not only by blocking the sun’s rays but also through transpiration. Tree leave transpire, or release moisture, which cools the surrounding air. A large tree can release as much as 400 gallons of moisture from its leaves daily.
  • Reduce Utility Bills
    Deciduous trees planted on the south and southwest sides of a home will shade the structure during hot summer months and reduce air conditioning or other cooling needs. In the winter, with the leaves fallen, the sun is able to warm the structure, reducing heating bills.
  • Reduce Noise Pollution
    Strategically planted, trees can dramatically reduce the volume of unwanted noise from loud neighbors, nearby businesses or car traffic.
  • Hide undesirable views
    Purposefully sited, trees can camouflage unattractive views and create privacy, providing a natural sanctuary in your yard.

In our area, fall is just about the best time of year to purchase and plant a tree. The soil is warm, air temperature is cool and morning and evening dew increase available moisture to nurture a new tree. Stop in and see our extensive collection, and we can assist you in choosing the tree that is perfect for your landscape and lifestyle needs.


Fall Lawn Care

Fall is the best time of the year to overseed your existing lawn or establish a new lawn. If your lawn is a bit thin, has bare patches or needs good care, now is the time to take care of it so it can become thoroughly established before warm temperatures arrive in spring.

Overseeding A Weak Lawn

A weak lawn may have thin or scraggly patches, seem overrun with weeds or have bare patches that are difficult to keep green and lush. Overseeding can help eliminate these problem areas and create a more consistent, luxurious lawn.

  1. Spray broadleaf weeds with a selective herbicide and wait 2 weeks for the weeds to disappear. Several treatments may be necessary if the yard is thick with weeds.
  2. Take a soil sample of your lawn to determine the pH. A garden extension service can help determine pH levels, or home test kits are available.
  3. Mow shorter than normal and rake clean to remove unnecessary debris that may keep seeds from reaching the soil.
  4. Core aerate if you have compacted soil or heavy thatch. Remove the cores and dispose of them properly to keep the soil light and airy for seeding.
  5. Apply starter fertilizer and lime if determined to be needed by the pH test, or choose a grass type that will thrive in your soil’s conditions.
  6. Dethatch your lawn if thatch is thicker than ½ inch. This can be done with heavy raking or a special dethatching rake may be necessary in extreme cases.
  7. Overseed with the proper seed. If core aerating, lightly topdress with topsoil or humus. Cover with straw to retain water.
  8. Water daily until grass has germinated, then soak once a week to encourage deep root growth.
  9. Fertilize in late fall with fall fertilizer.

Seeding A New Lawn

If you have no existing lawn or the entire ground is overrun with nothing but weeds, it may be best to start from scratch and create the lawn of your dreams.

  1. Kill existing vegetation with nonselective herbicide. If you want to preserve nearby trees or shrubs, take steps to protect that vegetation from the treatment.
  2. Take a soil sample of your lawn to determine the pH. A testing kit can provide a good pH estimate, or a gardening center or garden extension service can provide a more precise evaluation.
  3. Prepare soil by breaking up the surface with a rake or spade using a crisscross pattern. All large lumps should be broken up, and any large rocks should be removed.
  4. Broadcast starter fertilizer, lime and gypsum as determined by the pH test. This will provide a nutrition boost for fresh seeds.
  5. Spread topsoil or humus to a ½ inch depth for appropriate planting.
  6. Rototill to a depth of 4 inches and grade smooth. This will mix all the top layers together for uniform soil and nutrition, ensuring even turf growth.
  7. Sow proper seed and mulch lightly with salt hay to control erosion and conserve moisture.
  8. Water daily until grass has germinated, then soak once a week to encourage deeper root growth to resist droughts and repel weeds.
  9. Fertilize in late fall with fall fertilizer to provide nutrition throughout the season.

Which Seed?

Not every lawn will thrive with the same type of grass seed. Allow our staff to help you select the seed that best suits your needs, soil type and planting conditions. Apply at the recommended rate and incorporate into the top ¼” of soil. Do not bury the seed or it may not germinate evenly.

No matter what the condition of your lawn, fall is the best time to take steps to help it rejuvenate so you have an amazing lawn to enjoy in spring.